Do you want to do incredible food photography?
Fortunately, capturing gorgeous images of food isn’t hard. In fact, anyone can do it.

You just have to know a few tricks.
And I’m going to teach you how to create stunning food photos.
Let’s get started.
1. Shoot With Sidelight for Gorgeous Food Photography
Light.
It’s one of the most important elements in amazing food photography.
And the best light for food photography?
Sidelight.
(Sidelight is light that comes from the side of the food–the right or the left. This is in comparison to frontlight, which comes from over the photographer’s shoulder, and backlight, which comes from behind the food.)
Sidelight is the most common type of light direction found in food photography.
Why?
It’s very flattering. And it complements most dishes.
Plus, sidelight creates shadows–and shadows add depth to the shot.
You can also place a diffuser between the light and your setup–which will add a slightly softer look to the photo.
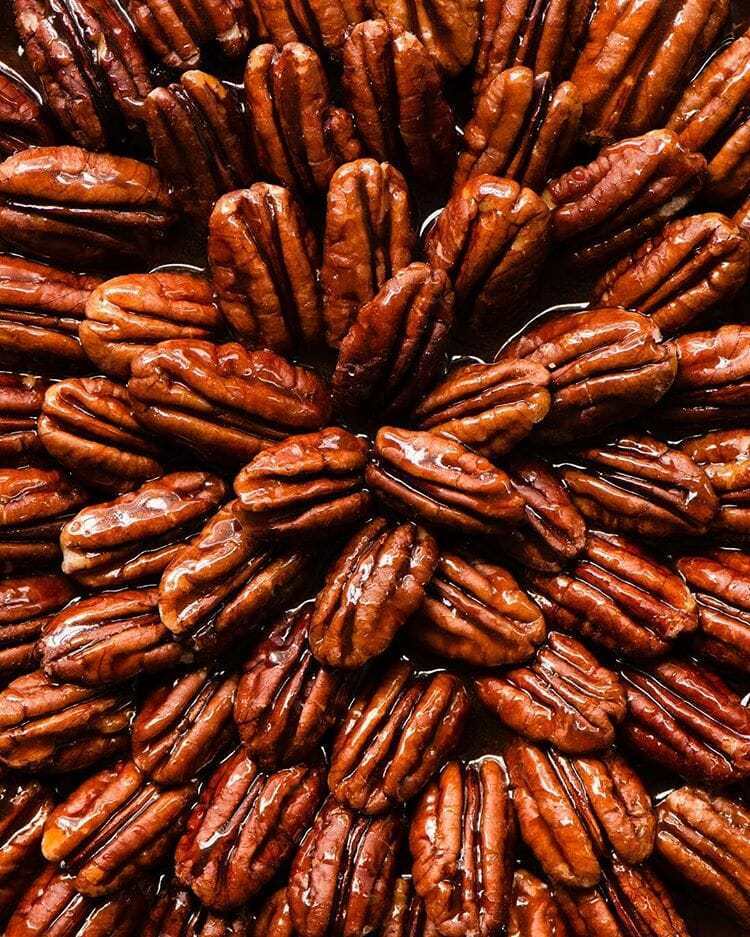
In the image above, the light is coming from the top left-hand corner–giving the food a nice side-lit glow.
Bottom line?
When in doubt, use sidelight.
You’ll get some beautiful photos.
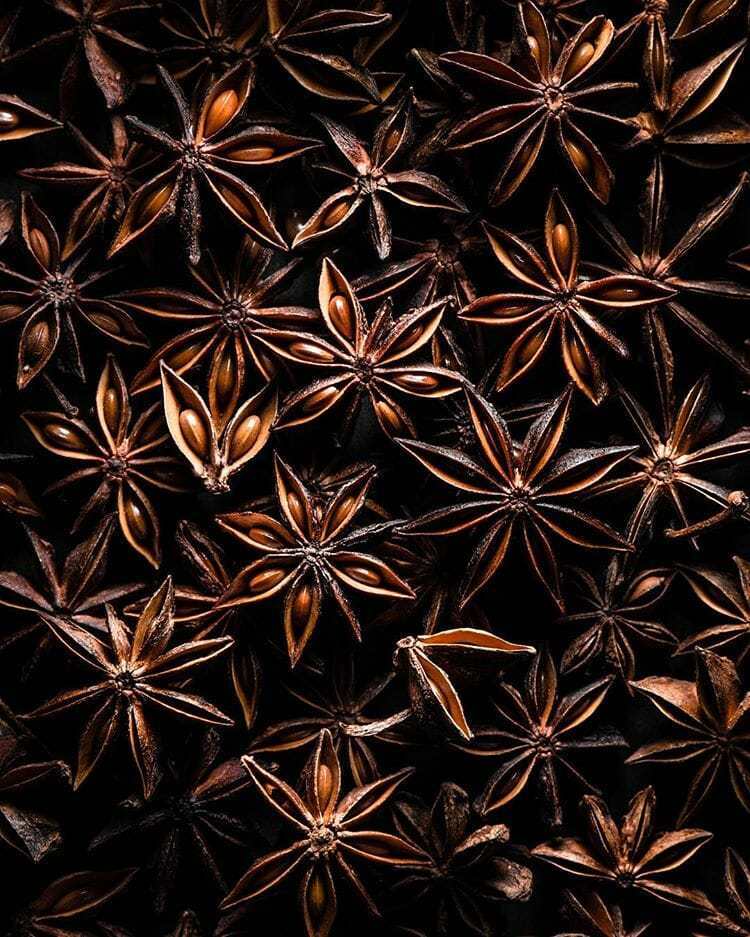
2. Shoot With a Deep Depth of Field for the Best Food Photography
Here’s another tip for amazing food photography:
Shoot with a deep depth of field.
That is, use an aperture of f8 and beyond–to make the whole image sharp.
Here’s why:
In food photography, you want to create a food scene. You want an arrangement of food that tells a story. And you want the viewers to be sucked in.
But shooting with wider apertures? It won’t give the viewer enough depth to connect with the food.
Much of the food will be blurred, and viewers won’t appreciate the shot.
Instead, it’s important that you make the whole image sharp–by using a deep depth of field.
If you’re shooting from directly above the food, f5.6 or f8 is an excellent aperture choice.
That way, the whole photo will be tack sharp.
However, I also suggest that you experiment with different apertures.
Take some food photos at every aperture–and compare them. See which you like best.
In general, a deep depth of field is perfect.
But by experimenting, you’ll find your own personal food photography style.
3. Use Multiple Angles to Tell Stories
In food photography, the best photos are not snapshots.
The best photos tell stories. These photos set a scene with the food. A scene that draws the viewer right in.
And here’s one way to tell stories:
Shoot from multiple angles. And then present the photos together, side-by-side.
There are a few angles that I recommend you start with…
First, the overhead angle.
This angle is exactly as it sounds. You shoot the food from directly overhead.
It’s easy to execute. And it makes for some stunning photos.
Then, once you’ve taken the overhead shot, change your angle.
Look for a 45-degree angle shot.
I recommend keeping your food arrangement consistent from shot to shot. This will ensure you capture a cohesive story.
One thing to note:
Different lenses are best for different angles.
For a comprehensive look at which lenses work best with different angles…
…you can take my 7-day free course.
You’ll be telling gorgeous food stories in no time.
4. Add Napkins or Linens for More Compelling Food Photography
One thing beginning food photographers often struggle with?
Creating interesting food photos.
(The kind that draw in the viewer and make them contemplate the photo.)
So here’s a neat trick for increasing interest:
Add linens to the setup!
Linens give viewers something more to look at. And they help lead the eye around the frame.
Now, linens can be tough to style.
So here’s a quick tip to help you:
Have a warm iron on hand.
You see, a little warm iron can heat up the fabric and allow you to create a ‘flowing’ look. Plus, it removes any creases that will distract from the food.
But if you’re still struggling to style linens?
Don’t worry. You can use the method I call the ‘peeking in’ trick.
That is, just have a little section peeking into the frame. Notice the linen in the photo below–peeking into the frame!
Here’s the key takeaway:
A linen or two can go a long way.
So if you’re struggling to add interest to your photos, include some linens.
5. Add Drips to Your Photos for a Final Touch
Drips are small spills from food.
And drips?
They add a really nice touch to your food photos.
(Food photos that feature drips also get the most attention on social media.)
Now, you shouldn’t add drips until you have everything else set up: your food arrangement, your lighting, etc.
Now, the best drips have a certain thickness.
Too thick, and you won’t get natural drips. But too thin, and the drips will be difficult to see.
We’re going for that ‘Goldilocks’ look – just right!
It can be useful to have a drawing spoon in your styling kit. This will help you control your drips.
(If you’re not sure what a drawing spoon is, check it out here.)
My advice?
Just spend a bit of time creating your drips.
You won’t regret it.
6. Include Repetition for the Best Compositions
If you want gorgeous food photos, then you have to compose your shots carefully.
And the best way to compose your food photos?
Use repetition.
Repetition simply involves including a repeating subject throughout the frame for visual interest.
And it’s so easy to do. Just place many similar pieces of food together!
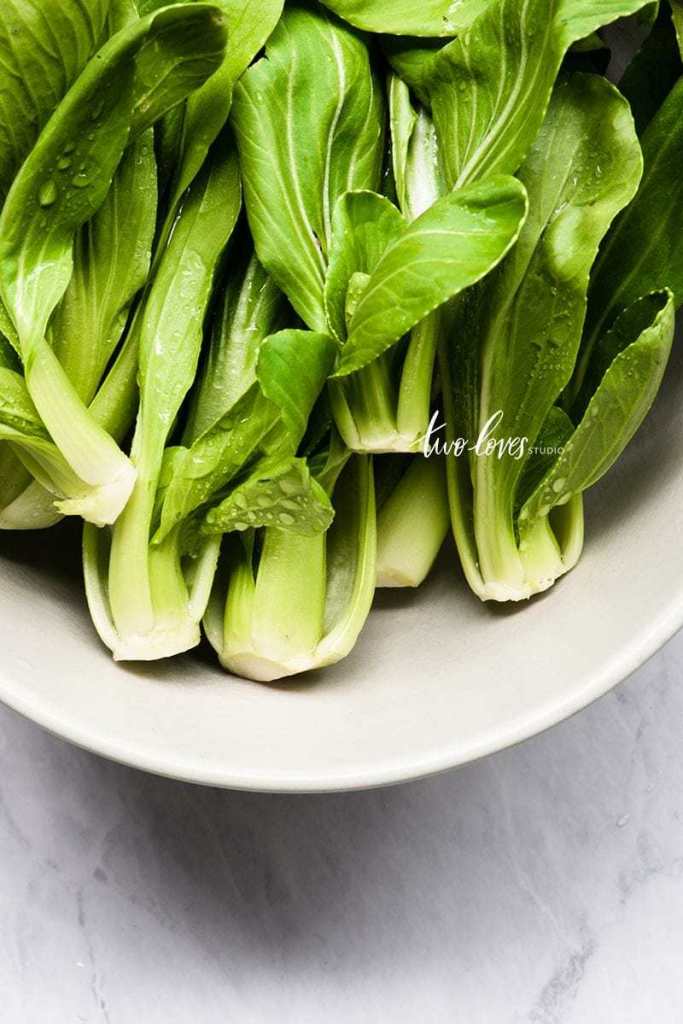
Repetition works especially well when photographing ingredients:
One of the best ways to use repetition is when you have a subject with a lot of interest.
For instance, a subject with unusual colors or shapes.
Here’s the deal:
Repetition will net you some incredible photos.
To learn more about repetition for food photography, come and join my online masterclass – Composition Essentials and step-up your styling.
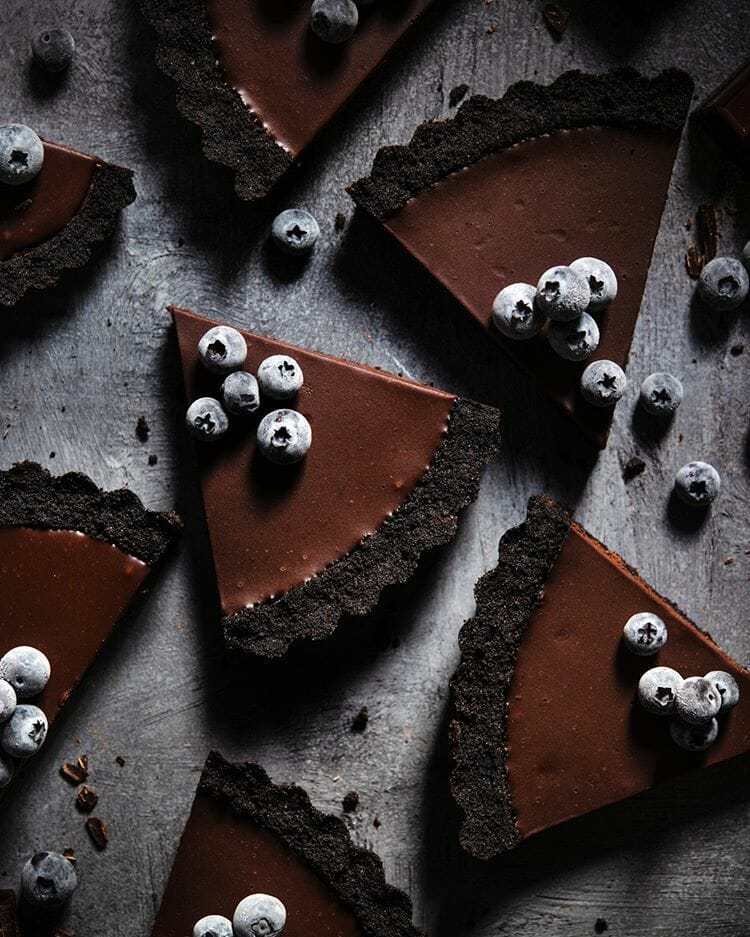
7. Use Backgrounds With Texture to Instantly Improve Your Food Photos
Here’s a final trick for you:
The quickest and easiest way to improve your food photos…
…is to include backgrounds that have texture.
A textured background has marks, patterns, and colors.
(Instead of just a plain white or black.)
Texture helps to create
Take a look at the background below. Notice the slight variation in
In fact, you can make backgrounds like this on your own! It just takes a small board and a few different paints.
You can even find food safe paints! And these are perfect for food photography.
Now, don’t go wild with
Doing Amazing Food Photography: The Next Steps
Now that you know some tips and tricks for stunning food photography…
…the only thing left to do is practice!
And if you’re interested in learning even more, check out my blog at Two Loves Studio. You can also check out what I’m up to on Instagram.
Download FREE Photography Lighting Cheat Sheet
Subscribe and get a free downloadable photography lighting cheat sheet