Do you struggle to create gorgeous compositions in your photos?
You’re not alone.
Fortunately, there’s a simple principle that you can use to capture incredible compositions, every time! It’s called the rule of thirds.
Read on to discover the rule of thirds, and how you can use it to improve your photos!
What is the Rule of Thirds?
Imagine a scene divided into nine parts…
…using two vertical lines and two horizontal lines:
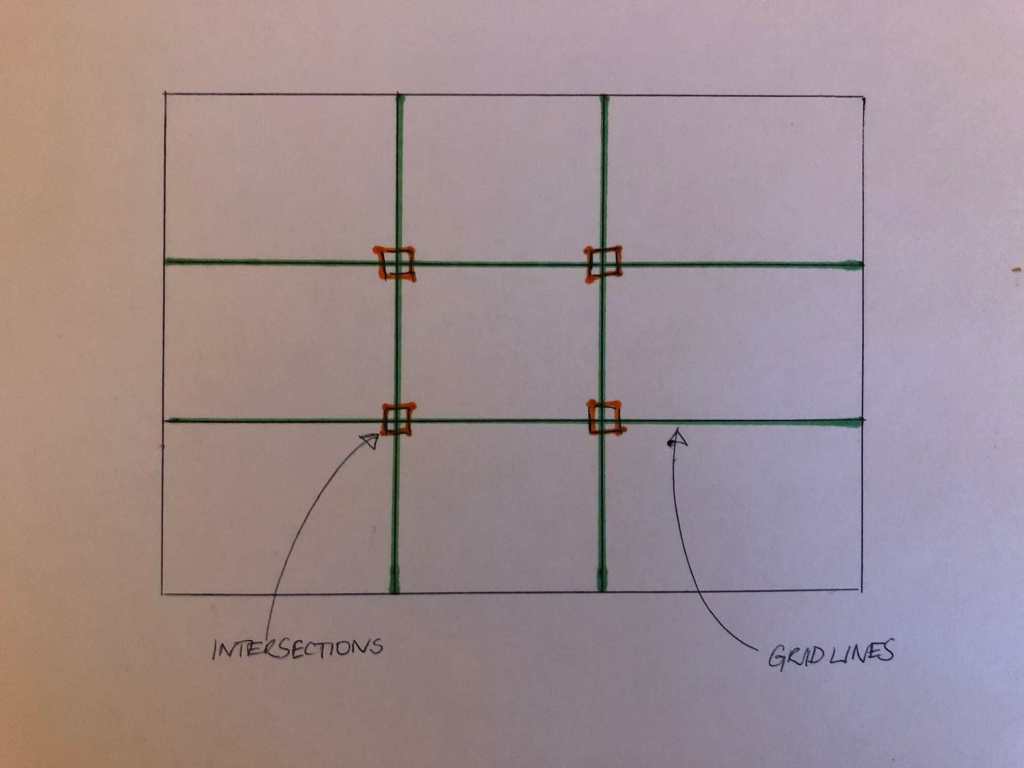
You’ll also notice four intersections – where the lines cross each other.
The rule of thirds simply states that prominent elements of a composition should be placed along one of these lines or at a point of intersection.
It works because the human eye is naturally drawn to intersections and grid lines of the rule of thirds.
Look at the photo below. The main subject of the photo (the sn) is placed at the intersection of the rule of third lines. This is exactly what you should do in your own photos!
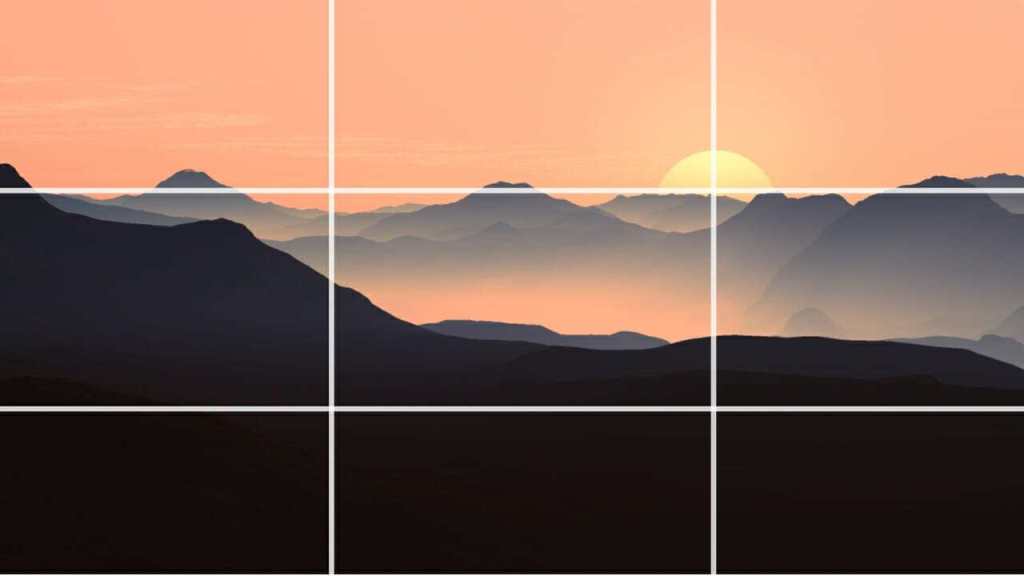
Ultimately, just remember:
If you’re struggling to create a good composition, use the rule of thirds.
Because the rule of thirds will help you create a beautiful photo!
Tips for Using the Rule of Thirds
Keep the rule of thirds in mind when composing your photos. It will help you to:
- Avoid clutter
- Create a dynamic image
- Prevent a divide in your photos
1. Use the Rule of Thirds to Avoid Clutter
If an image is too busy, then you have a cluttered scene. The viewer’s eye doesn’t know where to rest.
And this makes for an image that doesn’t look good.
Whenever you’re faced with a messy scene, keep the rule of thirds in mind.
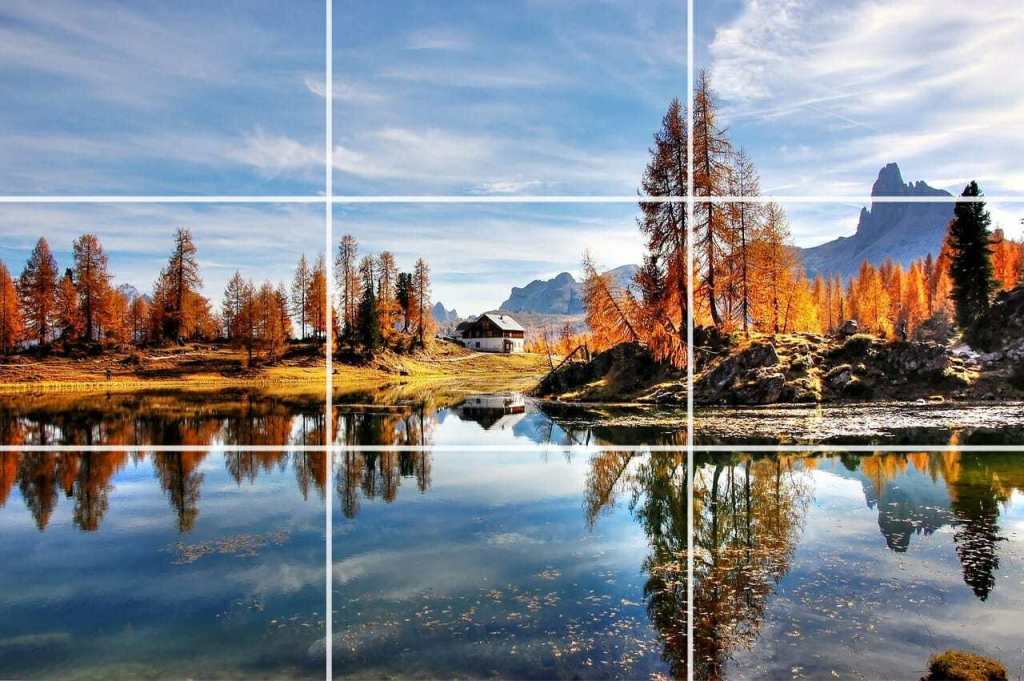
Choose your main subject–and place it at one of the
It’s especially important that you don’t include other objects at the rule of thirds intersection points. Elements placed at these spots will stand out–and the image will become far too chaotic.
2. Use the Rule of Thirds for Dynamic Compositions
The best compositions are dynamic.
That is, they move the eye around the frame. They excite the viewer.
Unfortunately, photographers often create non-dynamic, static photos.
One of the easiest ways to do this?
Center your subject. If you center your subject, the photo will often appear flat and lifeless.
Which is why you should use the rule of thirds instead!
If you want to create truly dynamic images, try placing your subject at a rule of thirds intersection point.
This will immediately create a more dynamic composition. One that’s exciting and compelling.
3. Use the Rule of Thirds to Avoid Image Division
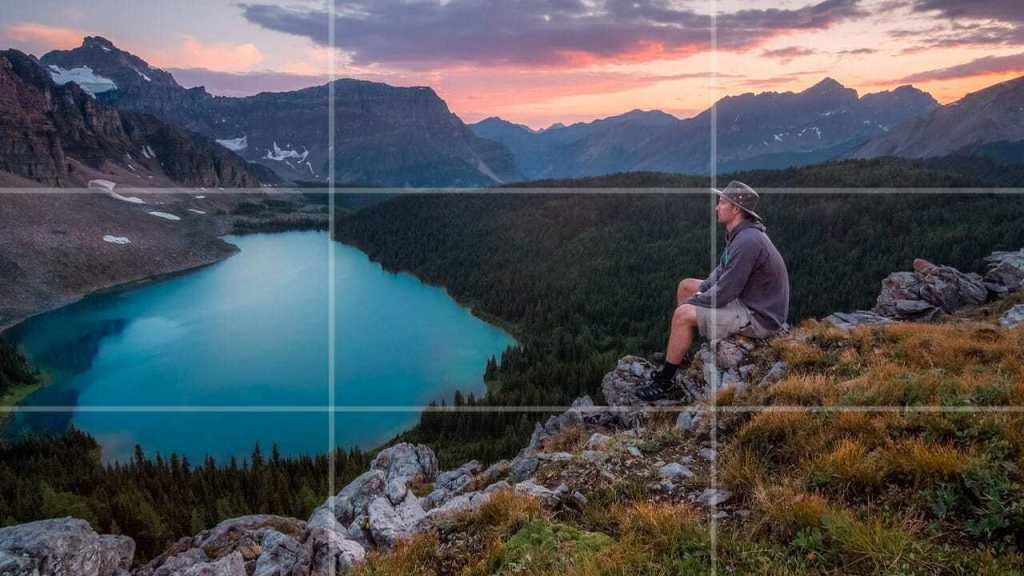
Place a strong subject in the
…and you risk dividing an image in two.
Why should you avoid this?
If you divide your images in two, the viewer will feel trapped on one side of the frame. Whereas you want their eyes to move all around the photo!
So…
Choose an
Use the rule of thirds!
Use the Rule of Thirds in All Genres of Photography
Here’s some advice:
Remember the rule of thirds–for every
The principle remains the same. But the main points of interest change.
Consider the following genres and how you can apply the rule:
Landscape: Use the Rule of Thirds to Position the Horizon
Most landscape photos feature the horizon.
(That is, where the ground meets the sky.)
So place the horizon along one of the horizontal gridlines–if you want a beautiful, balanced image.

And place subjects in the landscape at gridline intersections.
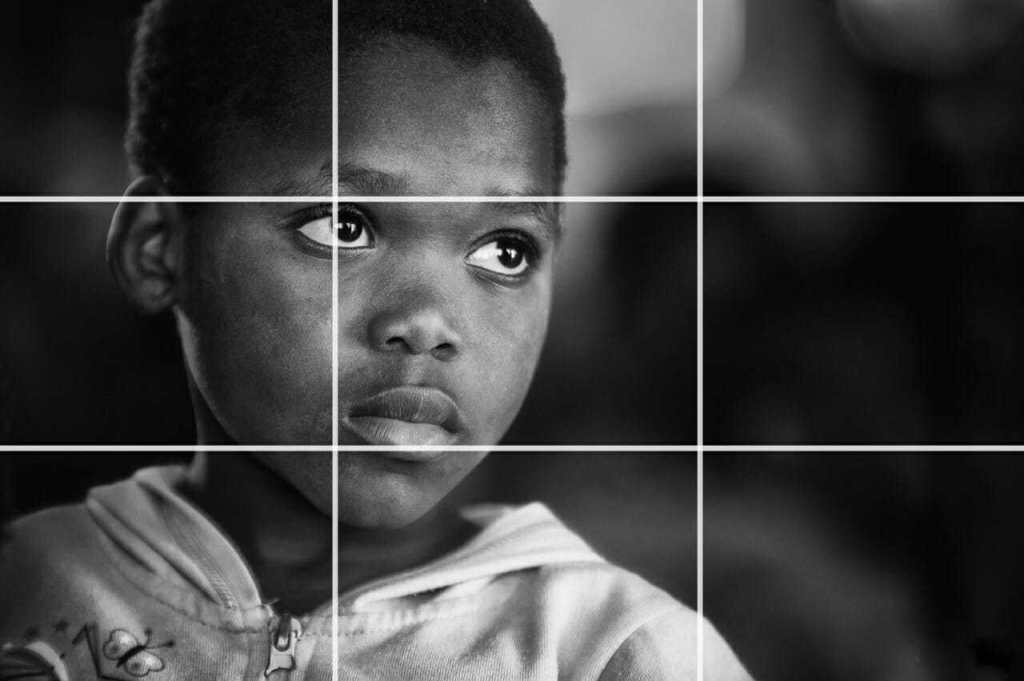
Portrait: Use the Rule of Thirds to Position the Eyes
In portrait photography, the eyes of your subject are key.
The eyes draw the viewer’s attention. The eyes pull us into the photo.
So…
Position the eyes at gridline intersections!
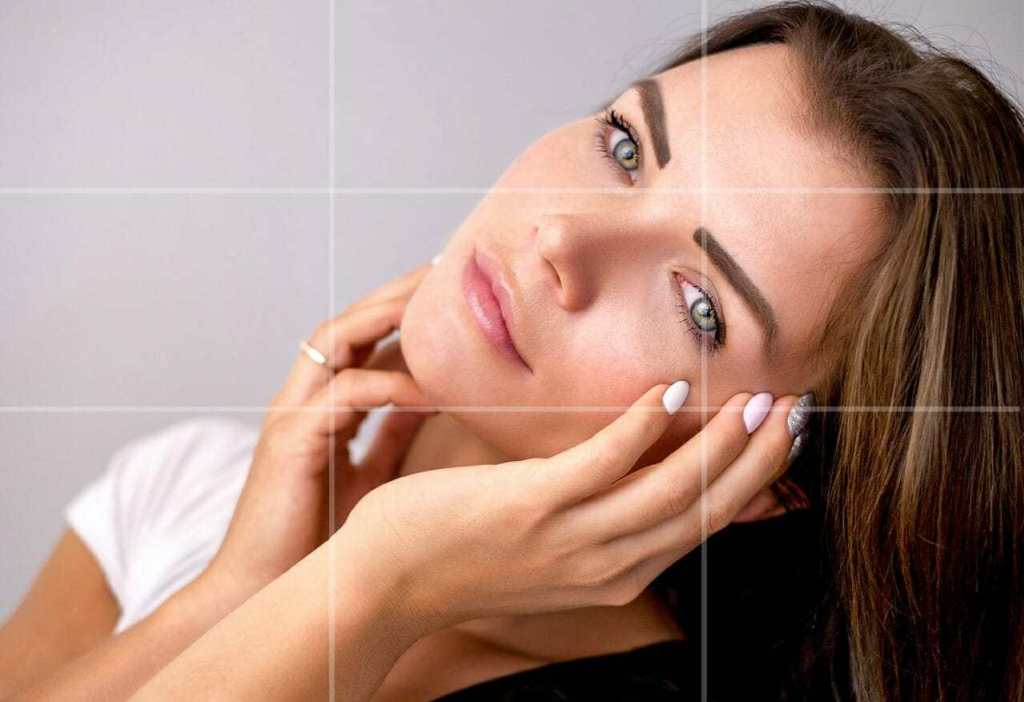
Plus, an
Street Photography: Use the Rule of Thirds to Emphasize Your Subject
In street photography, there can be a lot going on.
But you still need to make your subject stand out.
Fortunately, there’s an easy solution: Use the rule of thirds!

Specifically, you can place your main subject at a gridline intersection. This will prevent it from becoming lost in the scene. And it’ll help direct the viewer.
Macro: Use the Rule of Thirds to Position Your Point of Focus
Macro photography often uses a shallow depth of field.
This means that only part of the image is in focus.
So how do you choose which part of the image is in focus?
You use the rule of thirds, of course! Focus on a part of the subject that falls along one of the rule of thirds lines. Or, better yet, focus on a part of the subject that sits at an intersection point!
That’s what was done for the photo below:

How to Get the Rule of Thirds Right in Your Photos
If you’re struggling to put the rule of thirds into practice, ask yourself two questions:
- What is the main subject of my image?
- Where do I want to place that subject?
(The main subject is what attracted you to take the photo in the first place. It could be a person, an object, or a distant landscape.)
If you’re using the rule of thirds, I recommend always placing your subject at an intersection point.

This might require a bit of experimentation. You can try kneeling or even lying down for a new perspective.
Fortunately, most digital cameras and mobile phones have a grid display function. Be sure to turn this on to help you position your subject. Use the grid on your display to help you fit your subject to a gridline or intersection.
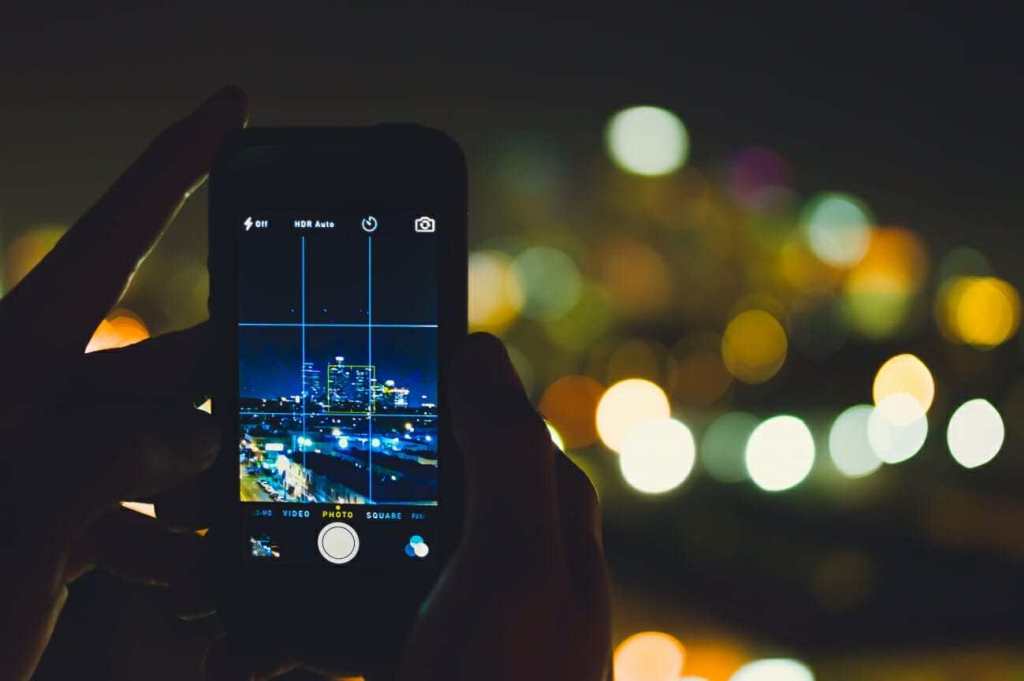
Break the Rules
Now, it’s important to remember one more thing:
No matter how hard you try, some scenes won’t fit the rule of thirds.
But they can still make a good photo.
See, the rule of thirds is just one composition principle. And it’ll get you some amazing shots.
However, there are plenty of other compositions that will work, too! You just have to do a bit of experimenting.

Now that you’ve learned these tips for stunning photos, you’re a better photographer.
Guaranteed.
But the fact is, the journey doesn’t stop there. There are more tips, tricks, and secrets–all of which will help you take gorgeous photos.
And if you want to learn all of these secrets, I recommend you sign up for the PhotoBlog newsletter. We send our subscribers all sorts of great stuff–including the tips, tricks, and secrets, straight from the experts. All to help you capture world-class photographs.
Did I mention that it’s all totally FREE?
(Oh, and we’ll send you a natural lighting cheat sheet–designed to help you use light in ways you’ve never considered.)
So to start taking stunning photos, enter your email:
