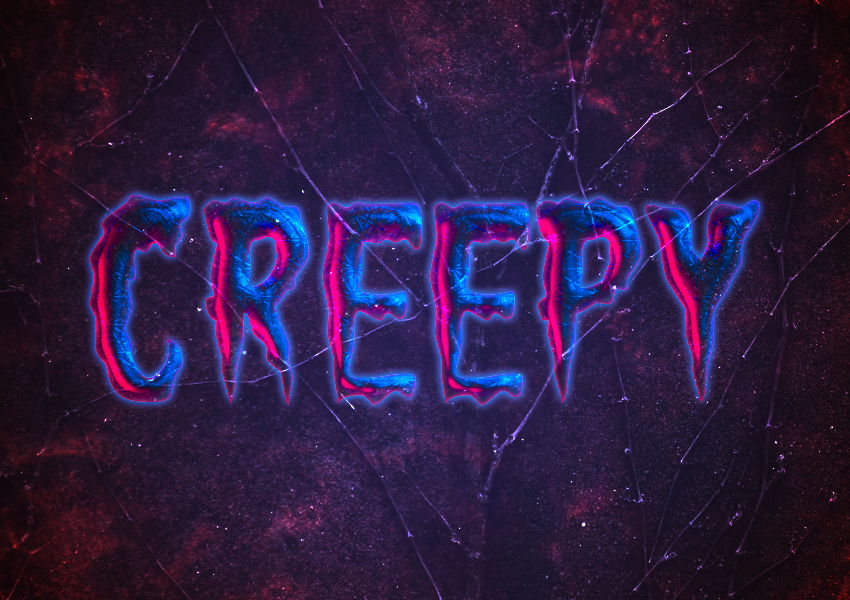
In this tutorial you will learn how to create a spooky Halloween text effect in Adobe Photoshop.
This tutorial will show you how to use a couple of Photoshop’s layer styles, along with some textures and blend modes.
Final Image
As always, this is the final image that we’ll be creating:

Tutorial Details
- Program: Adobe Photoshop CC 2015
- Estimated Completion Time: 20 minutes
- Difficulty: Beginner
Resources
Step 1
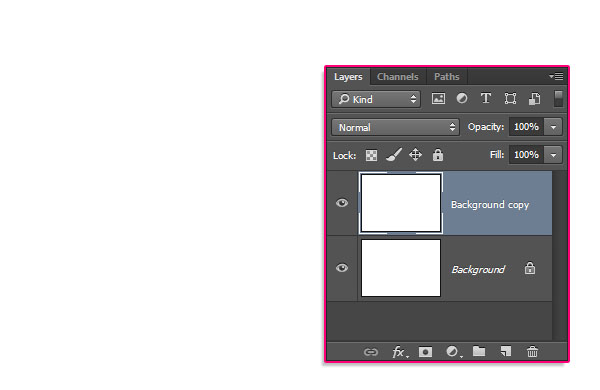
Create a new 850 x 600px document, and duplicate the Background layer.
Step 2
Double click the Background copy layer to apply a Gradient Overlay effect using the following setting:
- Check the Dither box
- Style: Radial
- Scale: 130%
- Click the Gradient box to create the gradient using the colors #1a1c49 to the left and #1f1115 to the right.
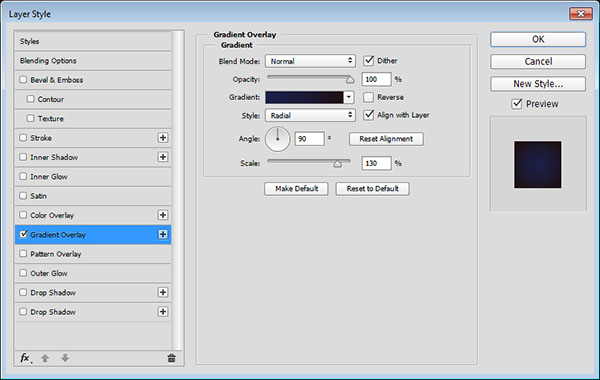
This will create the background gradient fill.

Step 3
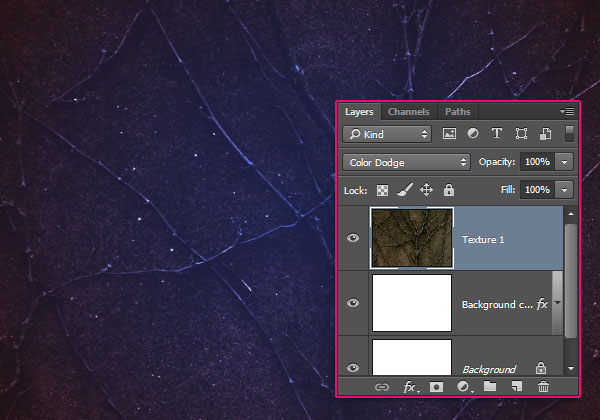
Place the Texture 83 image on top of the Background copy layer, resize it as needed, then rename its layer to Texture 1, and change its Blend Mode to Color Dodge.
Step 4
Place the Seamless_Monster_Flesh_0001 image on top of the Texture 1 layer, resize it as needed, rename its layer to Texture 2, and change its layer’s Blend Mode to Color Dodge as well.
Step 5
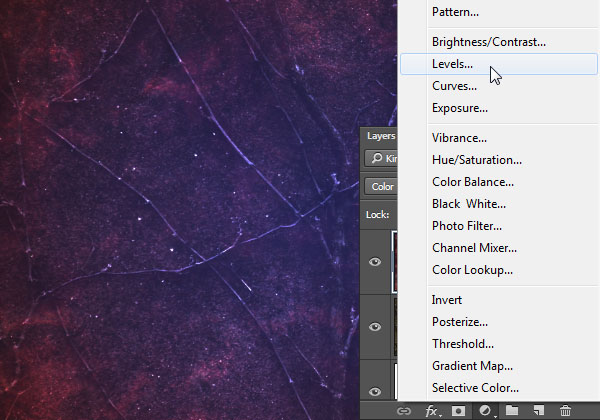
Click the Create new fill or adjustment layer icon at the bottom of the Layers panel and choose Levels.
Step 6
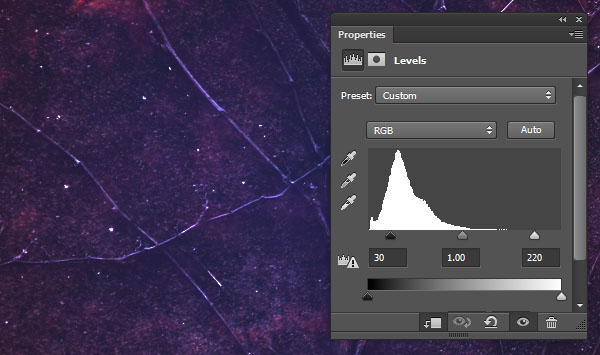
Click the Clip to layer icon, then change the Shadows value to 30, and the Highlights value to 220.
Step 7
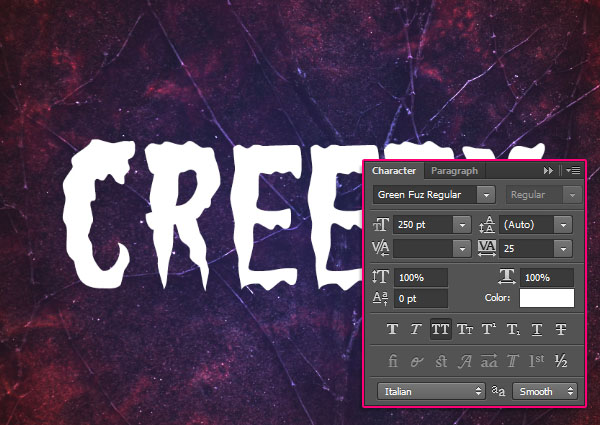
Create the text using the font Green Fuz Regular. The Size is 250pt, and the Tracking value is 25.
Step 8
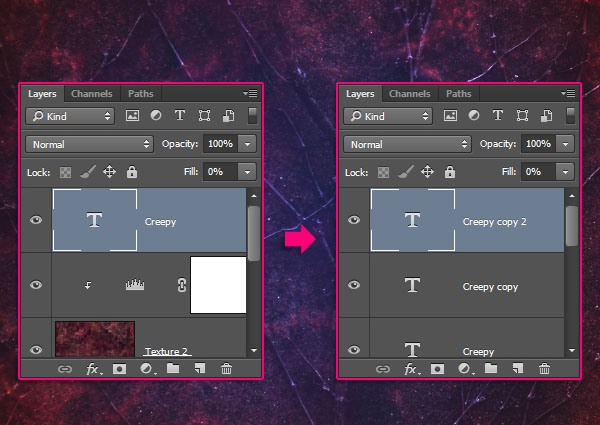
Change the text layer’s Fill value to 0, then duplicate it twice.
Step 9
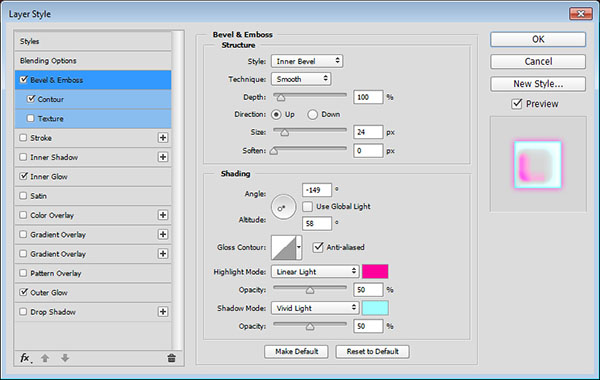
Double click the original text layer and apply the following layer style settings:
– Bevel and Emboss
- Size: 24
- Uncheck the Use Global Light box
- Angle: -149
- Altitude: 58
- Check the Anti-aliased box
- Highlight Mode: Linear Light
- Color:
#ff009c - Opacity: 50%
- Shadow Mode: Vivid Light
- Color:
#a1feff - Opacity: 50%
Step 10
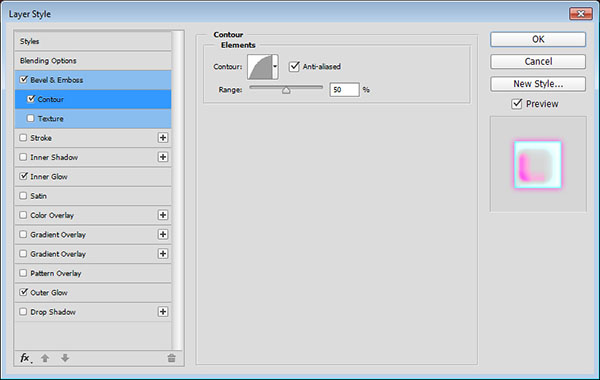
– Contour
- Contour: Half Round
- Check the Anti-aliased box.
Step 11
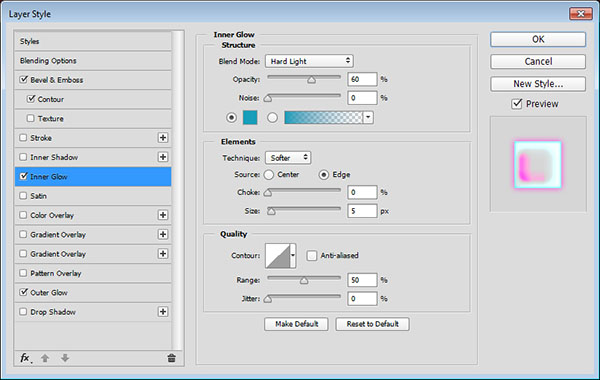
– Inner Glow
- Blend Mode: Hard Light
- Opacity: 60%
- Color:
#199eba
Step 12
– Outer Glow
- Blend Mode: Hard Light
- Opacity: 80%
- Color:
#d74892 - Size: 10
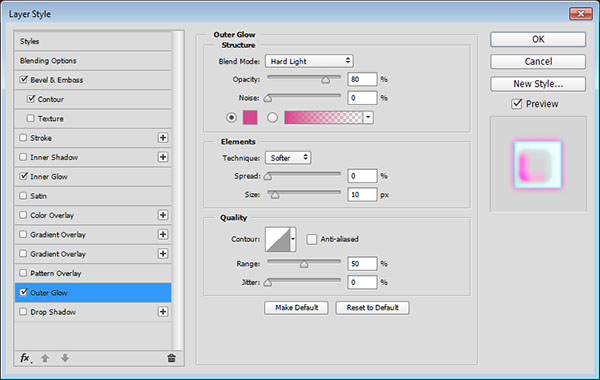
This will style the first text layer.
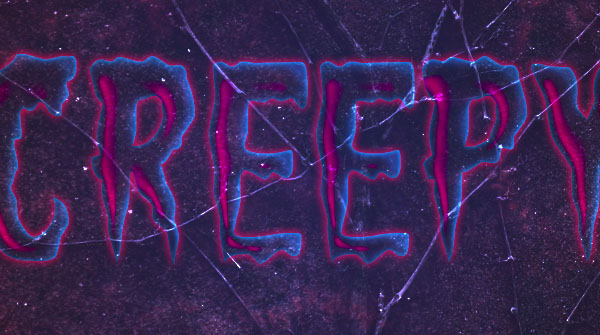
Step 13
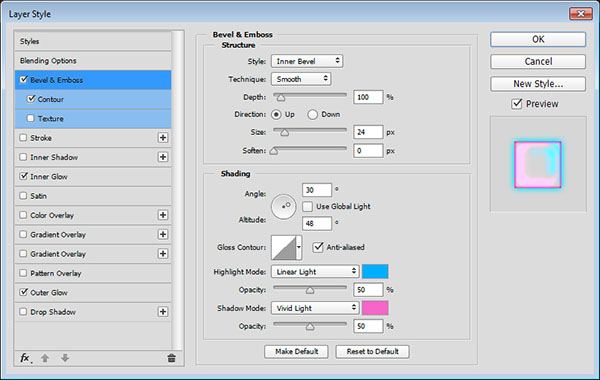
Double click the first copy text layer and apply the following layer style settings:
– Bevel and Emboss
- Size: 24
- Uncheck the Use Global Light box
- Angle: 30
- Altitude: 48
- Check the Anti-aliased box
- Highlight Mode: Linear Light
- Color:
#00aeff - Opacity: 50%
- Shadow Mode: Vivid Light
- Color:
#f865c9 - Opacity: 50%
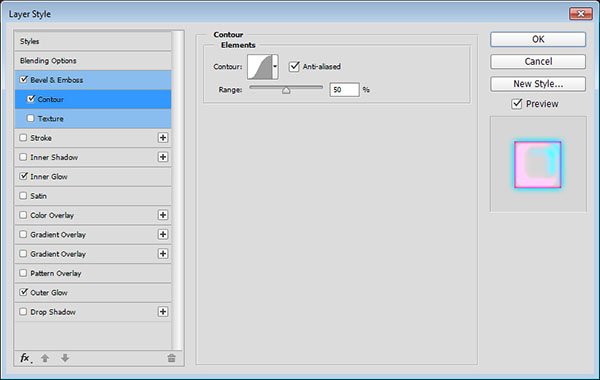
Step 14
– Contour
- Contour: Gaussian
- Check the Anti-aliased box.
Step 15
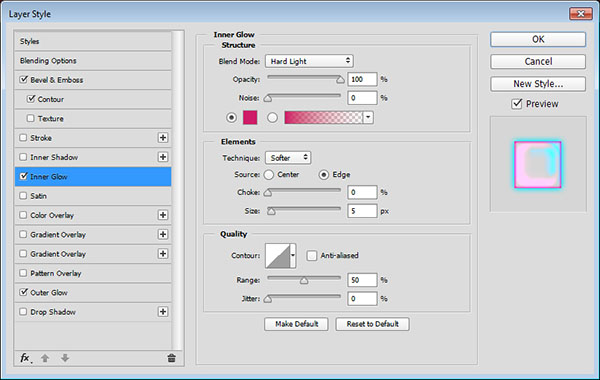
– Inner Glow
- Blend Mode: Hard Light
- Opacity: 100%
- Color:
#cf1c68

Step 16
– Outer Glow
- Blend Mode: Hard Light
- Opacity: 80%
- Color:
#00c0ff - Size: 10
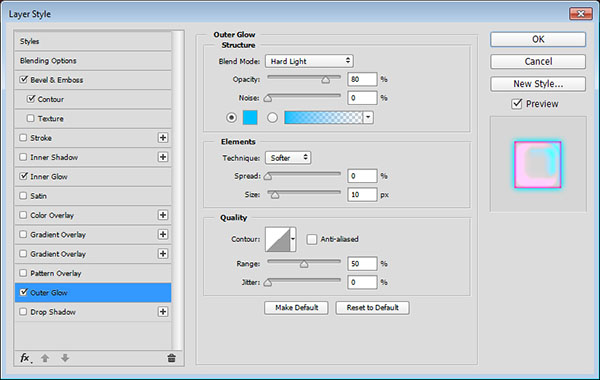
This will style the second text layer.
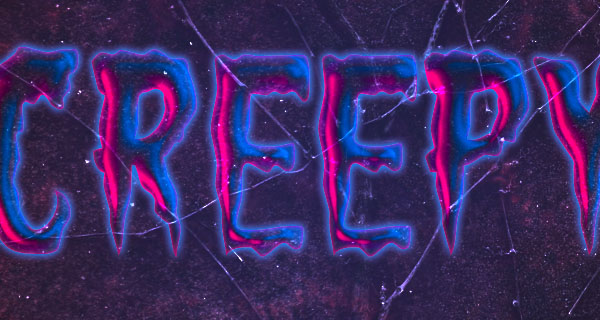
Step 17
Double click the second copy text layer to apply the following layer style:
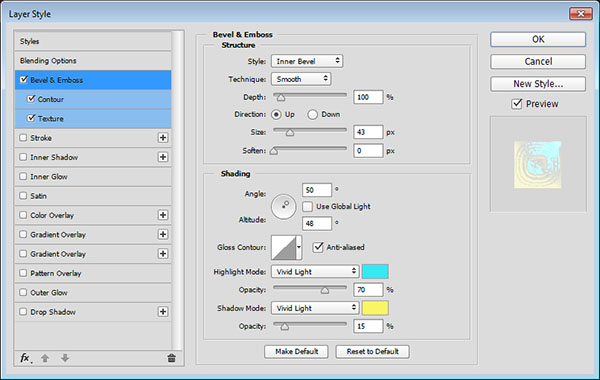
– Bevel and Emboss
- Size: 43
- Uncheck the Use Global Light box
- Angle: 50
- Altitude: 48
- Check the Anti-aliased box
- Highlight Mode: Vivid Light
- Color:
#35e9f0 - Opacity: 70%
- Shadow Mode: Vivid Light
- Color:
#f8f665 - Opacity: 15%
Step 18
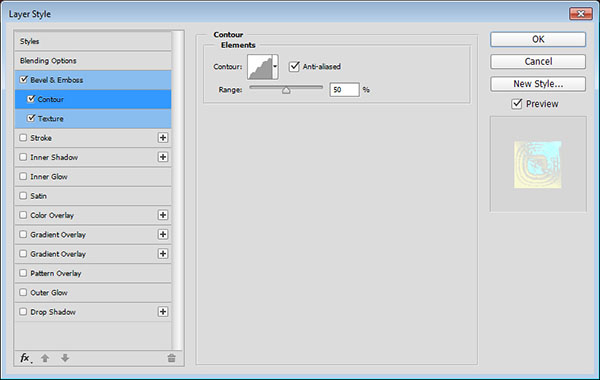
– Contour
- Contour: Rounded Steps
- Check the Anti-aliased box.
Step 19
– Texture
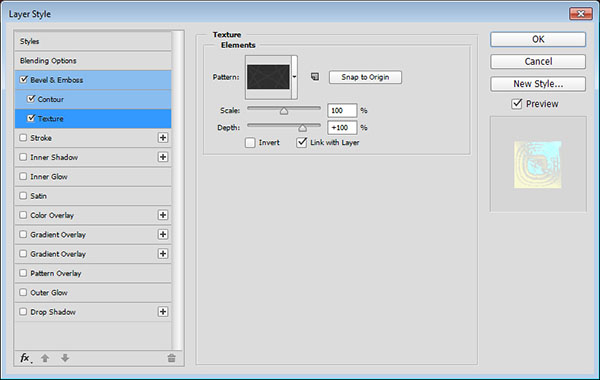
This will add a nice texture and subtle detailing to the text.

Step 20
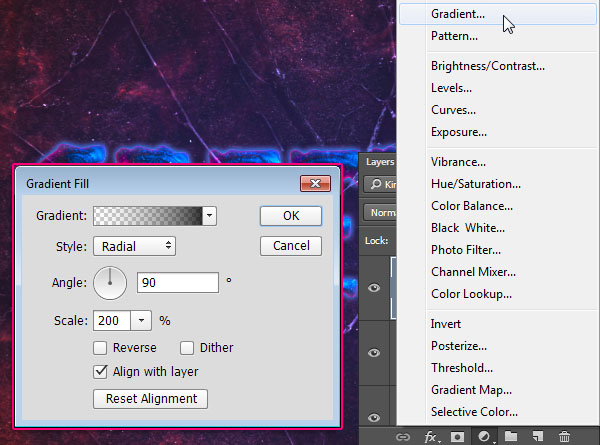
Click the Create new fill or adjustment layer icon and choose Gradient.
Create a Transparent to Fill Color gradient using the colors #747474 to the left and #000000 to the right.
Change the Style to Radial and the Scale to 200.
Step 21
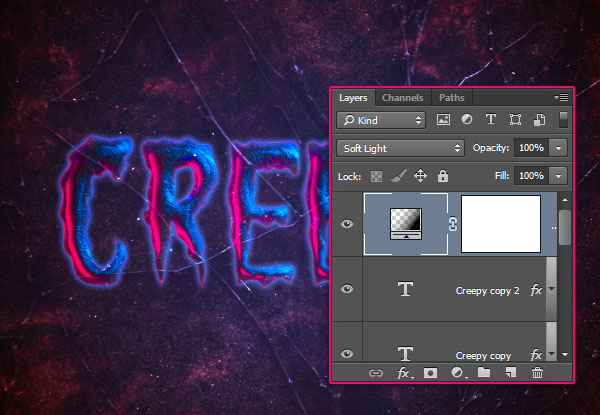
Change the Gradient layer’s Blend Mode to Soft Light. This will add a nice vignette to the final result.
And We’re Done!
