Layer styles, textures, and blend modes can be combined in many different ways to create quick and easy effects. This tutorial will show you how to use them in order to create a simple, rough, rusty horror text effect in Photoshop.
Final Image
As always, this is the final image that we’ll be creating:

Tutorial Details
- Program: Adobe Photoshop CC 2015
- Estimated Completion Time: 20 minutes
- Difficulty: Beginner
Resources
- Ghoulish Fright AOE font.
- Wood grain texture 2 by Salitas91.
- BG Texture – DT Original 44 by Hehayo.
- Peeling Rust by LogicalXStock.
- you’ll also need to load a patterns set. So go to Edit > Presets > Preset Manager, and choose Patterns from the Preset Type drop down menu. Then, click the little arrow to the right of the Preset Type drop down menu, and click Nature Patterns in the center of the pop-up menu. When the dialog box appears after that, just click Append, and you’ll get the patterns.
Step 1
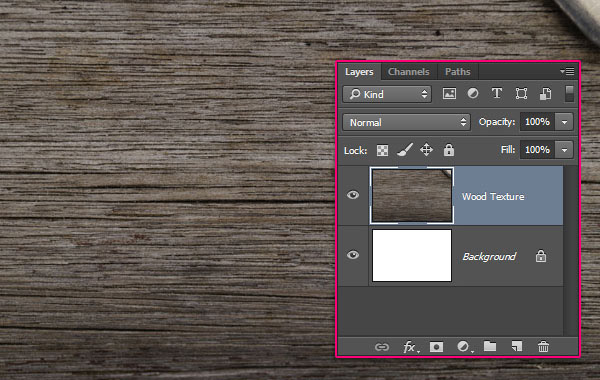
Create a new 850 x 550px document. Place the Wood grain texture 2 image on top of the Background layer, resize it as needed, then rename its layer to Wood Texture.
Step 2
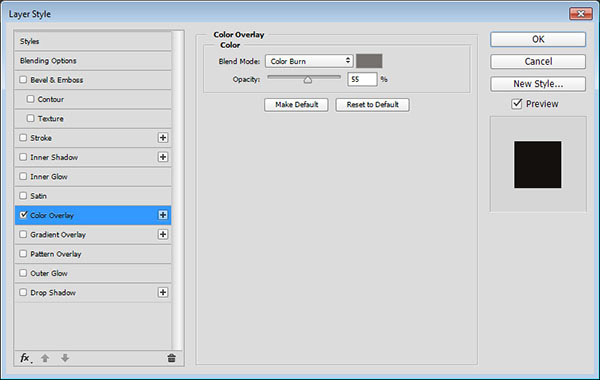
Double click the Wood Texture layer to apply a Color Overlay effect using the following settings:
Add a Color Overlay with these settings:
- Color:
#74716f - Blend Mode: Color Burn
- Opacity: 55%
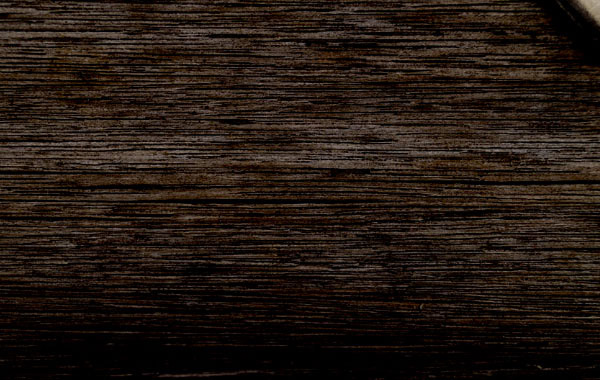
This will darken the texture.
Step 3
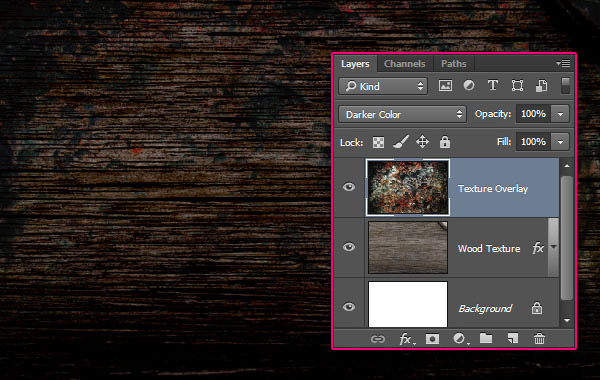
Place the BG Texture – DT Original 44 image on top of the Wood Texture layer, resize it as needed, rename its layer to Texture Overlay, then change its Blend Mode to Darker Color.
Step 4
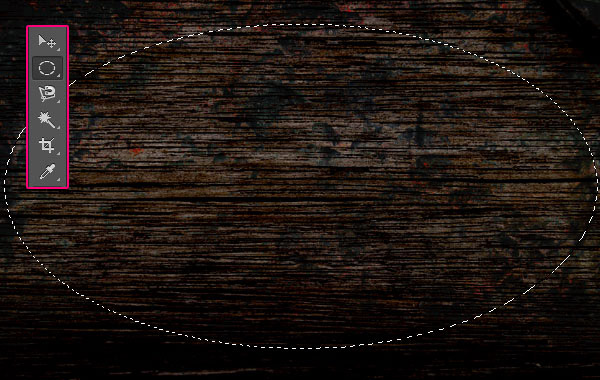
Pick the Elliptical Marquee Tool, and draw an ellipse around the center of the document.
Step 5
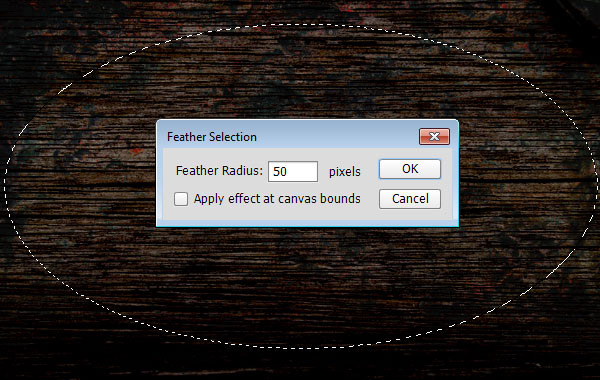
Go to Select > Modify > Feather, and type in a Feather Radius that you like. The value used here is 50 – the bigger the value the softer the edges will be.
Step 6
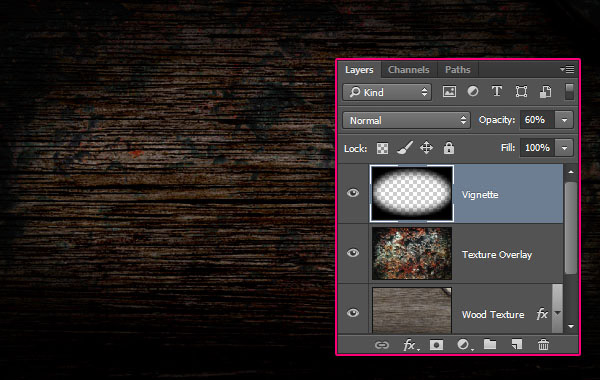
Go to Select > Inverse, then create a new layer on top of all layers, call it Vignette, and fill the selection with Black.
Go to Select > Deselect, and change the layer’s Opacity value to 60%, or any other value you like.
Step 7
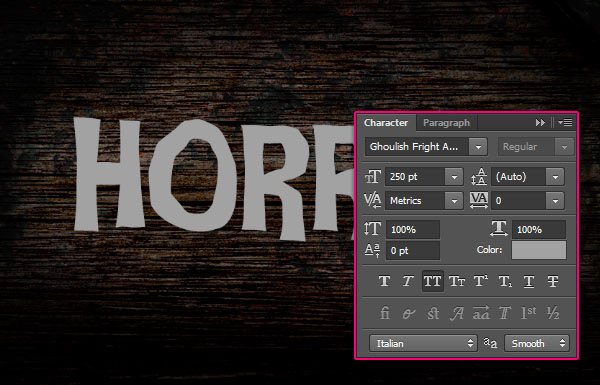
Create the text using the font Ghoulish Fright AOE. The Size is 250pt and the Color is #a2a2a2.
Step 8
Duplicate the text layer twice, then change the original and second copy text layers’ Fill value to 0.
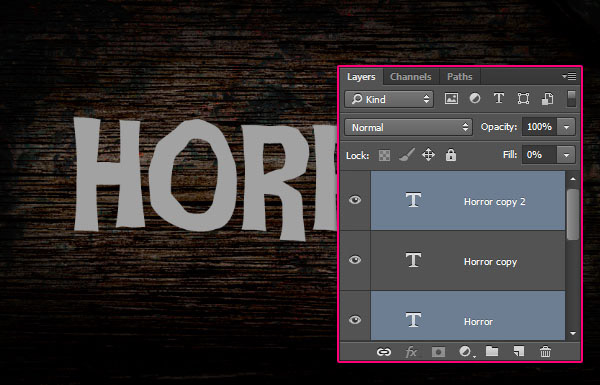
Double click the original text layer to apply the following layer style:
Step 9
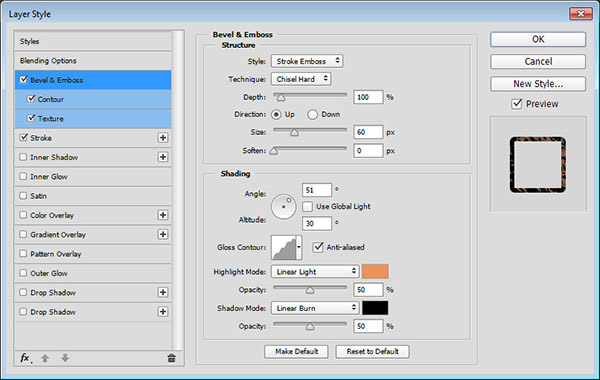
– Bevel and Emboss
- Style: Stroke Emboss
- Technique: Chisel Hard
- Size: 60
- Uncheck the Use Global Light box
- Angle: 51
- Altitude: 30
- Gloss Contour: Rounded Steps
- Check the Anti-aliased box
- Highlight Mode: Linear Light
- Color:
#ec925c - Opacity: 50%
- Shadow Mode: Linear Burn
- Opacity: 50%
Step 10
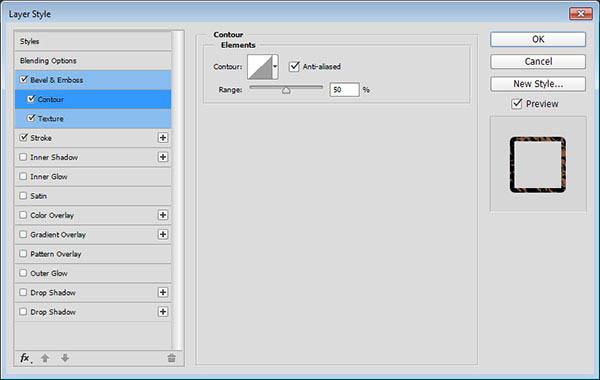
– Contour
- Check the Anti-aliased box.
Step 11
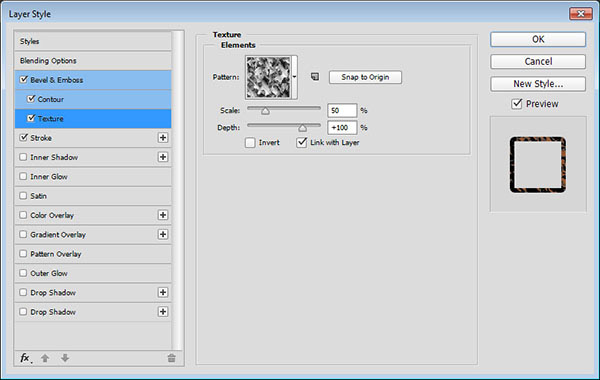
Texture
- Pattern: Leaves
- Scale: 50%
Step 12
– Stroke

This will style the outer stroke.
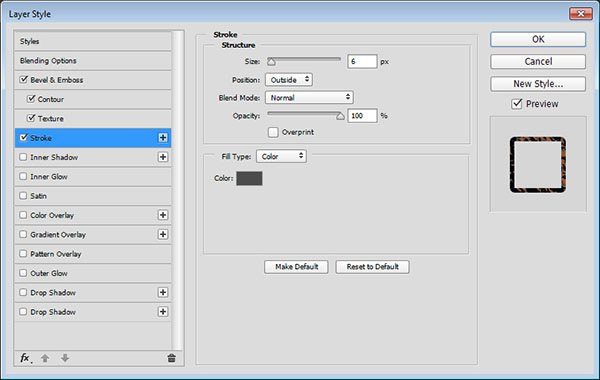
Double click the first copy text layer to apply the following layer style:
Step 13
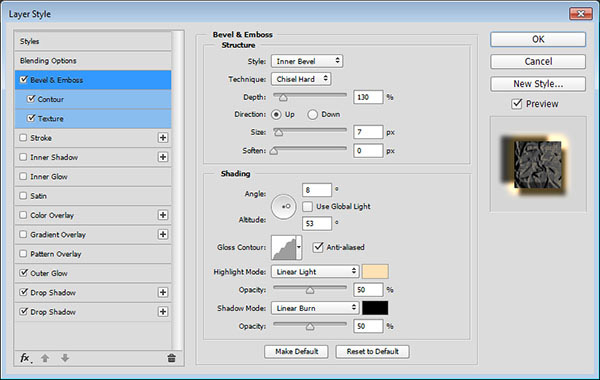
– Bevel and Emboss
- Technique: Chisel Hard
- Depth: 130%
- Size: 7
- Uncheck the Use Global Light box
- Angle: 8
- Altitude: 53
- Gloss Contour: Rounded Steps
- Check the Anti-aliased box
- Highlight Mode: Linear Light
- Color:
#ffe1b6 - Opacity: 50%
- Shadow Mode: Linear Burn
- Opacity: 50%
Step 14
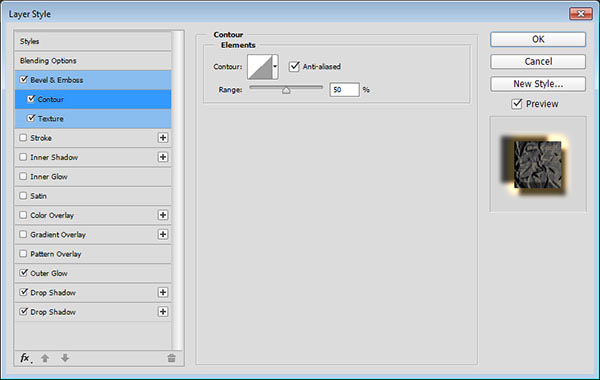
– Contour
- Check the Anti-aliased box.
Step 15
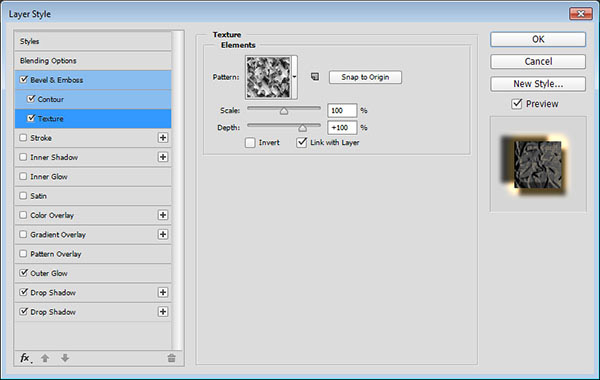
Texture
Step 16
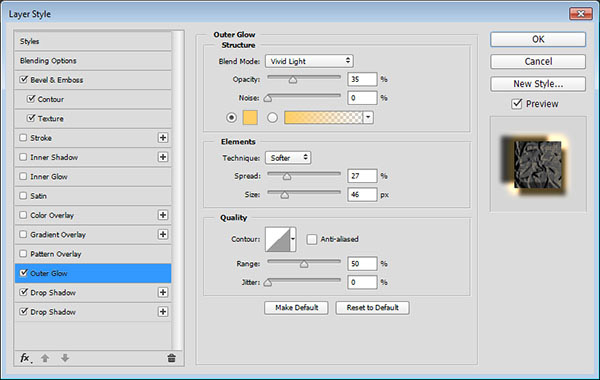
– Outer Glow
- Blend Mode: Vivid Light
- Opacity: 35%
- Color:
#ffce64 - Spread: 27
- Size: 46
Step 17
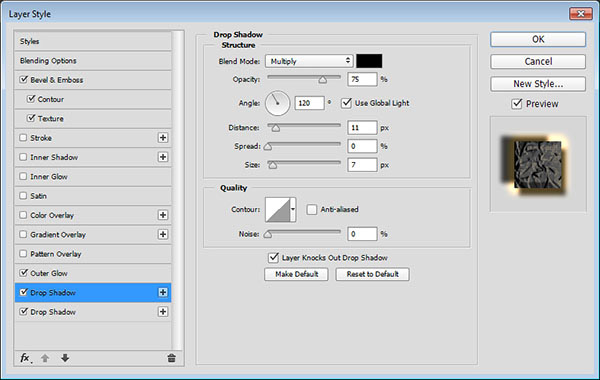
Drop Shadow – 1
Step 18
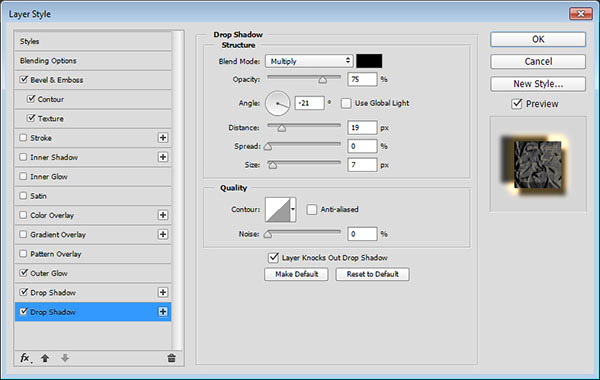
click the + sign next to the Drop Shadow tab, then select the tab at the bottom to change its settings as shown below:
Drop Shadow – 2
- Uncheck the Use Global Light box
- Angle: -21
- Distance: 19
- Size: 7
This will style the first text layer.

Double click the second copy text layer to apply the following layer style:
Step 19
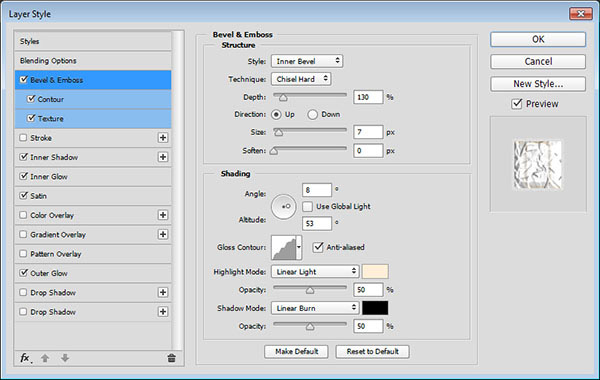
– Bevel and Emboss
- Technique: Chisel Hard
- Depth: 130%
- Size: 7
- Uncheck the Use Global Light box
- Angle: 8
- Altitude: 53
- Gloss Contour: Rounded Steps
- Check the Anti-aliased box
- Highlight Mode: Linear Light
- Color:
#ffefd8 - Opacity: 50%
- Shadow Mode: Linear Burn
- Opacity: 50%
Step 20
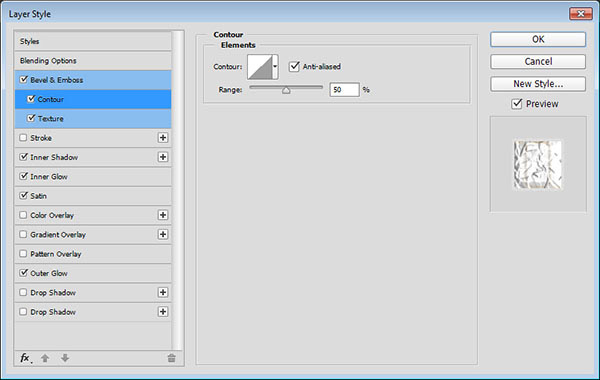
– Contour
- Check the Anti-aliased box.
Step 21
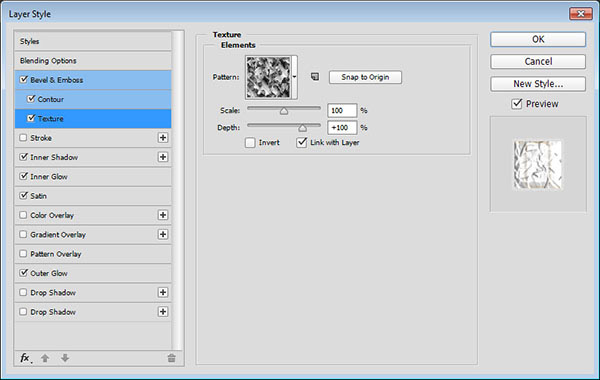
Texture
Step 22
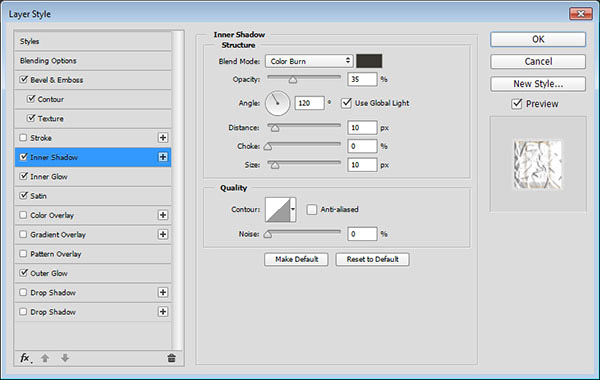
– Inner Shadow
- Blend Mode: Color Burn
- Color:
#383430 - Opacity: 35%
- Distance: 10
- Size: 10
Step 23
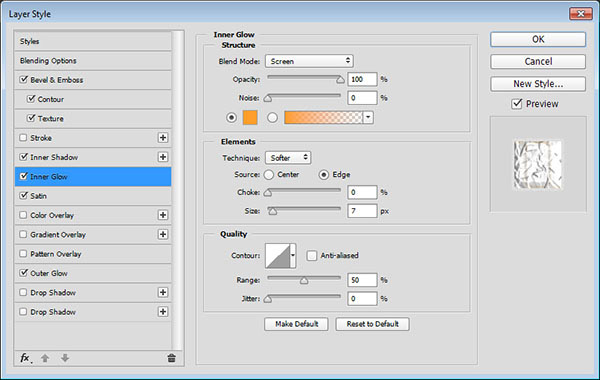
– Inner Glow
- Opacity: 100%
- Color:
#ff9e2b - Size: 7
Step 24
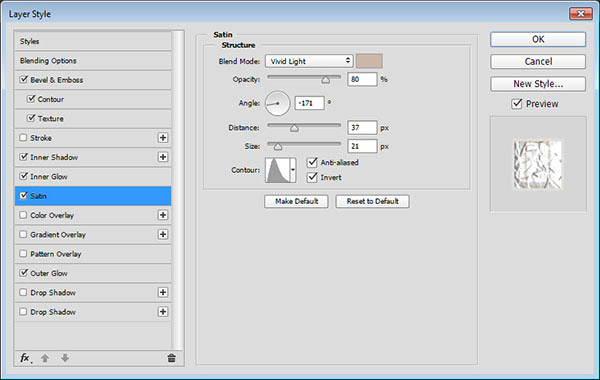
– Satin
- Blend Mode: Vivid Light
- Color:
#ccb6a8 - Opacity: 80%
- Angle: -171
- Distance: 37
- Size: 21
- Contour: Cone – Asymmetrical
- Check the Anti-aliased box
- Check the Invert box
Step 25
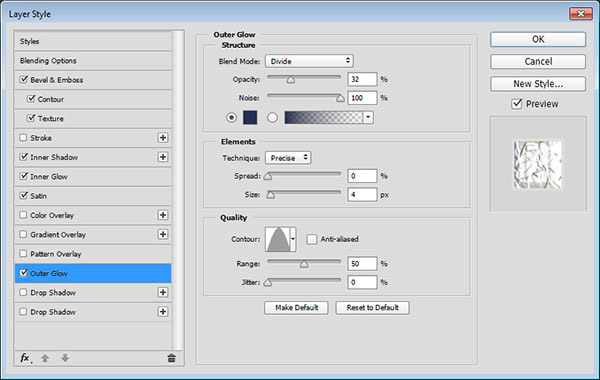
– Outer Glow
- Blend Mode: Divide
- Opacity: 32%
- Noise: 100%
- Color:
#242f51 - Technique: Precise
- Size: 4
- Contour: Cone
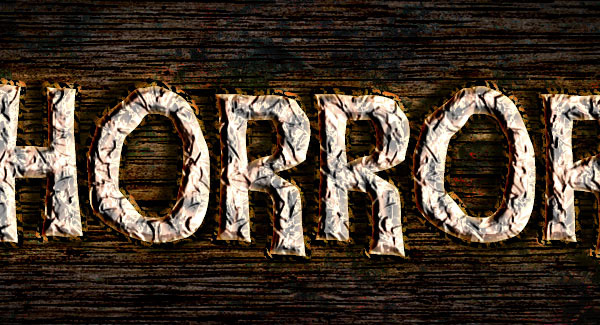
This will style the second text layer.
Step 26
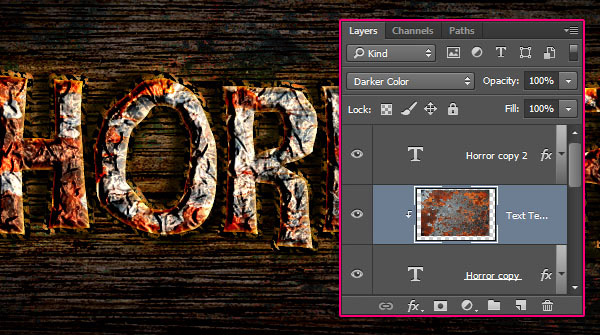
Place the Peeling Rust image between the two copy text layers, go to Edit > Transform > Rotate 90° Clockwise, and resize it as needed.
After that, right click the texture layer , choose Create Clipping Mask, then change the layer’s Blend Mode to Darker Color.
And We’re Done!
