In the following tutorial you will learn how to create a set of share buttons in Adobe Photoshop.
Final Image
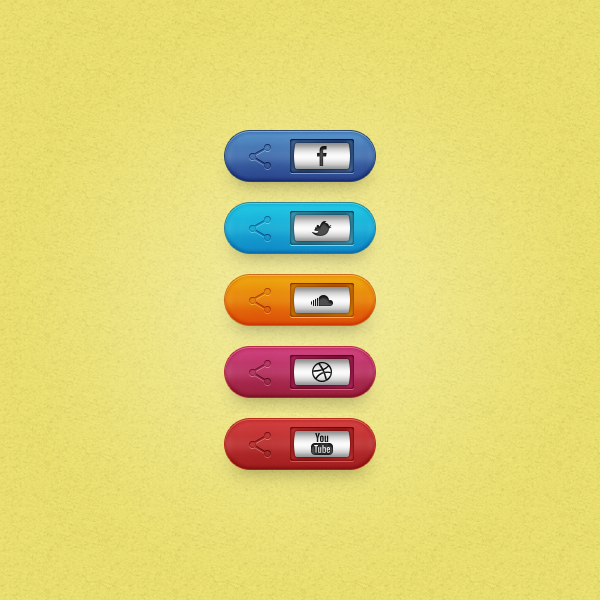
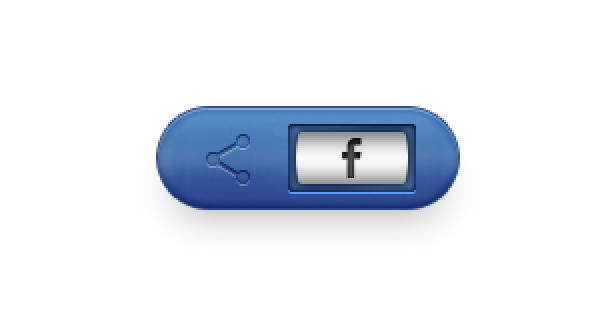
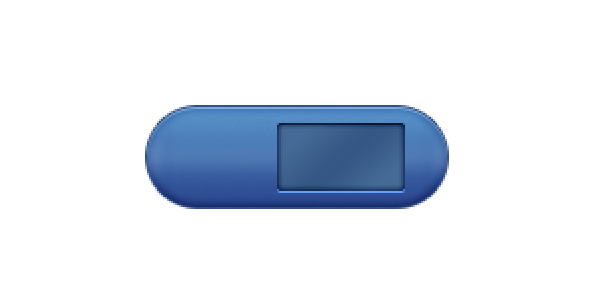
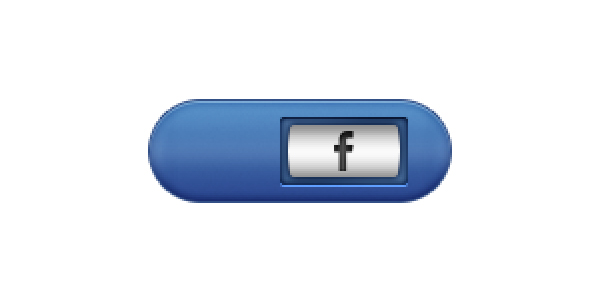
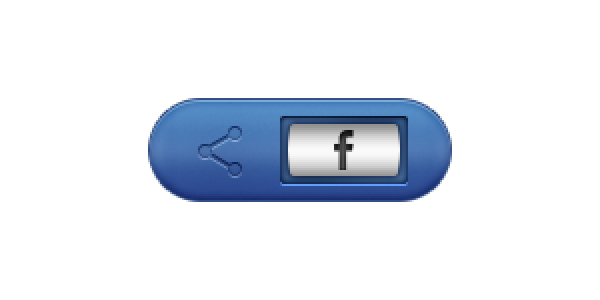
As always, this is the final image that we’ll be creating:
Tutorial Details
- Program: Adobe Photoshop CC
- Estimated Completion Time: 45 minutes
- Difficulty: Beginner-Intermediate
Resources
Step 1
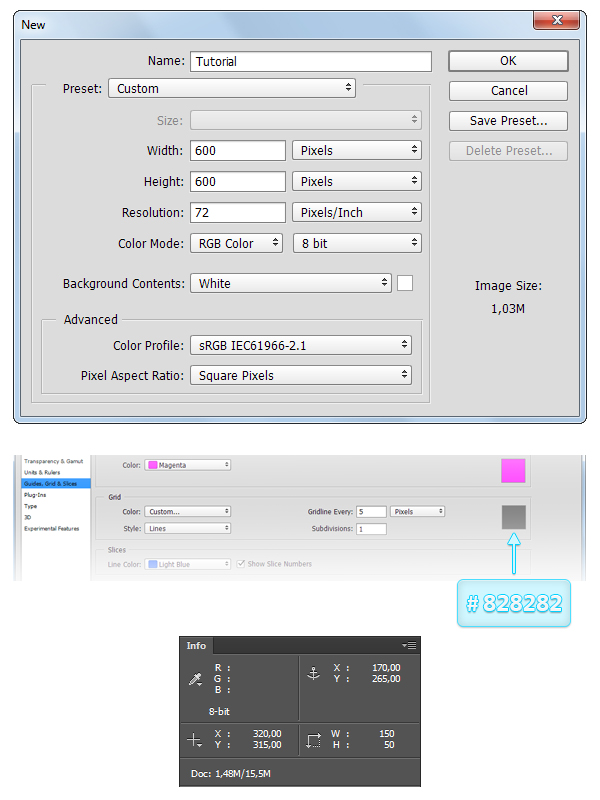
Open Photoshop and hit Control-N to create a new document. Enter all the data shown in the following image and click OK.
Enable the Grid (View > Show > Grid) and the Snap to Grid (View > Snap To > Grid). For starters you will need a grid every 5px, so simply go to Edit > Preferences > Guides, Grid & Slices and focus on the Grid section. Enter 5 in the Gridline Every box and 1 in the Subdivision box. Also, set the color of the grid to #828282. Once you have set all these properties click OK.
Try not to get discouraged by all that grid, it will ease your work later and keep in mind that you can easily enable or disable it using the Control-“ keyboard shortcut. You should also open the Info panel (Window > Info) for a live preview with the size and position of your shapes.
Step 2
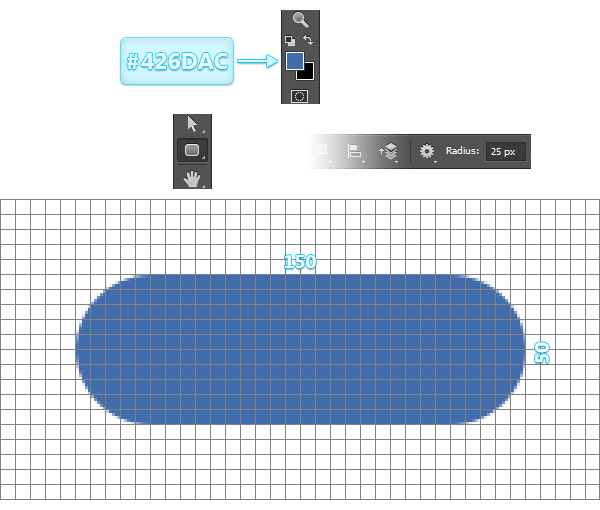
Set the foreground color to #426DAC, pick the Rounded Rectangle Tool, focus on the top bar and set the Radius to 25px.
Move to your canvas and create a 150x50px vector shape.
Step 3
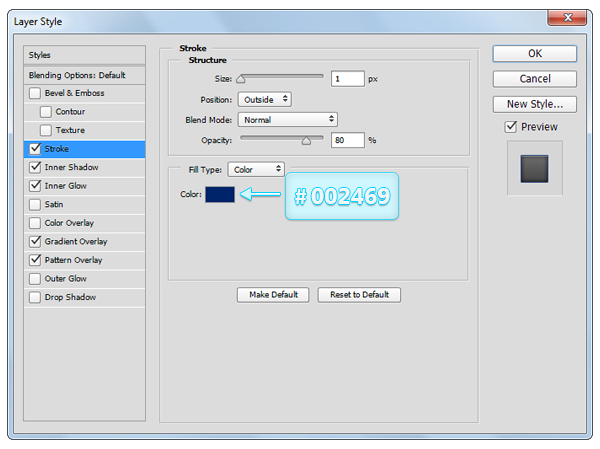
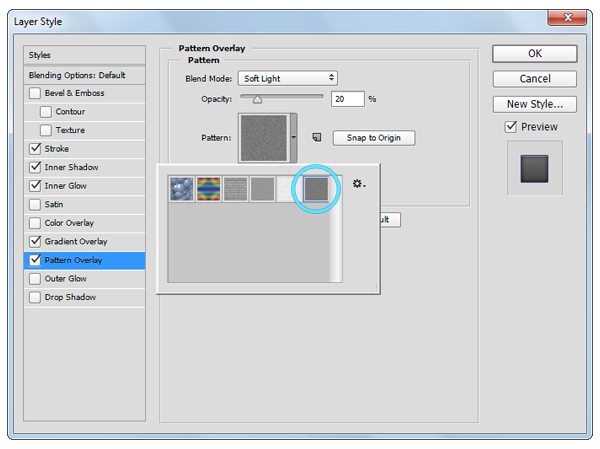
Download the Dark Gray Flecks pattern file from the Resources section (at the beginning of the tutorial), you will use it in the Pattern Overlay section.
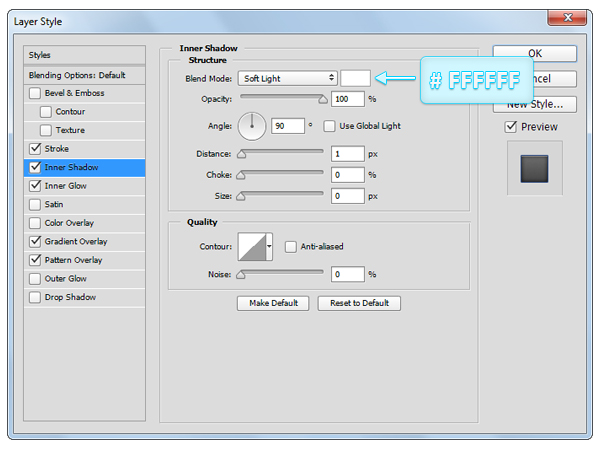
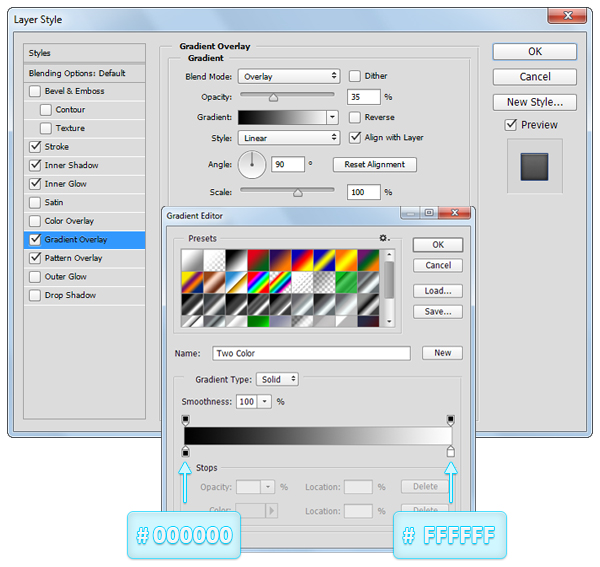
Move to the Layers panel and double click on your shape to open the Layer Style window and enter the properties shown in the following images.

Step 4
Make sure that your vector shape is still selected and hit Control – J to duplicate it.
Focus on the Layers panel, right click on your copy and go to Clear Layer Style.
Make sure that your copy stays selected, keep focusing on the Layers panel and lower the Fill to 0%.
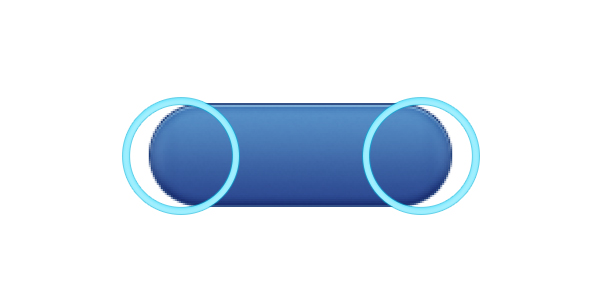
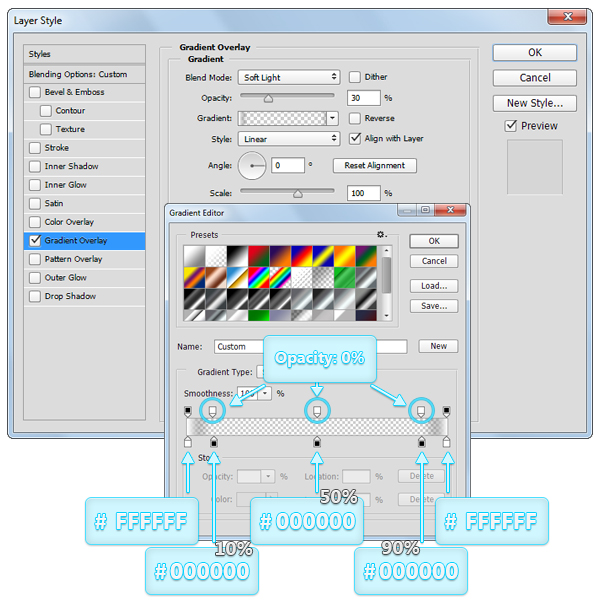
Open the Layer Style window for this copy and enter the properties shown in the following image.

Step 5
Make sure that the copy made in the previous step is still selected and duplicate it ( Control – J ).
Focus on the Layers panel, right click on this new copy and go to Clear Layer Style.
Make sure that your copy stays selected, keep focusing on the Layers panel and lower the Fill to 0%.
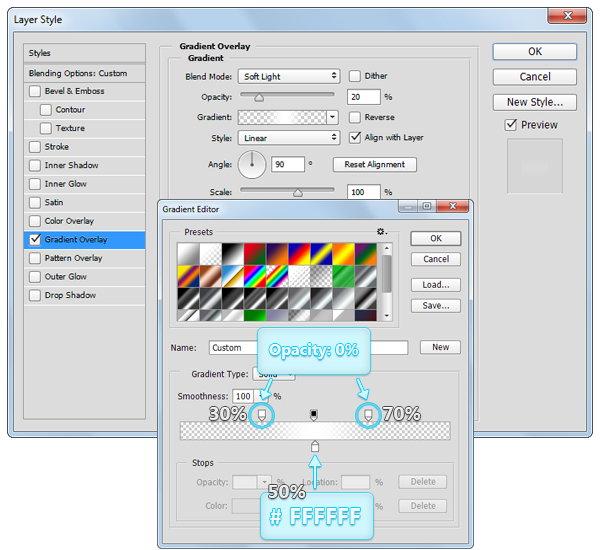
Open the Layer Style window for the copy made in this step and enter the properties shown in the following image.


Step 6
For the following steps you will need a grid every 1px, so go to to Edit > Preferences > Guides, Grid & Slices and enter 1 in the Gridline Every box.
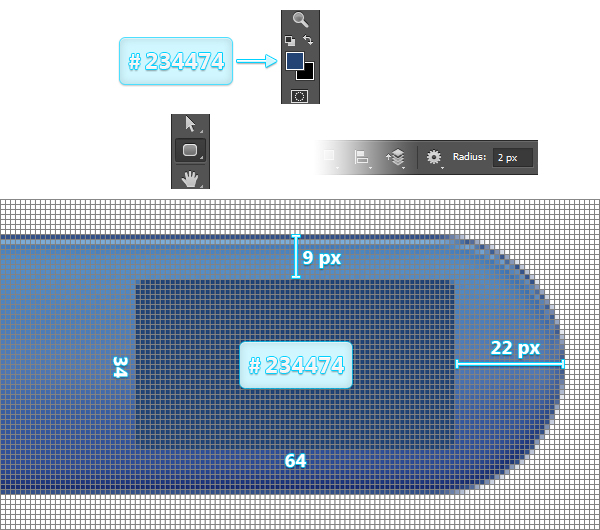
Set the foreground color to #234474 and pick the Rounded Rectangle Tool. Focus on the top bar and set the Radius to 2px.
Move to your canvas, create a 64 x 34px vector shape and place it exactly as shown in the image.
Step 7
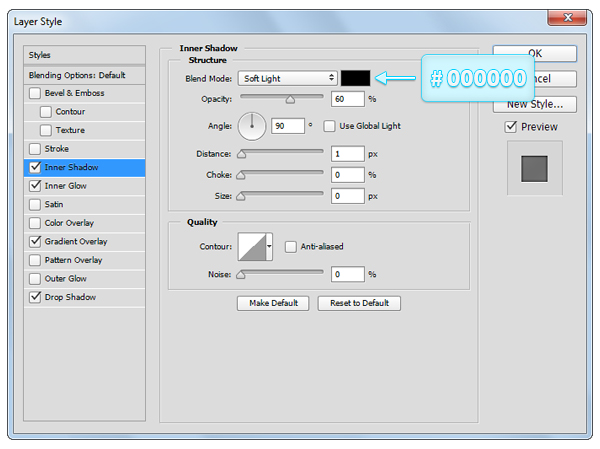
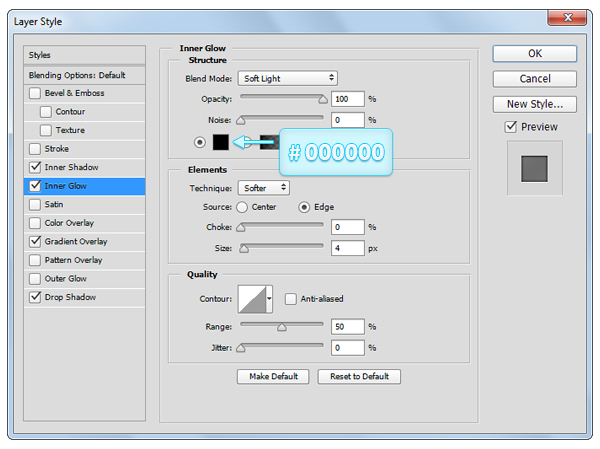
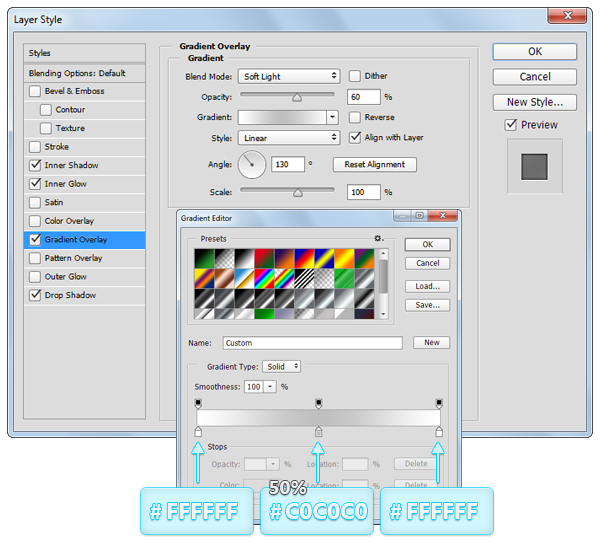
Open the Layer Style window for the shape made in the previous step and enter the properties shown in the following images.
Step 8
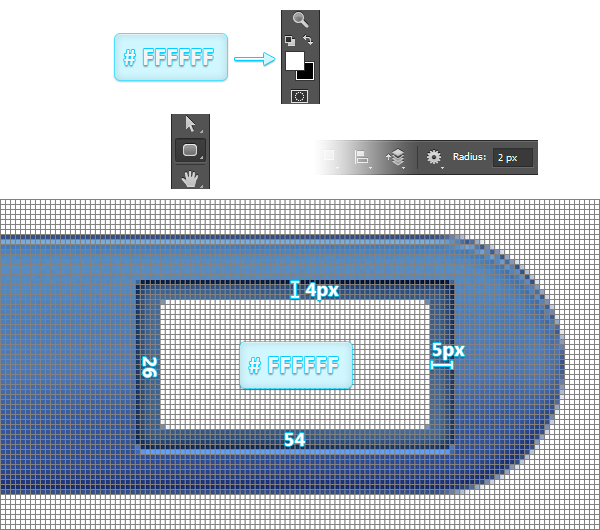
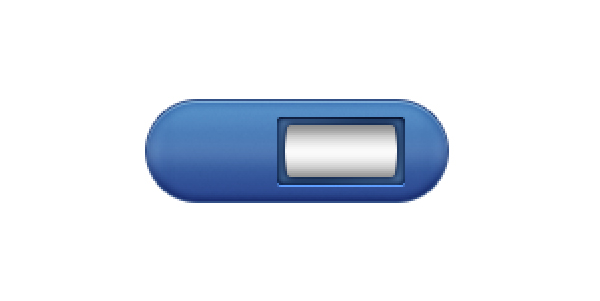
Set the foreground color to #FFFFFF and pick the Rounded Rectangle Tool. Focus on the top bar, make sure that the radius is still set at 2px, create a 54 x 26px vector shape and place it exactly as shown in the image.
Step 9
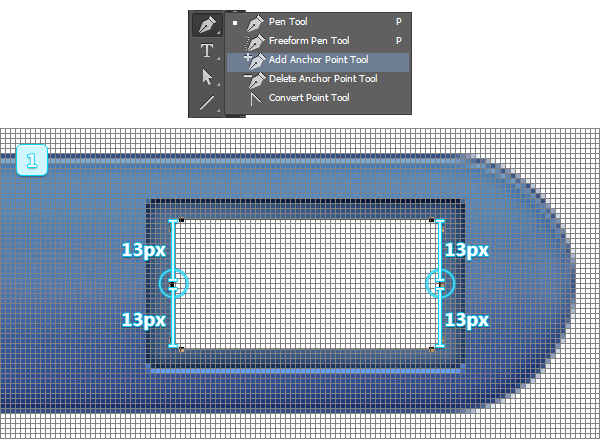
Make sure your white vector shape is selected, pick the Add Anchor Point Tool and add two anchors as shown in the first image.
Pick the Direct Selection Tool, select the middle right anchor point and move 1 px to the right using the Right Arrow button on the keyboard.
Using the same tool, select the middle left anchor point and move it 1 px to the left using the Left Arrow button on your keyboard.
Step 10
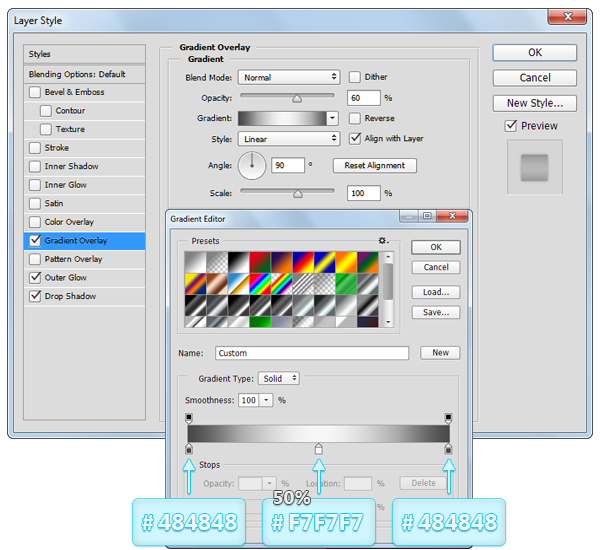
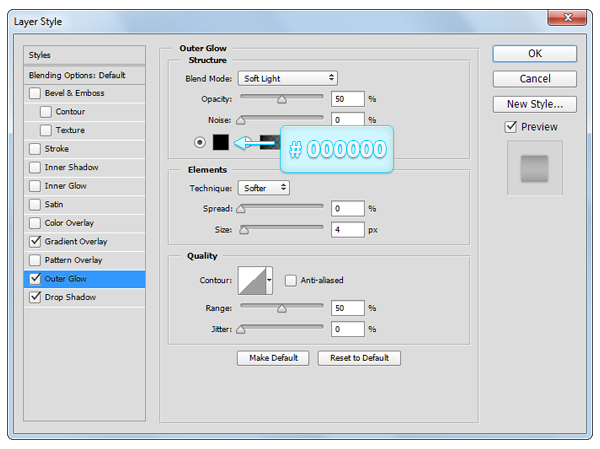
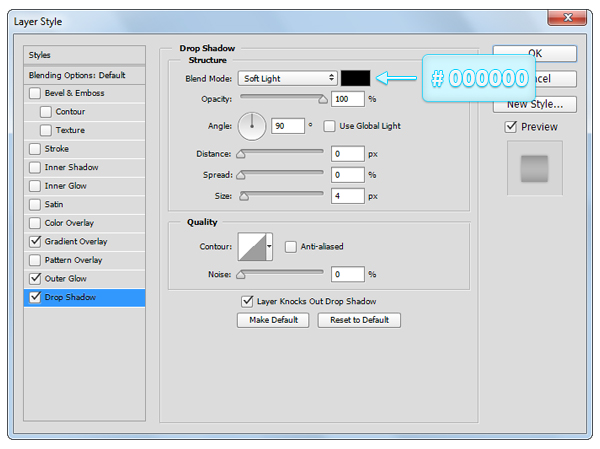
Open the Layer Style window for your white vector shape and enter the properties shown in the following images.
Step 11
Download the Social Icons Ps file from the Resources section (at the beginning of the tutorial) and open it.
Use the Facebook Icon and place it as shown in the image.
Step 12
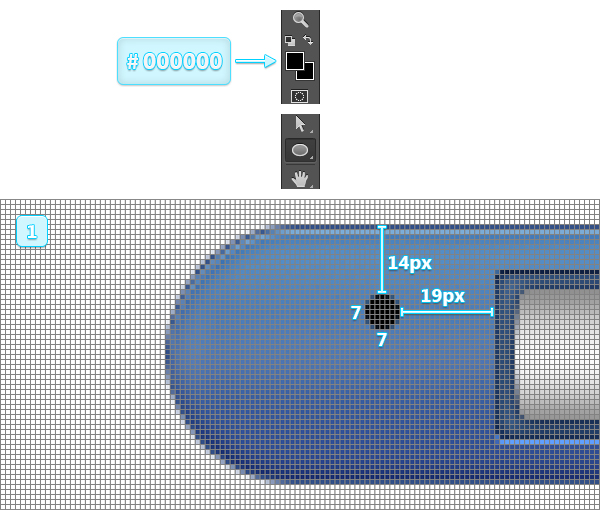
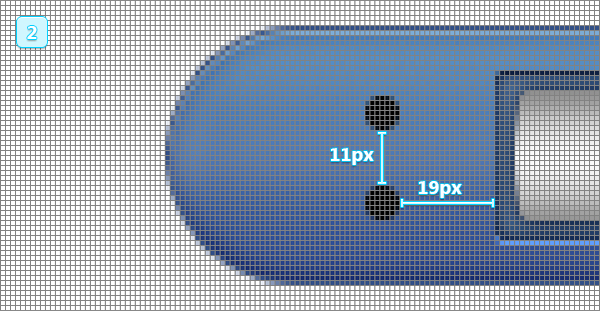
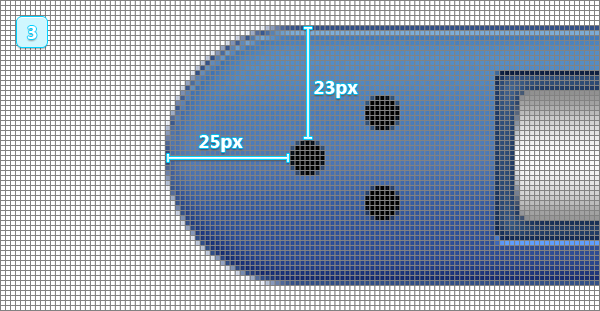
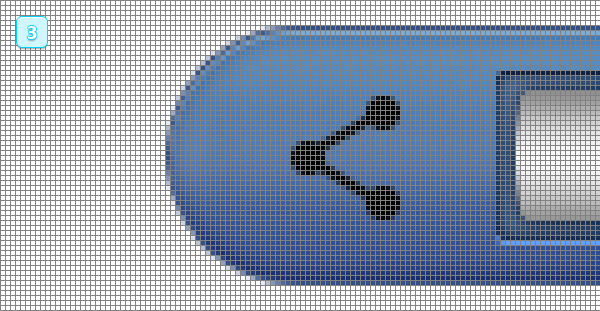
Set the foreground color to #000000 and pick the Ellipse Tool. Move to your canvas, create a 7 x 7px vector shape and place it as shown in the first image.
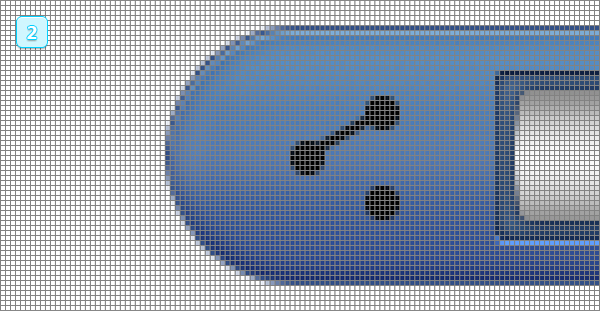
Duplicate this vector shape twice (Control + J), select the copies one by one and place them as shown in the following images.

Step 13
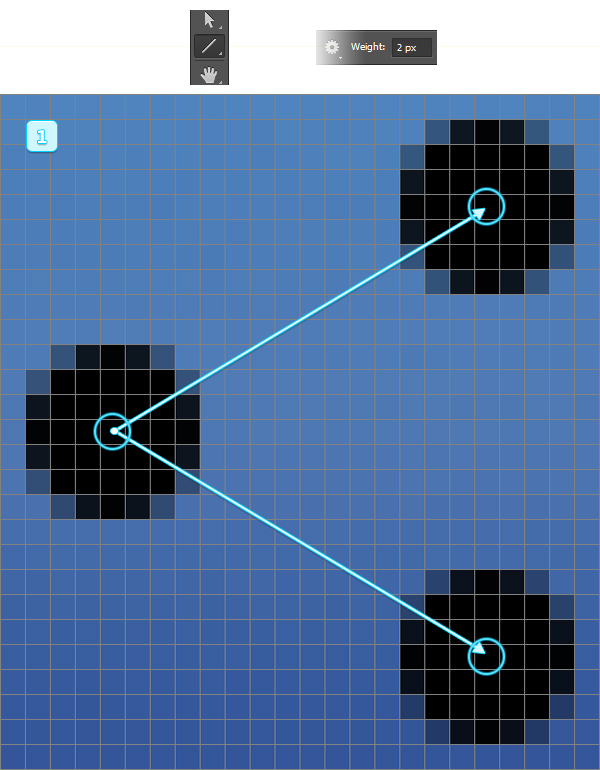
Pick the Line Tool, focus on the top bar and set the Weight to 2px.
Click in the center of the left circle and drag to the center of the top circle.
Again, click in the center of the left circle and drag to the center of the bottom circle.
Focus on the Layers panel, select all vector shapes made in this step along with the circles made in the previous step, right click on one of these shapes and go to Merge Shapes.

Step 14
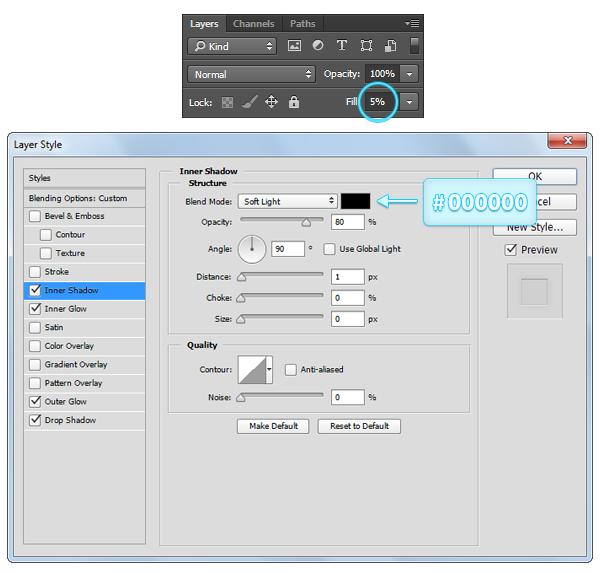
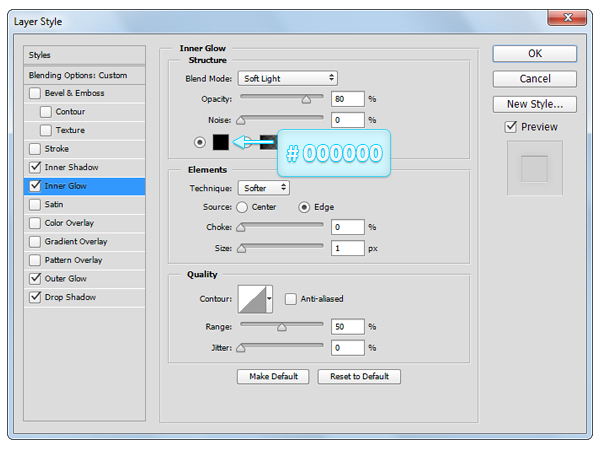
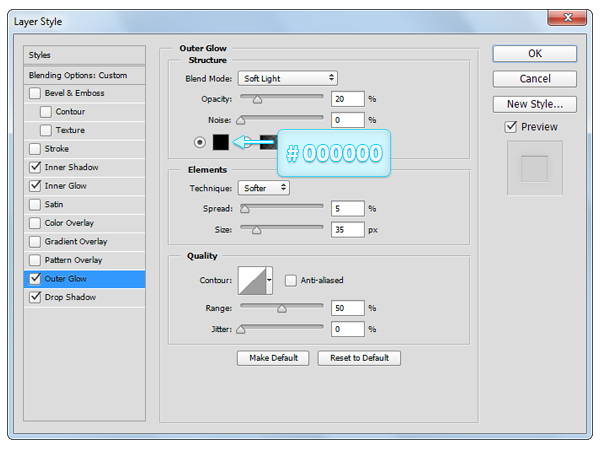
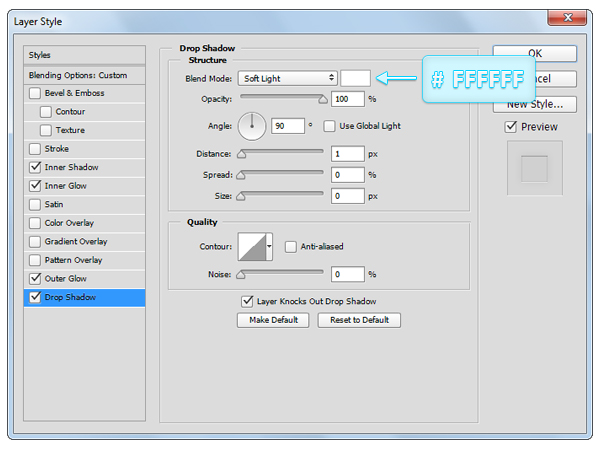
Focus on the Layers panel for the vector shape made in the previous step and lower the Fill to 5%, then open the Layer Style window and enter the properties shown in the following images.
Step 15
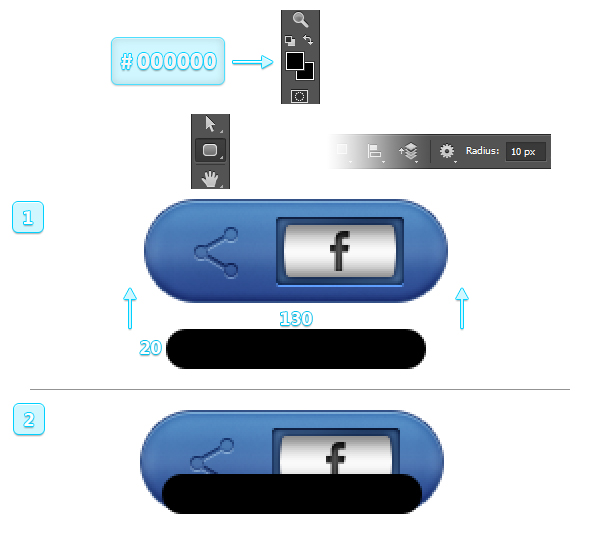
Set the foreground color to #000000, pick the Rounded Rectangle Tool, focus on the top bar and set the Radius to 10px.
Move to your canvas, create a 130 x 20px vector shape and place it as shown in the images.
Step 16
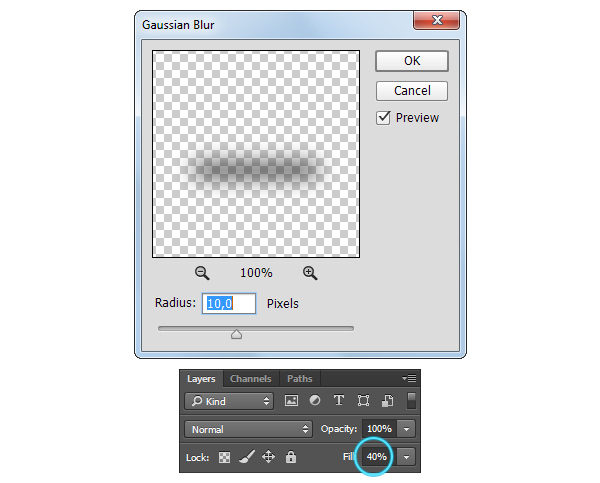
Focus on the Layers panel right click on the vector shape made in the previous step and go to Convert to Smart Object.
Select this new smart object, go to Filter > Blur > Gaussian Blur and set Radius to 10px.
Make sure that your smart object is still selected, return to the Layers panel and lower the Fill to 40%.
Finally, hit Control + SHIFT + [ to send your smart object to the back.

Step 17
Finally, here’s how you can easily change the color of the final button.
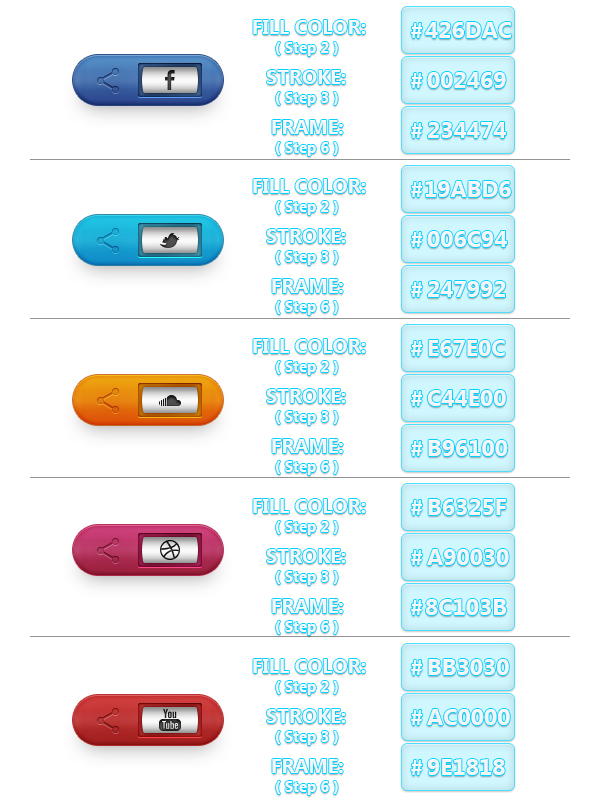
First, select the main vector shape (the 150 x 50px rounded rectangle) focus on the top bar, and replace the existing fill color with #19ABD6 and the stroke color to #006C94.
Next, select the second rounded rectangle (the 64 x 34px rounded rectangle), return to the top bar and replace the existing fill color with #247992.
Finally, replace the Facebook logo with the Twitter logo which can be found in that same Social Icons Ps file.
Follow the color instructions shown in the following image if you wish to create one of the other buttons shown below…
And We’re Done!
Here is how your final result should look.
