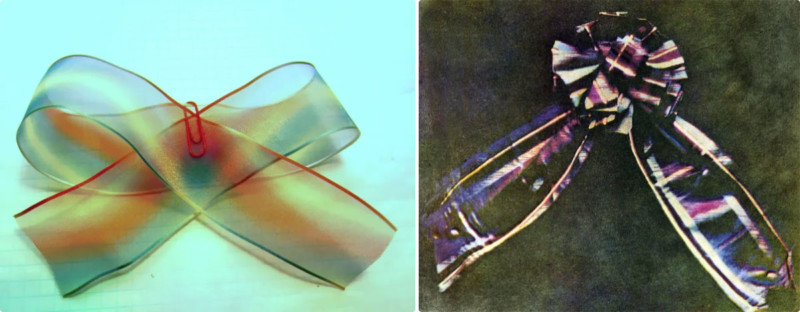
In the “Olden Days,” professional science was still in its infancy. People who trained in science and practiced science were using every ounce of creativity and imagination at their disposal to discover the nature of the world. They were scrappy and inventive. In this article, I will outline a modern replication of the experiment that produced the first color photograph ever made.
As you will see, the method for making the original color photograph was itself a remix! It was made in 1861 by Scottish physicist, James Clerk Maxwell working with the photographer Thomas Sutton (here’s a nice historical blog post). The image was of a tartan ribbon and based on ideas he had worked out and described in a scientific paper six years earlier, in 1855 (you can get Maxwell’s original paper here).
In a world driven by multi-media and digital imagery, it is easy to forget that not so long ago, photography was a brand new technology. As of right now, it is less than 200 years old! The first photograph known to be taken that is still surviving today was by Joseph Nicéphore Niépce in 1826 or 1827. It is a photograph taken through an upstairs window, looking out over the rooftops of his estate in Le Grase, Burgundy, France. The earliest photograph known to include people was by Louis Daguerre in 1838, showing the Boulevard du Temple in Paris.
These early photographs were all monochromatic — “black and white.” They were largely based on chemical reactions of silver nitrate, which darkens when exposed to sunlight. Such reactions are called “photochemical.” While the novelty of capturing life exactly as it appeared at a given moment was enchanting, there was always something missing: color.
This article will guide you through a modern implementation of the Maxwell-Sutton method. It is not necessary by any means, but it is an enjoyable process and has its own charming elements that can be launching points into your own personal explorations of the artistry and science of photography.
Step 1: Maxwell Color Separation Method
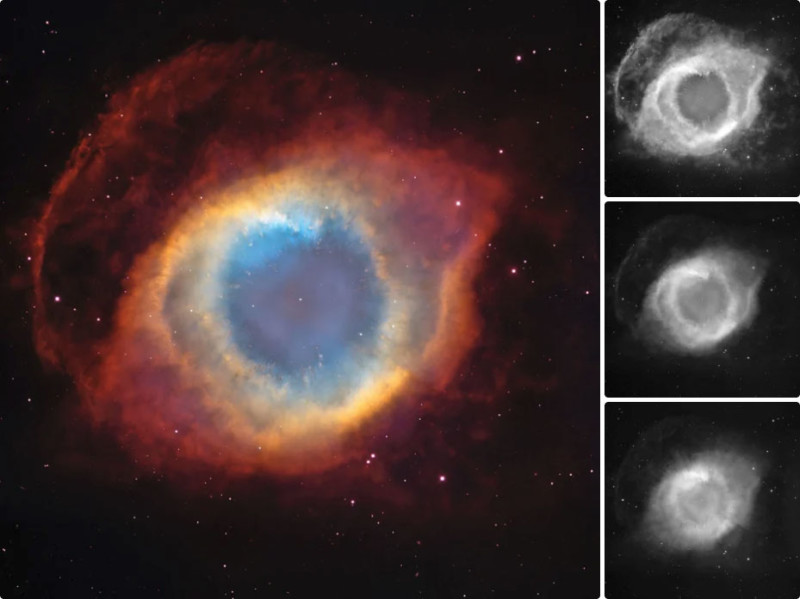
Maxwell’s method is to exploit monochromatic photography in a subtle and clever way. The basic idea is this:
1. Take a black and white photograph of a scene through a colored filter. The image will be black and white, but the only things in the image are the things that can be seen through the filter.
2. Take a multitude of black and white images through different filters. The classic choices are RED, GREEN, and BLUE.
3. To reconstruct the color image, shine a RED light through the “red” black and white image; shine a GREEN light through the “green” image, and a BLUE light through the “blue” image.
4. Align the three projected images together on the screen or wall, and the correct color image will appear!
In images where the colors are well defined and separated, it is easy to imagine how this might work. Above, I show a Hubble Space Telescope image of the Helix Nebula (NGC 7293). Hubble takes images using exactly the Maxwell method, through separate color filters, with the final image being a combination of the separate images. The three black and white images are the RED, GREEN, and BLUE breakdown of the Helix Nebula. You can compare them to the color image to see how different parts of the full-color image are created.
Step 2: Materials
To complete this project, you’ll need:
- Some cardstock
- Tape
- Red, Green, Blue transparent plastic (see below)
- Smartphone (or other camera)
- Tripod
- Printable transparency sheets
- A bright light
The keys to the method are the colored filters. You can try just about anything, but the overall color balance you end up with depends on the color of the filters and how dark one filter is compared to another. For accurate color representation (as opposed to artistic — see the last step!) you want the three filters to be roughly the same in terms of how dark the world looks through them, and slightly darker is better than slightly lighter.
Good sources of filter material might be clear gel filters used in theater lighting or colored PVC sheets at your local art supply store. I’ve used clear cellophane for gift wrapping for this project.
Step 3: Color Filter Mount
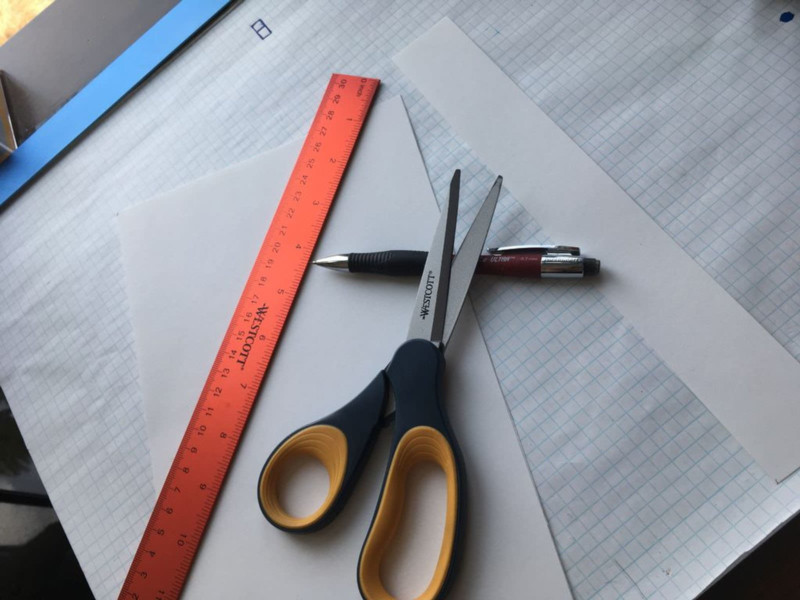
To make photographing simpler, we’ll build a “filter slide” that holds a colored bit of filter in front of the lens on your camera. For this step, I’ll assume you are using a smartphone.
Begin by cutting a 1-1/2″ wide strip of cardstock from the long dimension of your sheet.
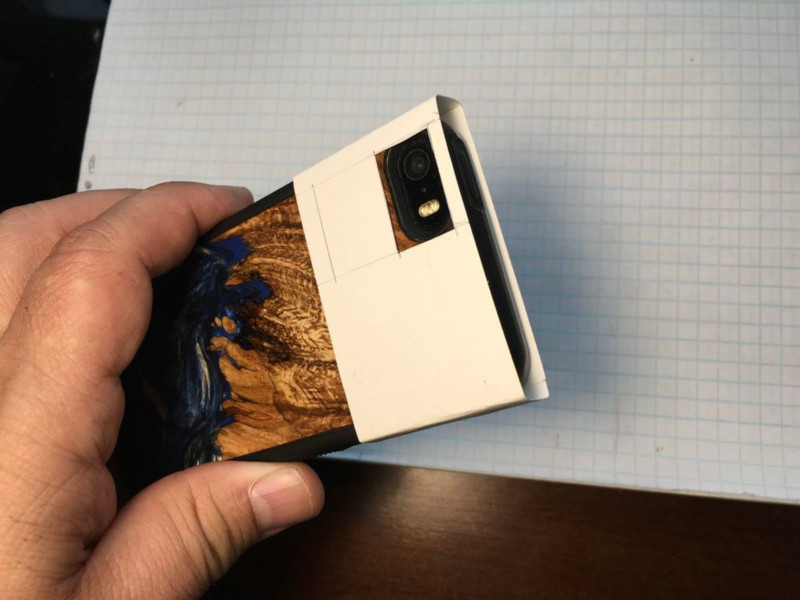
Fold the strip around your smartphone so it overlaps itself making a loop sleeve.
Note where the camera is; unfold the strip and using an Exacto knife cut an opening over the location of the camera.
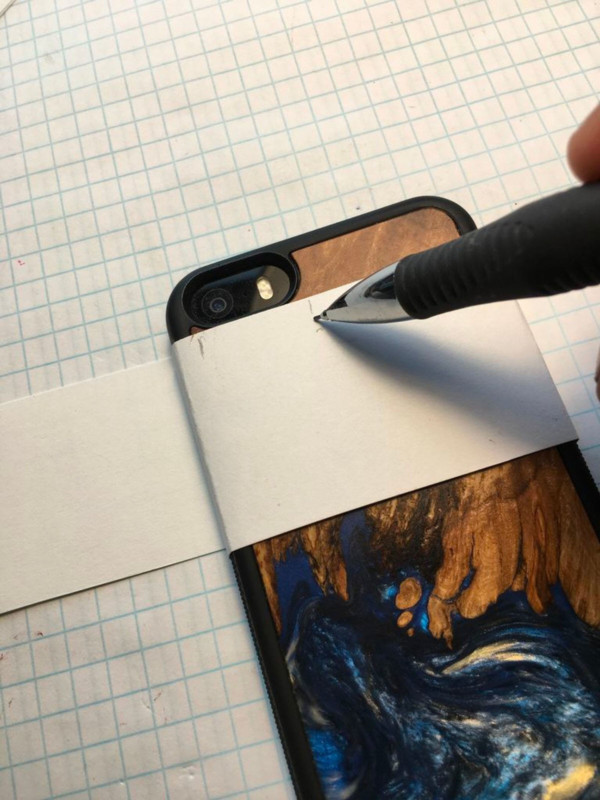
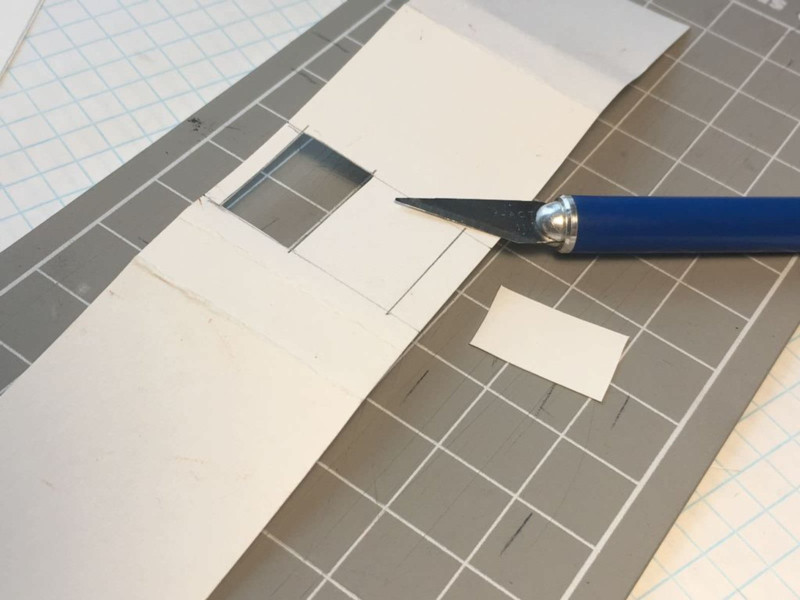
Tape the sleeve shut into a loop, and confirm your hole sits over the camera.
Step 4: Color Filter Slide
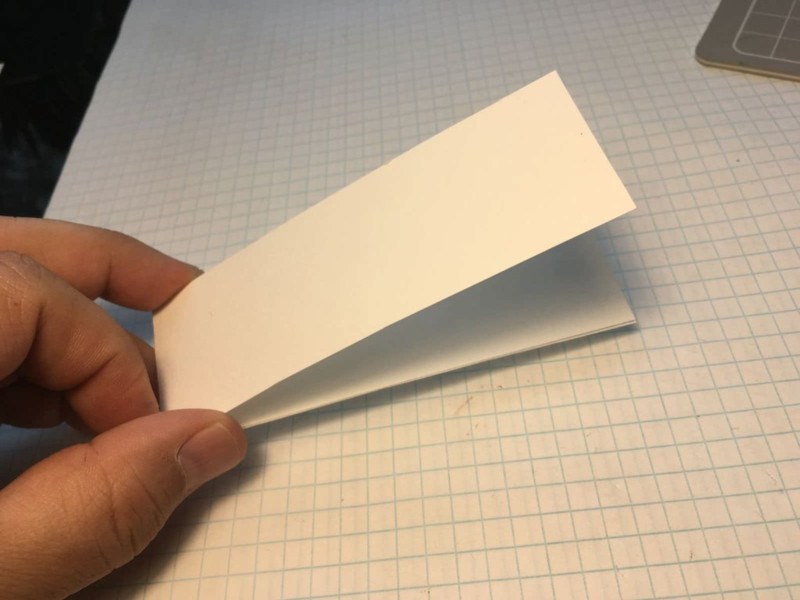
To make the filter slide, take another 1-1/2″ wide strip of cardstock about 8 inches long, and fold it in half. Cut three large windows through both sides using your Exacto knife.
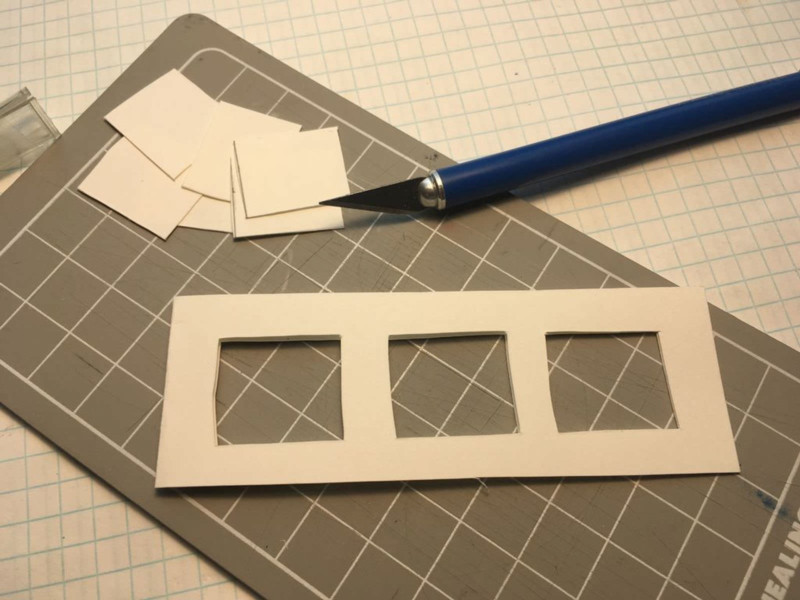
In each window, pick one of your three color filters and tape a bit into the window. Be careful to not get any tape in the window — otherwise, it will show up in your photographs!
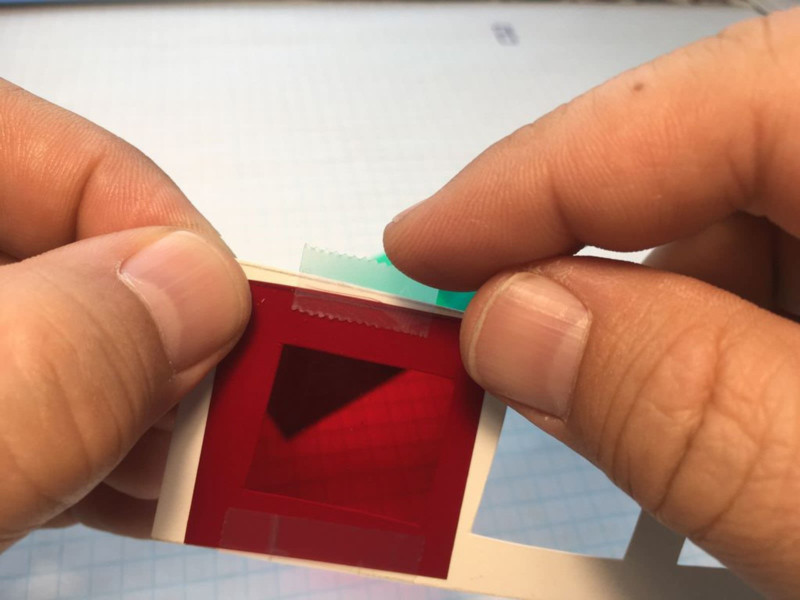
If you need the filter material to be a bit darker, you can fold it over on itself (I had to do this with my blue cellophane). If you do this, make sure it is as flat as possible, or your photographs will not come out crisp and in focus.
When the filter windows are covered, tape the edges of the cardstock together so you can slide it into the filter mount as one piece without it flopping open.
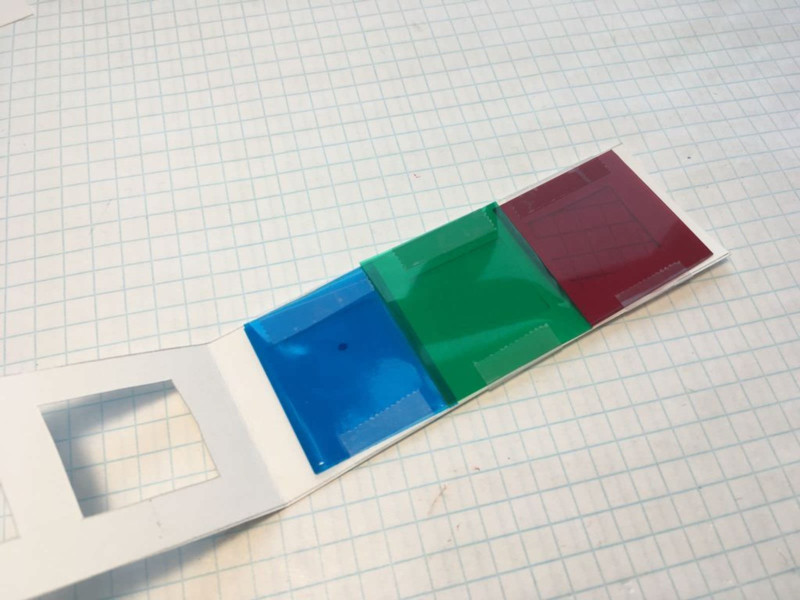
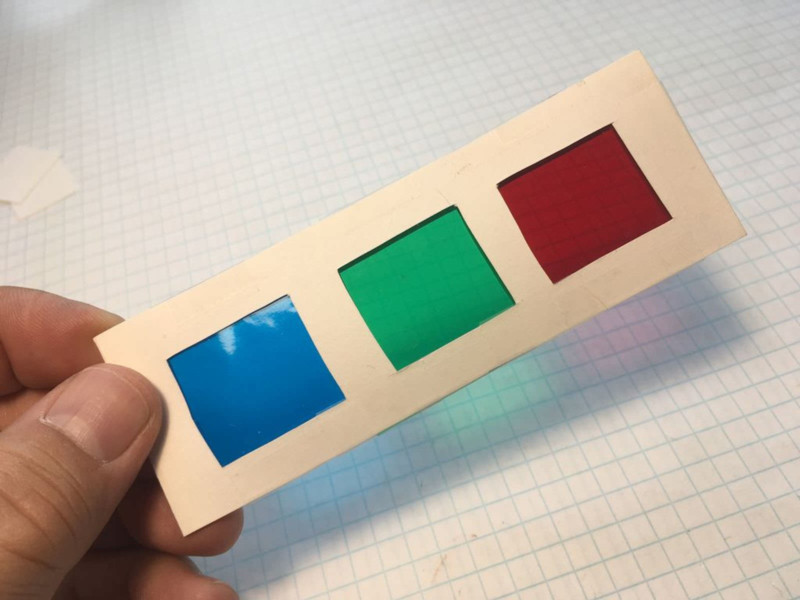
Be careful to place the windows so you can cover the camera with the film, not the cardstock. I had to trim my first filter slide a bit because the cardstock boundary was a bit too thick the first time I cut it, and it blocked about half of the camera view!
Step 5: Using the Filter Slide
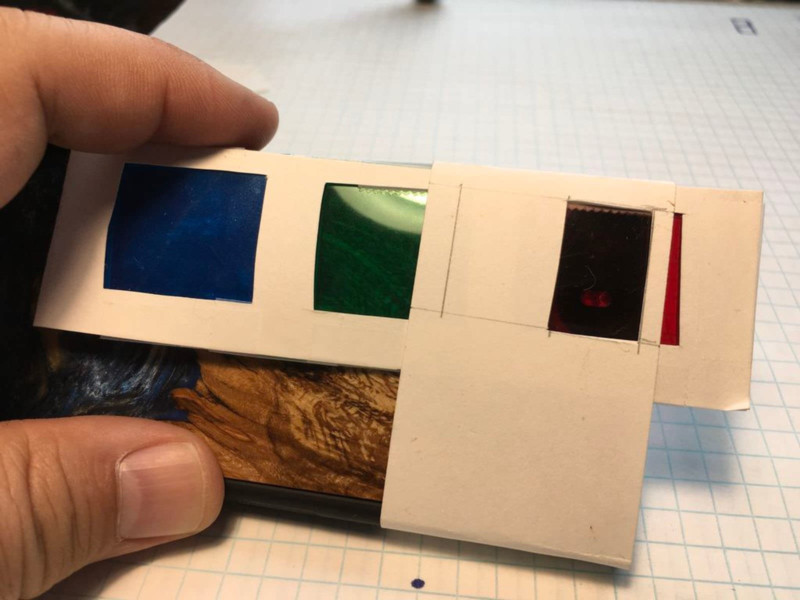
Insert the slide with the filters underneath the filter mount against the body of your smartphone. Carefully slide the filter back and forth until one of the colors shows through the window.
If you look at the camera view, you will see a color filtered image of the world!
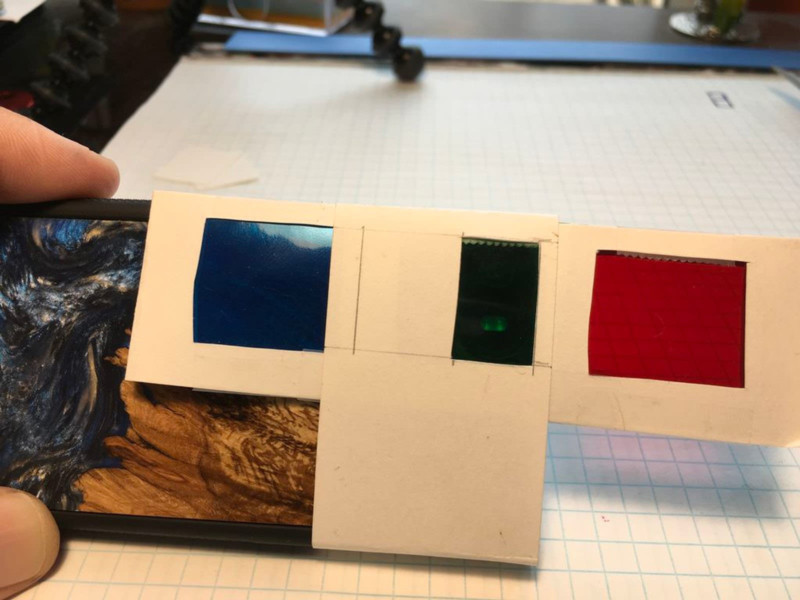
When you are ready for the next filter, push the slide along underneath the mount until you reach the next filter window.
Step 6: Photography Setup
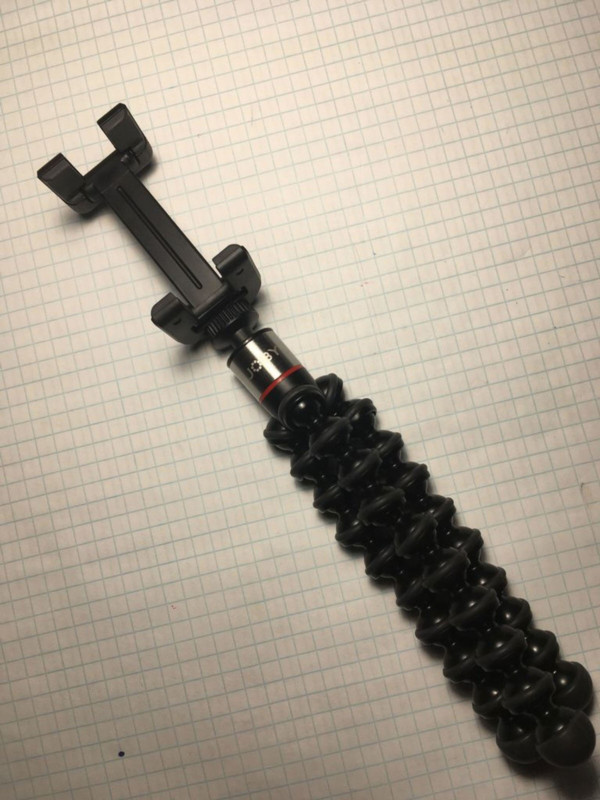
The key to successful Maxwell-Sutton image composition is ensuring that each of the images is taken from exactly the same vantage point and orientation. For the method to work, you are taking three identical photographs through each of the different filters, so you don’t want the camera to move between shots. Since I’m doing this with my smartphone, I use a small table-top “Gorillapod” tripod from Joby.
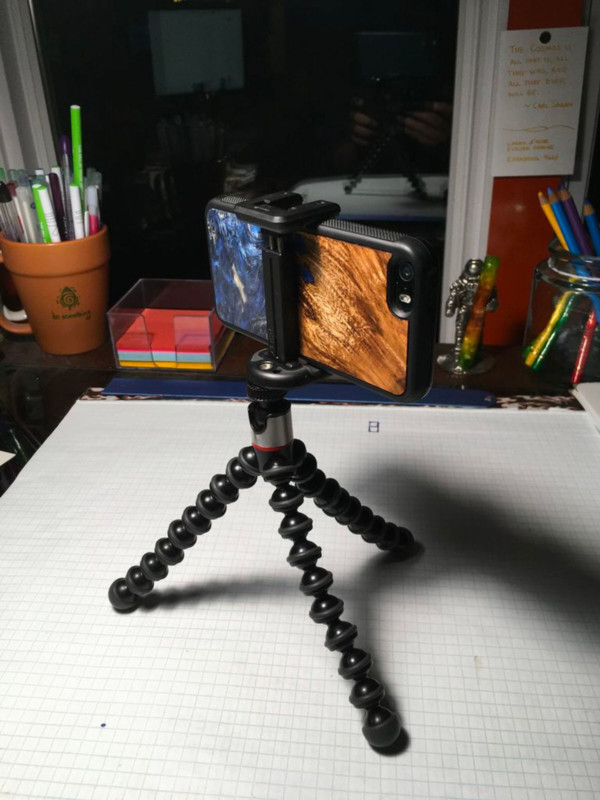
Set-up your camera with your still life well lit up — the camera flash will be behind your colored filters and will not illuminate the scene; I recommend turning the flash OFF so it doesn’t fire and glare off the inside of the filter.
Slide your filter into the sleeve to the first color (red for me) and take the first shot — make sure you tap to focus! Carefully slide to the next color (green for me) and take a photo, then slide to the last color (blue for me) and take a photo.
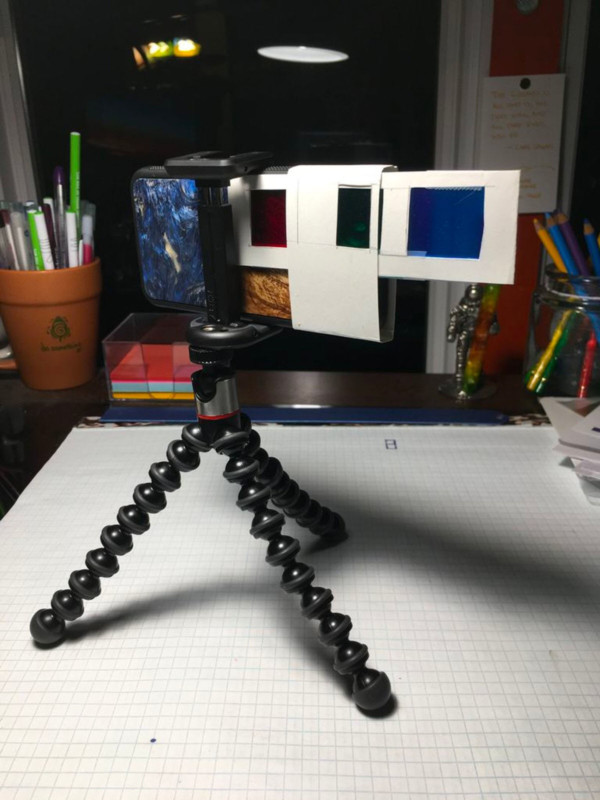
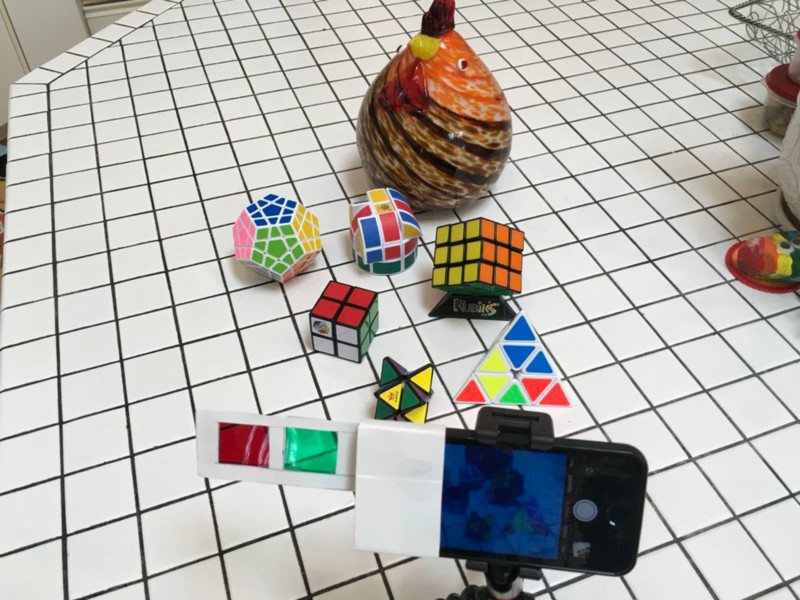
You may experiment with different exposure settings in your camera, to see how the resulting filtered images look.
Step 7: Printing the Modern Maxwell Ribbon
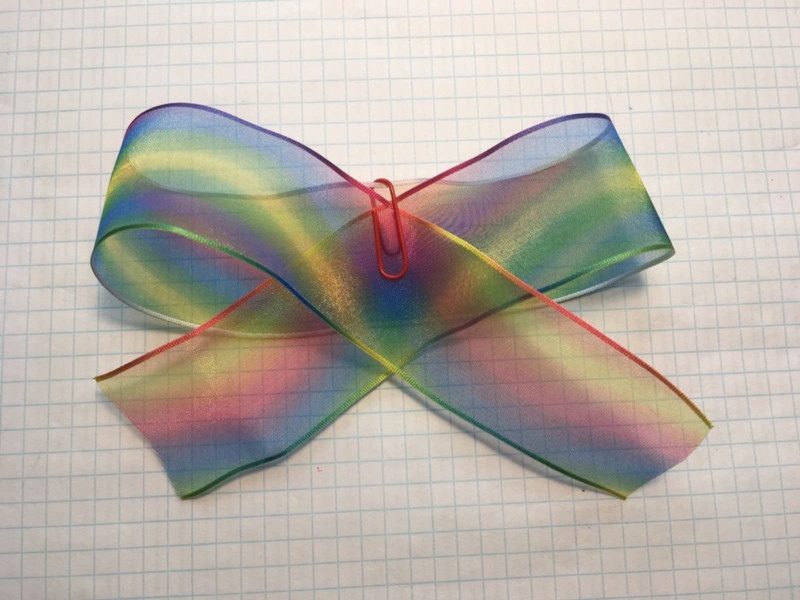
One difference between what we are doing and what Maxwell did is we are taking COLOR photographs through filters, then recombining them directly. Maxwell took BLACK AND WHITE photos through filters, then shined the pictures through the correct color filters to recombine them.
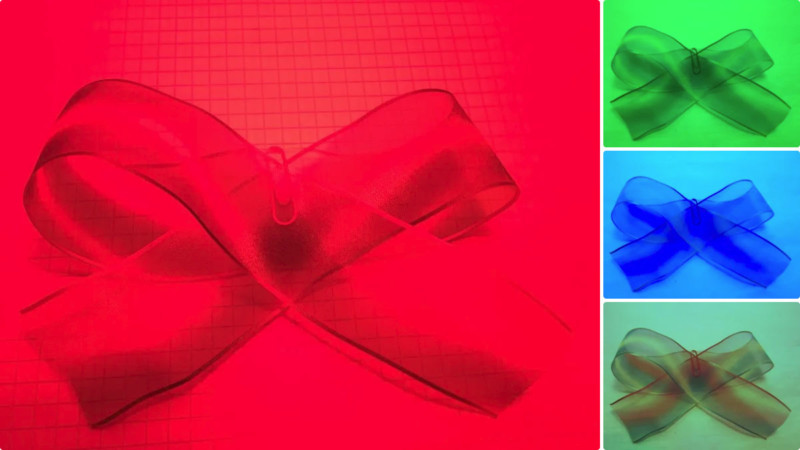
Each of your filtered images will look somewhat like the still-life, but not exactly. In the first image above I show a colored ribbon I used (I did not have a Maxwell family tartan ribbon!), and the three printed images taken through each of my filters.
On a piece of transparency, print out each of the red, green, and blue images separately.

As noted above, it is not perfect as the filters themselves are not perfectly balanced against one another; experimenting with different filters can make the color return more true to the original. As we will see below, all of the color information is in the filtered images, and software processing can make up for color imbalances.
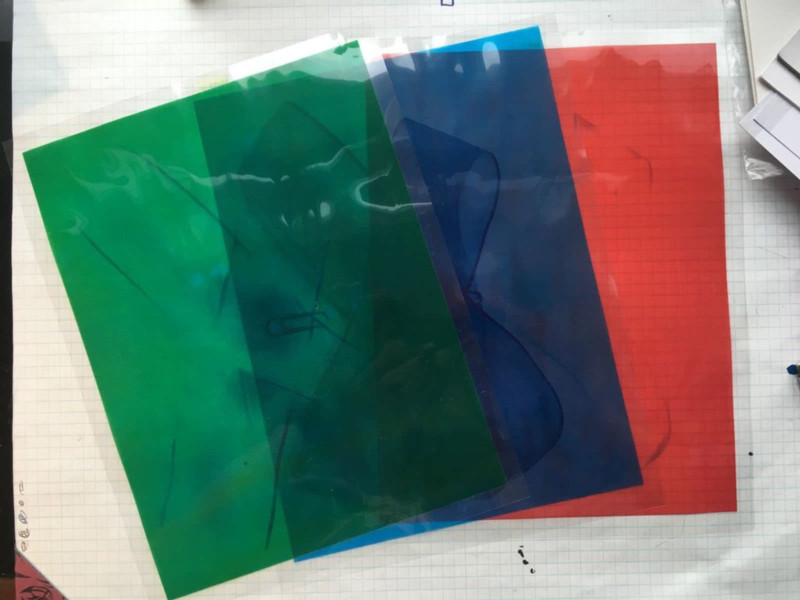
Step 8: Viewing the Modern Maxwell Ribbon
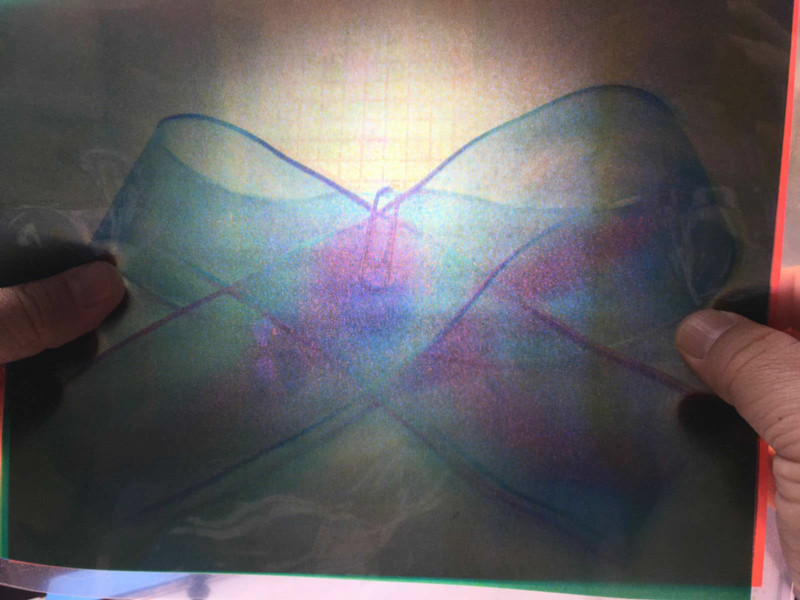
Stack the three images on top of each other, and carefully align them. You’ll notice in my ribbon, I had a small paper clip holding the ribbon in its shape, which was very useful for alignments!
Hold the stack up to a bright light and you will see the recombined color image!
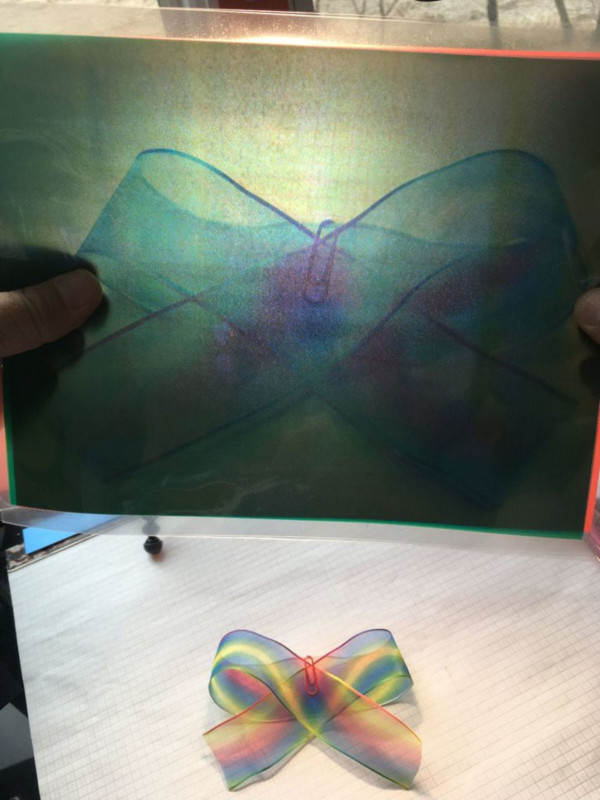
Using random color filter material, it is hard to get a perfectly accurate color image out. It is a complex combination of the color filters you use, your printer’s interpretation of those colors, and the quality of the print. But you can clearly see the color pattern and the trends in the colors. In this particular case, I think the blue needed to be even darker.
The quality of your light source also matters. A light-table would be ideal, as would sunlight. The day I was doing this project was cloudy, but if I get a sunny day someday soon, I’ll add a picture viewing with bright sunlight.
Step 9: Using Software for Recombination

Modern printing methods use a variant of the Maxwell technique to generate color on the printed page or screen, breaking images up into color channels (like RGB or CMYK) that when mixed give the full-color images you are used to seeing; this is why your color printer has different color ink cartridges. In the first image above, I’ve put a 20x magnifying loupe up against a white space on my monitor, and you can see the individual pixels are lit up in a combination of red, blue, and green!
In software like Photoshop, the color separation information is stored in “channels.” We can have the software combine our color filter images into a full-color image using the channels.
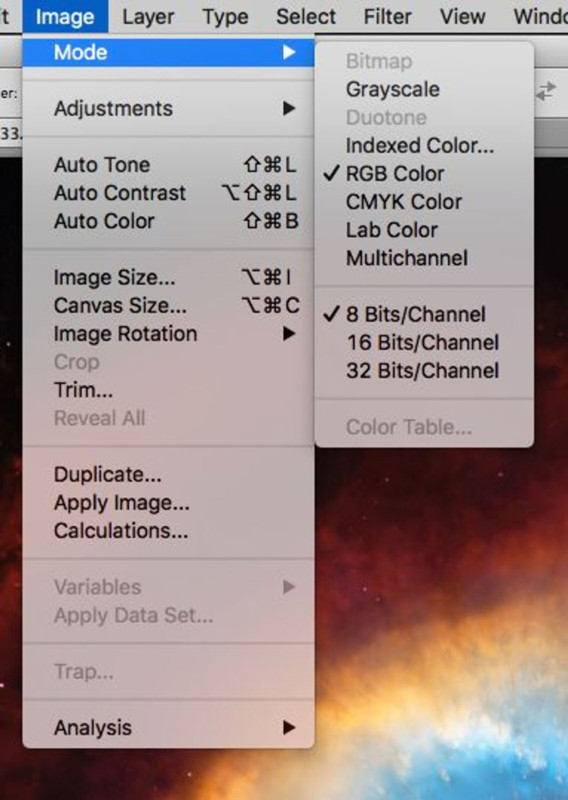
Which color channels you have in Photoshop depends on the image Mode you are using. In my version of Photoshop (CS6) you can find this under the menu Image > Mode, as shown in the second image above (we’re using RGB for this project).
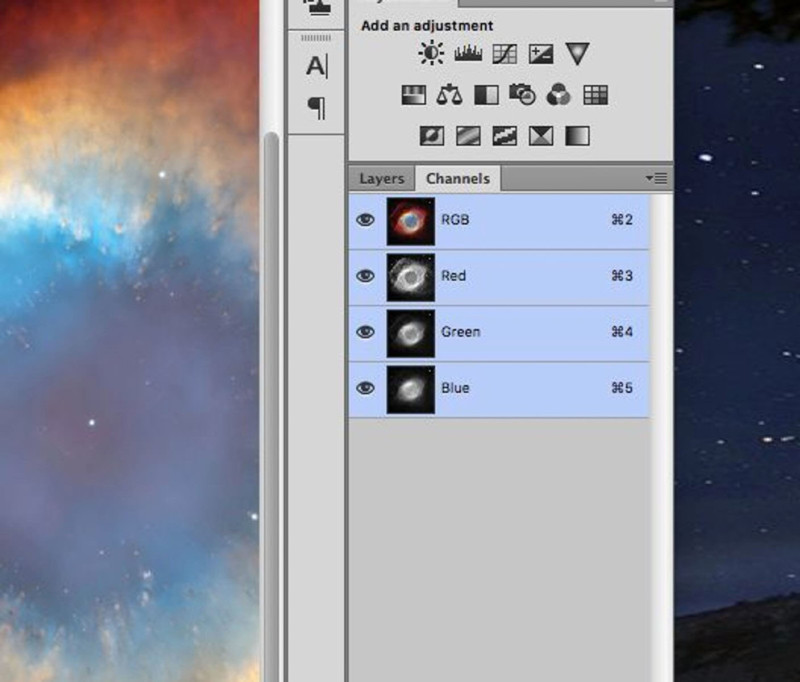
Selecting under the menu Windows > Channels will bring up the separated channels. In the third image above you can see I’ve opened a full-color RGB image. The channels show the combined RGB result and then separate R layer, G layer, and B layer. They act just like layers do in any document — you can turn individual ones on and off, or change them. This is what we will exploit in the following steps.
If you don’t have access to Photoshop, there are also good openSource image manipulation software packages, such as GIMP (Gnu Image Manipulation Program) for all platforms.
Step 10: Software and the Modern Maxwell Ribbon
Open up all three of your filtered images in Photoshop, and note down the dimensions. Open up a new document with the same dimensions as each of the filtered images.
Go to the red image. Select the entire image (“Select All”), and copy it. Switch to the new image file, and view the channels described in the last step.
Now we’re going to copy the individual color filtered images into the correct color channel:
- Select the RED channel, and paste. You’ll see a greyscale version of the red image in the red channel layer.
- Repeat the process by copying the blue image file, and pasting it into the blue channel of the new image.
- Lastly, copy the green image file and paste it into the green channel of the new image.
You can see the result in the last image above — nothing has been done to rebalance this, but it looks very good! There is an excess of green, which you can see in the white background — this is because the green of my clear cellophane is not what Photoshop thinks the basic green filter should be. Never-the-less, the color response you see is excellent — your screen display, on a pixel by pixel basis, is much better at showing good combined color response than overlaying the fine grains of ink or laser toner on printed sheets!
Step 11: Software Color Balancing
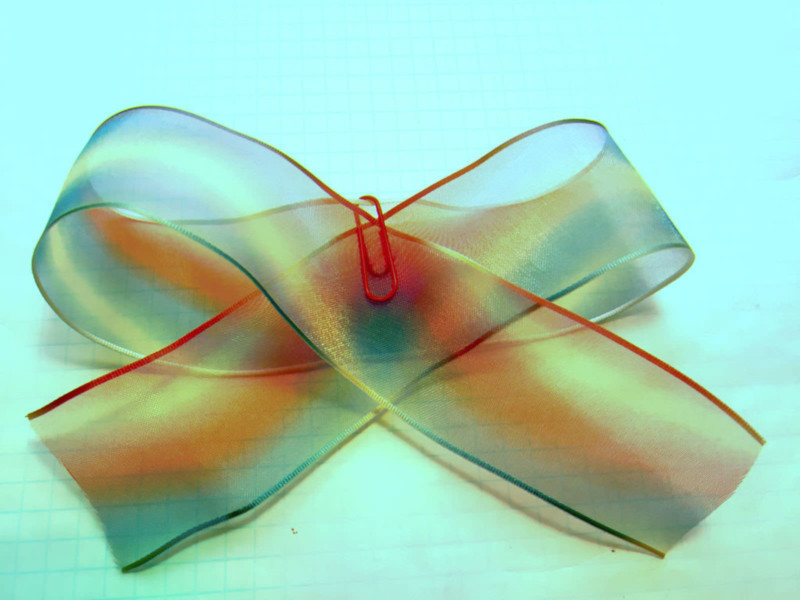
As we noted above, software is good at rebalancing color and can make up for the relative strength in the color of our individual filters. Photoshop has an auto-balancing feature that does its best to rebalance how much each of the color channels influences the overall image combination. Above, I’ve shown a rebalanced color combination. Here’s the original full-color ribbon for comparison:

With the balancing, you can see the green background is closer to the truer white it is in real life.
Step 12: Last Thoughts & Artistic Games
I’m experimenting with this technique but would like to settle on a good set of filters and good printing process so I can print a piece to hang in my house as art. The need for illumination is making me think about a shadow box with LED strips and a light diffuser behind the printed transparency stack. It will make for good conversation!
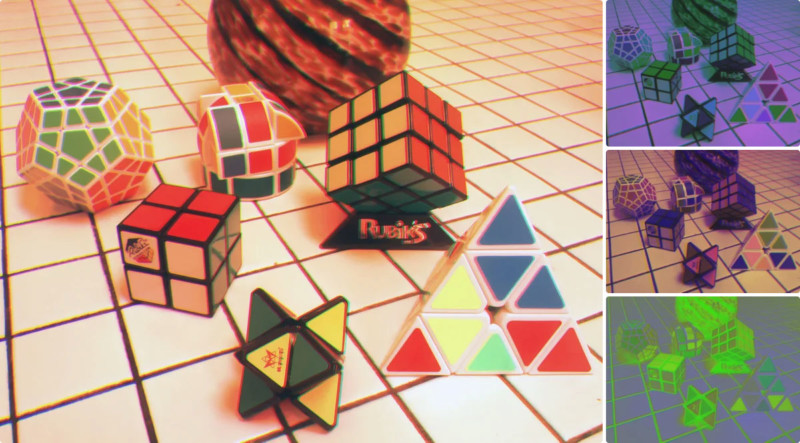
Beyond that, there is a well-developed science around color which you can learn about and exploit, but the ability to play around creatively can lead to unexpected and interesting artistic results. For instance, consider the color balanced collection of Rubik’s style puzzles in the first image above, created using the process outlined in this article. In the second and third images, I took the red, green, and blue images and pasted them in different channels — this makes strikingly different, and clearly not correctly colored images! In the last image, I took the red and blue channel and left them alone. For the green channel, I did a “color inversion,” replacing the green with its color “opposite” (a kind of pink palette; Photoshop can do this automatically). The result is a very alien glowy green image! Awesome!
I hope you enjoyed this remix of photographic history and experiment some on your own with creating your own images of the world!
About the author: Shane L. Larson is a professor of physics and astronomy at Northwestern University. The opinions expressed in this article are solely those of the author. His hobbies include amateur astronomy, woodworking, and LEGO modeling. You can find more of Larson’s work on Twitter and YouTube. This article was also published here.