Sebastian Tontsch is a German photographer based in Dubai. Read on for his top astrophotography tips in desert environments.
INTRODUCTION
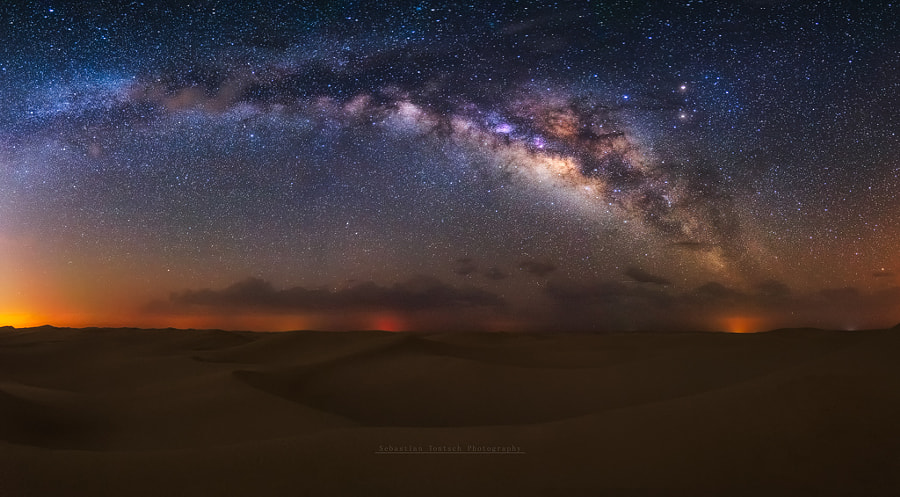
My Milky Way photos are usually taken in a nearby desert, a very dark place with low levels of light pollution which are great conditions for astrophotography. Finding dark spots with low levels of light pollution can be tricky if you live in the city. Most of the times, you need to drive a while to reach areas with low light pollution levels. In my case, this is around 3 hours into the desert away from Dubai.
GEAR
The gear I use is a Sony A7R2 and a Canon 6D. The Sony is my favorite camera, as it has great low light performance so I shoot mostly with the Sony but any decent DSLR with a manual mode will get the job done. I also use a 16-35 f4 (f2.8 would be better) on the Sony for wide angle shots and a 35mm f1.4 for my panoramas. On my Canon, I use the Samyang 14mm f2.8 and a Tokina 16-28 f2.8. A sturdy tripod is also a key part of astro photography. You’ll need a solid tripod for the long exposures you will need to take to gather enough light on your sensor.
The galactic center of the Milky Way is best visible during summer, which makes it hard for photographers in my region as the temperatures in the desert reach around 40 Degrees Celsius. Even at night, those high temperatures are a real problem for the cameras, and a lot of DSLRs suffer from heat noise due to the high temperatures combined with the long exposure. If you live in a place that is colder, you won’t face those problems.
TIME OF DAY
Season-wise, I normally start shooting in April as it is a bit colder, then I continue through August which is the hottest month. In the early months of the Milky Way season, the Milky Way will be visible during night hours (2 a.m. onwards in our region), and it will rise earlier from day to day. You can shoot the Milky Way during winter as well, but you won’t see the galactic core with all its amazing colors and nebulas during that time.
My astro shots are my way of sharing the beauty of the universe. A lot of people live in cities, and sadly, a lot of them never have the chance to see the Milky Way with their own eyes.
The desert is such a remote place. The darkness makes it perfect to see the stars and galaxies with your naked eye, which is something very special. Because of light pollution, dark places are rare, so I want to show people how our galaxy looks and how amazing it all is.

COMPOSITION
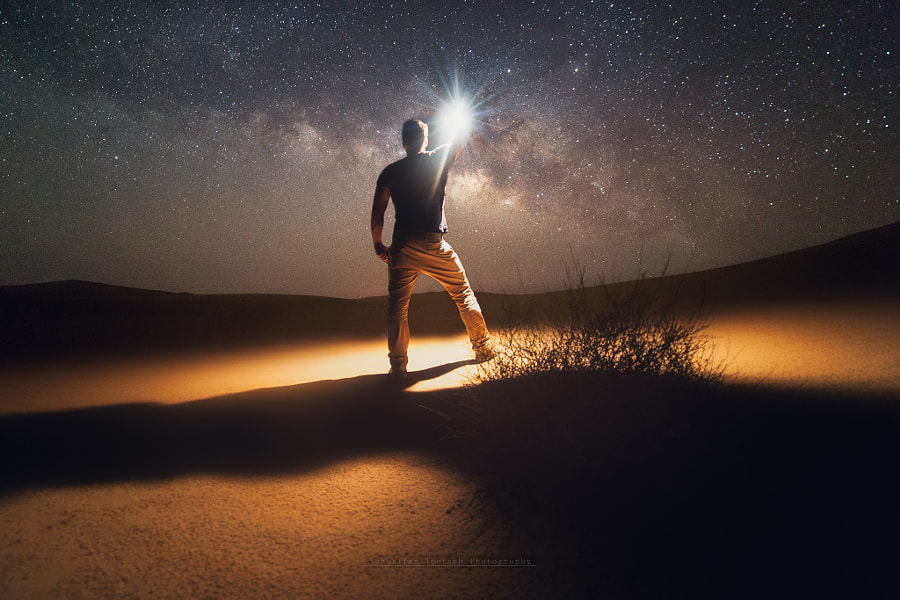
In a lot of my shots, I add some element of life — either myself in the frame looking at the universe, or some form of natural element like a tree. Finding foregrounds is the real challenge in the desert, so you have to work hard to find a composition, because there is not much to work with. I spend hours and days scouting the desert for potential compositions—I’ve always been lucky so far.
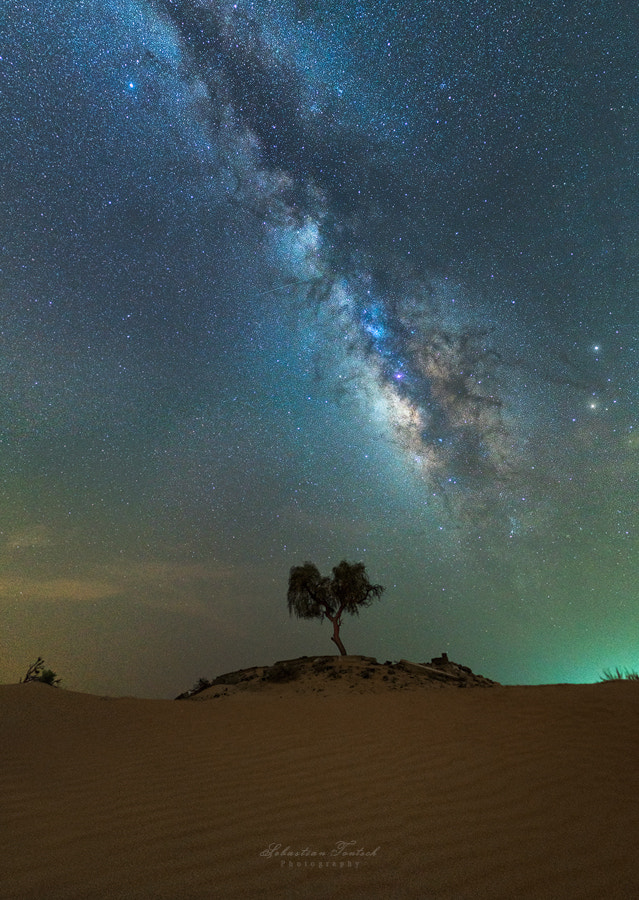
For example, my picture called “Life” portrays a tree growing out of an old demolished house in the middle of the desert. There was life once in human form, and now, there is still life in form of a tree. Those are the stories I try to bring into my shots.
10 ASTROPHOTOGRAPHY TIPSs
1. Find dark places to get a better view of the Milky Way. Light pollution makes it hard to see all the details of the Milky Way. There are a lot of dark sky sites online. Just look for light pollution maps, and see what’s the darkest spot near you.
2. If you are shooting in the desert during hot temperatures (35c+), check your shot for heat noise. Some cameras will create blue and red strings of noise. If that’s the case, turn long exposure noise reduction on. Otherwise, leave it turned off. I never use this function, but if there is heat noise, the camera will remove it, which is easier than doing it in post.
3. Be prepared when shooting in the desert at night. There are dangers in the desert especially at night. It is easy to lose your sense of direction wherever you go. Make sure you find your way back to your car. Carry enough water (you will run out faster than you think). Take a fully charged mobile with you—you should always be able to get a GPS signal even in the desert, which can help you find your way back when you are lost.
4. If you are new to astrophotography, follow some basic rules for exposure settings like the 500 rule, which is just a guideline how long to exposure your shots before you get blurry shots due to the earth’s rotation. Also, try to shoot your lens as wide open as possible to gather the most light you can. Your ISO level should be bumped up as well to gather more light values, depending on your camera and how it handles noise in general. Anything above 1600 should give you decent results. Some of the Sony cameras can go up as high as 16000 ISO without problems. Just try it out, and start from 1600 for a GPS-C sensor camera and 3200 for full-frame.

5. Check your lens, and make sure it’s always clear. The front element can fog up under certain conditions, and you might not notice it until you get home, and your shots are blurred. Make sure everything is clean and clear at all times.
6. Practice using your camera in the dark. Or just remember how to set everything up without seeing much. Turning on a flashlight can disturb you and others while shooting the Milky Way. If you use a headlamp, use a red light one which is easier for your eyes to adjust to. Your eyes will adapt to the darkness, and you will see the stars clearer after approximately 30 minutes.

7. Get your focus right. A lot of Milky Way shots that I see online are out of focus. You have to manually focus your lens, and it can be tricky to get the focus right on the stars. If your camera supports live view, go into live view, and use the 10x magnification to try to find one single star, and set the focus to it. If your lens has a scale on it that shows you the infinity mark, set it to infinity, but at least double check it in the live view, as well to make sure the infinity mark is accurate.
8. Shoot RAW always. For astrophotography where you want to get out the most detail and information out of your files, shooting RAW is really important to get good results in post-processing.
9. Don’t try to get something in post-production that is not there. I see it a lot of times where people try to squeeze out a Milky Way in a shot where there is not enough detail captured. You need to see the Milky Way clearly on the back of your camera while shooting. If it’s not there, your starting point is not right, and there won’t be much that can be done in post-production.
10. Try to travel light in the desert. Walking dunes is not as easy as people think, but doing it with loads of heavy gear at night is even harder. It’s all totally worth it! Taking a shot from the side of the road is easy. Anyone can do that, but walking into the dunes to find a unique composition is the fun part. A light set of equipment makes those hikes more enjoyable.
To see more of his breathtaking work, follow Sebastian Tontsch on 500px.