Something that we all enjoy is a stunning sunrise or sunset. There’s something about the colours stretching out across the sky and make you feel all warm inside. But capturing that feeling in your photographs can be a bit tricky.

Tips for Better Sunset Photos
I’m going to give you three tips to help you get out there and create some spectacular sunset photos. These are simple, but effective and if you follow them it will greatly improve and enhance your sunset photos. Remember these works just as well for sunrise also. I don’t know about you but I’m not particularly a morning person so I prefer sunset. You decide which you want to shoot, or get out there and do both!
In short here are the three problems these tips will help you solve:
- Help my sky is washed out and has no colour
- My photo is just not that interesting
- The colour isn’t as warm and rich as I remember seeing it with my eyes
#1 Fixing a washed out and faded looking sky
A while back I explained why your snow might be coming out grey in your winter photos. The problem of faded or washed out sky is the same issue, and has the same solution.
The meter in your camera is designed to measure the light, and set the exposure based on medium grey. Next, when you point your camera at the sunset and take a reading, it tries to average the scene which is a high contrast range from very bright (the sun) to very dark (the foreground objects). It will struggle to find the “correct” exposure and usually thinks it is too dark so tells you to give it more exposure. Doing so will give you some detail in the foreground, but usually that is not what you’re looking for with a sunset. You want the foreground to go dark, almost black, and the sky to be darker and full of richness.
Have a look at this serious of exposures to understand how this works.
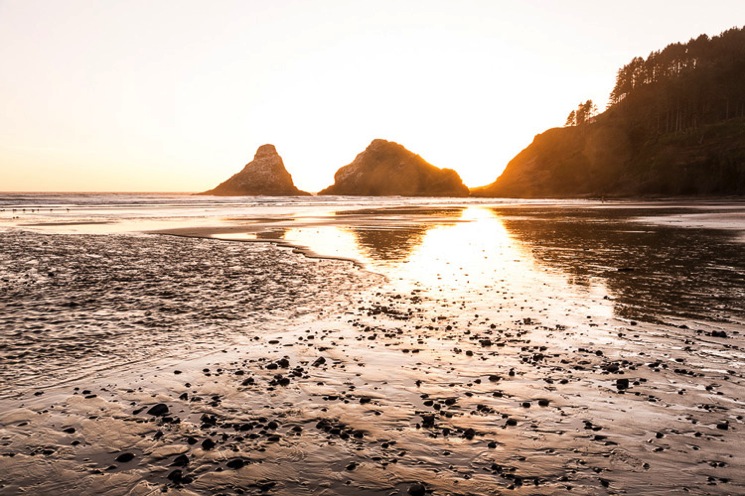
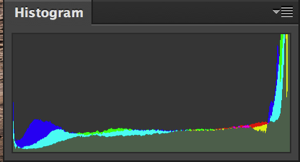
The image above is one stop over exposed at: f/10 at 1/13th of a second. Notice there is visible detail in the hills and beach foreground but the sky is almost white it’s so washed out. Look at the histogram. What it tells you is this exposure has mostly light tones and very little in the middle and darker tones.
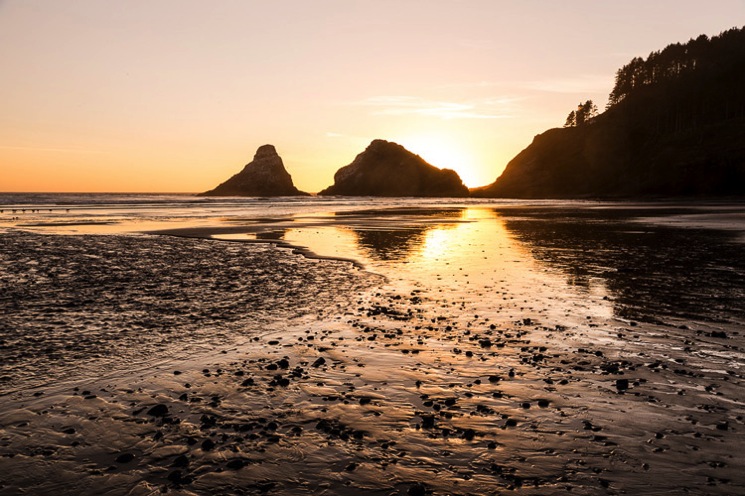
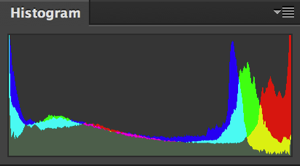 This is a “normal” exposure based on what the camera reading said at: f/10 at 1/40th of a second. This is getting closer, now there is some colour in the sky and minimal detail in the foreground. Now notice this histogram has more dark tones (left side of the graph represents black and darker than middle grey) and that the light tones are now more spread out and not as much going off the chart, or clipping (white with no detail).
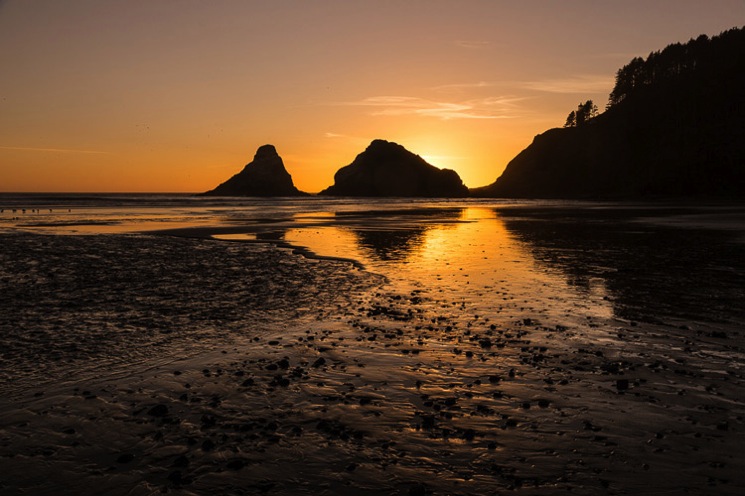
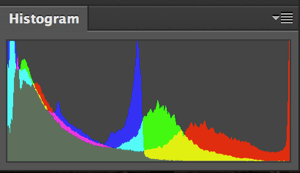 This last image is 1.6 stops under exposed according to the camera meter. I usually shoot in Aperture Priority mode so to accomplish this you can just set your exposure compensation to -1.6, or in Manual mode adjust your exposure until you see it showing -1.6 on the metering scale in your view finder. The graph (histogram) is more more evenly distributed on this exposure and you’ll see a lot of middle tones, lots of darker and black tones, and only a very few really light (and pure white clipping off the right side). This is good!
The lesson here is know when to trust your camera’s meter reading and when to override it. Learn to read the histogram and use it to set your exposure. The LCD screen on your camera may also give a false reading if it is set too bright or too dark.
#2 Adding more interest into your sunset photos
Have you ever had the experience of seeing the most amazing sunset, taking a few photos, and then getting home to look at them on the computer and feeling like something is just missing? You’re not alone!
This is a common problem, especially if you are new to photography. It’s really easy to get carried away by the colours in the sky and snap away, only to realize later that there isn’t a centre of interest in the photos. Someone viewing the image later doesn’t have the benefit of having been there to view the scene live. So, it’s your job as the photographer to capture not only the colours but something to hold their attention and invite your viewers to explore the whole image.
The best way to do that is to put something in the foreground. This will do three things:
- Adds depth to your image
- Adds a sense of place and scale
- Adds a point of interest for your viewers
When selecting your foreground object try and choose something that has a distinctive shape, something that will be recognizable in a silhouette. It is also really helpful to have something to help the viewer identify with the location such as a palm tree on the beach, a bicycle, or even a unique building or city skyline.
Lastly by putting something in your shot closer to you than the horizon you add depth, like layers in your photograph. The foreground, or closer object, is the top layer and the horizon or sunset itself is the background or back layer. The more layers you have in your image, the more it will draw your viewer’s eye in for a closer look. It feels more three dimensional, like you could step into the scene, and gives you a sense of actually being there in person.

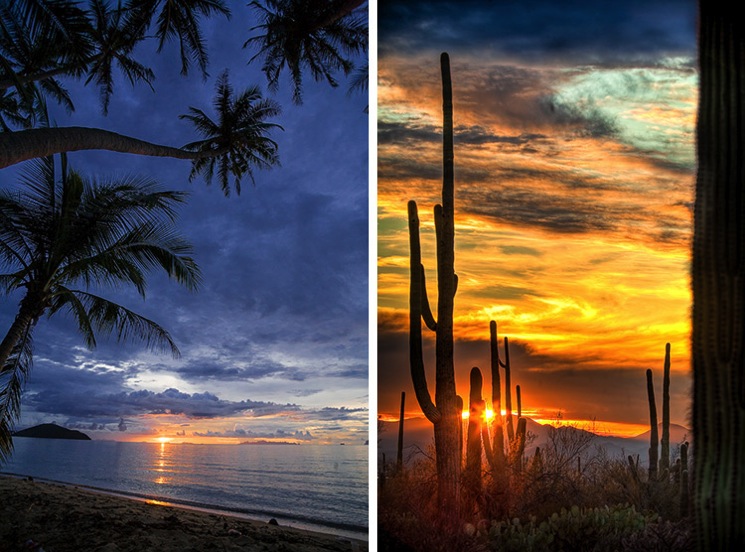
Looking at the three images above, can you tell something about the places they were taken just by the foreground objects? That’s the idea!
#3 Making your sunset colours pop
This last tip involves playing with the setting on your camera that adjusts the colours. I’m talking about the White Balance. Usually you think of this adjustment as something that is corrective, such as filtering out green fluorescent light and neutralizing colour. But, it can also be used artistically.
If you know that choosing the “shade” White Balance presets will correct for blue shadows by adding orange tones to your image – think what that could do for a sunset. Hmmm?! Or perhaps the sunset was really more pink than orange – so by selecting “fluorescent” it will filter green out of your image by adding more pink.
Here’s a series of images shot using different White Balance presets. See how different they all look and feel? Keep in mind that if you shoot RAW files you can make these adjustment in your favourite image processor later as well. But personally I like to get it looking good on my camera when I shoot it, and get as close as possible to what I envision for the scene.
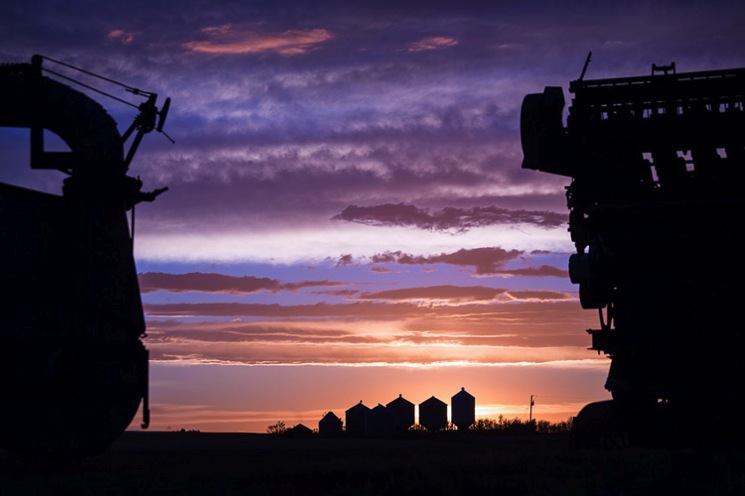
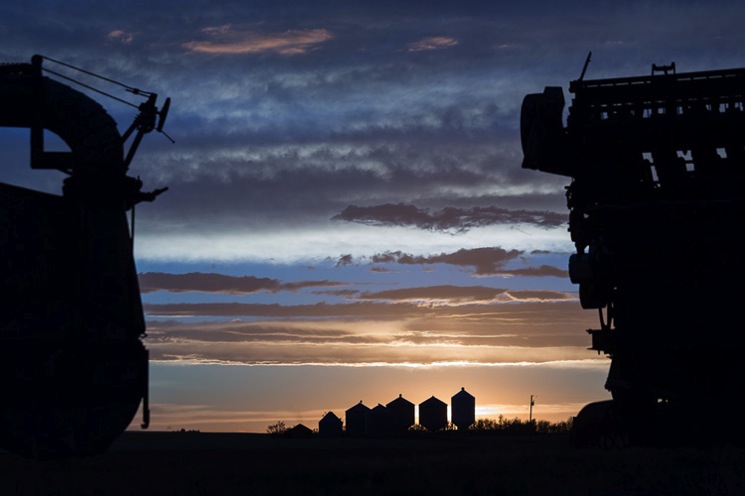
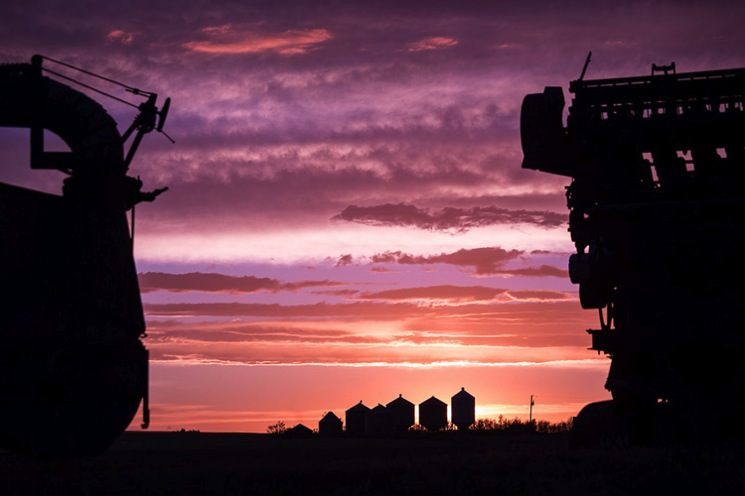
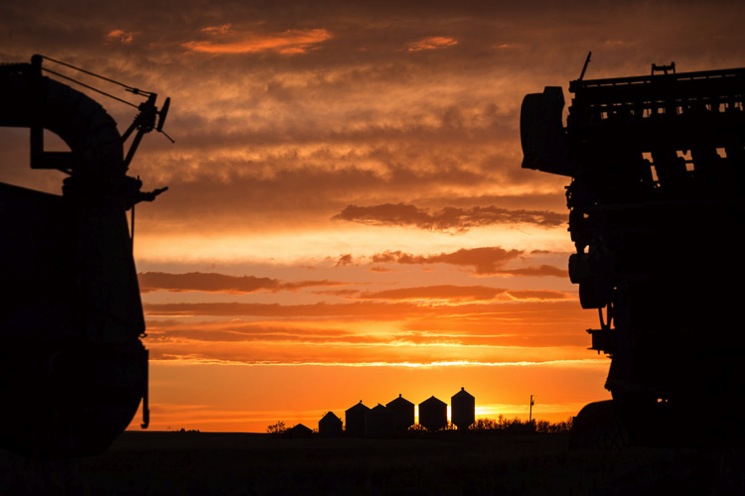
Notice there is also something in my foreground. What can you tell about this location from the foreground and even background objects? What type of place was this taken? (Hint: if you grew up or live near a farm you might get this one)
You can also use your “K” setting for White Balance adjustment if your camera has that option. That will give you a range from 2500-10,000 on the colour scale to play with. There might be times when you want more blue in the sky, like just after the sun dips beyond the horizon. Try “tungsten” or 2500K for a bluer image tone.
Some camera models also have a colour shift or correction option where you an customized the colour and shift it any which way: pink, green, yellow, blue. Get extra creative by trying different settings. Just remember if you do customization it may not reset back to zero when you’re done so do a check and reset your camera settings before you head home. That way you can avoid frustrations on your next photo trip.
Bonus tips
Just to leave you with a couple other things to think about when you head out to photograph your sunset.
Where to focus
If you put something in front of the horizon, ideally you want to focus on that object. The sky in effect becomes your background and it doesn’t need to be in sharp focus. A bit tree in the foreground in silhouette however, looks really odd when it’s blurry.
Rules of composition still applies
Composition is a whole book unto itself, so just a quick tip to remember that where you place the horizon will determine what is most important in your image. A low horizon will emphasize the sky, and a higher one (top third if following the rule of thirds) will emphasize the foreground or ground in general. That is usually good for things like reflections in water, or like the beach image above in the exposure examples.
ACTION PLAN
Okay, so what are you waiting for? I want to see some sunset images. Use the tips here to help you and please share your results in the comments below.
Cheers,
If you liked this article, please take a moment to share it on Facebook or other social media site. We appreciate your help letting people know about us.