If you want to learn how to photograph waterfalls, streams or moving water in general, you’ll need to know the best camera settings. These tips will help you with the proper camera settings, iso, shutter speeds and tips regarding the best time of day to shoot.
We used to spend a week each summer enjoying the Oregon coast, and if you’re not aware, Oregon is abundant in waterfalls and rushing streams.
On one such occasion, we happened to stop to explore one such waterfall along the highway, so I set up my camera and did a few examples for you for this article on tips for waterfall photography.
However, these tips also apply to any moving water including streams, rivers, waves on the beach, rain, or a fountain. So take them and apply to any situation where you have a chance to photograph water.
6 Tips for Waterfall Photography
This is what we’ll cover in this tutorial:
- What equipment I recommend – camera essentials, tripod, remote trigger, ND filters.
- Creating a focal point – something in tack sharp focus.
- Camera settings – what shutter speed and ISO to use.
- The best time of day for waterfall photography.
- Best tips for shooting in bright sunlight if you can’t get out at the optimal time of day.
- How to get something different than the usual kind of waterfall shots.
Let’s go over them one by one.
#1 RECOMMENDED EQUIPMENT
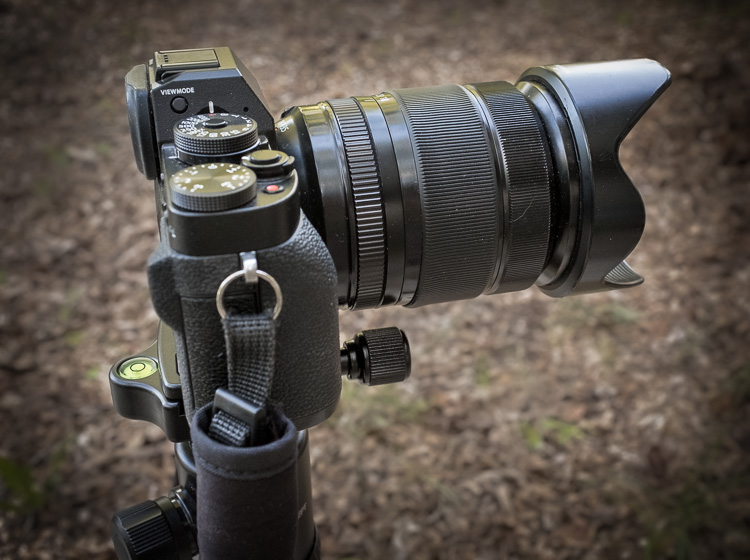
Shooting waterfalls or any moving water is pretty simple in terms of equipment needs. I recommend you have a minimum of the following:
- A camera that can do long exposures, up to 15 seconds or so. All DSLRs, most mirrorless cameras and even many point-and-shoot cameras can do this.
- A sturdy tripod that can hold the camera still during the long exposure.
- Remote trigger to fire the camera (but if you don’t have one you can use the timer set to 2-second delay).
- Neutral Density filter to cut down the amount of light when shooting in the sun.
#2 CREATE A FOCAL POINT
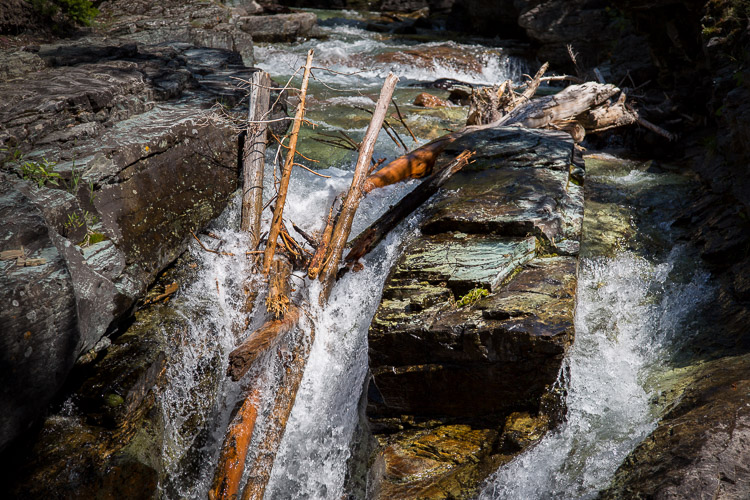
Moving water often looks best when you use long exposures to blur it and make it appear mystical and magical. But you want to make sure you get at least one thing tack sharp in your image.
Select an object in the scene that isn’t moving such as a big rock or a tree that is near the water and focus on that spot. That way even though the water will be blurry in your image it will give the viewer something to anchor on because the eye is naturally drawn to areas of sharpness in an image.
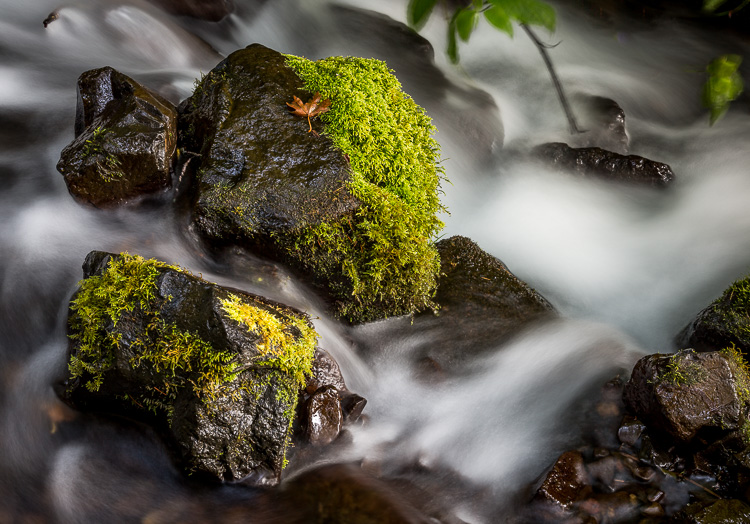
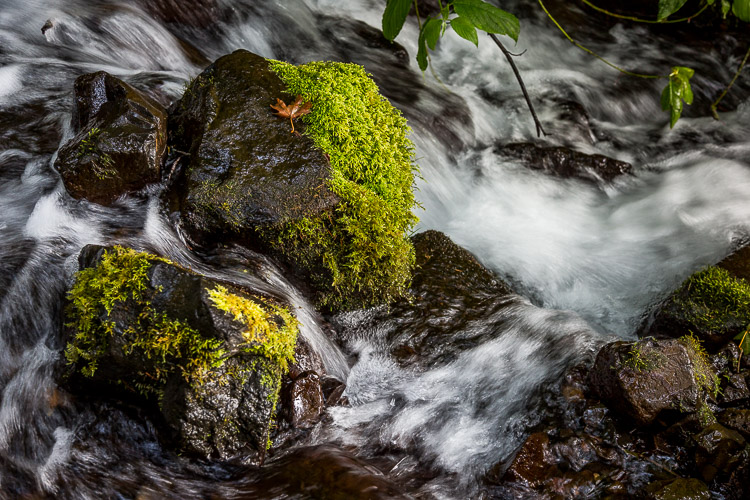
In the image above notice that the rock is sharp, as is the tiny leaf on top of it. The bright colors of the moss, and the sharpness of the rock, lead the eye right there.
Our eyes normally scan from left to right, top to bottom, just as we do when reading a book. So the flow of the water leads your eye to move to the right but the sharpness and focal point of the rock bring you back to that area.
#3 CAMERA SETTINGS
Your camera settings for waterfall photography will vary depending on the look you want. See below for examples of a variety of settings for photographing moving water.
As you will be using a tripod you can choose pretty much any shutter speed you want. Here is what I recommend for a starting point, then experiment by adjusting the shutter speed/aperture combo up and down.
Camera Settings for Waterfall Photography
- Set the shooting mode to Manual so you can adjust all three exposure settings yourself.
- Set the ISO to 100 or as low as it goes (your camera’s native ISO not L1). This will help avoid noise in your images.
- White Balance – I recommend setting the White Balance to one of the camera’s presets like Daylight or Shade. Choose the one most applicable to that scene, or that fits the look you want to achieve (Shade for a warmer look or Daylight for cooler tones).
- Shutter Speed – First decide if you want to freeze the water droplets for a suspended animation look, or if you want to have it appear misty and wispy. If you want frozen droplets, use 1/500th of a second to start, then adjust faster if need be. If you want misty, soft, water then start at half a second (1/2) and try a few at slower speeds to see which you prefer. I find that at some point the images start to all look the same, so a 30-second shot may look just like a 5-second one. This all depends on the water speed, lighting, etc. so try different settings.
- Aperture is pretty much going to fall where it needs to be to make a correctly exposed image. If you want a slow shutter speed then you’re likely going to need your smallest aperture like f/22 or f/32 (if your lens has that setting). That’s fine just set the aperture to make sure you get a good exposure and remember to check the histogram.
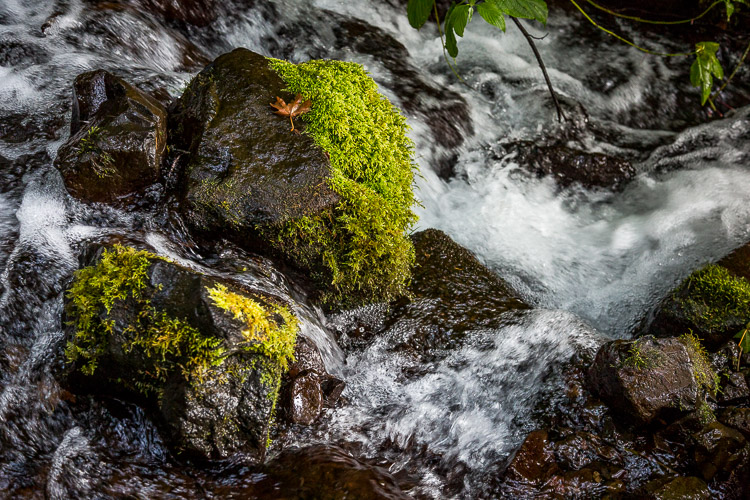
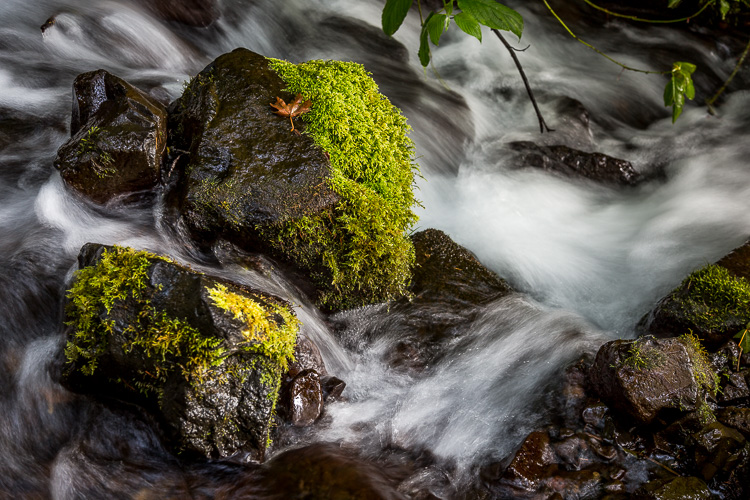
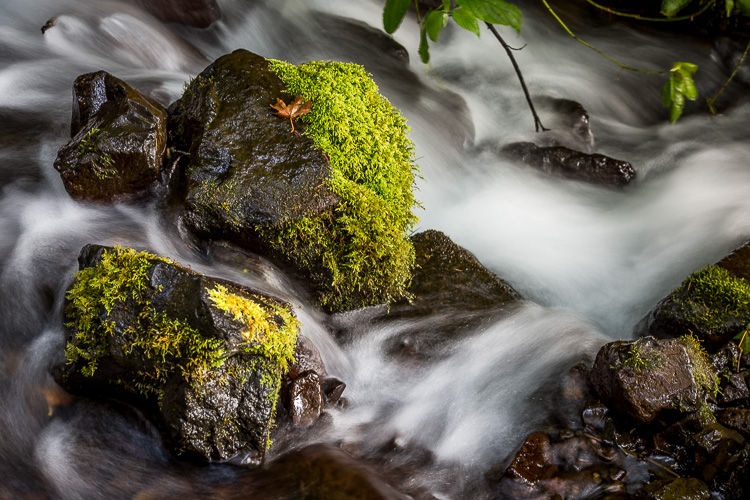
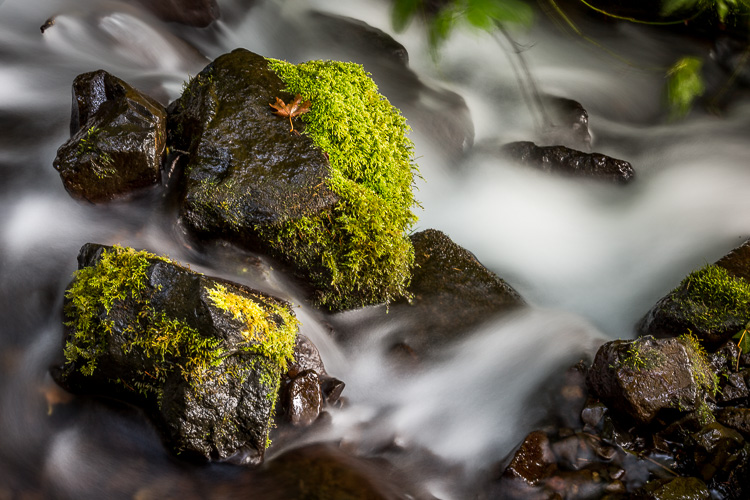
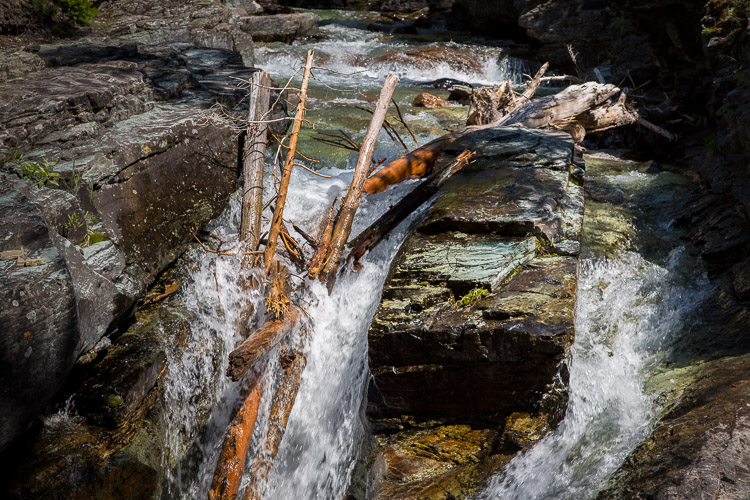
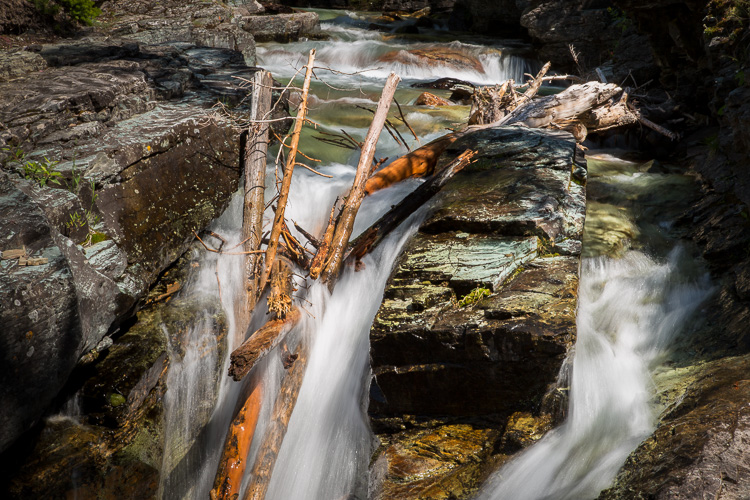
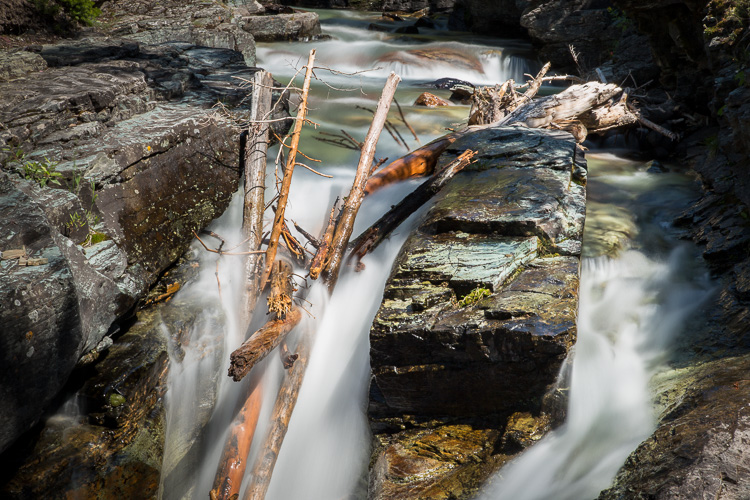
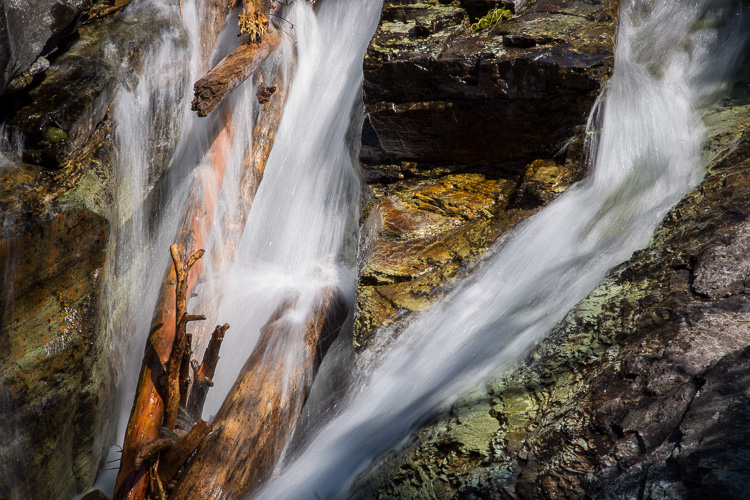
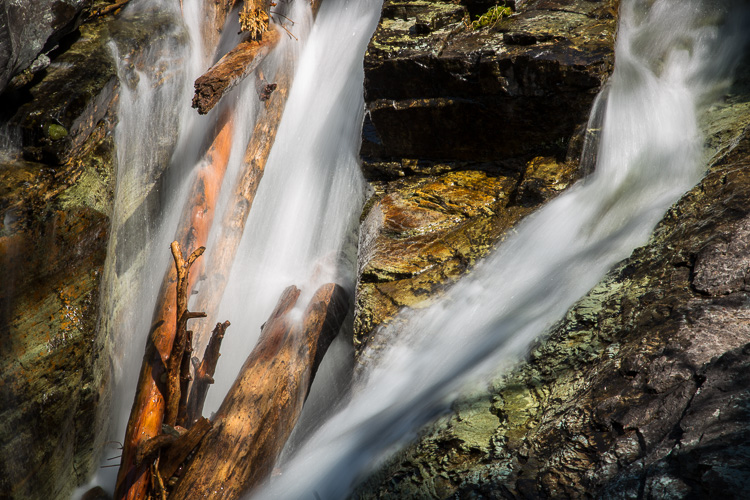
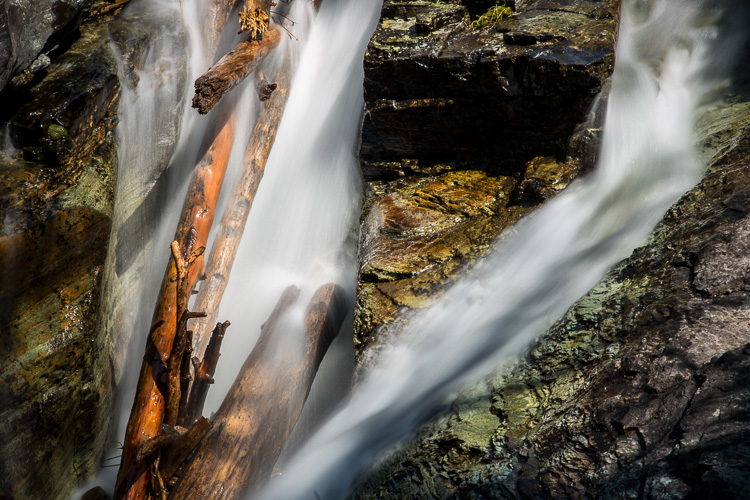
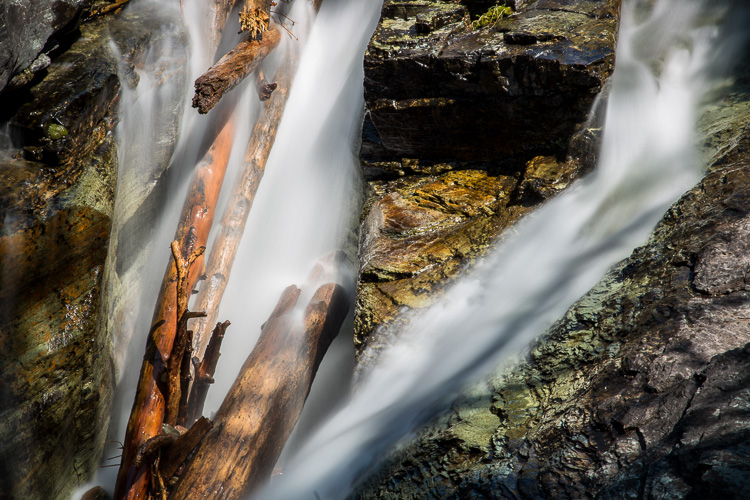
Below is a series of images from the same set as the one above, but shot with different shutter speeds. Because I was there in the late evening it wasn’t a problem getting slower shutter speeds.
Is one image better than the other? That’s left to personal taste and intention, in my opinion. So one is not better, they’re just different. You, as the photographer, get to choose how you want it to look.
I chose the one above because the water was misty and blurry like I wanted, but the trees weren’t moving as much as they did during the 6-second exposure (notice the double image of the tree branch in the last of the series below).
#4 BEST TIME OF DAY TO PHOTOGRAPH WATERFALLS
Whenever possible get out and shoot at the edge of daylight, meaning sunrise to 1-2 hours after sunrise, or dusk until sunset.
This tip not only applies to waterfall photography but landscape photography in general.
The amazing photos you see in magazines and books are usually taken within those hours. Those photographers that are prepared to stay late or get there early, get the best images. End of story.
This sometimes requires a bit of planning if you are traveling.
Photographing waterfalls at sunset: If you’re aiming for sunset, plan to get their two hours before the listed sunset time. That will give you plenty of light to still work with before it gets dark. It also allows you to scout the location a bit to find the best shooting spot before the sun hits the horizon.
At sunrise: For the morning, try and arrive before the sun is over the horizon (during blue hour). Depending on how far north you live, that could be really early. Are you the early bird prepared to catch the worm, which in this case is some stunning images?
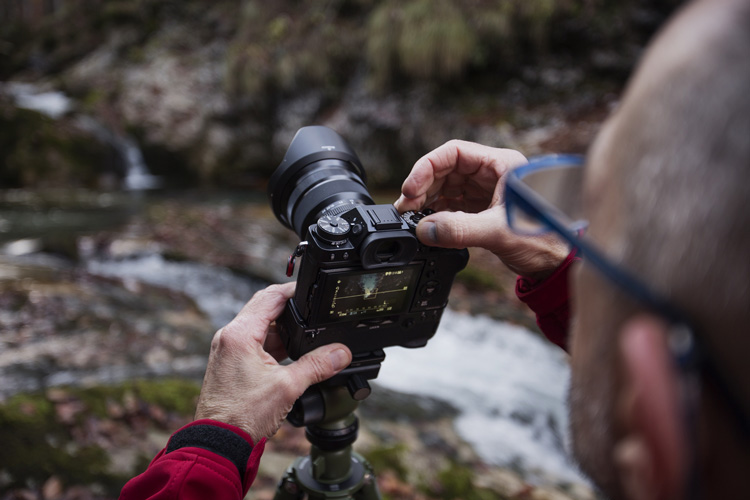
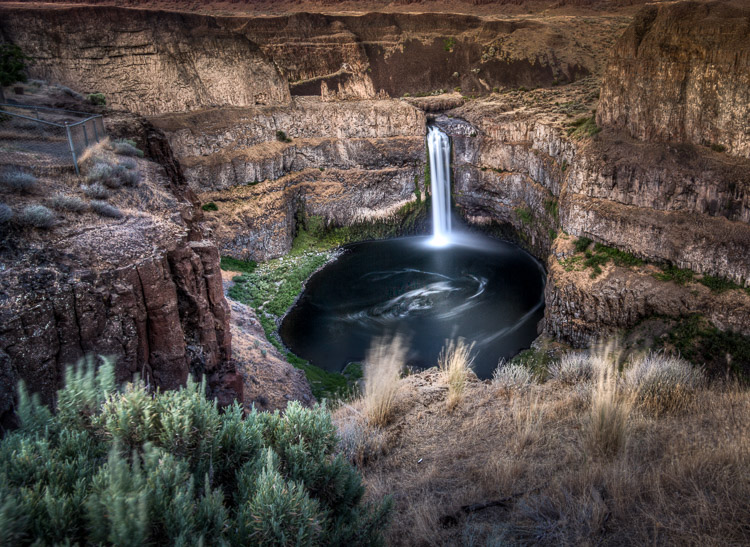
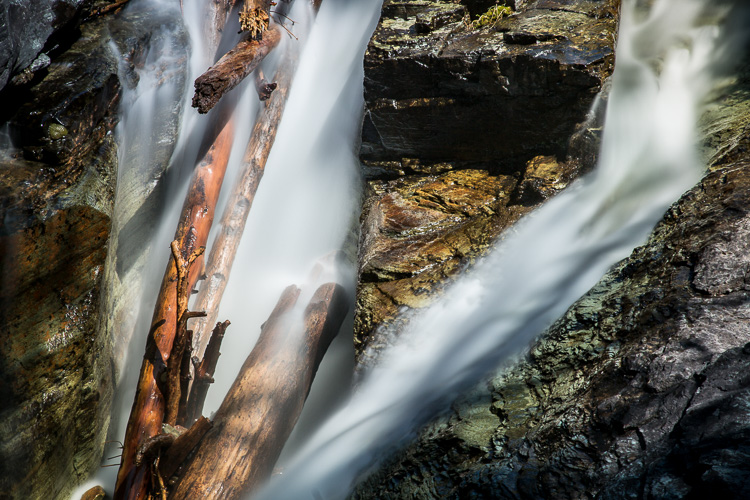
The image you see at the very top of this page was taken practically in the dark. We got to the location pretty late (after the sun had already set) but there was enough light to still see so off I went!
Remember you have a tripod so exposure times are not an issue. What can become an issue is your companions waiting in the car blowing the horn and yelling, “Are you done yet?” as you wait for your 4-minute exposure to finish.
But don’t hesitate to keep photographing even into the night.
Just keep the ISO low (even though instinct tells you to crank it up because it’s dark) and come prepared with a lot of patience to sit and wait. Better yet, bring a photo friend or one that’s patient and happy to sit with you and wait.
#5 HOW TO HANDLE SHOOTING IN BRIGHT SUNLIGHT
Have you ever heard of the “Sunny F16 Rule”?
It’s an old rule of thumb that photographers used to use if they forgot their light meter or their camera battery was dead and it turns out to be pretty accurate.
Sunny F16 Rule
When shooting in bright sunlight your exposure will be f/16 at 1 divided by your ISO – meaning if you are using ISO 100, your exposure will be: ISO 100, f/16, 1/100th of a second.
In the “old days” of film, cameras would still fire without a battery, you just didn’t get the benefit of the built-in light meter.

“So what,” you ask?
Well, what the sunny f16 rule means is that it is impossible to get those gorgeous creamy white waterfalls in midday bright sunlight.
If you’ve tried in the past and just gotten blown out way overexposed images – that is why. You aren’t doing anything wrong. You just need a tool!
Follow with me as we do a little math.
Adjust your camera to the smallest available aperture on your lens, let’s that’s f/32. That is a shift of 2-stops from f/16 to f/32 (f/16 > f/22 > f/32). So to keep the same exposure value (EV = the amount of light hitting the sensor) you also must adjust the shutter speed 2-stops slower.
So 1/100 > 1/50th > 1/25th which will give you 1/25th of a second. Unfortunately, that is NOT slow enough for misty, magical water (see the examples above and below).
So what’s the solution?
Buy yourself a Neutral Density Filter (ND filter). It’s simply a dark grey filter that blocks the light, just like putting sunglasses on your lens. They are available in different densities ranging from 1-stop all the way up to 10-stops.
Some brands offer adjustable versions that have two pieces of glass, which when rotated against each other get darker or lighter. I have one of these Variable ND filters.
Let’s look at some examples of how this works
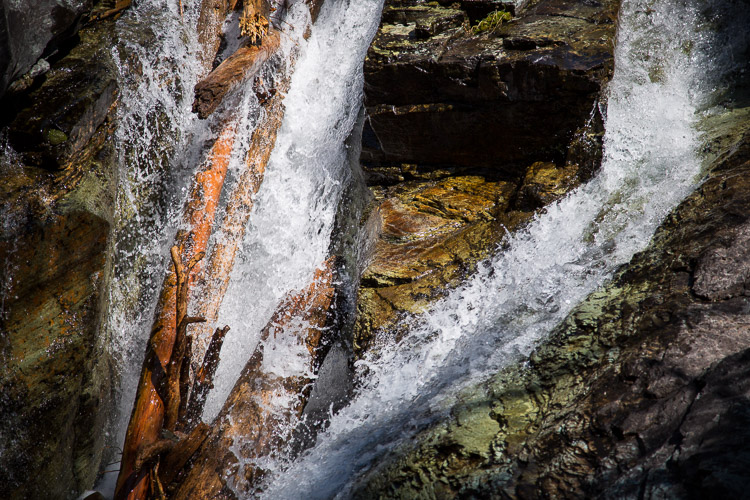
The images below were taken without the help of an ND filter. Notice the slowest shutter speed possible was 1/20th of a second.

At that point I had nowhere to go with the aperture, that’s the smallest setting I had on that lens. If I had shot with a longer exposure like 1/5th of a second the image would be grossly overexposed (3-stops too bright – 1/40th > 1/20th > 1/10th > 1/5th).
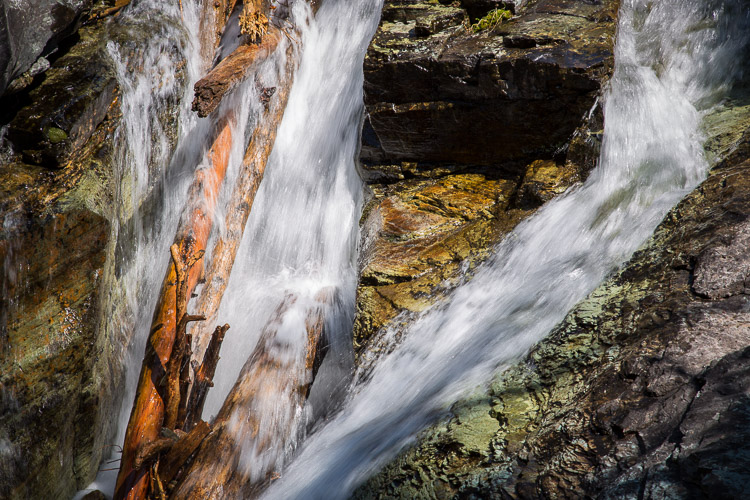
The water is starting to look misty in the image above, but not quite. After adding the variable ND filter (adjusted to different densities for each shot) I was able to take the following images.
I was quite happy with the 5-second exposure so I stopped there. I did take one at 10 seconds and it was almost identical so I deleted it.
Here’s another example
The last three images in the series below were only possible with the ND filter. See if you can guess the shutter speeds for each of the images below.
I do find that at its very darkest point my ND filter tends to add a color cast (image below) that doesn’t appear with less density. It also makes the image have a little less contrast. This may vary with the type of filter you purchase.
Just do some tests to find out idiosyncrasies of the one you are using. Don’t cheap out and get the least expensive one as they tend to be prone to more color shifts and sharpness issues.
#6 TRY SOMETHING DIFFERENT
Waterfalls are a commonly photographed subject. Trying to come up with a unique image can be challenging. So let’s think outside the box a little bit and consider what the norm is and how you can do something just a little different.
Can you get behind the water? Or for flowing water, can you get into the middle of it safely?
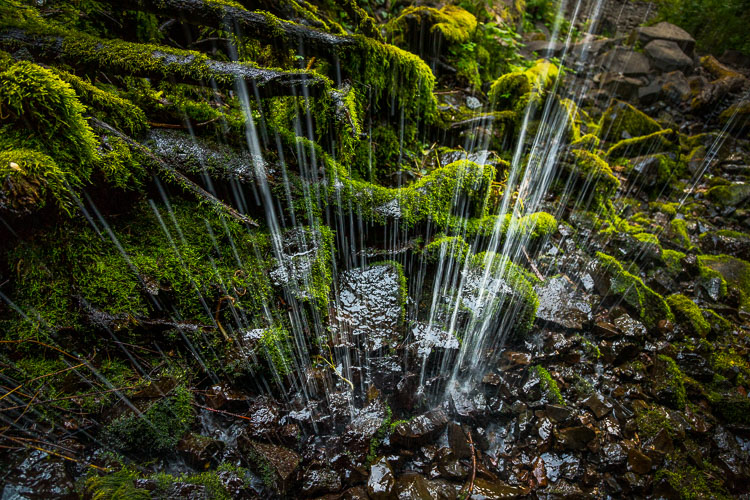
The image below was taken from behind this tiny stream of water (I hesitate to call it a waterfall, it was more like a sprinkle) from a high camera angle looking down. The light skimming off the wet rocks and the moss-covered tree roots caught my eye.
I did get a little damp as did my camera (NOTE my Fuji mirrorless cameras are Weather Resistant so not an issue with them!) so if you attempt this sort of thing wear the right clothes and have a rain cover for your camera and your bag.
Notice that I also used a slightly faster shutter speed (1/25th) because when I slowed it down there was so little water falling that it almost disappeared in the image!
What other ways can you get a unique camera angle?
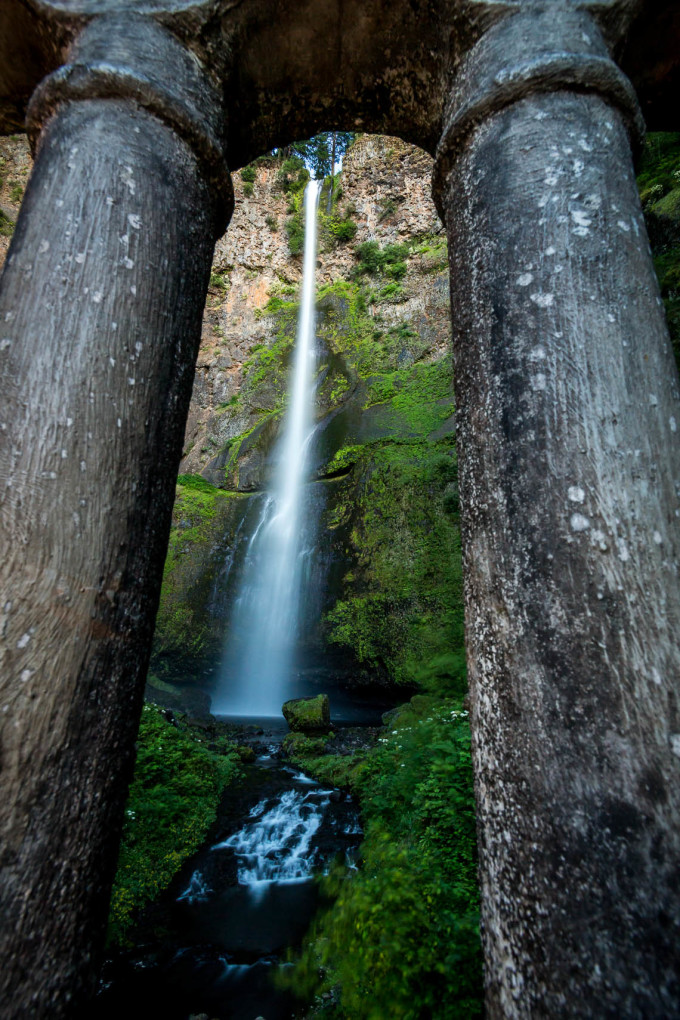
How about framing the waterfall with a natural frame? Is there an overhanging tree bough? Or in the case of the image below, a manmade structure, to frame the subject behind or through?
I’m not 100% happy with the image because the columns could be sharper, but I shot it at f/16 for a minute. It was already almost totally dark and we had to walk back down the hill to the car, so I wasn’t keen on staying much longer. It also looked sharp on the camera screen and I didn’t zoom in to check it (DOH!).
Lesson – learn from my mistakes!
If it’s an important shot, check the focus and sharpness on the camera by zooming in as far as the preview will go on the camera’s LCD. The small screen is deceptive! An image can look sharp on the camera but when you view it larger it doesn’t always measure up. Be sure!
RESOURCES
For a full idealist of all the things mentioned in this article, I’ve put together a handy Amazon list for you here. If you haven’t tried this before and aren’t ready to dish out $200 for a good ND filter, try one of the less expensive sets just to see if you even enjoy this kind of photography. If you find yourself using it a lot, then do an upgrade!
Neutral Density Filters
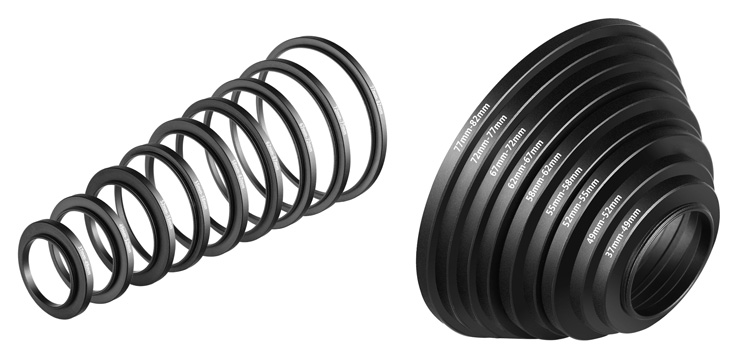
- Variable ND Filters – Promaster 77mm variable ND filter (1-9 stops approx.) This is the one I use. Of course, you’ll need to buy the size that fits your lens. If you have more than one lens you may need more filters, or buy the largest size and get some step-down rings to fit the larger filter on the smaller lenses.
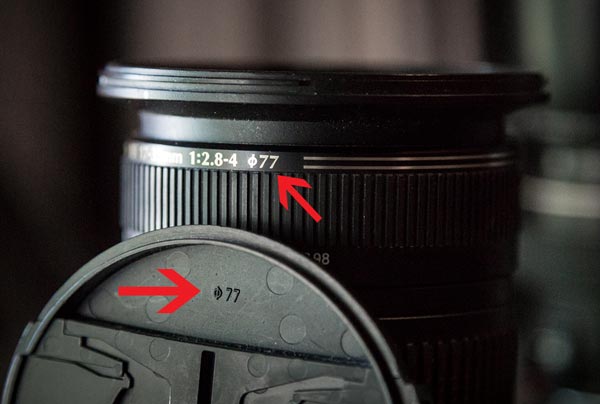
- What size to buy – If you aren’t sure what filter size you need, look inside your lens cap, it will tell you the filter size.
- Lower-cost ideas – another option is to get a set of filters, each a different density
- Drop-in filters – You can also get the drop in style filters that will work with any lens size, you just need to get an adapter ring to attach the holder, for each lens.
TIP: Always buy filters that are the size (diameter) of your largest lens. Check inside the lens cap as you see above, usually, that will be 77mm or 67mm. Then get a set of step-down rings so the filter will fit on your smaller lenses too (with no cut-off).
Tripods
If you don’t have a tripod I recommend reading Stress-Free Tips for Buying a Tripod before you go shopping.
Check out this review I did if you need a new tripod that won’t break the bank Tripod Review: the K&F Concept TC2534 Carbon Fiber Tripod.
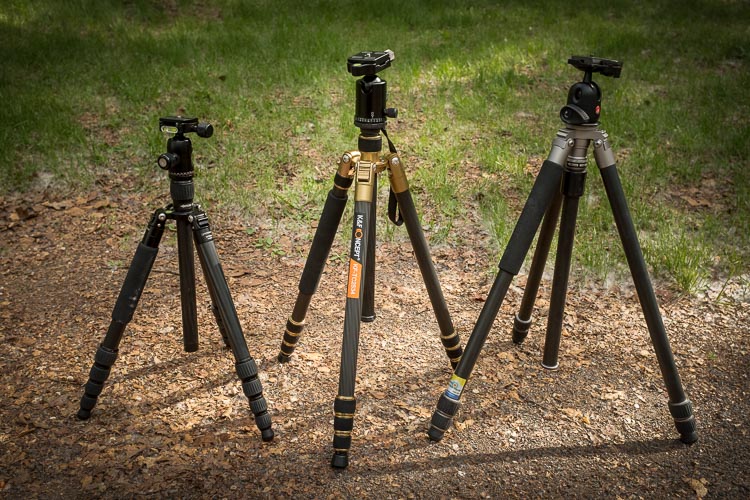
Also, give this a read before you head out – 9 Tripod Mistakes That Could Be Ruining Your Images and Putting Your Camera at Risk.
SUMMARY AND ACTION PLAN
Okay so now your mission is to go find some moving water. It doesn’t have to be a waterfall it could be a fountain or even a fish pond that has a flowing stream.
Make sure you have the necessary gear and give this a try. Experiment and try different settings. Then come back and share them in the comment section below.
If you have some images you’ve done in the past of water please share those also, and tell us how you achieved it. Indicate your camera settings and tell us about the image.
Cheers,