Are you a beginner looking to improve your landscape photography? If so, then this article will show you seven of the most frequent mistakes made by landscape photographers and how you can avoid or solve them.
When it comes to landscape photography, there are a lot of little things that you need to be aware of in order to come home with a beautiful shot. Photography and the process of capturing the perfect image require effort as well as patience.
Avoid making these common mistakes
During my learning phase, I wasn’t happy with my final results, but I didn’t know what was missing.
I learned that it takes a bit of self-critique, and you need to develop an eye for detail if you want to take your landscape photos to the next level.
The mistakes I was making were pretty common among newbies. With great relief, what I needed to do to improve my images immediately was to fix those poor practices.
So I put together a list of some of the most frequent mistakes made by landscape photographers during the learning process. Let’s dive right in so you can learn them, and then avoid making them!
Mistake #1 – Using the wrong tripod (or none at all)
It’s easy to get started as a landscape photographer. Spend a fortune on the latest fancy camera and lenses, then make a quick visit to Amazon for a cheap tripod and game on.
I’m kidding!
It is true that you don’t need to break the bank and buy expensive gear to take great photos. But as a landscape photographer, you’ll soon realize that a good tripod is an essential tool in your bag.
An unstable tripod will show its limits pretty soon, in particular when you’re shooting at a windy location. Your photographs just won’t be sharp enough if the tripod is too shakey because your camera will move, and your final images will be blurred as a result.
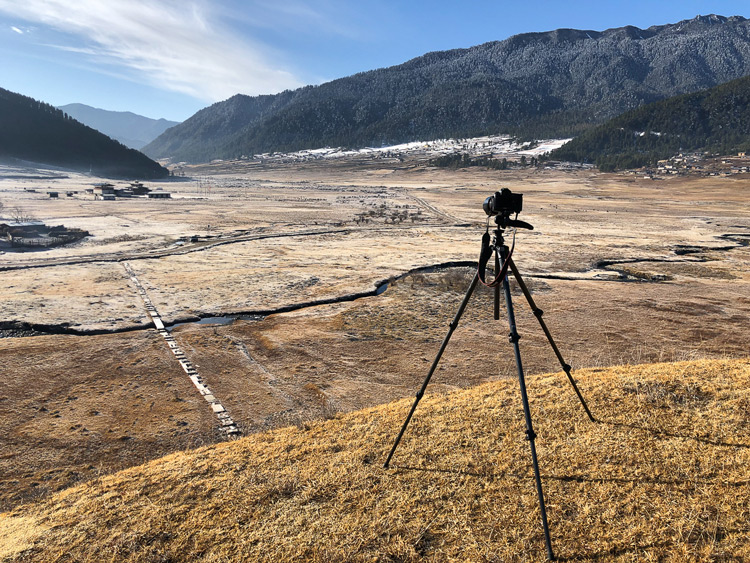
One of the secrets of landscape photography is to keep your camera as still as possible, especially in low-light conditions, and the solution is to use a sturdy tripod.

Another critical aspect when it comes to buying the right tripod is its height. Too small, and you’ll always be hunching over when you’re shooting which can cause back issues. Or you might find it challenging to get a clear shot if your tripod isn’t tall enough and you find a fence or rocks in front of the camera.
Don’t get me wrong. Small, lightweight tripods are excellent, particularly for travelers, but depending on the context, you might need a taller, more heavy-duty one for landscape photography.
Which leads us to the next mistake.
Mistake #2 – Lack of planning
So you want to shoot at that beautiful lake with mountains in the background that you’ve had on your bucket list for ages. Maybe you also drove a few hours to reach the location. So now what’s your plan to get that perfect shot? Don’t have one?
Been there, done that.
Not having a plan almost always means missing a good photo for many reasons. You don’t know how crowded it will be or how the lighting conditions are at a particular time of the day.
Arrive on location early enough to avoid crowds of photographers. Especially in popular touristy areas, you want to make sure you find space to set up your tripod in the right spot before the light is perfect.

Use social media platforms such as Instagram or search Google Images to get a first idea of what other photographers have done before at that location. By researching the area and getting info such as how distant it is from the car park is also useful to help you know what gear to bring with you.
I can’t stress enough, though, that the best way to get home with a great photo is to scout your location well in advance. Are you shooting at sunrise or sunset? If possible, visit the spot the day before. Study the area, see where the best vantage points are to position your tripod.
Having a well-thought-out and well-researched plan ahead of time will help you come home with the shots you want.
Then you need to understand how light works.
Mistake #3 – Poor choice of lighting
The lighting in your image can make or break your photo. By learning how to use light (and shadows), you can enhance the visual traits of a subject, create depth, and tell a story.
Your challenge as an outdoor photographer is to work in a continually changing environment. Weather conditions can change rapidly as well as the direction of the light.

Needless to say, shooting on a cloudy day would be completely different than taking photos on a sunny day with a clear sky, and so on. If you’re aware of all this, you can have great control over your final images.
The bottom line is that not paying attention to lighting will result in poor photos.
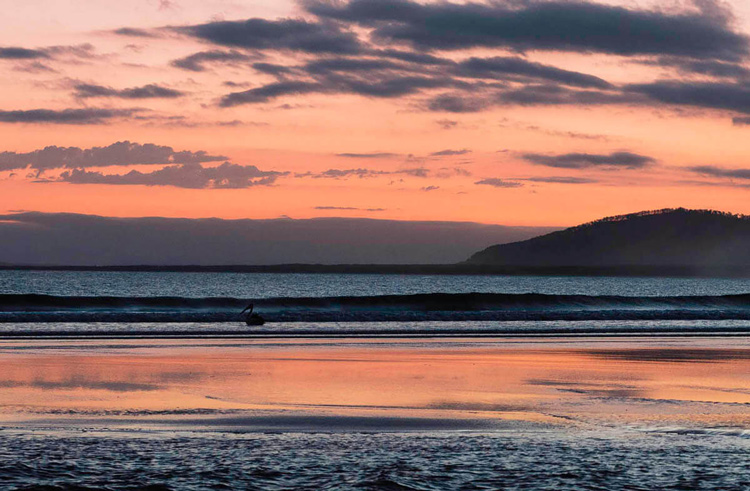
For me, optimal lighting conditions present themselves during sunset or sunrise when the sun is low on the horizon. To be more precise, in landscape photography, you get the best light during the golden hours.
Right after sunrise and before sunset, color contrast in the scene is higher, and thanks to the reddish light, landscapes just look much more appealing during that time of the day.

Mistake #4 – Lack of care in composing the image
Landscape photography relies on specific rules of composition. No, you don’t need to be an expert in visual arts. Just be aware that by knowing the basics, you’ll immediately deliver better images.
Without paying attention to some rules of composition, you miss opportunities for making your shots look more attractive. Often even a beautiful moment can lose appeal without a bit of attention to compositional details.
For example, you can use the rule of leading lines to guide the viewer’s eye to the subject. Roads or any other imaginary paths drawn by objects scattered in your field of view can form leading lines.
You can also use leading lines to connect the foreground to the background and reinforce the visual impact of your main subject as shown in the image below.

Mistake #5 – Crooked horizon line
One of the most common mistakes I see when reviewing landscape photos is that many new starters produce images with a tilted or crooked horizon line. It might seem trivial to many, but it’s a rather usual mistake that occurs to the untrained eye.
Let’s try to understand why a crooked horizon is considered a mistake. If you go for a walk and have a clear view of the horizon, what do you see? Yes, a flat line.
As a general rule, lines that are perfectly horizontal in real life should be horizontal in your photographs (it’s also valid for vertical lines).

A crooked horizon line looks unnatural and distracting. Go back to your photos and see if you’ve missed that detail while composing your images. But not to worry, you can still fix it in the processing stage,

The best way to avoid this issue, however, is to think about it when you’re in the field. This can be easily avoided by keeping your tripod level or enabling the grid in your camera viewfinder or LCD screen. Most cameras also have a virtual horizon built-in that you can activate in your live view.
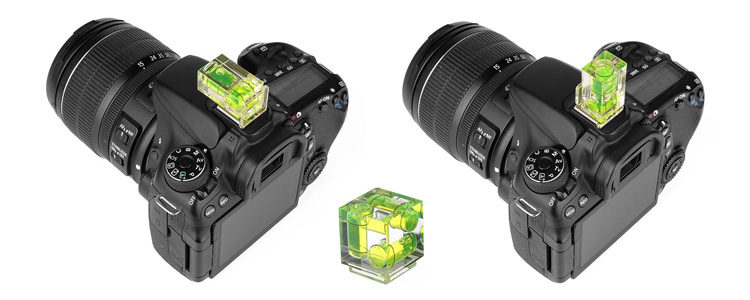
Or for a few dollars, you can buy an inexpensive 3-axis level that you can pop into your camera’s hot shoe and never have another crooked horizon again.
Mistake #6 – Unwanted elements on the edge of the frame
Random objects that appear on the edge of the frame only add distractions to your photo. They can take the viewer’s eye away from your intended subject.
Again, as a landscape photographer, you need to pay attention to your composition. Maybe your subject is amazing, but you don’t want unwanted elements coming in from the edges of the frame, such as tree branches or a power line.

It’s another frequent error that you’d have to spend time fixing in the editing process. But the more time you spend editing, the less time you spend shooting, so always make sure there are NO undesired objects breaking the edge of the frame.
NOTE: If you’ve conquered mistake #1 and are using a tripod this allows you the time to slow down and review your images carefully. So you should have no excuses now, right?
So when you notice such things in your shot, just zoom in a little bit more, take a few steps ahead, or move to a better camera position to remove those kinds of distractions from your composition.

Mistake #7 – No clear main subject in the photo
This one is the sum of all of the previous mistakes. Or maybe it’s the root cause of pretty much all of them – and that is not having a clearly defined and obvious subject in your image.
When you don’t know why you are taking a particular photo and what is your primary subject, viewers of your image won’t be able to tell either. The final image will look like a simple snapshot.
Lack of proper composition, poor choice of lighting, rocks, or branches sticking in on the edges of the frame will all result in a really distracting photo.
I used to make this mistake all the time when I started learning landscape photography. Today, having a clearly defined main subject always helps me prevent a lot of issues and deliver better pictures.

So start asking yourself, why are you taking that picture? Why do you love that landscape, and what do you like about it?
Answering these questions will help you focus in on the subject and create brilliant images.
Before you go
If you’ve learned something new from this article, make sure to share it on social media right.
Now it’s your turn. Which of these seven strategies are you going to try first? Are you going to look for leading lines in your compositions, or are you going to scout the location the day before?
(Note from Darlene: If you’re going out to do photography currently, please make sure you do so in a safe and responsible manner.)
Let me know by leaving a comment below and please share your landscape images as well.