In this article, I’ll cover several popular photography beliefs and debunk them as myths. Some are opinion related and are subjective, others are just plain factual.
Let’s just get right to it!
# 1 – Manual Mode and manual focus go together
Many photographers believe that when you shoot in Manual Mode you also need to use manual focus as well, The belief is that they are the same or are mutually inclusive (overlap) That if you use autofocus you also can’t adjust any of the other camera settings.
This is simply not true.
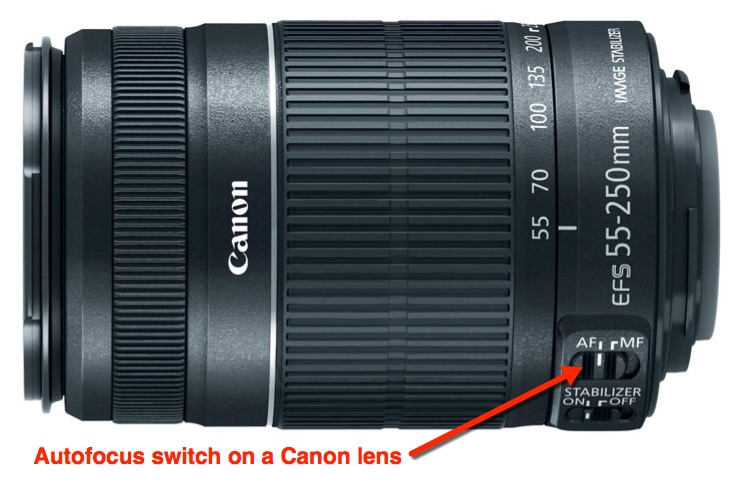
You can shoot in Manual Mode and use autofocus without any issues. Likewise you can switch to manual focus and use any of the automatic or automatic shooting modes like Aperture Priority or even Program.
The fact is that I very rarely, almost never actually, shoot using manual focus. The only time I use it is for macro photography and then I zoom in on the LCD view to be able to focus manually. I explain that process in this article: The Ultimate Guide Macro Photography.
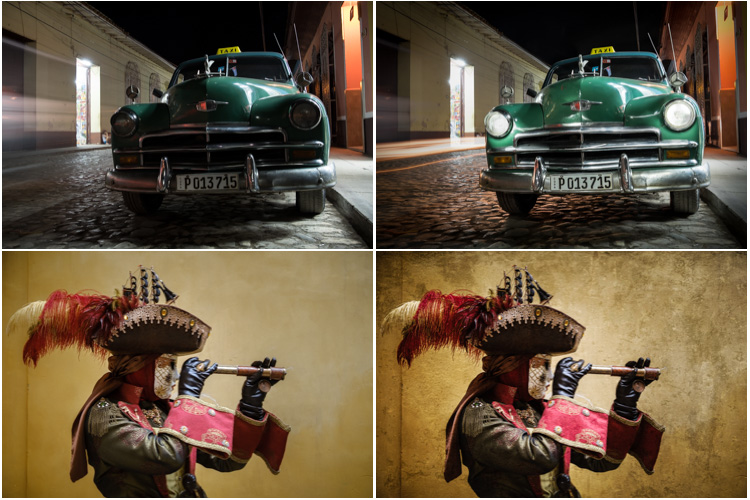
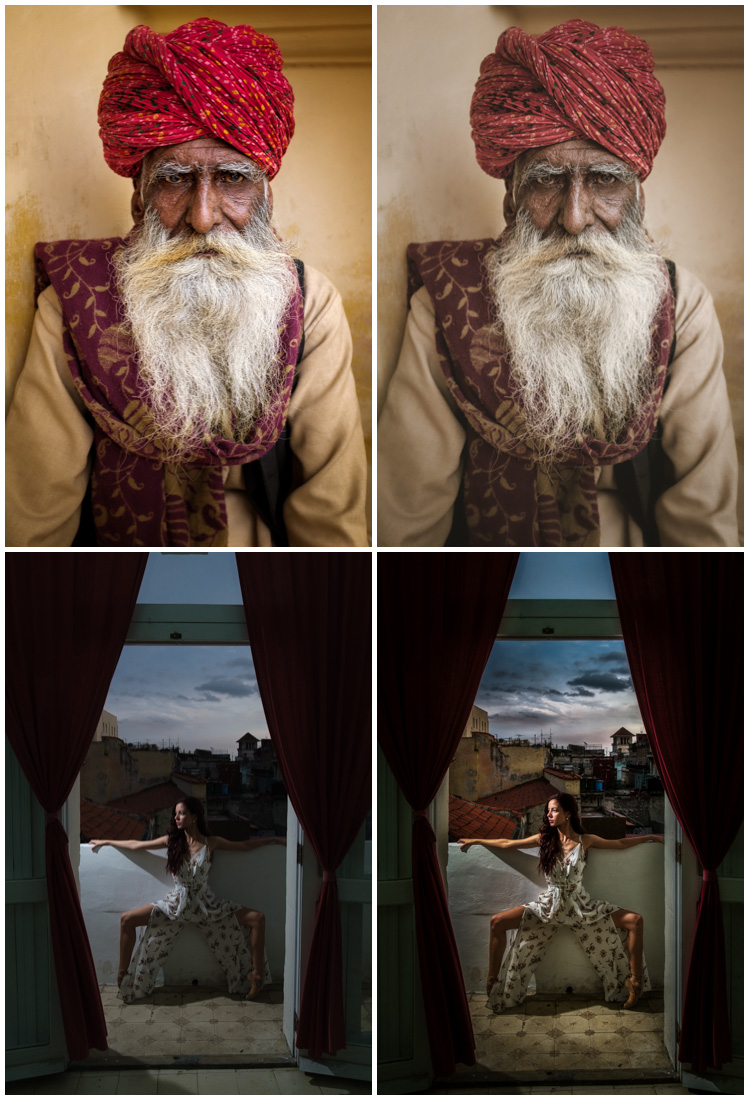
#2 – Processing is cheating
This one is highly subjective and can cause a lot of debate and even arguments.
The question of whether or not doing any image editing or processing is really photography is a not a new discussion. Since the early days of film photography there have been two camps on this.
- The side of the purists who believe that any image manipulation is cheating and the result is not photography anymore.
- The opposing side with those who do whatever is necessary to get the desired result and still consider it photography.
This was debated long before digital photography too. Film shooters would argue about the merits of using filters over the lens, thus altering the image captured. Filters like a polarizer, a graduated neutral density filter, or a red filter with b/w file which greatly darkens the sky.
Manipulation was done in the darkroom as well, I know I did a lot of it! Dodging to lighten certain areas, and burning to darken was commonplace. Things like sepia toning (with actual chemicals) and even hand coloring with oil paints and colored dyes was also done frequently (also all things I have done).
So where do we draw the line? How do we define photography? When does it stop being photography and if that is the case – what is it then?
My personal belief is that image manipulation, whether that be in-camera or in processing, is up to the individual photographer to decide for themselves. You choose what is best for you and fits with your style and your beliefs.
Just remember that to each their own – so let’s not try and convince one another to convert to the opposing view. Let’s live and let live and respect our fellow photographer’s choice.
#3 – Never shoot into the light source
While you do have to be careful shooting directly into the bright sun, don’t avoid it. There are several situations where it works and is even better:


#4 – Real photographers only shoot in Manual Mode
I’ve heard other photography teachers and instructors say this and it makes me mad. NO, you do not have to shoot in only Manual Mode all the time. In fact, most of the time I do not!

This is the rule of thumb I recommend you follow:
- When your camera is on a tripod use Manual Mode (remember you can still use autofocus)
- When you’re shooting handheld use Aperture Priority (95% of the time that’s the best choice).
The issue is that Manual Mode can be confusing, especially for beginners. There’s a lot to learn and take in all at once. So give yourself a break and go slow. Learn it bit by bit and gain confidence. Then use Manual Mode when it’s applicable.
I do not shoot in Manual when I’m doing street photography, candids, travel shooting, anything where I’m walking around and the scene isn’t constant. It’s a lot more work to pause the adjust the exposure for every shot on the fly.
So let the camera do some of the work for you by shooting in Aperture Priority Mode. You choose the aperture and the camera sets the shutter speed. I also recommend using Auto ISO in these situations as well.
If the light is changing from bright to shade, or sunny to cloudy, or you’re going from inside to outside – you have to really think fast on your feet to shoot Manual. Don’t work so hard!
Read: Camera Modes – Do Real Photographers Only Shoot in Manual Mode?
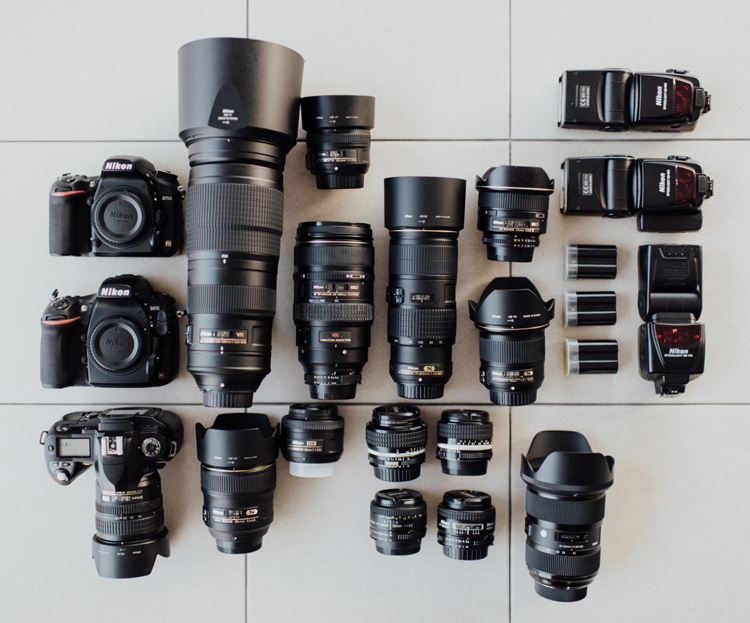
#5 – Better gear equals better photos
To this I say HOGWASH!
Gear acquisition syndrome (GAS) is a real thing. Many photographers mistakenly believe that by purchasing high-end and top-of-the-line camera equipment their photos will automatically improve in quality. They always want to have the latest and greatest shiny new toys.
While it may be true that better gear may give you less noise at high ISO ranges (see #9 below for more on this), or allow you to print larger if you are shooting full frame. But it doesn’t improve your images as far as the craft of photography goes. You are in full control of that!
You still need to know how to use light to your advantage, knowing when to use hard versus soft light and what that means. You still need to arrange and compose your image well, and you need to capture the peak of action or the “decisive moment”.
A better camera and lens can’t help you be a more intuitive and creative photographer.
Only education, knowledge, and practice can do that. So if you’re thinking about upgrading here are some things for you to read. If you have a bit of money to invest, consider doing so in better glass (higher quality lenses) and not a shiny new full-frame camera body.
Read: 7 Questions to Ask Before You Upgrade to a Full Frame Camera Body

Also read: What Camera Lens Should I Buy Next, and Other FAQs About Gear
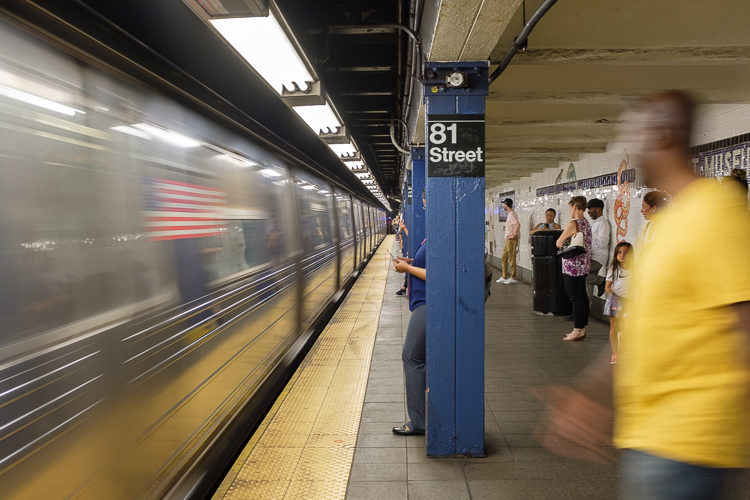
#6 – Images must always be tack sharp
This is another one that many photographers get hung up on. Try not to make this a hard and fast rule in your photography. Sometimes a little blur is a good thing.
Have you ever tried panning? It’s basically shooting at a slow shutter speed and moving the camera to match a moving subject. The effect, if it’s done well, is to blur the background and often part of the subject.
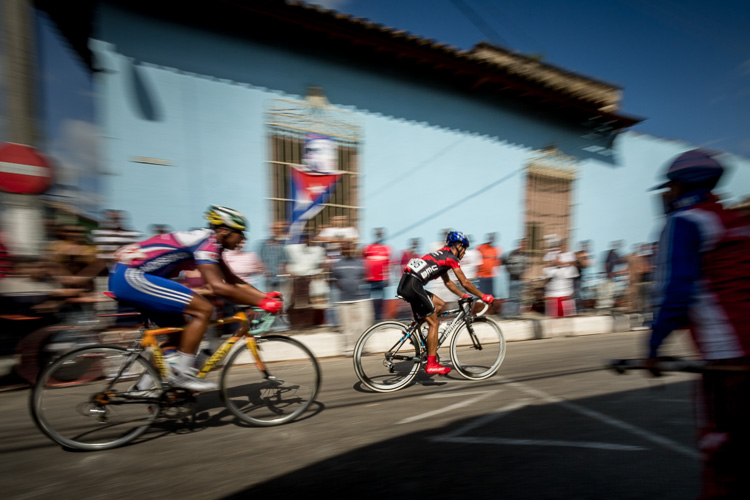

Read more here: Panning: How to Blur Photo Backgrounds and Add a Sense of Motion to Your Shots
Panning just one way that partially blurred images can be effective. How about a zoom burst or zoom during the exposure? If you haven’t tried that it’s a fun method of abstracting the image and it works well on subjects with bright lights or neon signs.
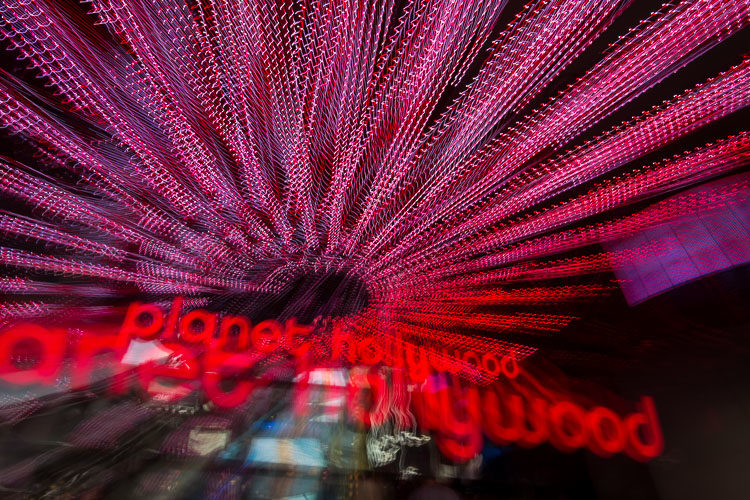
Read more on that here: How to do a Zoom Burst Special Effect with Your Camera
Another option is creating intentional blur through camera movement. This is similar to the zoom effect but you use an even longer exposure and move the camera on purpose to blur things.
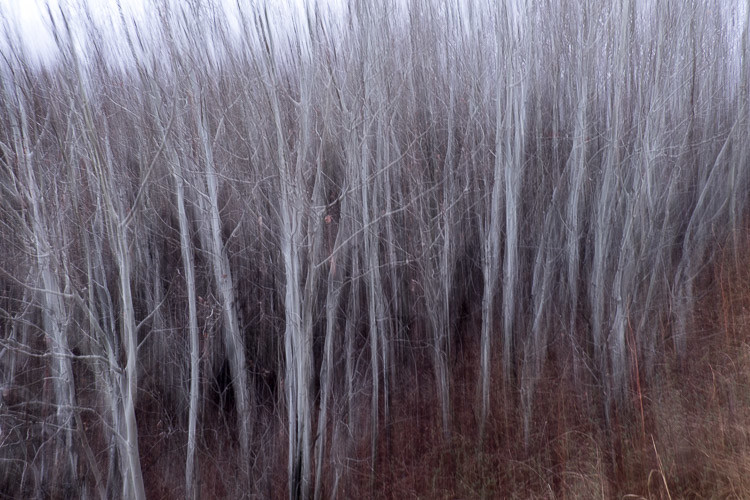
Read more: Create an Abstract Image Using Intentional Blur – Photo Challenge
Finally, choosing a slightly slower shutter speed on moving subjects like sports, pets, or birds can freeze part of the subject and blur others. Legs or arms that are moving faster than the body will be more blurred. This can add a sense of motion and speed to the image that using a faster shutter speed and freezing the subject can sometimes lack.
#7 – Pros take better photos than amateurs
I have heard a lot of my students yearn to one day be at the level of professional photographers, like it’s some badge or honor. That when you become a pro suddenly you’re among the elite, the best of the best, you’ve made it!
Well, I’m here to dispel that myth too.
The only real difference between amateur or hobby photographers and professional ones is that the latter get paid to do photography. Amateurs shoot just for the sheer joy and love of the craft and while pros usually love what they do as well, it’s a different ballgame once you turn pro.

Read: Going pro? Is it the right choice for you?
But in terms of who makes better photos, it’s not that cut and dried.
I know many amateur photographers that take amazing images. Award-winning images that I’d gladly hang on my walls. Likewise, on the converse, I have seen many pros who make less than stellar images and even some amateurs put them to shame.
So it’s not about how good you are as a photographer. It’s about who has decided to do it as a business and attempt to make a go of it. Sometimes the most successful pros are actually the ones who are good at marketing and sales, not necessarily the best photographers.
Do read the article mentioned above if you’re considering going pro (even part-time). If you want to continue doing photography just because you love it – DO THAT!
You have way more freedom and less stress just shooting for yourself. Trust me!
#8 – Use ISO 400 maximum
Many photographers I’ve seen avoid cranking up the ISO past about 400 or so. Why? Because they want to avoid the noise and graininess that can do along with high ISO images.
I do not recommend following that advice because the other side of it is that by limiting the ISO, you have to adjust the exposure by other methods.
Think of the exposure triangle.
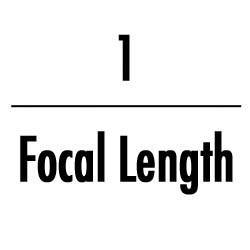
If you’re already using a large or wide-opened aperture, then the shutter speed must be adjusted to let in more light. That means slowing it down and often that will take you beyond the reciprocal rule which looks like this (see image on the right).
When you are shooting hand-held, you always want to keep your shutter speed faster than one over the focal length of your lens (when using a tripod this doesn’t apply). So with a 200mm lens, you want to shoot at 1/200th or faster. But if you limit your ISO to 400 maximum and you are in a dim lighting situation – you’ll end up with a slower speed and risk camera shake from your hand movement.


This is the #1 reason beginning photographers end up with blurry or unsharp images. It is NOT from lack of depth of field – just the opposite in fact. A small aperture means less light, and consequently a slower shutter speed yet again.
So to combat this problem, do not be afraid to use a high ISO.
I wrote a more extensive article on this topic, you can read it here: How to Overcome Your Fear of High ISO and Take Sharper Photos. You can fix too much noise (to a point) in the post-processing stage, but you can’t fix blurry.
Conclusion
This is just the tip of the iceberg when it comes to common myths and misconceptions about photography. Hmm, perhaps I see a follow-up coming soon in the near future . . .
What I want you to take away from this article is that just because you hear something on the internet, or another photographer tells you something that you HAVE to do or follow – it does not make it correct. Don’t learn other people’s bad habits or make their mistakes.
Be in charge of your own education. Empower yourself with knowledge and information and make your own decisions, and even a few mistakes. Often you learn the most from the things you’ve messed up! I know I have!
Cheers,