If you are a Capture One user, you might be wondering how you can properly resize your images for web use, so that the resulting files look great on any platform. Exporting full-size images from your high-resolution camera is typically not ideal, because you end up with very large images that are hard to work with. With most online platforms automatically down-sizing and compressing large images, you might end up with photos that simply do not look good. For this reason, it is a good idea to find out the best resolution for each platform, then export your images in that size. In this article, I will show you the proper way to resize images in Capture One using two different methods.
Capture One Image Resizing Workflow
Capture One has two methods to effectively resize images. The first method involves creating a “Process Recipe” (which is basically a preset with particular values), then reusing that recipe every time you need to export an image. The second method involves exporting an image variant in JPEG format, which you can invoke through a dialog each time you need to export an image. My personal preference is the former since I can batch export many images at once without changing any settings. I will go through both of these methods in this article. Here is my simplified workflow process for resizing and exporting images from Capture One:
- Import images into Capture One
- Make necessary adjustments to the image(s) I want to resize
- Apply sharpening to the full-sized image via the Details Tool
- Create a Process Recipe for specific output resolution and set up output sharpening
- Preview output sharpening via the Proofing tool
- Select image(s) I want to export, then use the “Process” shortcut to export them using the previously-created Process Recipe
This method takes a bit of time to set up properly, but once you do it, exporting images is a breeze.
Capture One Image Resizing Process: Exporting with a Process Recipe
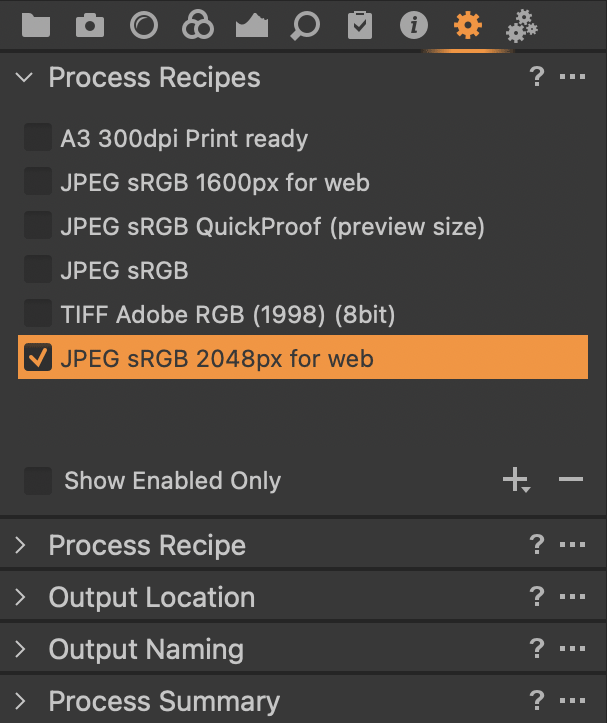
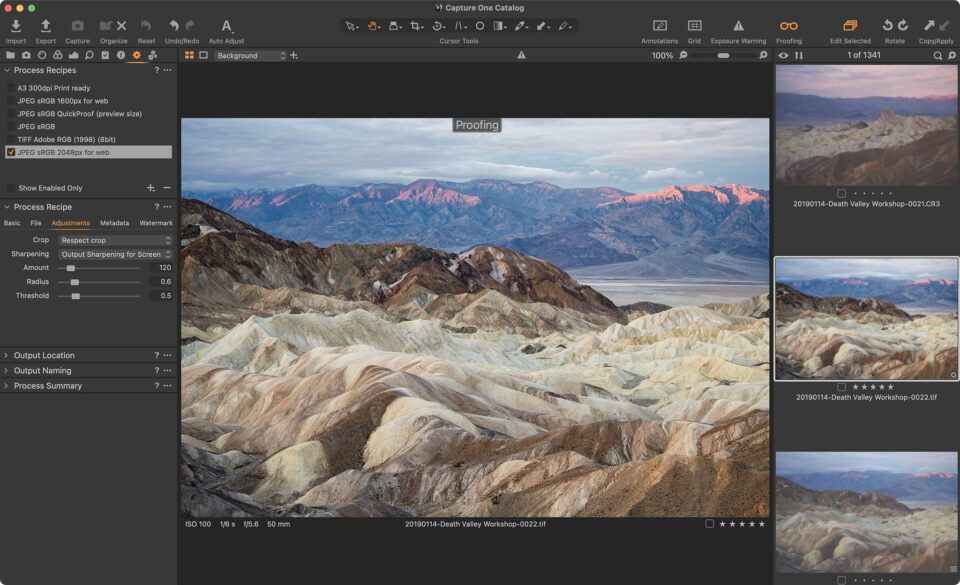
- Select an image you want to export out of Capture One Pro, then click on the Output tool to reveal a number of options, including “Process Recipes”, “Output Location”, “Output Naming”, and “Process Summary”. The tool should look like this:

Let’s go over each section and create a Process Recipe.
- Start out by creating a new Process Recipe for the resolution you need to export your images in. Click on the “+” sign under the “Process Recipes” dropdown. A new “Untitled Recipe” will pop-up right above. Click on it and rename it to something more descriptive. I typically export my JPEG images at 2048 pixel long resolution, so that’s what I am going to use as a name for my recipe. I will call it “JPEG sRGB 2048px for web”, as shown in the above screenshot. Make sure that the new recipe remains checked and everything else is unchecked. This will only enable the new preset we created for exporting.
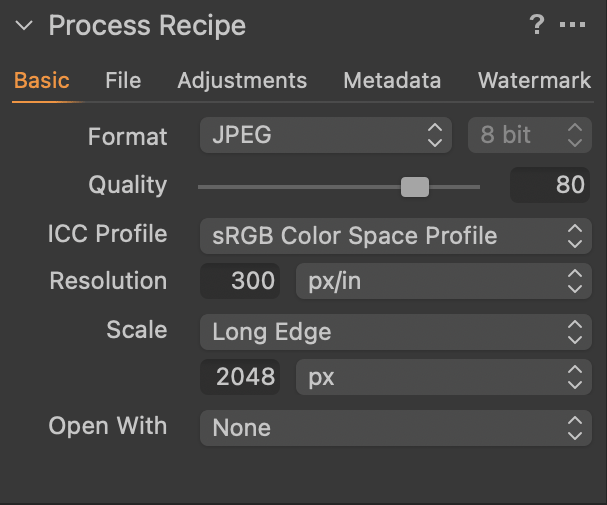
- Next, click on the “Process Recipe” drop-down and expand its options. Here, you will have a few very important tabs that you will need to configure. Under the “Basic” tab, you will be specifying the image format and all the relevant options, including image resolution. Here is what I set up mine to:

I set up my output format to JPEG, 80% quality, sRGB color space profile, and 2048 pixel-long resolution. The “Resolution” field is only relevant for printing, so you can ignore this setting if you are exporting for the web (this value can be overridden during the printing process anyway). I do not want my exported images to be opened after they are exported, but if you would like to see it with your image viewer, you can set it up under “Open With”.
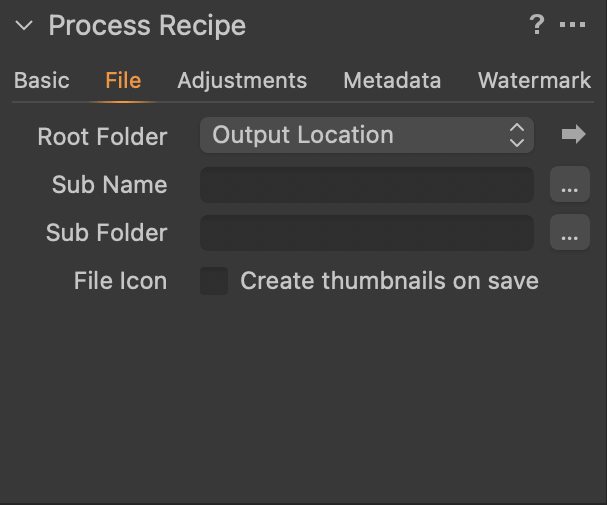
Click on the “File” tab to select the output folder where your images will be exported to. Here, you can set up all kinds of presets to create subnames and subfolders. Since there is a separate “Output Location” drop-down further down that allows you to select file destination and create sub-folders, I would recommend leaving these fields empty and setting up “Output Location” as the Root Folder:

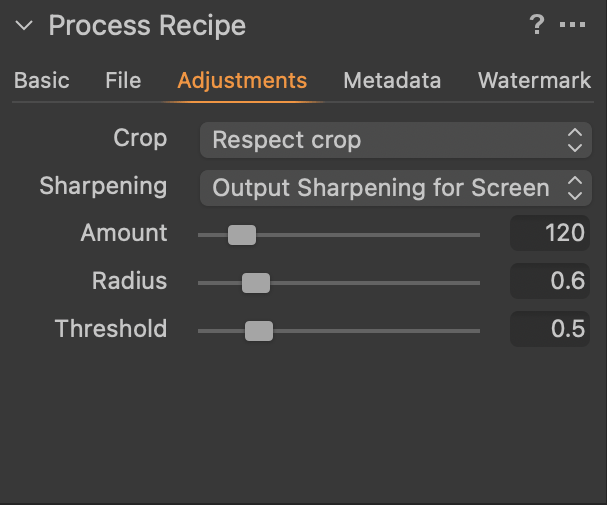
The next “Adjustments” tab is very important because this is where we will set up output sharpening. Make sure to pick “Respect crop” under the “Crop” setting, so that Capture One does not output the original uncropped image. Under “Sharpening”, make sure to select “Output Sharpening for Screen” when exporting images for the web. Set the desired Amount, Radius, and Threshold:

If you are wondering which settings are best to use here, the answer is “it depends”. Unlike Lightroom that only gives you three output sharpening options, Capture One gives a lot more flexibility. First of all, the output sharpening settings are applied on top of the existing sharpening that you have already applied to the full-size image, so you have to be careful with what you pick. So how can you tell which settings are best without seeing the end result? This is where you utilize the “Recipe Proofing” tool (the icon that looks like eyeglasses):

You can also invoke the Recipe Proofing tool using the SHIFT + CTRL + shortcut (SHIFT + CMD + on Mac). Once Recipe Proofing is enabled, you will see the image with “Proofing” text over it. Note that the image will be resized to the exact resolution that you are exporting the image in. From here, make sure you zoom in to 100% or 200% of the image (use the + on the loupe tool or press CTRL + (CMD + on Mac) to see the image up close:

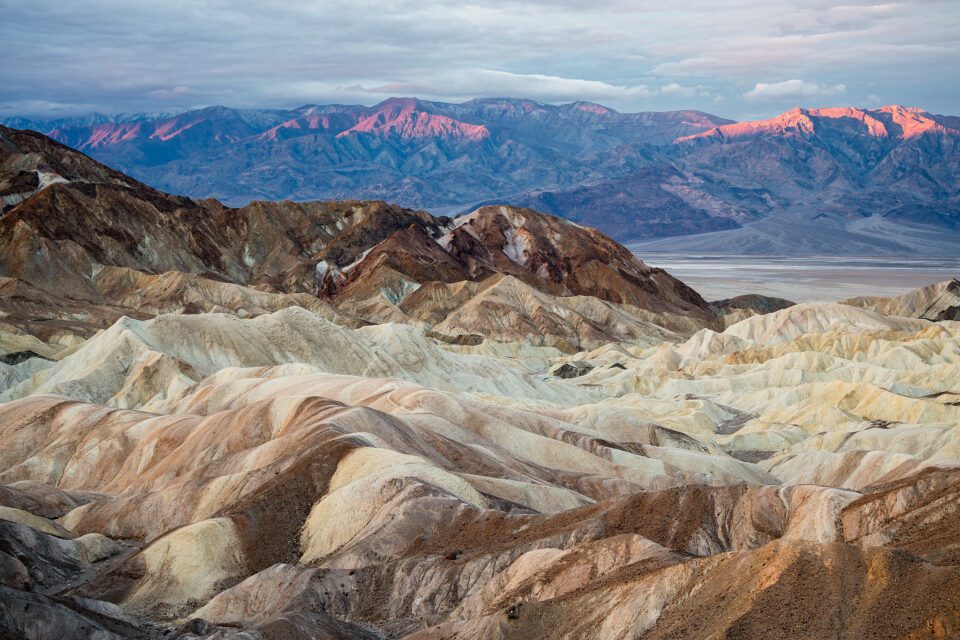
Now that you are looking at the actual output, it is time to adjust your sharpening settings. For the image above, I wanted to sharpen all the small details, including some of the rocks in the foreground. I picked 120 for “Amount”, 0.6 for “Radius”, which looked great. To make sure that sharpening does not add much noise all over the image, I bumped up “Threshold” to 0.5.
The Recipe Proofing tool is a great way to look at the end result. Once you are done, your exported sharpened image should look identical to how it appeared in this window!
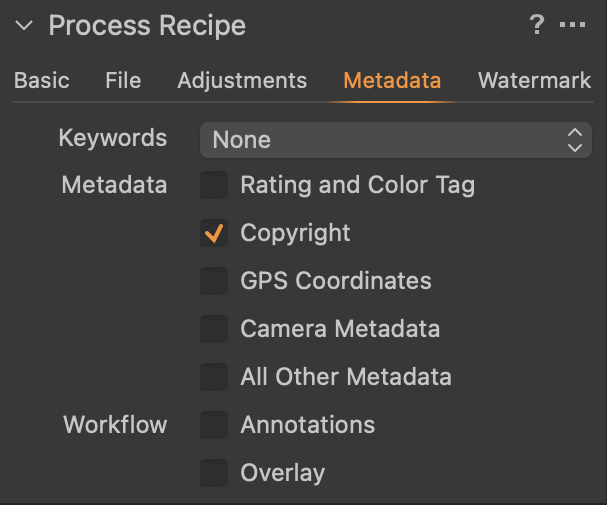
Next, navigate to the “Metadata” tab. Here, unless you want your exported image to contain sensitive data such as your GPS coordinates and camera settings, you should just uncheck most of the settings. For my recipe, I unchecked everything other than “Copyright”:

Lastly, the “Watermark” tab is there for adding a watermark to your images. I typically don’t add any watermarks to my images, but if you want to do that, you can do it from here.
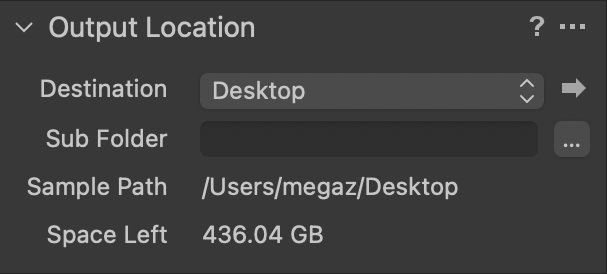
- The “Output Location” drop-down is for picking your output folder and subfolder (if you want to set one):

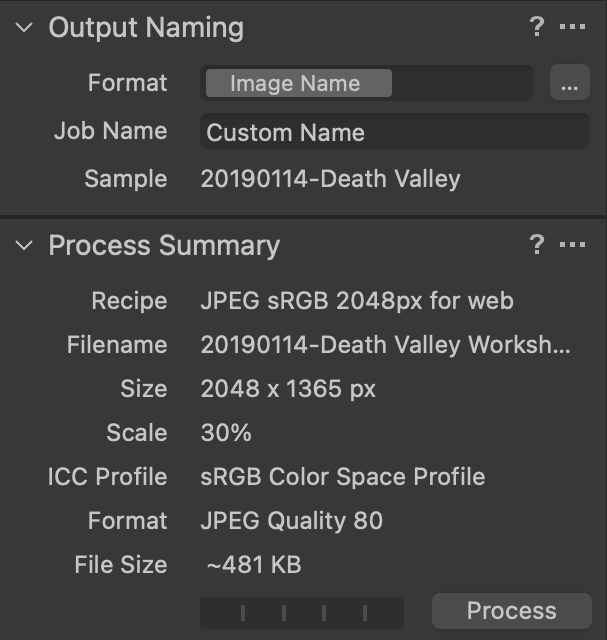
- The last two drop-downs are “Output Naming” and “Process Summary”:

Since I name my images during the image import process and want my exported files to have the same corresponding file name, I do not change them here and leave “Image Name”. However, if you prefer to rename your images when they are exported, you can set up a preset under “Format”. The sample file name is displayed below, as shown in the above screenshot.
Lastly, the “Process Summary” is basically a summary of your settings. As you can see, my resulting file will be 2048×1365 pixels, in sRGB color space, 80% JPEG quality, and the file should be roughly 481 KB once it is exported.
I picked “Desktop” as my destination, but if you have a particular preference for the export location, you can set it from here.
Finally, the recipe has been fully set up. Now all you have to do is pick the image(s) you want to export, then go to File -> Process, or use the CTRL + D (CMD + D on Mac) shortcut to start the export process.
I would recommend to set up similar recipes for all web resolutions you normally use. You can also set up other recipes for printing, etc.
Capture One Image Resizing Process: Exporting as a Variant
The second method of resizing and exporting images in Capture One involves a simple dialog that can be invoked by visiting “File” -> “Export Images” -> “Variants…”. By default, this window does not have a keyboard shortcut, but if you want to create one, you can do so by visiting “Edit Keyboard Shortcuts…” under the “Edit” menu. Another option is to add the Export button to the top menu, which you can perform by invoking “Customize Toolbar…” when right-clicking the top menu area of Capture One.
Once the Export Variants dialog box pops up, it will look like this:
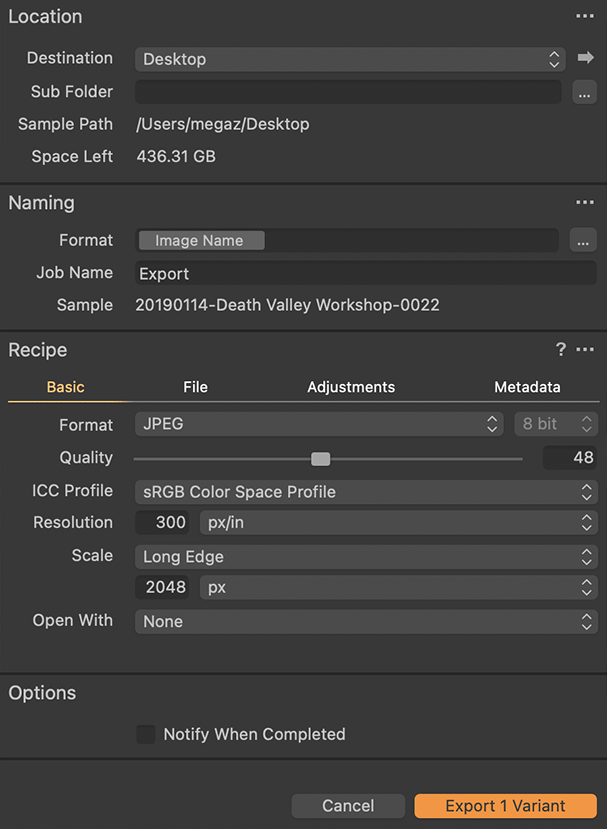
As you can see, the settings are very similar to the ones we have previously seen on the Process Recipes tool. You set up your export destination under “Destination”, a sub-folder if you want to, set up file naming structure and go through different tabs under “Recipe”.
Since the settings are the same, I am not going to go through them again. Once you are done, simply click the “Export Variant” button on the bottom right of the dialog box. The export process will start. If you want to be notified when the export is done, simply check the “Notify When Completed” box under “Options”.
If you have any questions about any of the above, please let me know in the comments section below!
