In today’s Photoshop tutorial I’ll show you some simple steps to give your type the appearance of soft and fuzzy animal fur. The process makes use of a real animal fur texture, which in this example is that of a Leopard, but a variety of results can be achieved by using source photos of different furry animals. The fur photograph will take care of the realism in the centre of the text, but we’ll also use a custom Photoshop brush to apply the soft fur effect to the edges of the hard letter edges, followed by some finishing touches to enhance the appearance.
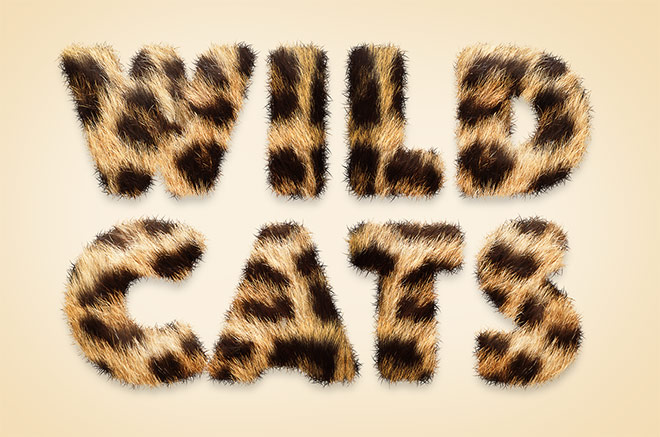
The artwork we’ll be creating in this tutorial is a realistic fur effect. Depending on the animal your source texture is from, the result can depict a variety of colours and common animal prints to create a range of safari themed type styles. In my example I’ll be using a stock photo of Leopard skin from Shutterstock, but there’s a selection of free images available online if you don’t have your own pet cat, dog or Leopard that you can photograph while they’re sleeping!
Begin by creating a new document in Adobe Photoshop. I’m using a canvas of 2000x1500px. Set out your desired wording in a bold font so there’s plenty of letter area to be filled with the fur texture. Also be sure to increase the tracking to provide enough space for the fur around the edges.
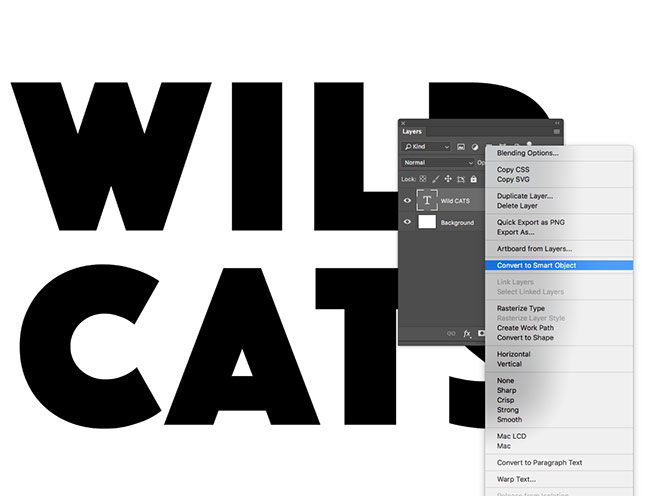
Right click on the text layer and select Convert to Smart Object. This will allow you to edit the settings of the next filter we’ll be applying if necessary, rather than the figures being permanently set.
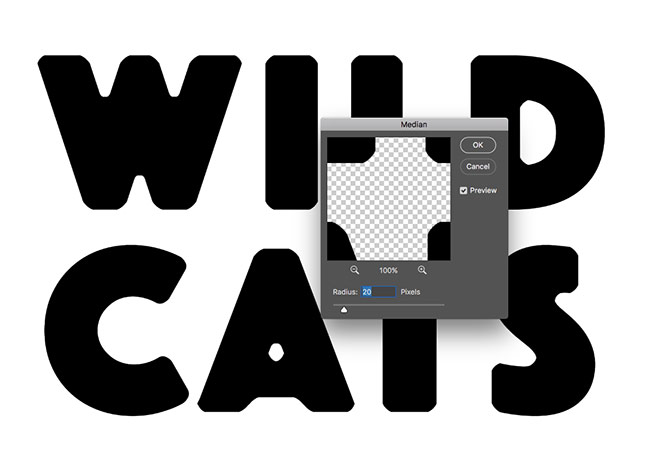
Go to Filter > Noise > Median and enter a value of around 20px to round off the corners of the type, which will help give the effect a softer appearance.
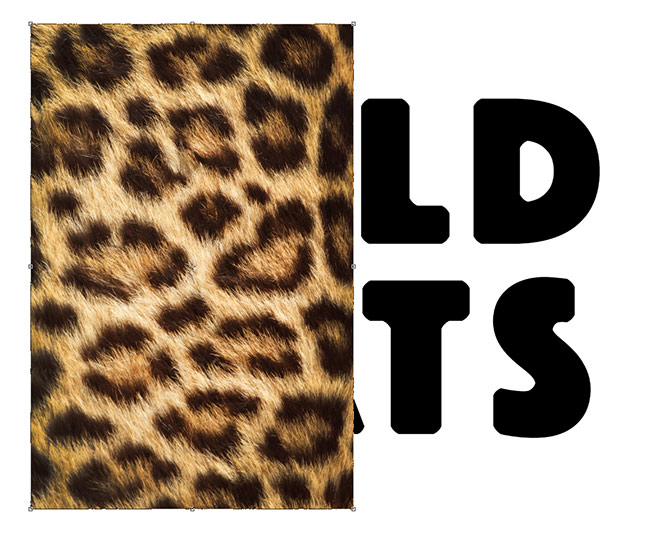
Download and open your fur texture in Photoshop. Select All, then Copy and Paste it into the main document. Hit CMD+T to Transform, then scale the texture to fit over a portion of the letters. Depending on the size of your wording relative to the scale of the texture, you could cover the whole word in one go, cover a portion at a time, or cover each letter individually.
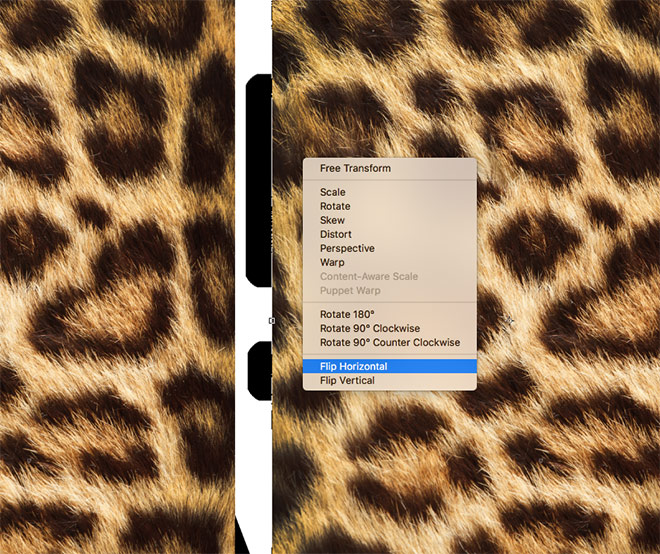
Hit Enter to apply the transformation, then hold the ALT key while dragging the layer to make a duplicate in order to cover the rest of the wording. Try to place the edges in the space between the letters, but where this isn’t possible, flipping the texture so the texture repeats seamlessly will help avoid any hard lines.
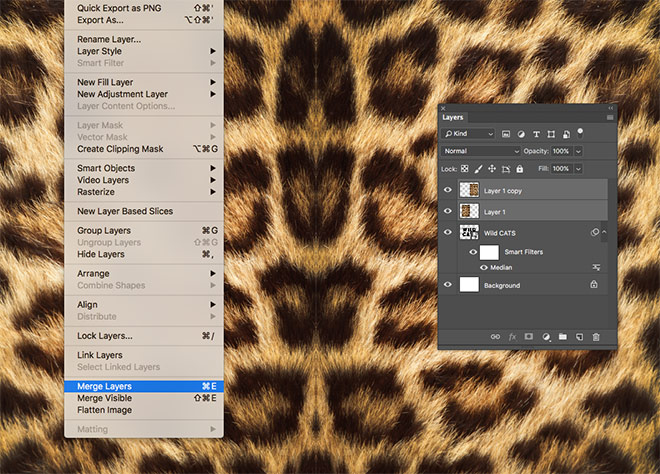
Select all the texture layer duplicates and merge then into one layer using the CMD+E shortcut, or the Layer > Merge Layers menu option.
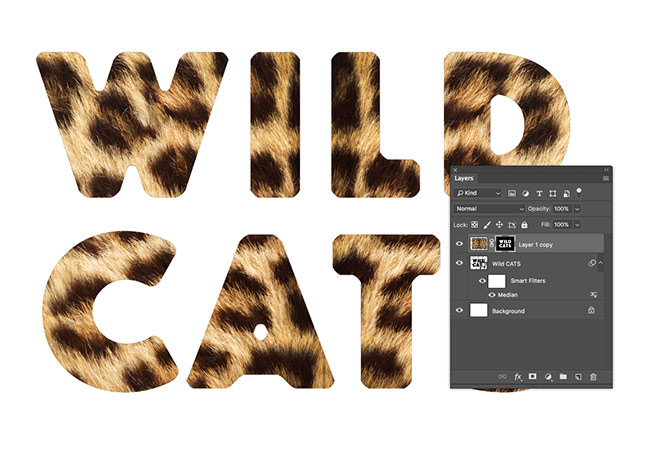
Hold the CMD key and click the text layer thumbnail to load its selection. With the texture layer active, add a Layer Mask to clip the texture to the outline of the wording.
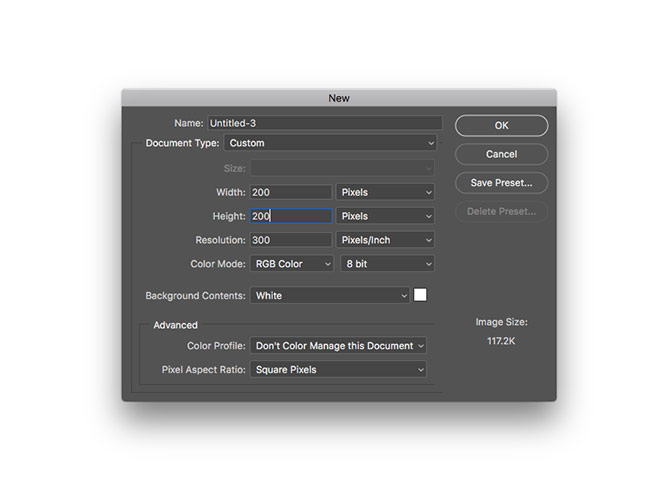
The effect doesn’t look very realistic with those hard edges, so let’s create a custom brush to blend them in. Create a new document at 200x200px.
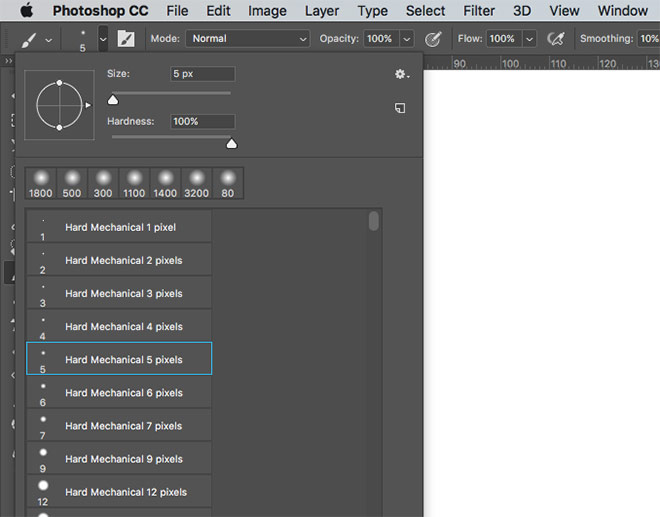
Select the Brush tool and choose the 5px Hard Mechanical brush preset. Zoom right into the document.
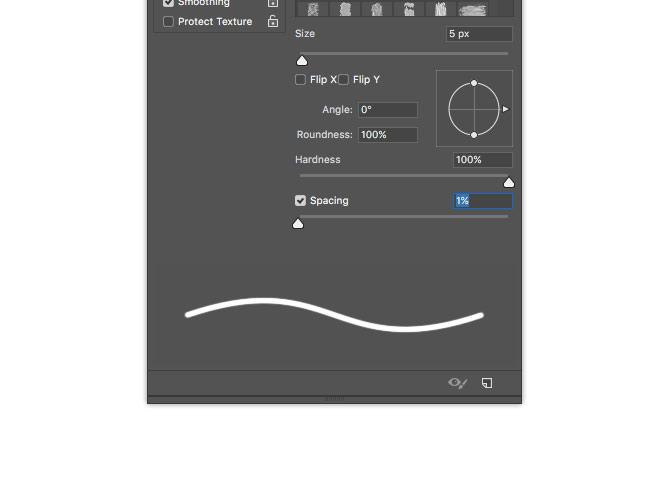
Edit the brush settings by reducing the Spacing to 1%.
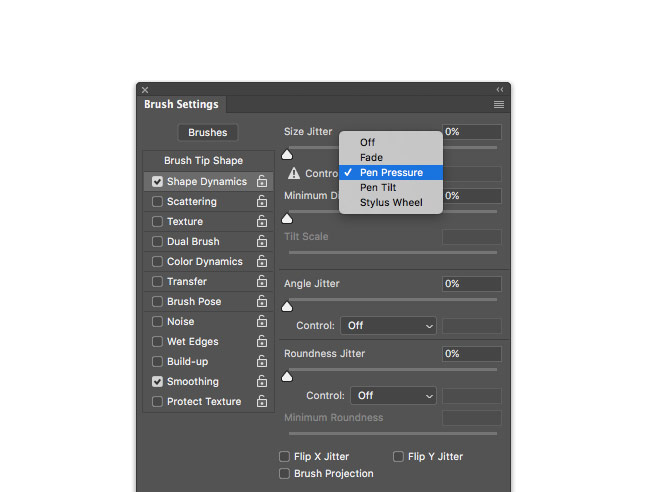
Turn on the Shape Dynamics options and set the Size Jitter Control to Pen Pressure.
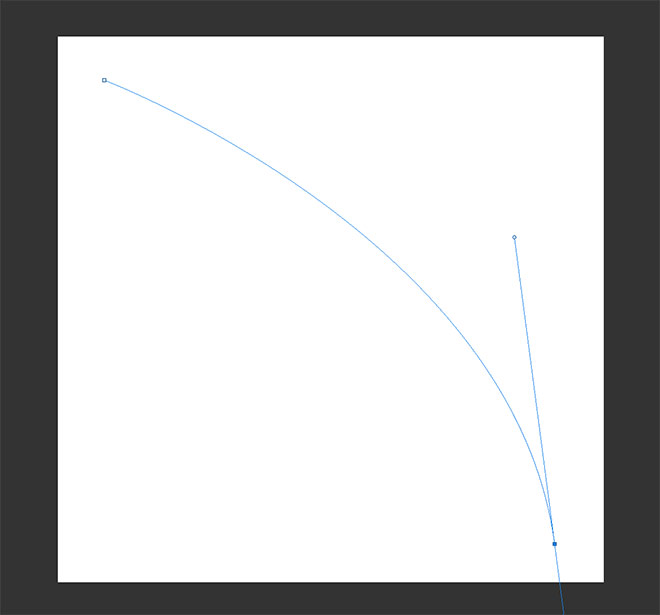
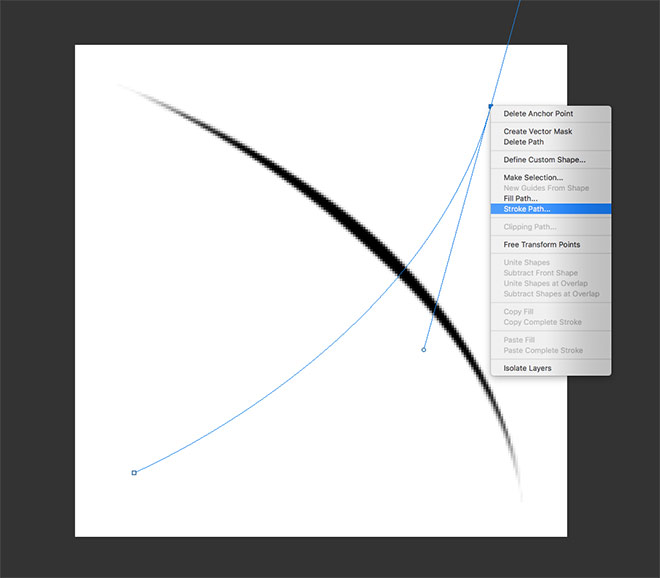
Switch over to the Pen tool and place a point in the top left corner. Add another point in the bottom right, but click and drag the bezier curve to produce an arc.
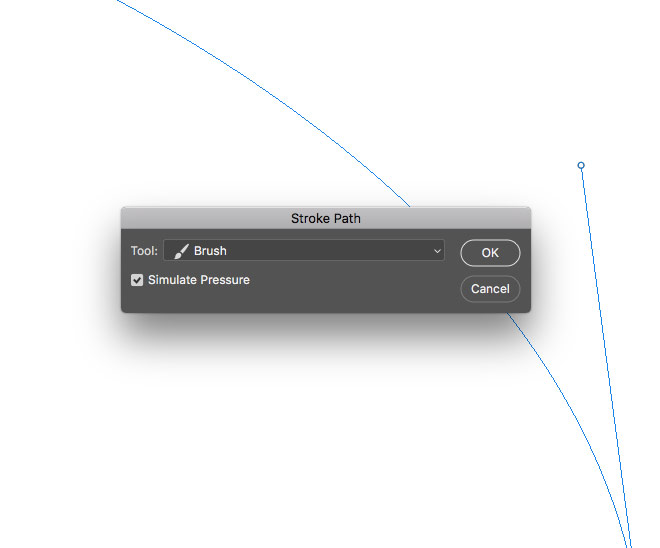
Right click and choose Stroke Path. Select Brush as the tool setting and select Simulate Pressure. Hit delete to remove the path to see a tapered line across the canvas.

Repeat the process of drawing an arc with the Pen tool, this time intersect the first line in a different direction. Stroke the path with the brush tool and delete the path.
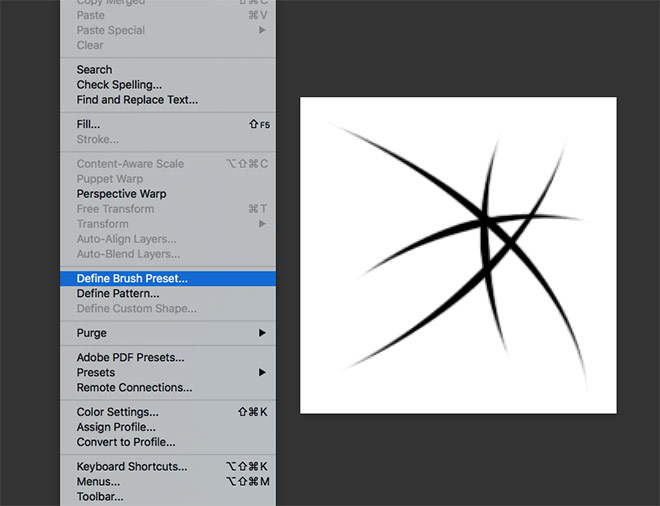
Add 3-4 more tapered lines in various directions, then go to Edit > Define Brush Preset. Now you’ve created this custom brush, you can skip this step any time you want to create the effect again in the future.
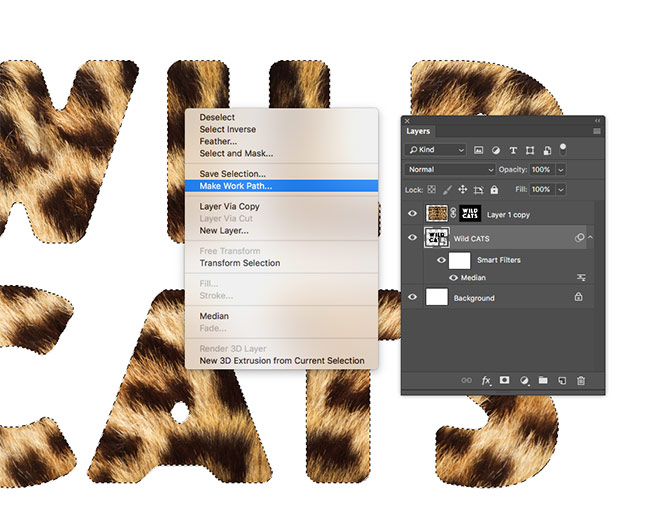
Close the temporary brush document and switch back to the main working canvas. Hold the CMD key and click the text layer again to loads its selection, then select the Marquee tool from the toolbar. Right click and choose Make Work Path and use 1px as the option.
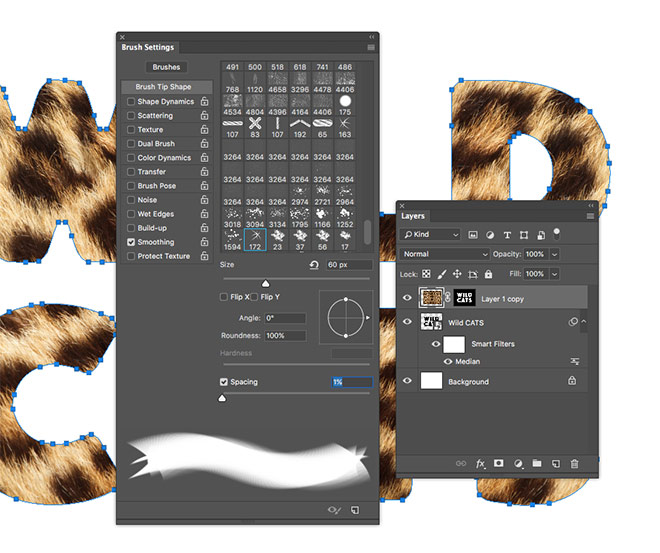
Switch over to the Brush tool to set up the brush tip. Select the newly created custom brush and reduce the size to around 60px. Reduce the Spacing to 1% in the Brush Settings.
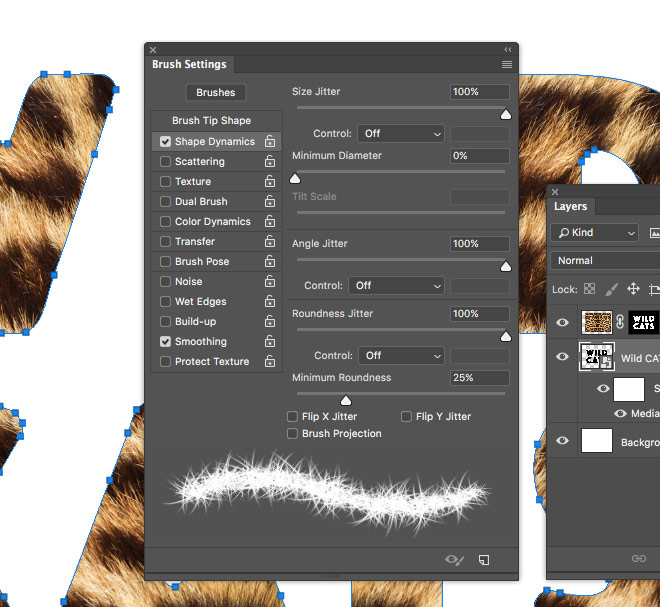
Under Shape Dynamics, max out the Size Jitter, Angle Jitter and Roundness Jitter options to 100% to completely randomise the brush tip.
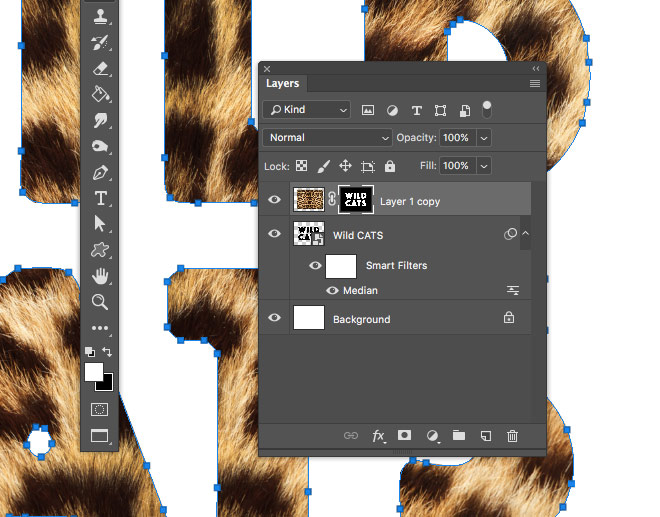
Select the Pen tool and activate the Layer Mask portion of the fur texture layer. Switch the foreground/background colours around in the toolbar to ensure the mask will be painted with white.
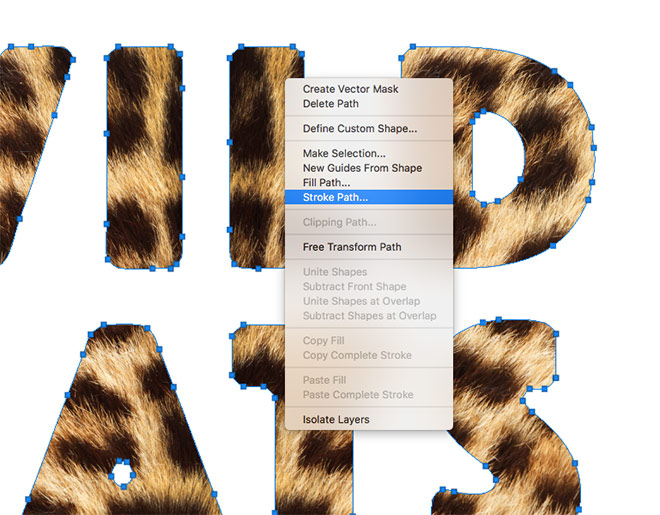
Right click on the artwork and choose Stroke Path, using the Brush setting to apply the custom fur brush around the outline of the letters. Since this outline will be painted in white, it will restore the fur texture in the layer mask.
This simple step applies lots of tiny hairs around each letter to give the wording a realistic furry appearance. The effect is looking much better, but there’s still a couple of additional effects we can apply.
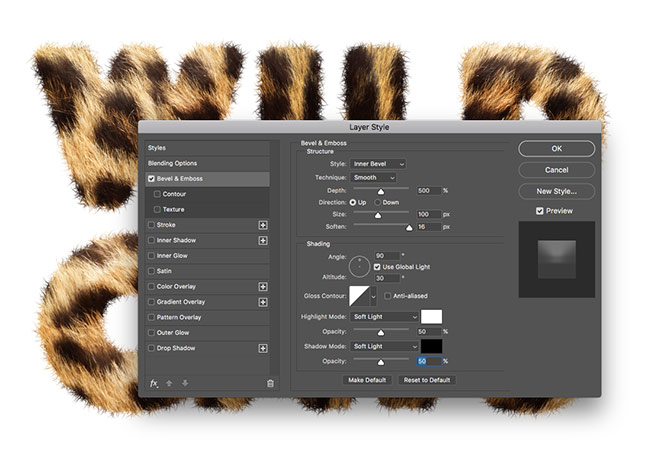
Double click the texture layer and add a Bevel and Emboss layer style. Set the Depth to 500%, Size at 100% and max out the Soften slider. Alter both the Highlights and Shadows modes to Soft Light and experiment with the opacities if necessary.
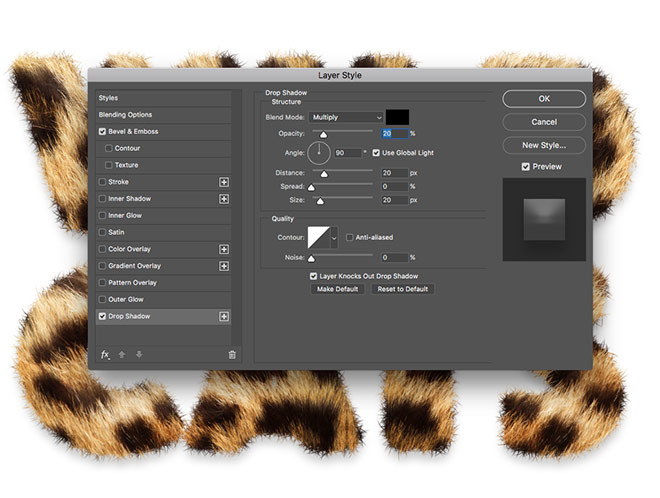
Add a Drop Shadow effect and configure these values to 20% Opacity, 20px Distance at 90°, 0 Spread and 20px Size.
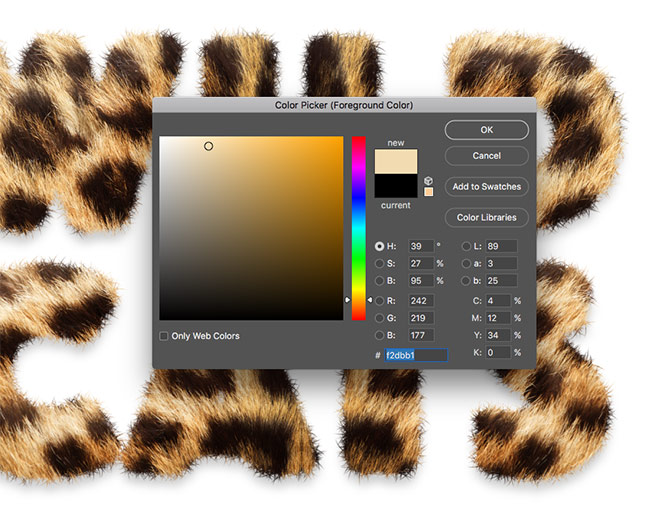
Use the Color Picker to sample a light hue from the artwork for the background colour, then fill the background layer using the CMD+Backspace shortcut.
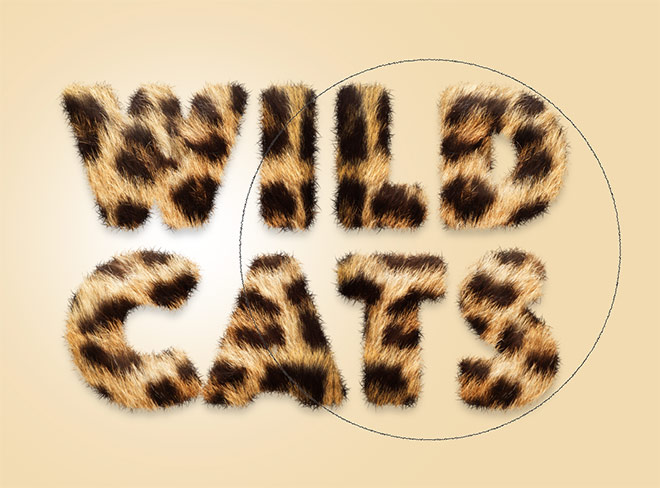
Select the Brush tool and change the tip to a large size with zero hardness. Add a new layer above the background, then paint a few dabs of white around the text area.
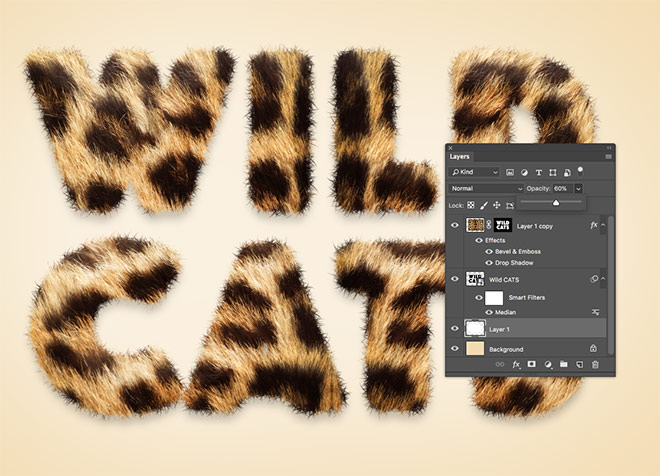
Reduce the opacity to around 50-60% to produce a subtle highlight to frame the artwork.
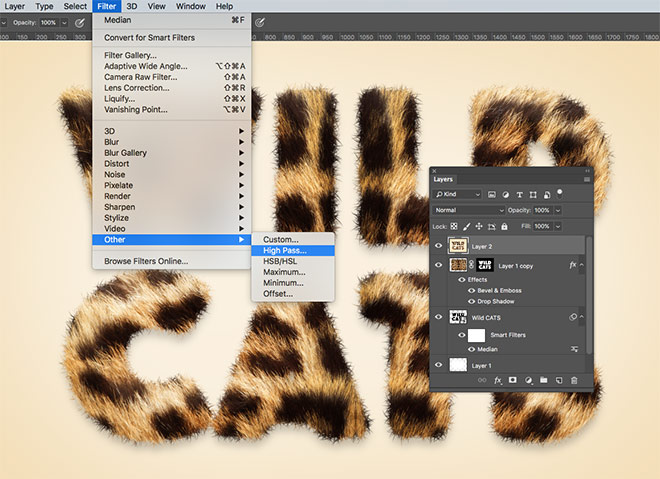
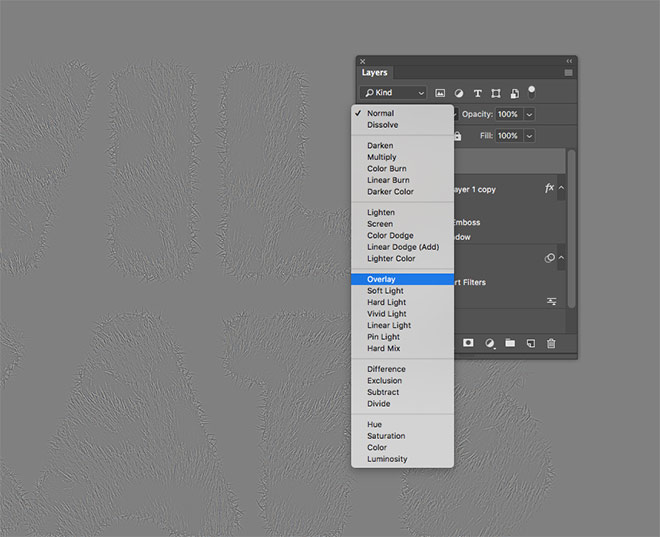
Press CMD+A to Select All, then CMD+Alt+C to Copy Merged, followed by CMD+V to Paste this snapshot of the whole design. Drag the layer to the top of the layer stack. Go to Filter > Other > High Pass.

Enter 1px in the High Pass options, then change the blending mode to Overlay. This finishing touch sharpens the details of the fur to enhance the clarity of the texture.

The final result is a cute furry text effect with a realistic appearance. The photograph of actual animal fur provides the base for the realism, then the custom brush helps fix the hard edges of the type by adding lots of individual hairs to give the wording a fuzzy appearance. A couple of finishing touches then enhance the effect to help lift it from the screen. Have fun using this text effect to create all kinds of safari themed artwork using source photographs from a variety of furry animals!
Download this file