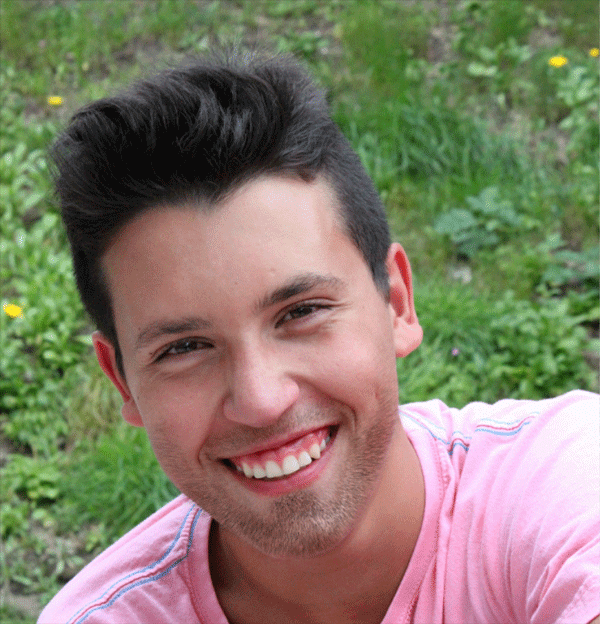
In this Photoshop tutorial we will learn how to add stubble to a face using nothing but Photoshop tools and filters.
Final Image
Tutorial Details
- Program: Photoshop CS4 +
- Estimated Completion Time: 15 minutes
- Difficulty: Beginner
Resources
Step 1
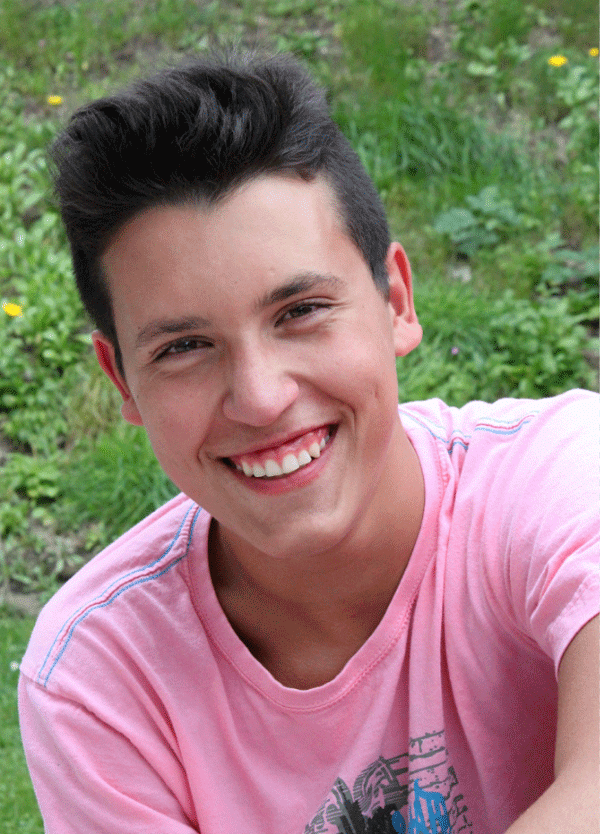
Open the image “Boy”.
Step 2
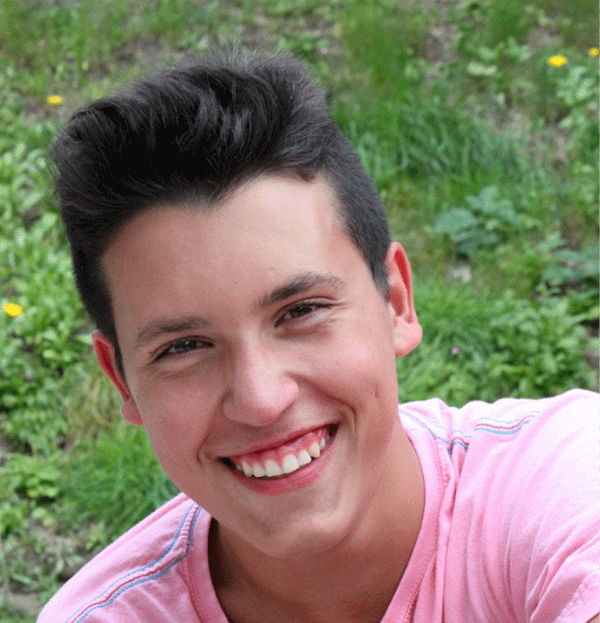
Select the Crop tool (C) and crop the image as shown below.
Step 3
Create a new layer (Ctrl + Shit + Alt + N) and fill it with black ( press D to set default colors and press Alt + backspace to fill with foreground color).

Step 4
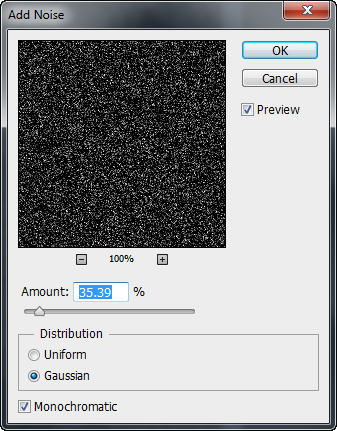
Add some noise by going to Filter > Noise > Add Noise.
Step 5
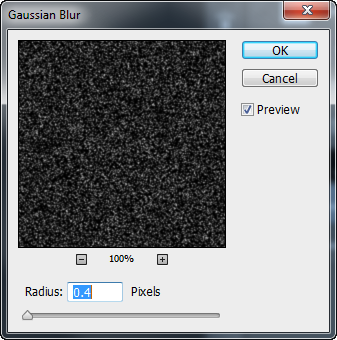
Now add 0.4 Gaussian Blur to the noise layer by going to Filter > Blur > Gaussian Blur.
Step 6
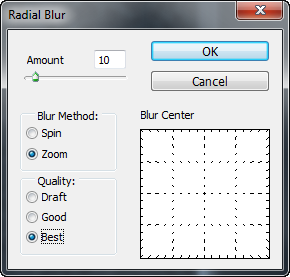
Let’s apply some radial blur to the noise layer. Go to Filter > Blur > Radial Blur and apply 10 Zoom blur.
Step 7
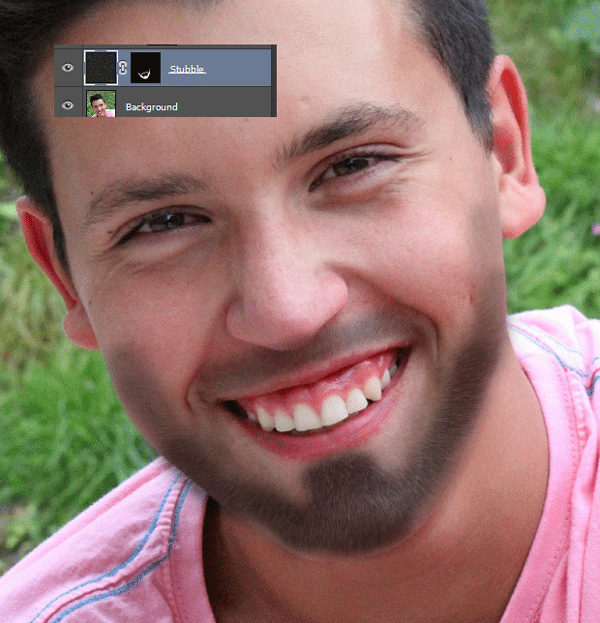
Add a layer mask to the noise layer (Layer > Layer Mask > Hide All). Choose a soft white brush and in the layer mask paint over the areas of the face where you want the stubble to show.
Step 8
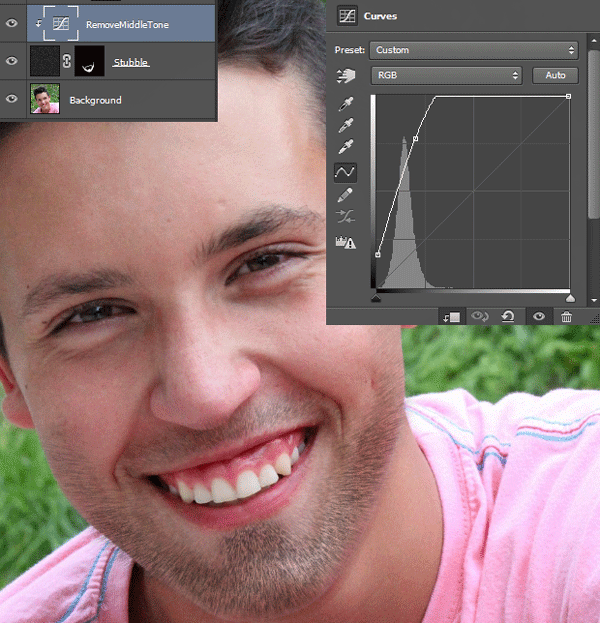
Create a Curves Adjustment layer (Layer > New Adjustment Layer > Curves) with the settings shown below in order to get rid of the middle tones of the noise layer. Clip the curves layer to the noise layer (simply hold Alt and click between the two layers).
Step 9
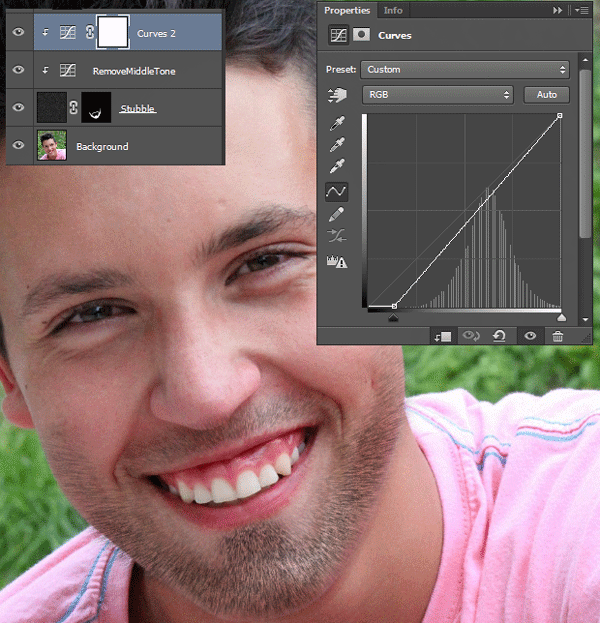
Create another Curves Adjustment layer and clip it to the previous Curves Adjustment layer. Use the settings shown below to increase the contrast of the stubble.
Step 10
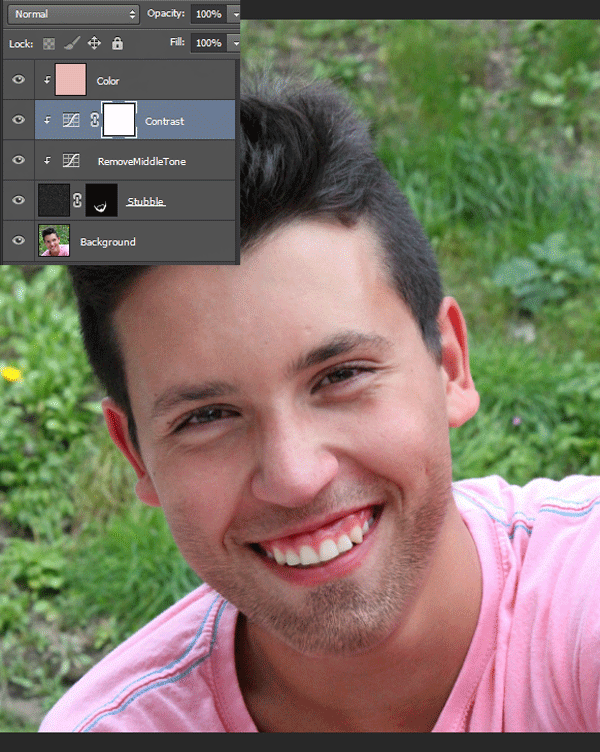
Sample a color from the face of the boy (#a86b63) by having the Brush tool selected and Alt-clicking somewhere on the image.
Create a new layer and press Alt+ backspace to fill the layer with that color. Now clip this layer to the two curves layers below and change the blending mode to Soft Light.
And We’re Done!
And we finished our tutorial. I hope you enjoyed it and learned some useful tips and tricks.
