In this article, I’ll highlight seven composition techniques for landscape photography and how to use them to improve your photos.
When I tell people I am a professional photographer, they often ask me how to take better photos. I like to start that discussion with concepts that don’t require fancy equipment.
Usually, I encourage people to first think about their subject. Then, move on to highlighting the subject with the composition.
So let’s take a deeper look at that.
Composition Techniques for Landscape Photography
Photography, like all art forms, has certain basic concepts that are easy to learn yet take time to master.
The good news is that some of the fastest improvements can be made shooting in, GASP, automatic mode.
This is because the basic concepts apply to how we see the world and how others see our photographs.
One of these building blocks to better photography is how you compose your scene.
Without any more delay let’s learn about different compositions.
Composition Technique #1 – the Rule of Thirds
The first technique is the rule of thirds.
If you are a beginning photographer you’ve probably heard others talk about this concept.
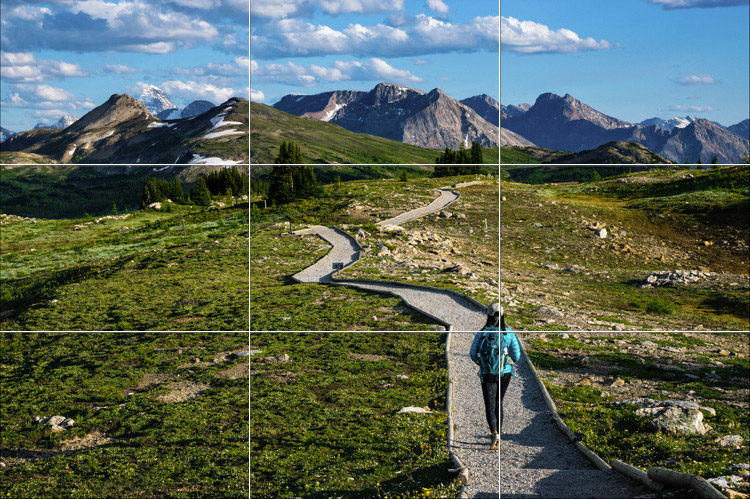
The rule of thirds means to break a scene into a three-by-three grid. Think of looking at your scene while holding a tic-tac-toe board in front of you.
This is perhaps the easiest composition theory to implement because most cameras have a grid or overlay (see below) built into their displays.
Digital viewfinders, like your phone or Live View, may require you to turn on the feature, but it is there.
Composition Tips to get you started
- Position your subject at or near when two of the lines intersect lines of the grid (as you see above with the hiker).
- Position the horizon on one of the grid lines (whether shooting portrait or landscape mode).
- If the sky is more interesting than your foreground, compose your photo to include 2/3 of the frame above the horizon and 1/3 below. Then do the opposite if you have a more interesting foreground (2/3 below the horizon, 1/3 above).
- The rule of thirds applies to both portrait (vertical) and landscape (horizontal) compositions.
RULES WERE MEANT TO BE BROKEN!
Get comfortable with the technique then break the rule to see what you can create.
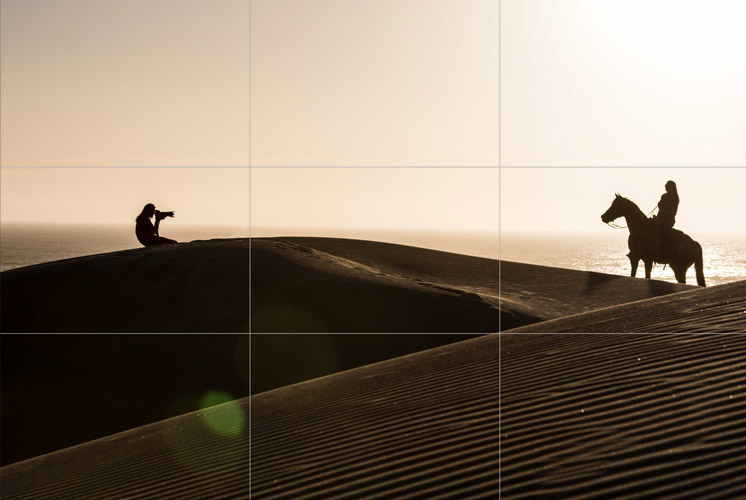
Here is my example of breaking the rule.
In this composition, the photographer on the left has positioned himself to photograph the horse and rider as they crest the sand dune. In this scene, there are two subjects, which means I should have put them each at an intersection.
However, if I had followed the rule, then the overall composition wouldn’t have matched how I wanted to share this moment.
So, I chose to put them both in their own squares with an equal amount of land and sky above and below.
Composition Technique #2 – Leading Lines

The idea with leading lines is that you capture a pair of lines that eventually converge somewhere in your frame. Usually, they converge in a direction that leads the viewer to your subject.
Think of the long, lonely highway photos that stretch on toward the horizon.
They appear to converge in the distance, drawing your eyes into the image. This gives a sense of motion to the photo.

However, leading lines don’t have to be straight.
Nature creates some pretty amazing leading lines that meander throughout the landscape (like in the image above).
Technique #3 – Natural Framing
When you walk into your home there is probably at least one framed photograph hanging on a wall. As you think about the art on your wall what do you see? A picture, maybe with a white border, and a frame?
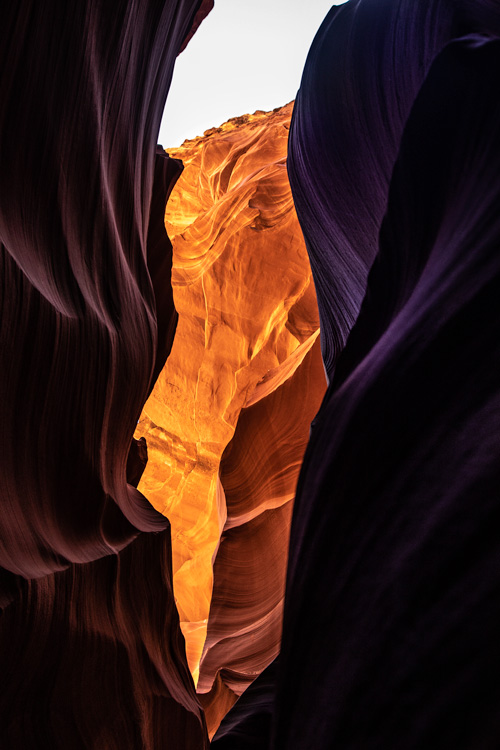
Now, with that image in mind, consider how you can add a frame into your photos using elements in the wild.
Think of it as looking through one element at another.
The thing INSIDE the frame is your subject, that is key. Make sure you have something inside the frame, not just a frame.
I’ve included a couple of examples of the technique. The first is from a slot canyon in Arizona (above). The second, from a roadside stop in Canada.
Can you see the way I used elements in the scene to frame the rest of the image?
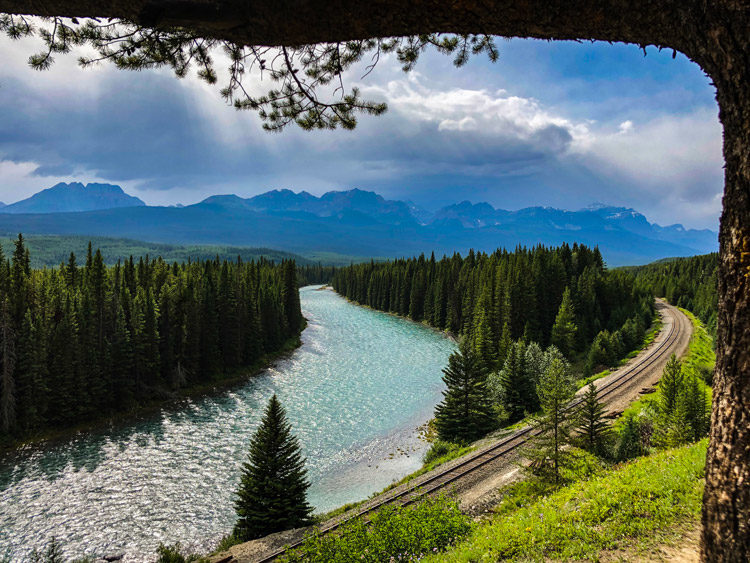
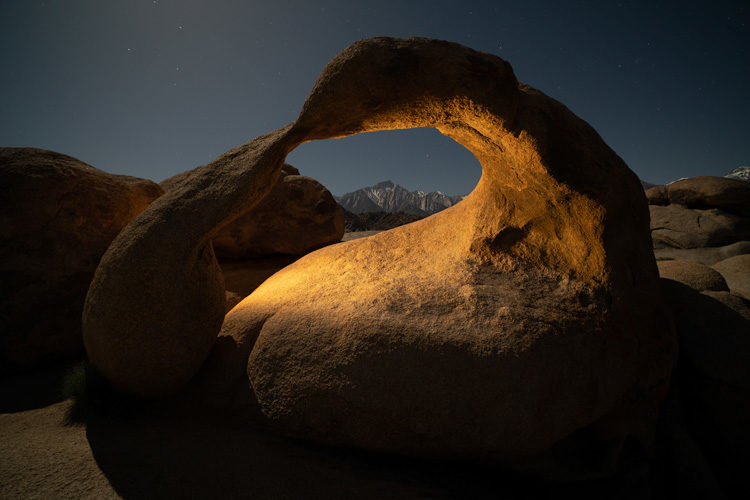
I don’t use this compositional technique all the time, but it can be used to create unique views.
Technique #4 – Foreground Elements
[INSERT FOREGROUND BANFF FLOWER]
Another photographic composition technique is to include a portion of the foreground in your photo. In the two included photos I used this technique in different ways.
While traveling through the Banff area in Canada, I stopped to photograph a well-known lake. After taking a few photos from a common viewpoint, I started looking around for ways to capture the scene differently.

In this case, rather than make the lake the subject of the photo, I chose to focus on the flower in the foreground (see above). Leaving the lake and mountains in the background provides the viewer with some reference.
The second photo is of a lake in New Zealand.
I spent nearly an hour photographing along the bank of the lake. Most of my compositions included just the lake, distant mountains, and the sky.
The brilliant blue of the lake is interesting, but it didn’t feel like a strong composition. I was sandwiching the mountains between two really strong areas of blue. That’s not the most interesting combination.

So, when I started back toward the car, I turned around to look at the grasses on the hillside above the lake. The warm, yellow colors of the grass provided what I felt was the missing piece of the composition.
Including the grasses, trees and rocks of the hillside helped to balance the cool colors of the lake and the sky (image above).
Technique #5 – Reflections
In landscape photography, reflections can be hard to come by, but they do make for interesting compositions. What are some places that you think of while you are out on the trail that could provide reflections?
If you said water, you are correct. However, are there any other reflective surfaces you can use? The answer is, it depends. But if you do a little observing you’ll likely find one or two.
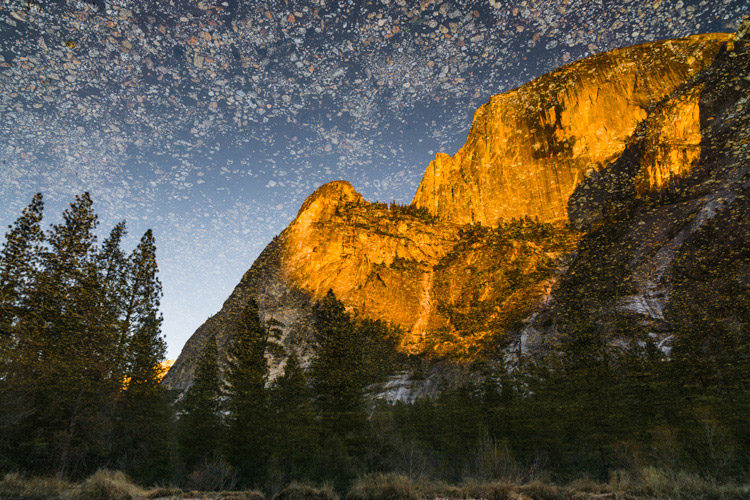
One of my favorite ways to use reflections when I’m out on the trail with friends is to capture the landscape reflected in their sunglasses. In the photo below, you can see the rocky portion of Mt. Kilimanjaro showing through the clouds.
To me, this is a fun way to share the behind the scenes action of my travel adventures.

Technique #6 – Negative space
Another theory of photography composition is negative space. This concept is often used in portrait photography but can be useful for landscapes as well.
Really, this is a just fancy way of saying part of your image contains nothing but empty space. If you are looking to create a sense of isolation or loneliness in your photograph, negative space is a great way to achieve that.
This technique usually works best if you place your subject on either the left or right side of your frame, leaving the rest devoid of anything but color.

Technique #7 – Unexpected Viewpoints
This is when you let your hair down, so to speak. You’ve practiced the photo composition theories above and feel pretty comfortable with them. Now, it’s time to break the rules.
Creativity is not bound by a few rules of how to do things, the possibilities are limitless. That’s what makes art, in general, and photography, in particular, so exciting.
Equipped with some of the theories on composition, go ahead and experiment.
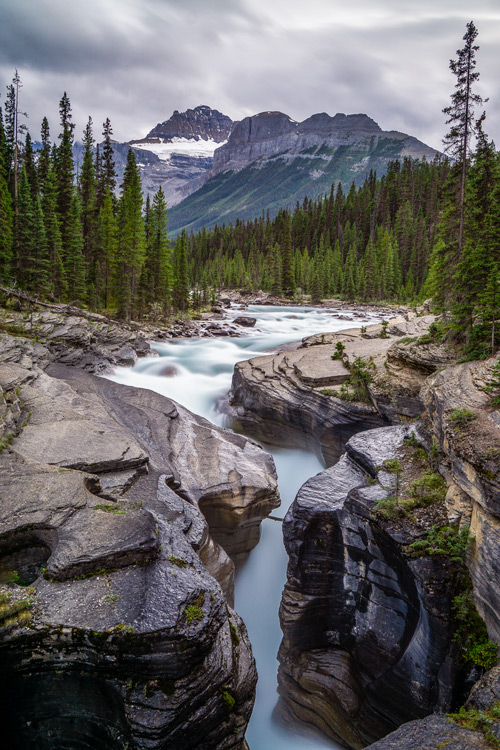
Take a picture of a flower from the ground up so you can expose the underside that we rarely stop to appreciate. Or, if you are visiting an oft-photographed location with towering mountains overlooking a river, follow the water into a slot canyon to capture a different perspective.

Until next time
I hope you enjoyed these photography tips and stories. Please let me know in the comments below if you found this information helpful.
Also, I’d love to see some examples of work that you created as a result of this article, so please share. Take care and see you on the trail.
