Hey everyone. Matt Kloskowski here from Kelby Media Group. First off, thanks so much to everyone over at 500px for giving me the platform of their blog today. What I’m writing about here (long exposure photograph) is actually something that 500px’s photos inspired me to do a couple of years ago.
How The Camera Sees Things
See, we probably all know that our camera doesn’t see things the way we see it right? Shadows, highlights, etc… Well another way the camera sees differently is motion. Given enough light and the right conditions your camera will freeze motion. Sometimes, like in the case of a sports photo, that’s exactly what we want. But other times, say when photographing water, that may not be what we want because we want to show motion. We don’t see water frozen in time, but rather it’s always moving.
Enter Long Exposure Photography
For me, a couple years ago I noticed a surge in the posting of long exposure photos. People were putting 3, 6 or even 10-stop neutral density filters on their cameras to slow shutter speeds. The result was this beautiful long exposure photo where clouds, water and lights had a beautiful streaky motion-like feeling to them. Personally, I love photographing the water. Beaches, waterfalls, lakes, streams, you name it. But I’m not a huge fan of choppy water. I love reflections and smooth silky water. So for me, long exposure photography was the answer.
Adding Motion
I’m primarily a landscape photography. In most landscape photos everything is still right? One of the other things I love about landscapes and long exposure photography though is that you get to introduce motion into an otherwise static scene. Chances are, when you were taking that beautiful photo outdoors time wasn’t frozen. But our photos don’t typically show that. With long exposure photos though, you can incorporate striking sharp and crisp areas of landscapes with movement in water or clouds.
Here’s an example. I took this photo in Bandon, OR. When I saw all of the pilings and patterns along with the water I thought it would make a great scene. I put my camera on the tripod and set it to Aperture Priority mode and let the camera do the rest of the thinking. This is what I got after a 1/25 second exposure.
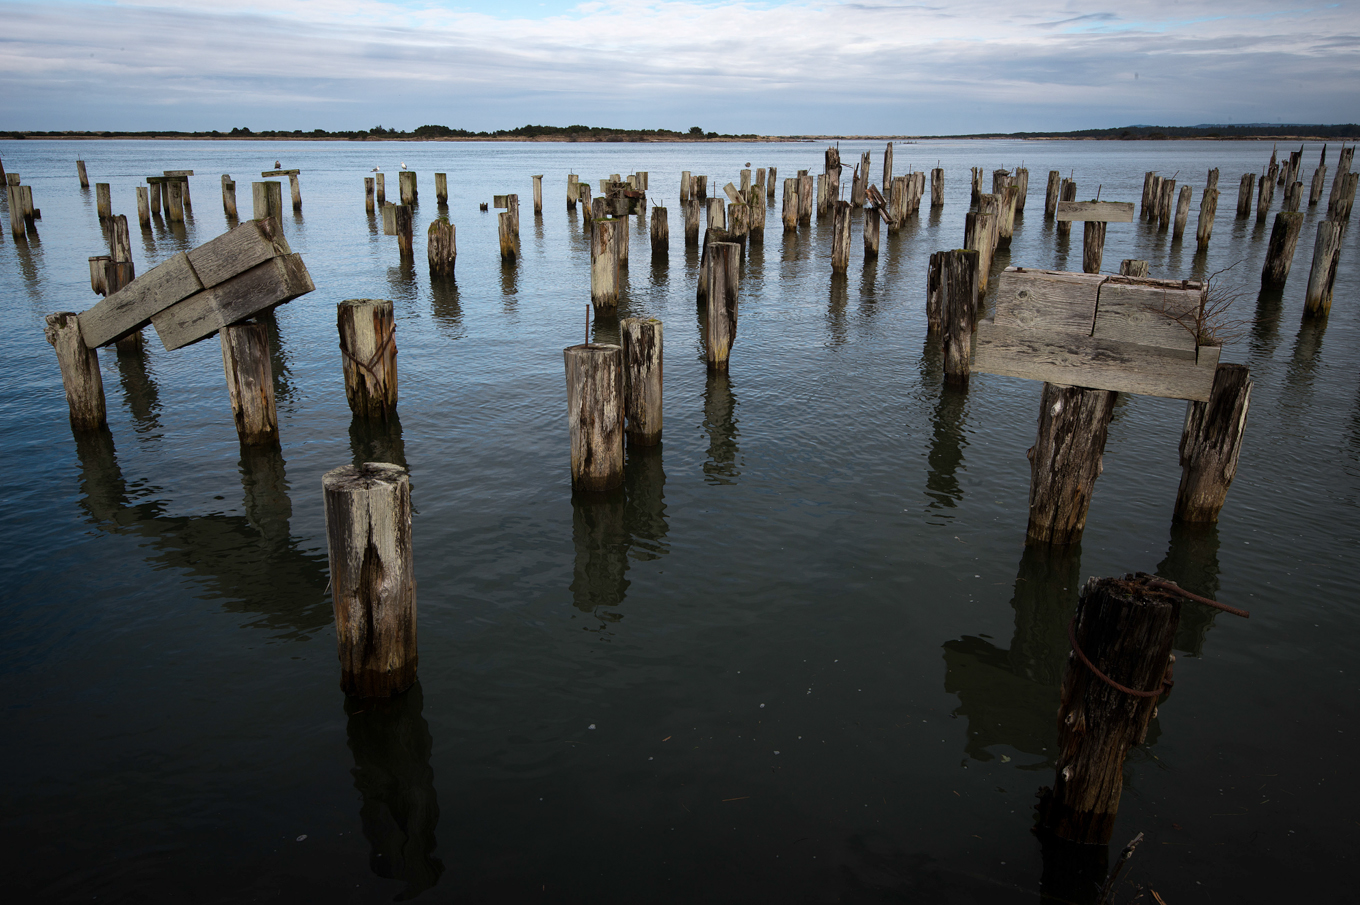
First, the choppy water is distracting. There are too many ripples, textures, and highlights that pull your attention away from the subject of the photo — the old decaying pilings. Plus, there’s junk in the water like sticks, leaves, and other little distractions that just make it not pleasing to look at.
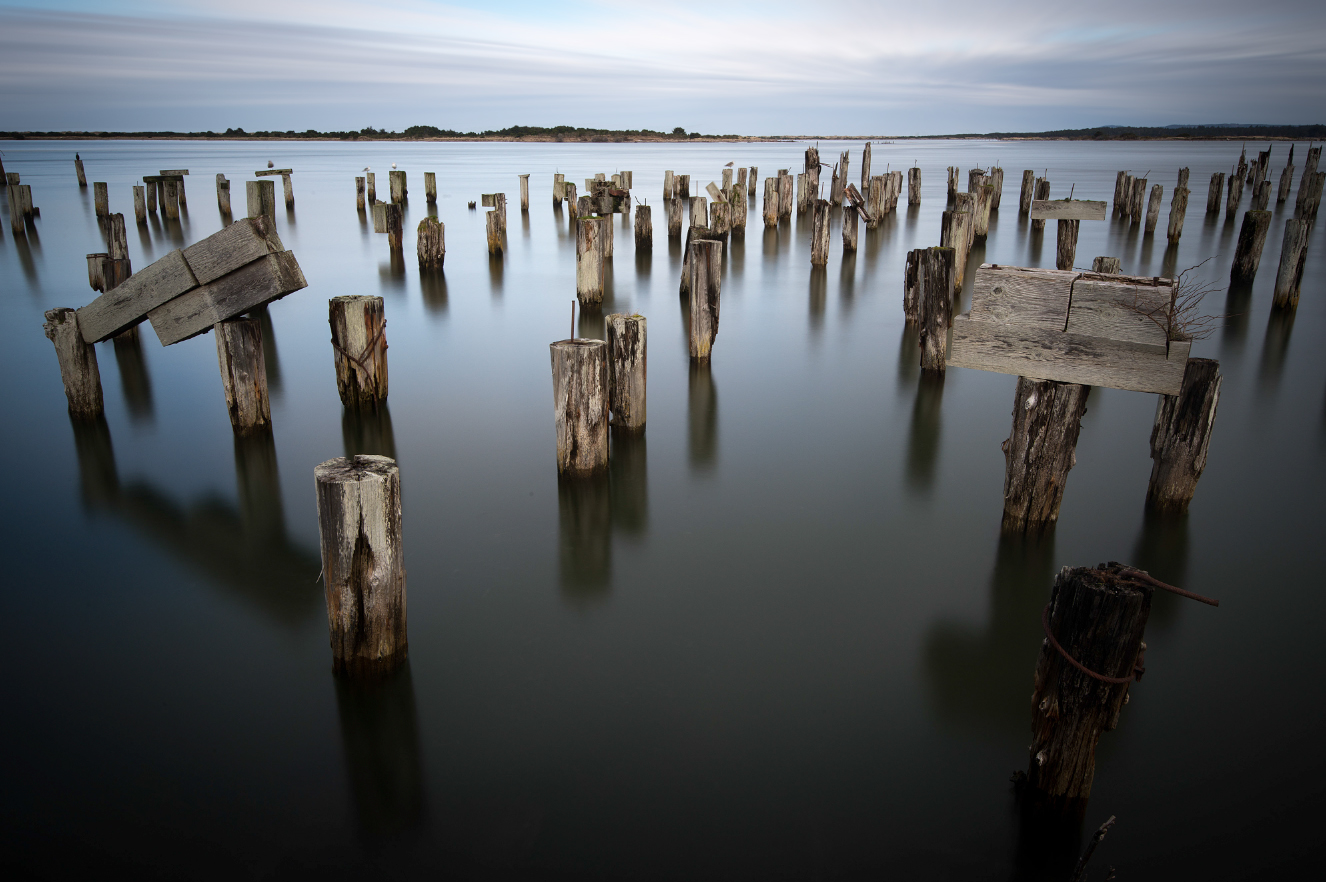
But after putting on my 10-stop neutral density filter (I use the Lee Big Stopper) and letting the shutter speed go to 30 seconds, this is the photo I got.
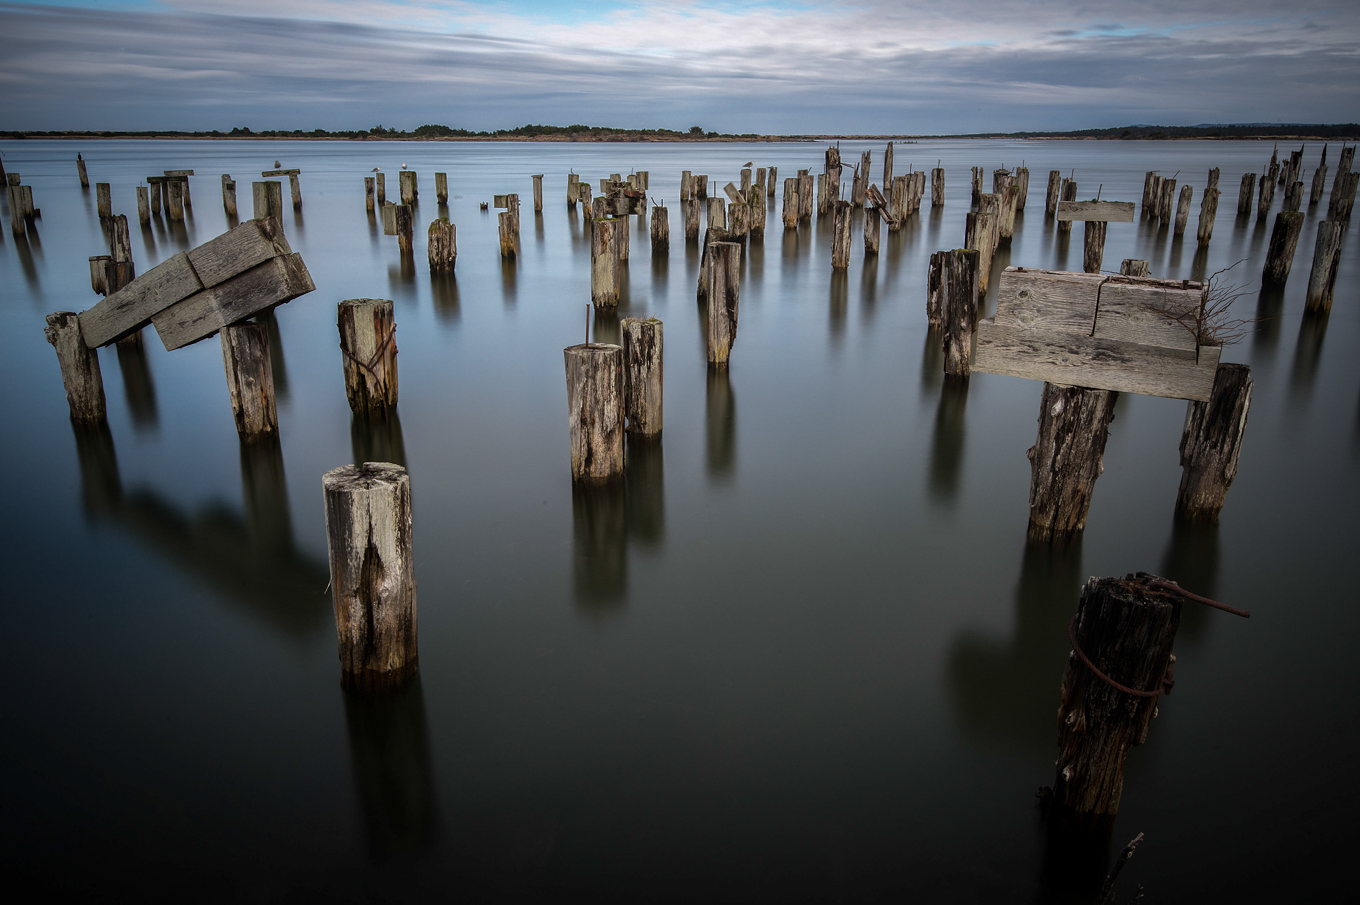
The ripples have smoothed out, we have some degree of reflections and there’s an overall peaceful feeling to the photo. The clouds even start to get a little streaky which makes makes the whole scene feel like it’s moving even though it’s not.
Enter Photoshop To Finish Things Off
As much as I like to get things right in camera, sometimes there’s things we simply can’t do. In my example above, the 10-stop ND filter did a great job of smoothing the water out. That’s something that would be nearly impossible to do in Photoshop. However, the clouds, while kinda streaky, still don’t have as much motion in them as I’d like.
We’ve all seen those beautiful clouds moving through the air and the feeling it gives us. 30 seconds just wasn’t long enough to capture the movement here though. That’s where I little bit of Photoshop work comes in.
First I opened the photo in Photoshop and made a selection of the sky using the Quick Selection Tool.
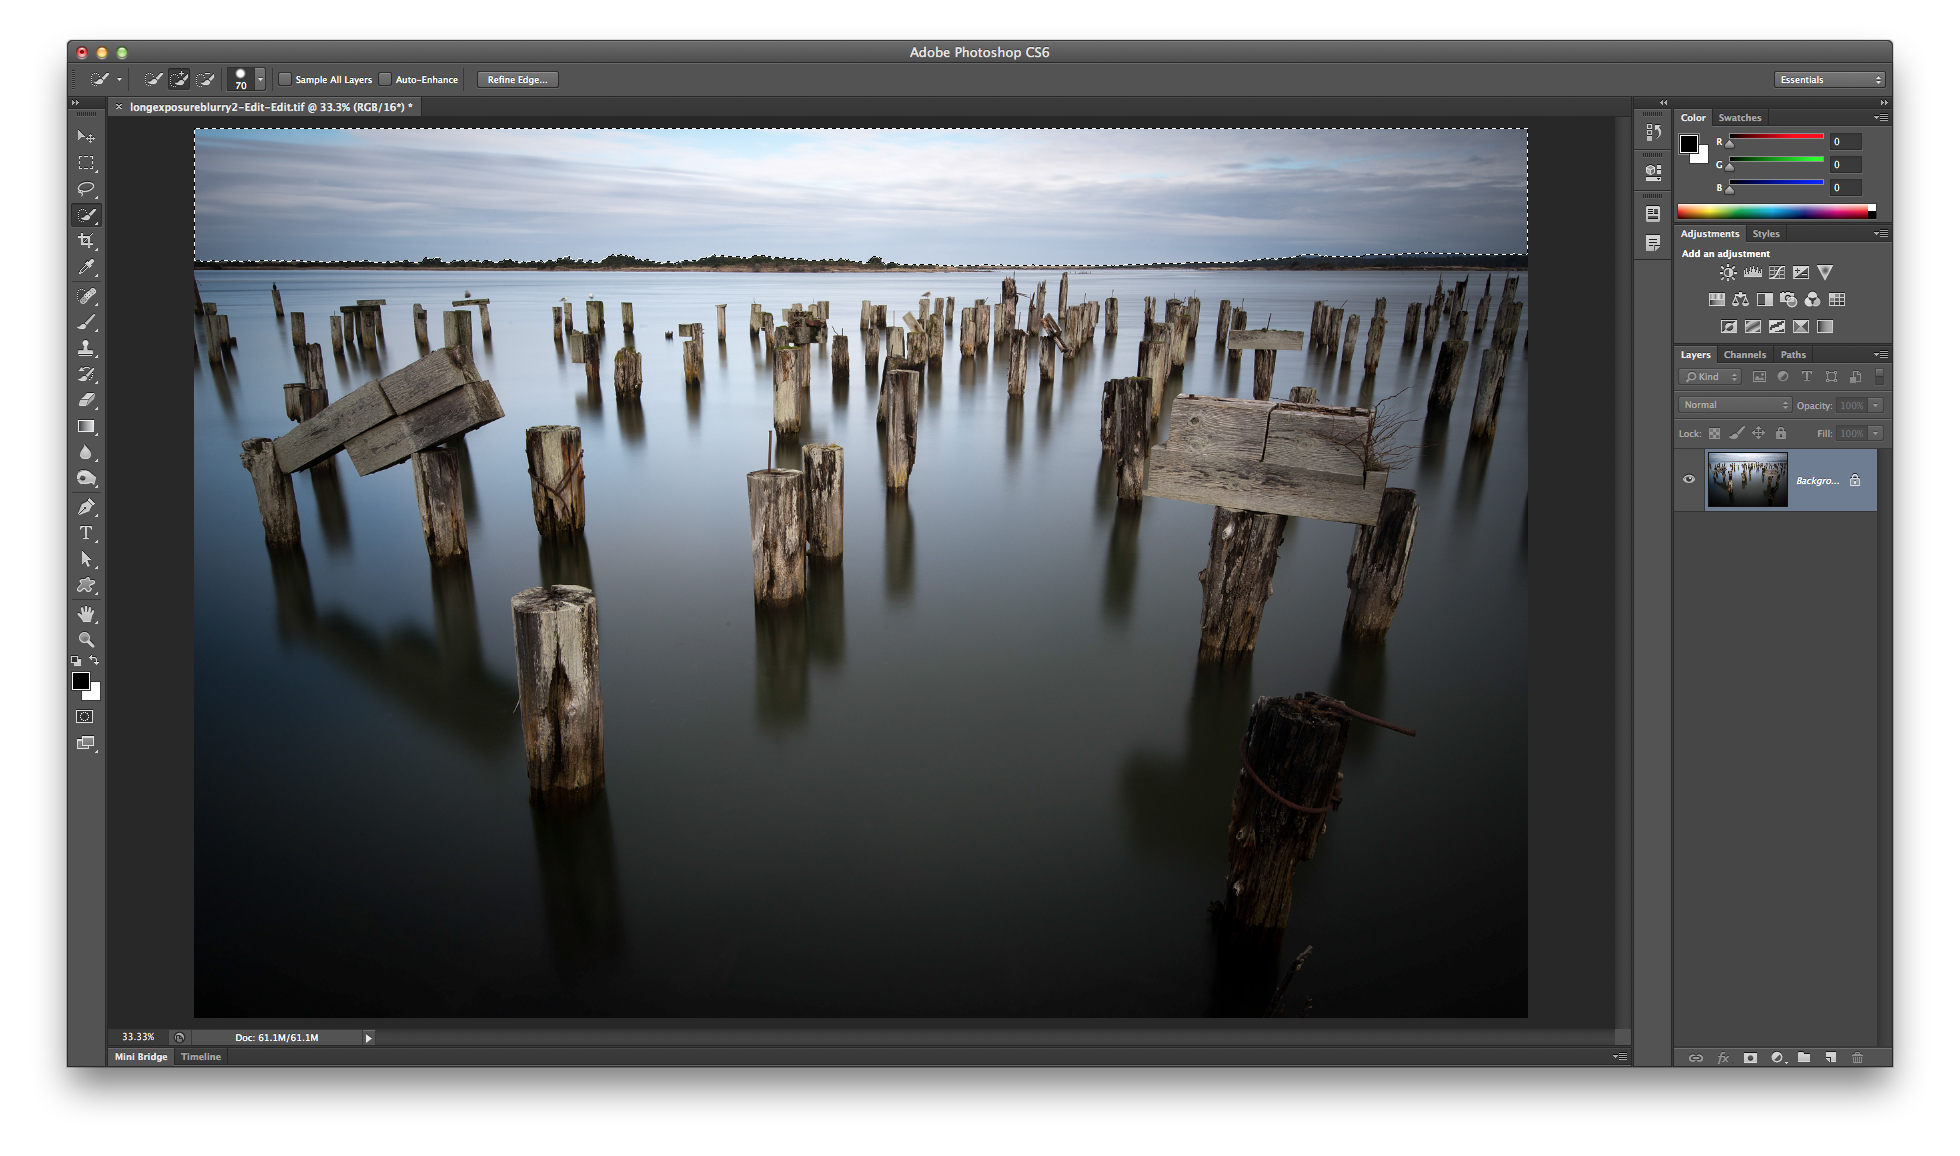
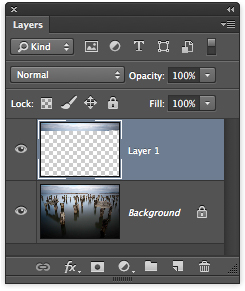
Then I pressed Cmd-J (PC: Ctrl-J) to duplicate that area of the sky on to it’s own layer in the Layers panel and Cmd-clicked (PC: Ctrl-clicked) to put a selection around the same sky area again.
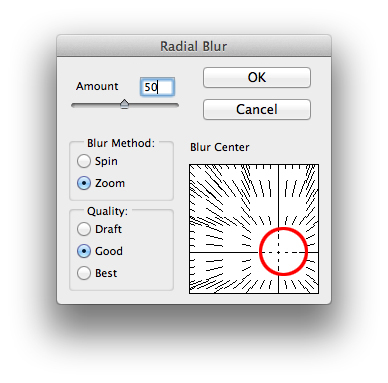
Next, I went to Filter > Blur > Radial Blur. I changed the Blur method to Zoom and increased the Amount to 50 percent.
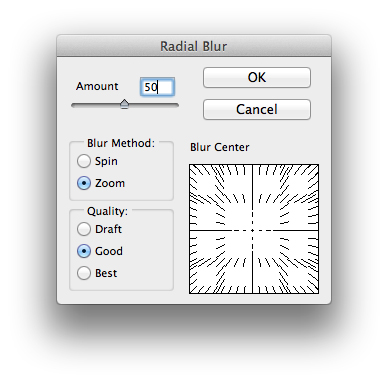
Lastly, I dragged the area in the Blur Center part of the dialog downward so the clouds would look like they were coming at us across the sky.
The result is that streaky effect we get in clouds when we leave the shutter open long enough to capture their movement. To me, it was a great finishing effect on the photo and it gave the photo the feeling I had when I was there creating it.
Thanks
I hope this sparks a few ideas for you when it comes to your photography. Long exposure photos have really become very popular lately. And with digital, we can see the results of experimenting with longer or shorter exposures right on the back of the camera.
And you don’t even need to go as far as a 10 stop ND filter. Give it a try with 3 or 6 stop filters as well. As an outdoor shooter, I think it offers you a whole new area of creativity, because we’re typically so used to shooting static scenes with no movement. For me, long exposures bring the best of both worlds together.
Take care everyone. Thanks for stopping by and if you’d like to read more feel free to follow me over on my blog at www.mattk.com. For more 500px tutorials check out Dreamy Great Gatsby Portraits.