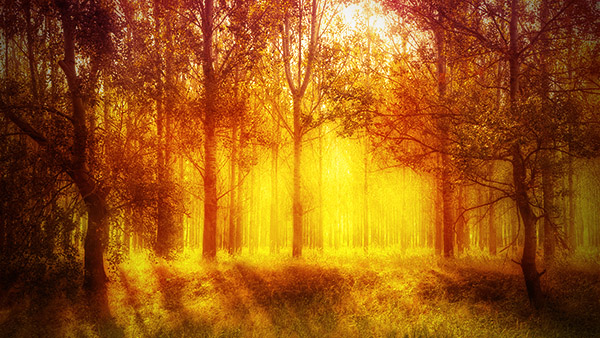
In this Photoshop tutorial we will add a warm atmospheric effect to a forest image.
We will use mainly Photoshop native filters in a way that is easy enough for beginners to follow.
Final Image
As always, this is the final image that we’ll be creating:

Tutorial Details
- Program: Adobe Photoshop CS3
- Estimated Completion Time: 30 minutes
- Difficulty: Beginner-Intermediate
Resources
Step 1
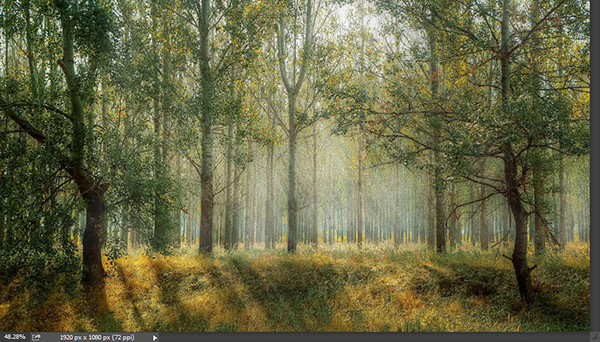
Open the file “Forest”. We will add a nice and warm atmosphere effect to this photo in the next steps.
Step 2
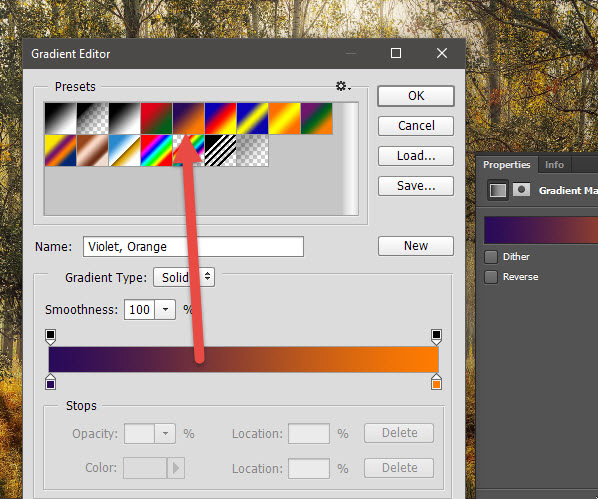
First let’s improve the overall tones a bit. Create a new Gradient Map Adjustment Layer (Layer > New Adjustment Layer > Gradient Map) and use the settings shown below.
Change the blending mode of this layer to Soft Light and lower the opacity to 63% – you should notice a very slight increase in contrast a pleasant warm effect creeping in.
Adjustment layers are the preferred way of modifying and adjusting our images. The reason for this is that unlike their older counterparts (Image > Adjustments >…) which change the pixel information of a certain layer for good, Adjustment Layers can be added, removed and edited without any actual loss of pixel information. They just sit there and apply their effect to all the layers below.
Step 3
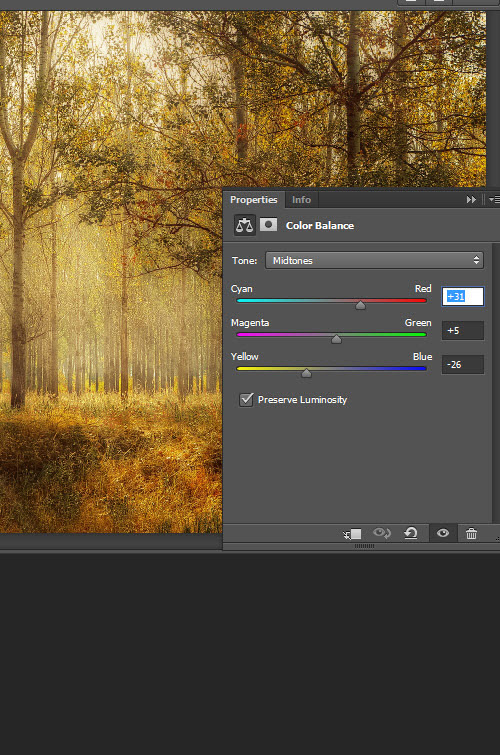
Now let’s unify the colors a bit. Why unify them? Because when using certain Adjustment Layers a certain disparity in colors across the image occurs which can lead to undesired effects. We can correct that by unifying the colors.
Create a new Color Balance Adjustment Layer (Layer > New Adjustment Layer > Color Balance) and use the settings shown below not only to bring some warmth to the scene but also to unify its colors.
Step 4
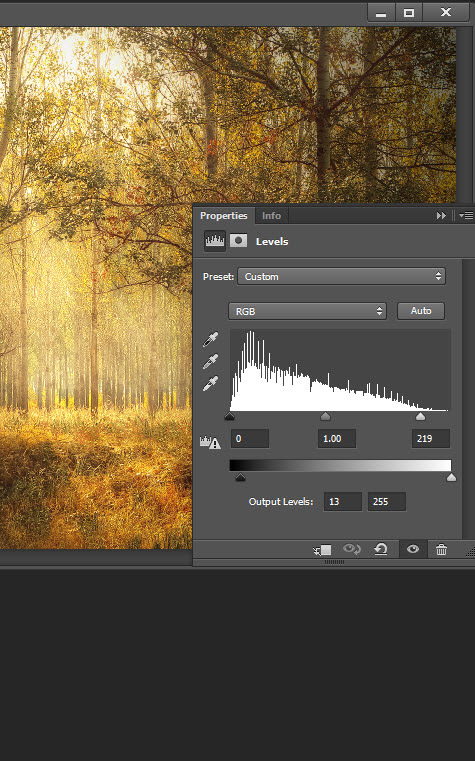
The image is a bit dark for my taste – let’s lighten it up a bit. The easiest way to do that is with a Levels Adjustment Layer. Create a Levels Adjustment Layer by going to Layer > New Adjustment Layer > Levels and use the settings shown below to bring up the light in our image.
Step 5
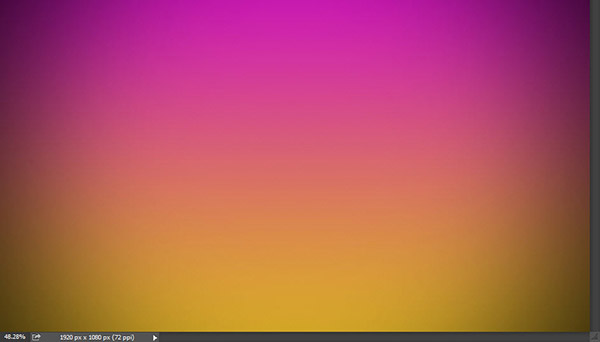
Now let’s add some color variety to our image. Create a new layer (Ctrl + Shift + Alt +N) and choose the Gradient Tool (G). Set the Foreground color to #c91cae and the background color to #d1a328. Use the Gradient tool to create a nice gradient from top to bottom as shown below. You can hold the Shift key while dragging with the gradient tool to restrict the movement to a 90 degree angle.
Step 6
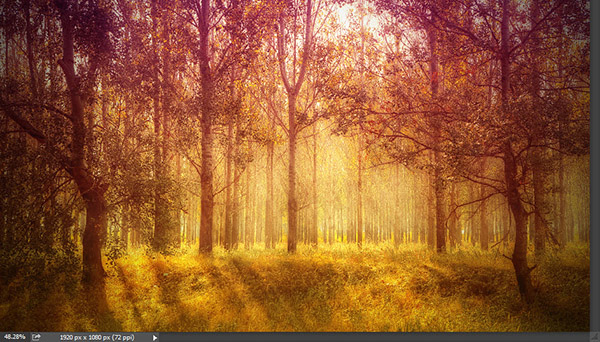
Change the blending mode of the gradient layer to Soft Light and you’ll see some nice vibrant colors popping in.
As you see, blending modes can be used to achieve a variety of interesting effects. A Gradient Map Adjustment layer set to Soft Light and various presets can change the colors in a drastic way. A Black&White Adjustment Layer set to Soft Light or Overlay will darken and increase the contrast in the image.
There’s no exact recipe for using blending modes – you’ll just have to experiment with them and see if you like the achieved effects.
Step 7
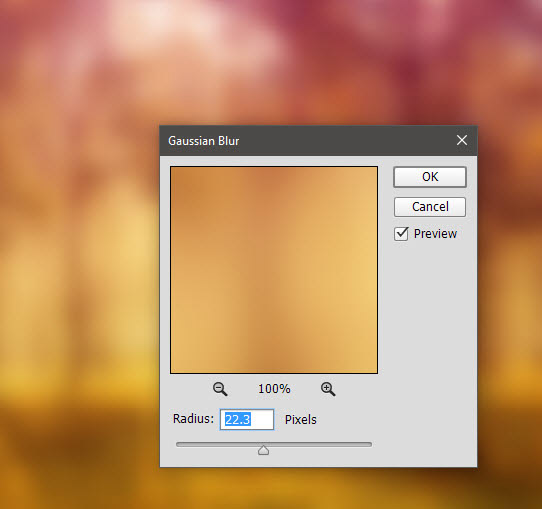
Create a new layer from all the visible layers by pressing Ctrl + Shift + Alt + E and apply a Gaussian Blur filter (Filter > Blur > Gaussian Blur) with the settings shown below. You’ll see that the image gets seriously blurred and not quite so good looking. But we’ll use this to our advantage with the help of blending modes in the next step.
Step 8
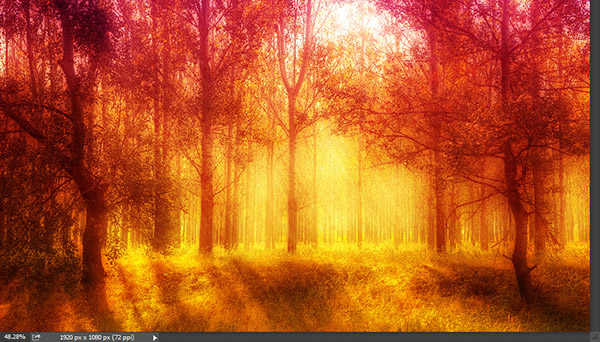
Change the blending mode of the blurred layer to Hard Light and suddenly you’ll see a boost in the colors’ intensity, an increase in contrast and some nice overall soft atmosphere.
This is a step that you can also use in all your image manipulations – especially if you want to achieve a soft, dreamy effect – this will work best with couple photos or people.
Step 9
The effect is nice but I think that in some areas it is way too strong – notice how the trees are so red that they look like they’re bleeding? We’ll want to hide some of this effect but in a way that it’s not permanent (so we can later edit or delete it).
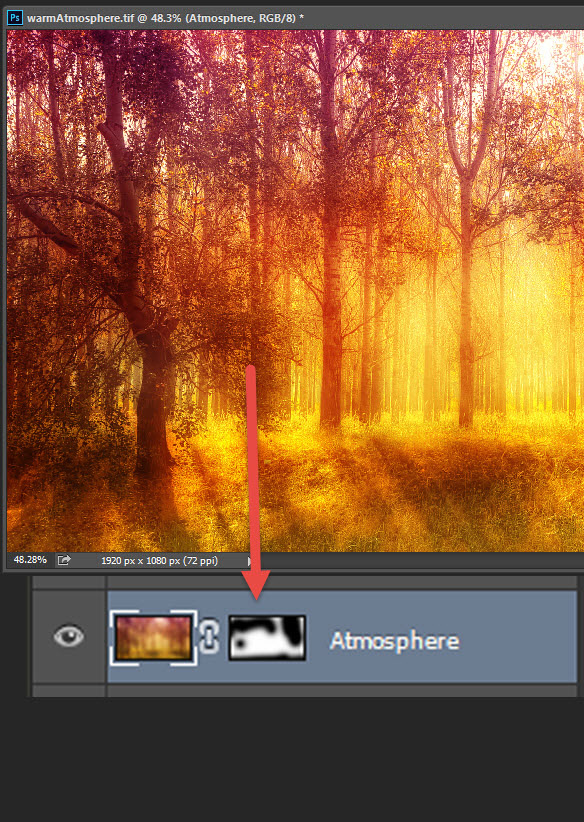
The way to do this is with the help of layer masks. Layer masks allow us to hide a section of the layer partially or completely. If you paint with black in a layer mask you will hide the painted area – if you paint with white you will reveal the painted area. This allows you to edit the layer mask as long as you want without worrying about deleting actual pixels.
Add a layer mask to the blurred layer (Layer > Layer Mask > Reveal All) and use the standard round soft brush (B) to paint with black over the areas where the effect is too strong. Just be careful to click on the layer mask to make it active (it’s the little white thumbnail next to the layer thumbnail in the layer palette) before painting.
Step 10
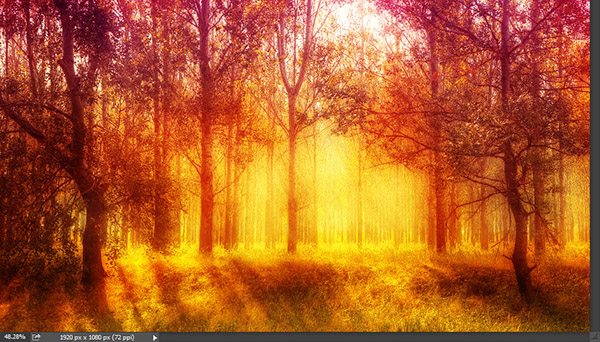
Now let’s add some more contrast. Create a new layer from all the visible layers and this time apply a 10px Gaussian Blur. Change the blending mode to Soft Light and lower the opacity to 46%.
Step 11
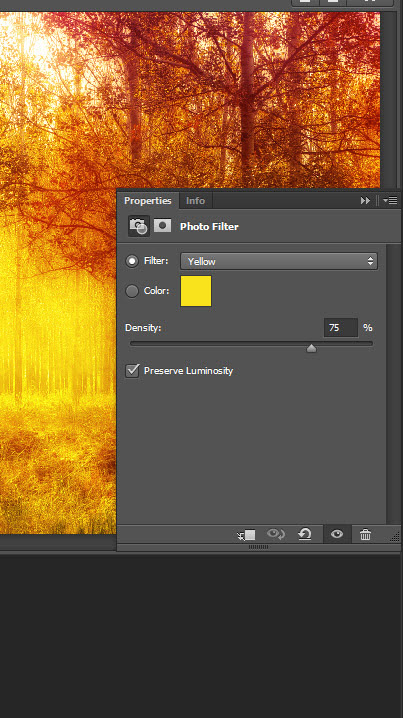
Let’s unify the colors again. Create a Photo Filter Adjustment Layer with the settings show below and you’ll see a nice yellow overall tone glowing in our image.
Step 12
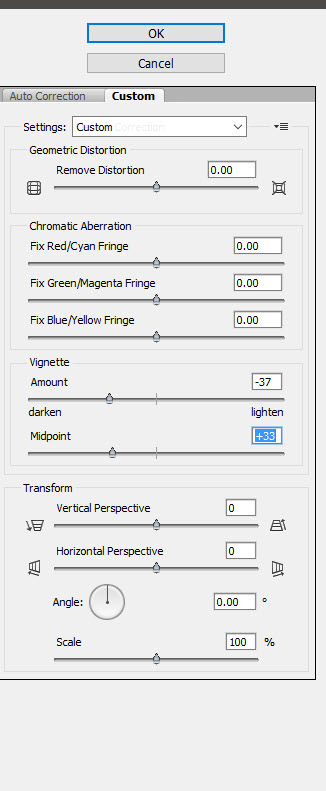
As a final step let’s add a vignette to put focus in the center of the image. Create a new layer (Ctrl + Shift + Alt + N) and fill it with white (Shift + F5). Go to Filter > Lens Correction and use the settings shown below to create a vignette. Click ok and change the blending mode of the vignette layer to Multiply in order to get rid of the white colors and keep the nice black vignette.
And We’re Done!
