Dina Belenko is a creative still-life photographer from Russia and incredibly successful 500px Prime photographer. Her artistic images capture magical stories behind everyday inanimate objects.
In this tutorial, Dina shows you how she shot her photo “kitchen mess” and discovered a really great way to capture beautiful powder clouds (no, she didn’t just throw the powder…). The good new is that it’s super easy! Read on, stay inspired, and enjoy.

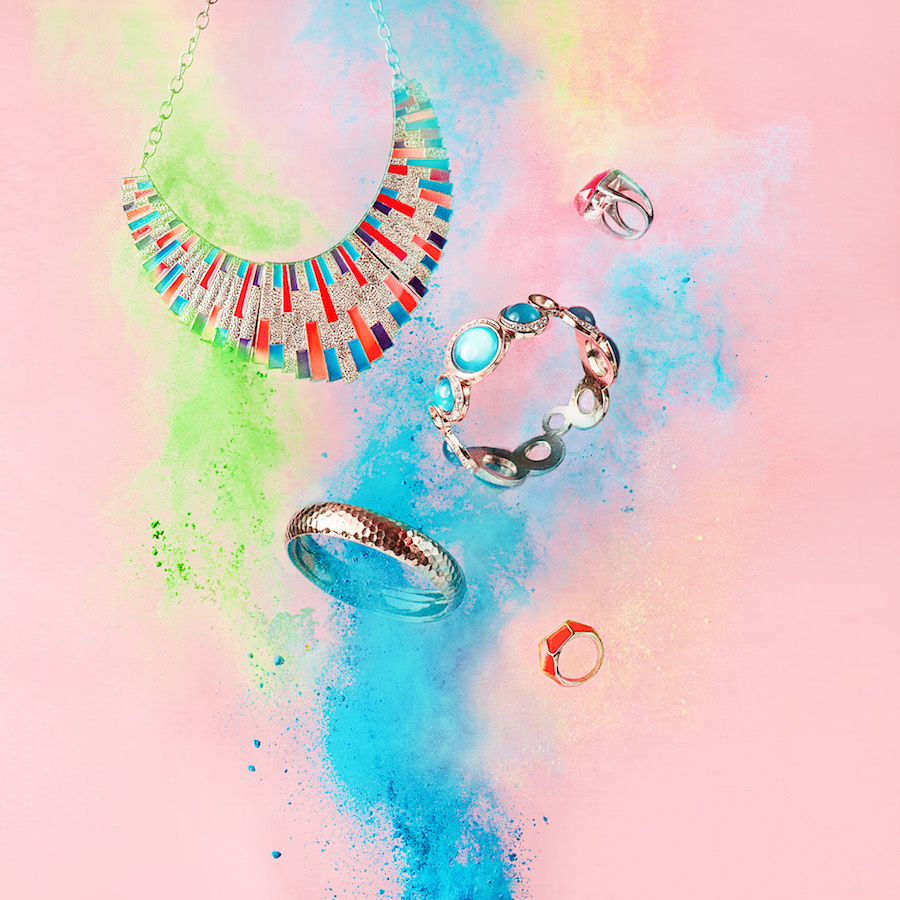
This year, I had the happy opportunity to see a Holi Festival of Colours in my own town. Explosions of powdered paint looked so bright and inspiring that I saved a couple of packages for my own still-life needs.
There’s just one problem: I found that simply throwing this coloured powder in the air is not a very smart way to take a picture—I could hardly control it, I often got my own hand in the frame, and it was impossible to make a beautiful cloud of colour. So I started to look for a more controllable way and found it in a shape of an old bicycle pump (I took it from unreachable shelf in the cellar and keep wandering where it came from, I haven’t ever even had a bicycle).
I took the two shots above using the pump and holi powder, but I didn’t took any backstage photos. So I decided to capture another picture using this same technique especially for this tutorial. Let’s see how it works step by step.
1. Sketch
First of all, let’s make a sketch with the approximate composition so we know what items we should prepare and how we’re going to arrange them.

2. Props
The most important items you’ll need are: a bicycle pump (1), silicone tubing (2), and a paper cone (3).
My pump is very old and not pretty at all, but it still works, so who cares how it looks! The silicone tubing was bought at the nearest pharmacy, and I created the paper cones myself using some thick paper… just make sure you don’t make them too wide.
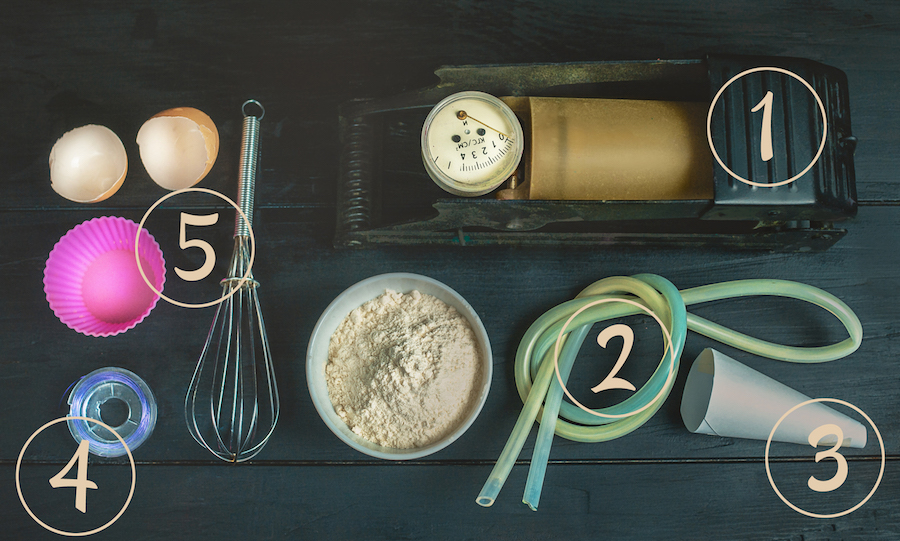
Another useful item is wire (4): it’s better than thread or even fishing line, because it’s much easier to mount and adjust. The other props (5) are the elements in our still life, including the flour we are going to use to make a cloud.
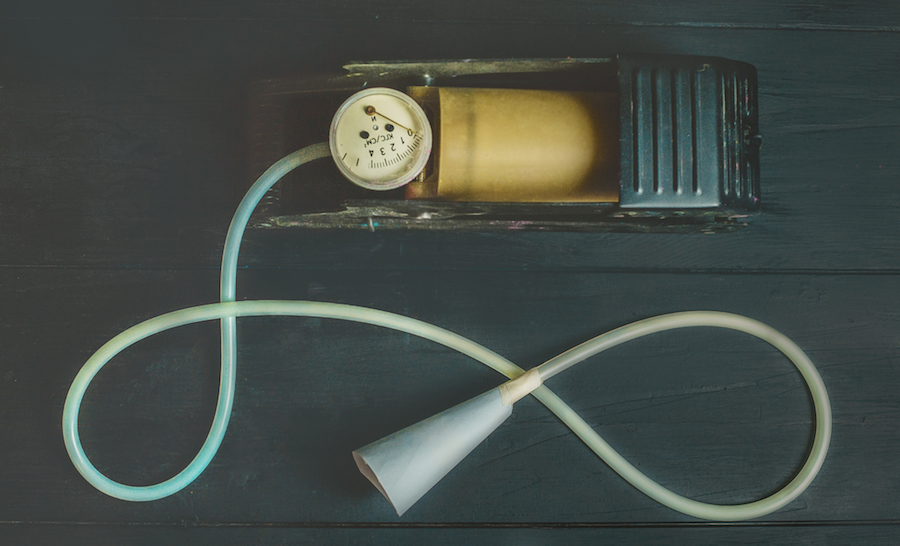
Attach the silicone tubing to the pump, add the paper cone to the other end, fill the cone with flour, and that’s it. We’re ready to shoot!
3. Test shot
Okay, it’s time to take a test shot to make sure everything is working properly. I put a flash on the left side (I used the same settings as for shooting splashes: 1/8 up to 1/128 power to provide a very short pulse that will freeze the motion, and set to RPT mode to get a few shots in a row) and the big reflector on the right.
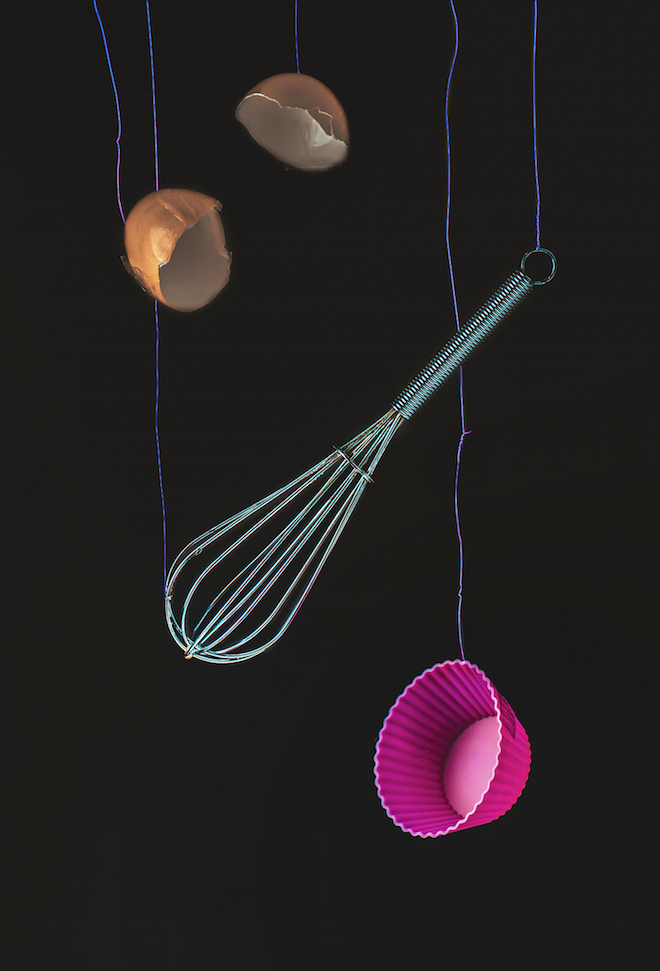
4. Composition
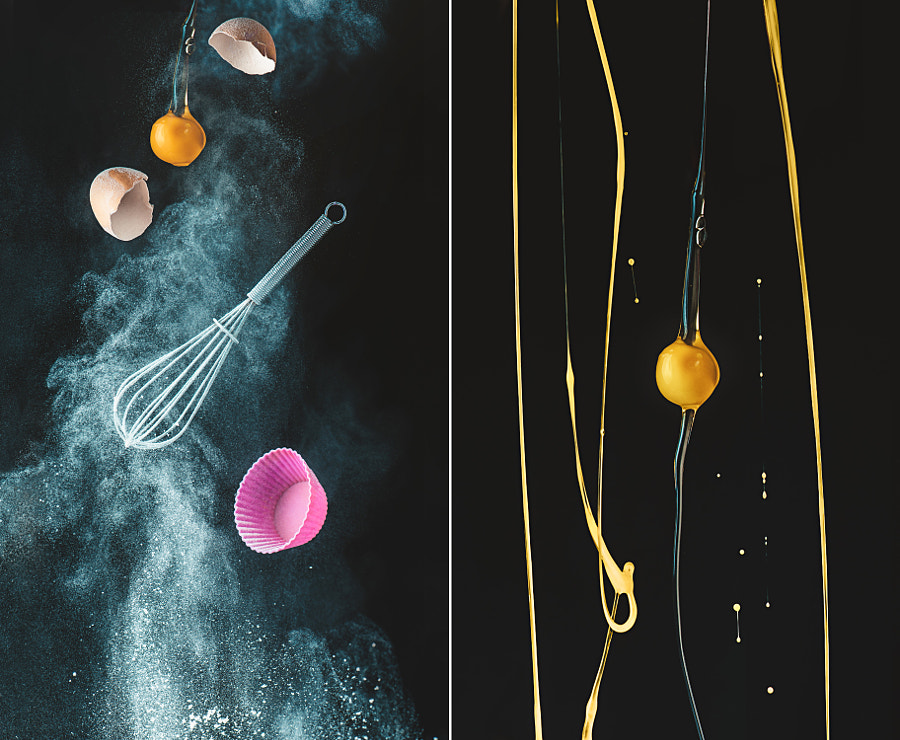
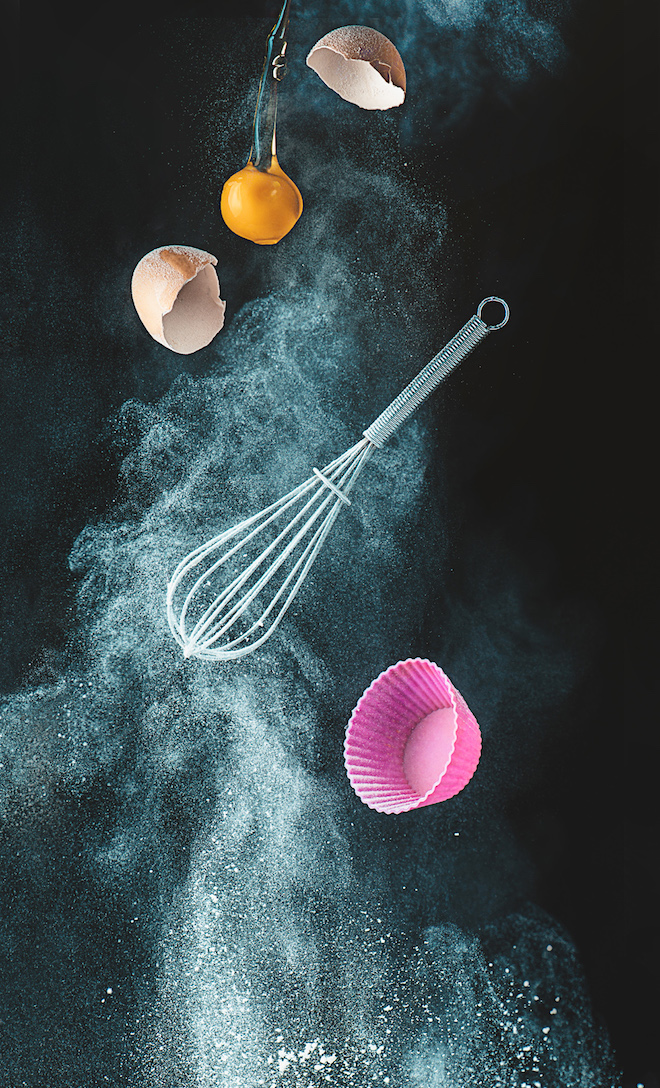
To make a whisk, muffin cup, and egg shells fly, I hung them on a wire. It is very thin, so it won’t be any trouble to remove it in post-processing later. Just make sure everything is steady and still.
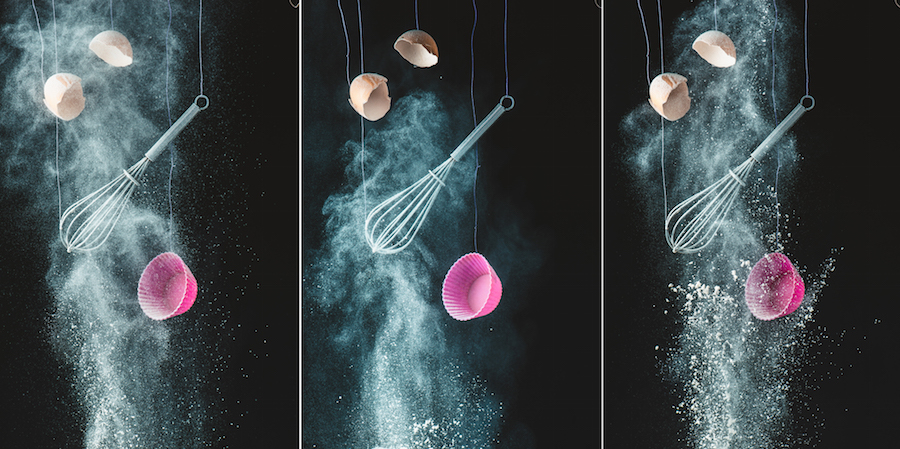
5.Shooting
Now, do you like your composition? Are you sure? I’m asking because I thought I was sure but in the end I had to rearrange it slightly during post-processing (and I would rather avoid that additional work).
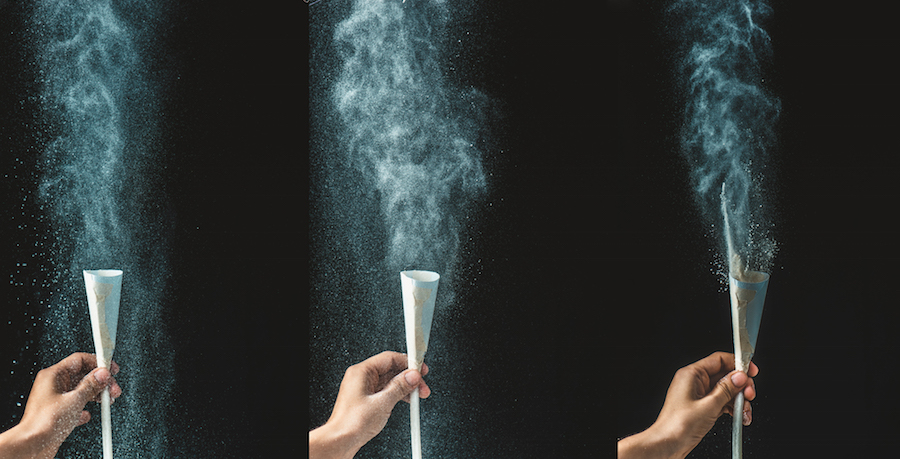
If you ARE happy with it, fill up the paper cone with flour, push the plunger, and take the picture! You can use remote control or ask the assistant to release shutter if that’s easiest.
This is my favourite part! Have fun ?
Since I planned to add a falling yolk to this picture, after I was done with the powder I dismantled all the stuff and shoot several yolks on the same background and with the same light.
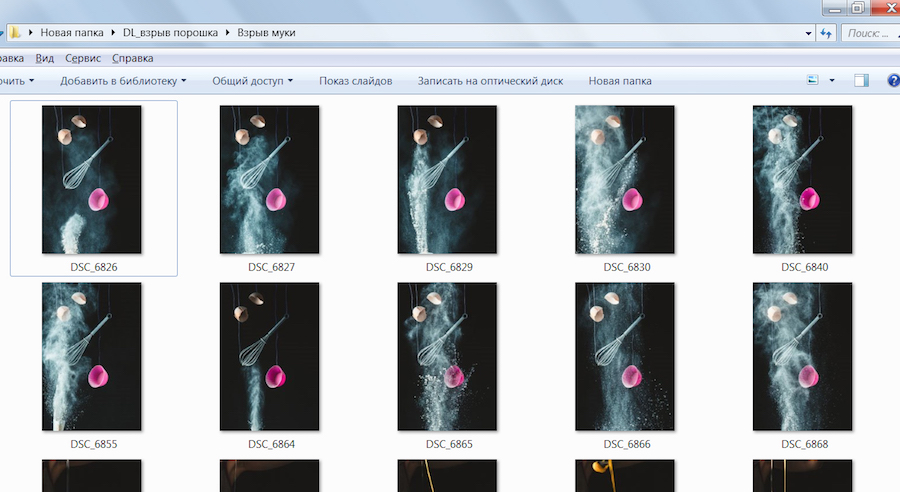
6. Post-processing
Now we can choose the most beautiful cloud and give the picture a little polish.
When I removed all wire I realized that I didn’t have enough space for the falling yolk, so I lifted the right egg shell a bit in order to add the yolk in the free space. I also added some more flour clouds, cropped the picture, and make a diptych with the shot with different takes of falling egg.
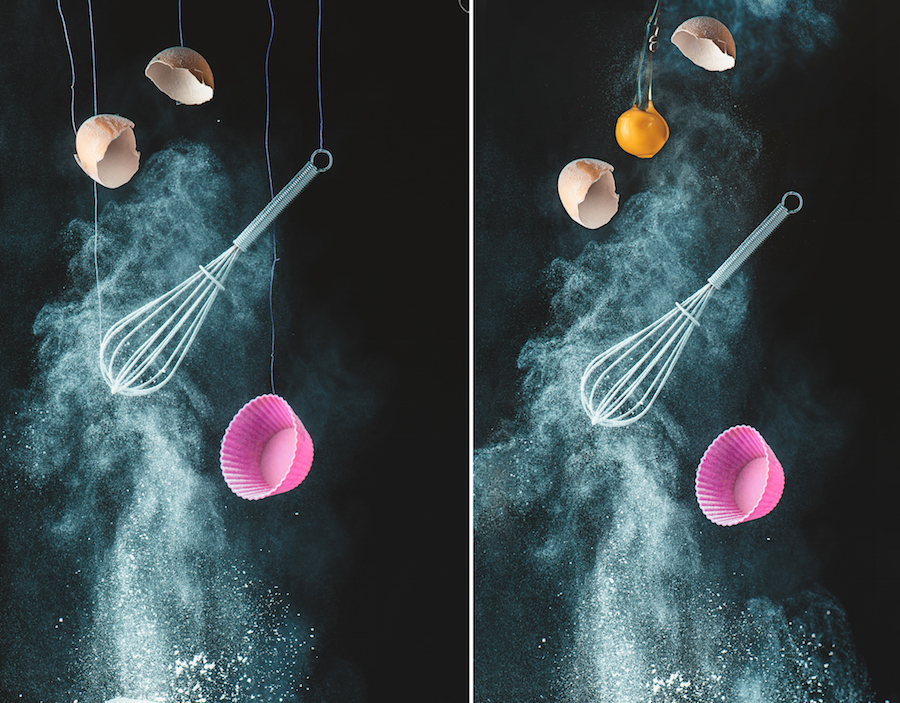
And that’s all! Here’s the final image:
I assume you can use this trick with any powder you can find: flour, holi powder, eyeshadow, spices, etc. Just keep it away from open fire (sprayed powder is extremely flammable) and have fun!
Stay inspired and good luck!