Felipe Buccianti is a freelance photographer and retoucher based in Atlanta, GA. A veteran of the advertising industry, he creates exceptionally polished and visually appealing imagery and infuses creativity and visual aesthetic into each and every project.
Whether working with natural light or creating ambience with studio lighting, his passion and attention to detail shows through a polished portfolio that is varied and distinct. He has worked with well-known and prestigious clients like NAPA Auto Parts, The Home Depot, Verizon Wireless, Atlanta Magazine, Wells Fargo and is a contributor for Getty Images stock photography.
You can see more of his work by following him on 500px, visiting his website, or giving him a like on Facebook.
https://500px.com/embed.js
Every year during Labor Day weekend, thousands of fans of comics, fantasy, and sci-fi swarm to Atlanta to attend DragonCon. It’s a huge event that rivals the likes of Comic-Con. To me, the most interesting part of the event are the cosplayers who spend months perfecting their costumes, often creating them from scratch.
Make it Happen
Creative and visually stunning projects won’t just fall into your lap. It’s important to look for opportunities to shoot personal projects to flex your creative muscles, get out of your comfort zone, and build a great portfolio. Clients need to see that you’ve done something before they will be confident enough to pay you for it.
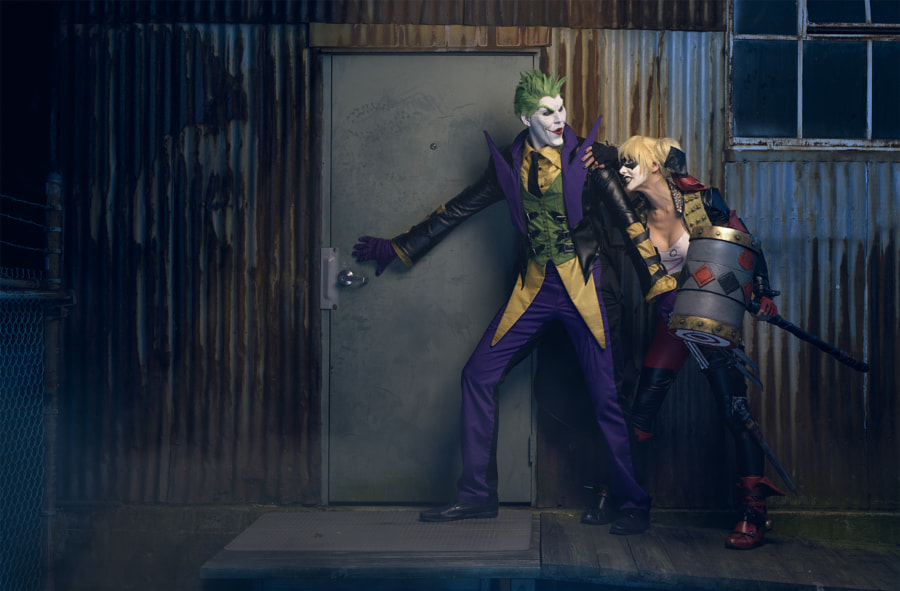
In this case, I wanted to shoot a model with an interesting costume in a setting that matched the character’s story, and make it feel cinematic.
I started following the big DragonCon pages on Facebook. That’s how I met Sarah, an artist that goes by the name Oonacat on her Facebook page. She posted progress photos of jackets for Harley Quinn and the Joker that looked amazingly close to the concept art from the game “Injustice: Gods Among Us.” I contacted her and found out that she was flying from Utah for the event and, after looking at my portfolio, she agreed to shoot with me.

Oonacat’s progress picture that caught my eye on Facebook.
Finding a Location
On the day of the shoot I picked up Sarah and her husband in full costume at the hotel. We drove to the location that I had previously scouted and I paid $20 to the owner for access.
Location scouting is a time consuming but important part of any shoot. Whenever I’m out and about I keep an eye out for good locations. When I find something I like, I drop a pin on Google Maps to remember all the hidden gems I stumble upon. I also use LightTrac, a light-tracking app, to figure out what time of day will work best. The app gives me sunrise and sunset information on a map at any given time of day and any day of the year along with a wealth of other features.
In this instance, I wanted to shoot in the shade of the building and found that the perfect time would be 6:00pm.
https://500px.com/embed.js
Turning Day Into Night
The Nikon D810 has a great autofocus system that works well even in dimly-lit situations, but I find it easier to shoot during the day not only to get the best focus performance, but also because it’s easier set up and break down… not to mention avoiding mosquitoes!
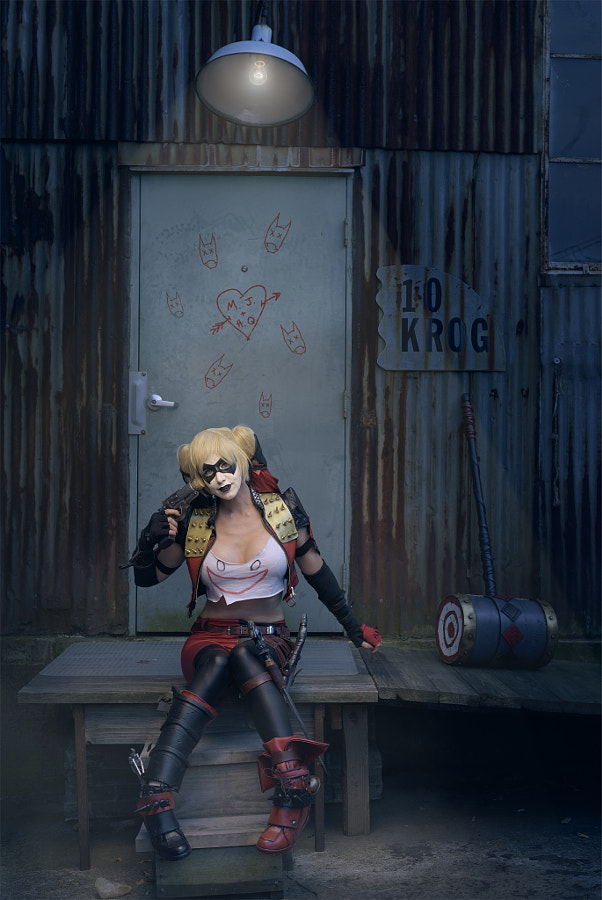
To create a full moon, nighttime scene artificially during the day, I set my white balance to tungsten and darkened the scene by dialing up the aperture and shutter speed and dialing down the ISO. To compensate for the blue hue and have correct color on the subject, I placed an orange CTO gel over the flash head in my main light, which was an octobox aimed down at the subject and held by a Manfrotto boom stand.
The goal of this light was to mimic an overhead lamp. Now I could control the natural ambient light without having to artificially light the entire scene had I shot in the dark. Because I used a Nikon SB900 flash, I had limited power and wasn’t able to get the exact results that I wanted right out of the camera, but it was close enough that I knew I’d be able to enhance it in post. Another small flash, a Nikon SB600, was placed in a stripbox behind and to the right of the subject for background separation, and a large silver reflector below just out of frame, angled upward, provided fill light.
After we shot a few poses I locked the aperture and took a couple shots of the background without any lighting equipment or talent to make it easy to composite the two shots in post.
The goal of the background shots was to blend in the darker area of the image that I wasn’t able to achieve with the limited output of my main flash, remove visible lighting equipment, and lower a lamp above the door so that it could be included in the shot:
[youtube https://www.youtube.com/watch?v=vlKBplvi0lw?rel=0&w=660&h=371]
Do Your Homework
What makes a great photo is a combination of research, prep work, coordination, scouting, execution, and thoughtful post-production. It seems daunting, but taking extra time to plan and prep your photoshoot will yield the interesting and visually stunning images every photographer wants to have in his or her portfolio.