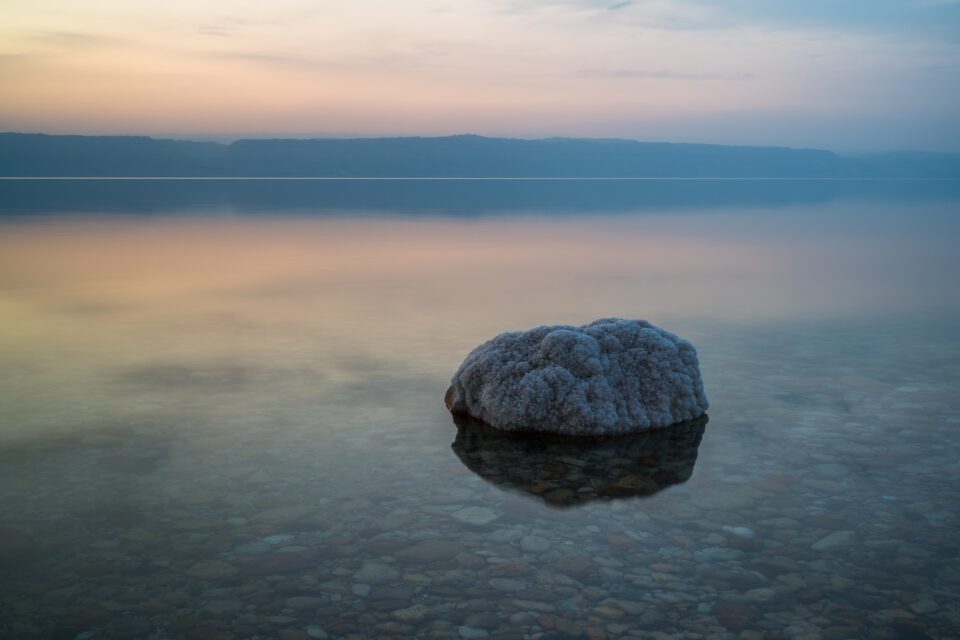
You can easily fill a backpack (or even the trunk of a car) with a landscape photography kit. Cameras and lenses only scratch the surface – there’s an overwhelming number of other accessories out there. This article breaks down what’s available and explains exactly what a landscape photographer really needs.
This article isn’t meant to be a review of any specific product or company. Instead, it covers all the camera gear and accessories that are commonly used for landscape photography, along with my thoughts on whether or not they’re necessary in the first place.
Here’s how I’ll be ranking the usefulness of each type of gear:
- 1/4: Rarely worth getting
- 2/4: Can be useful
- 3/4: Very useful
- 4/4: Must buy!
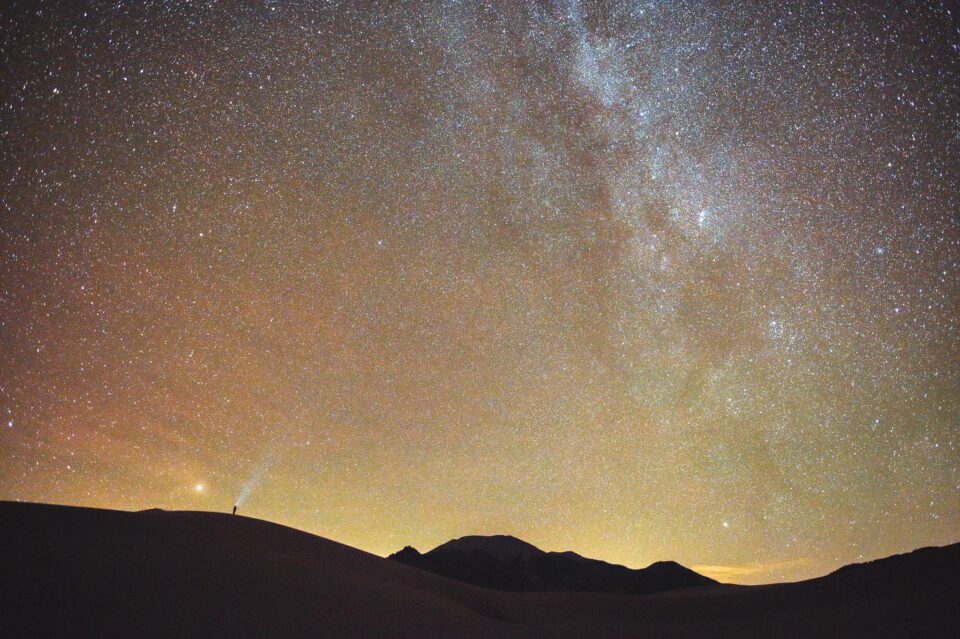
This article only covers “ordinary” landscape photography rather than Milky Way photography, which I will cover in a separate article to be published soon.
Camera (4/4)
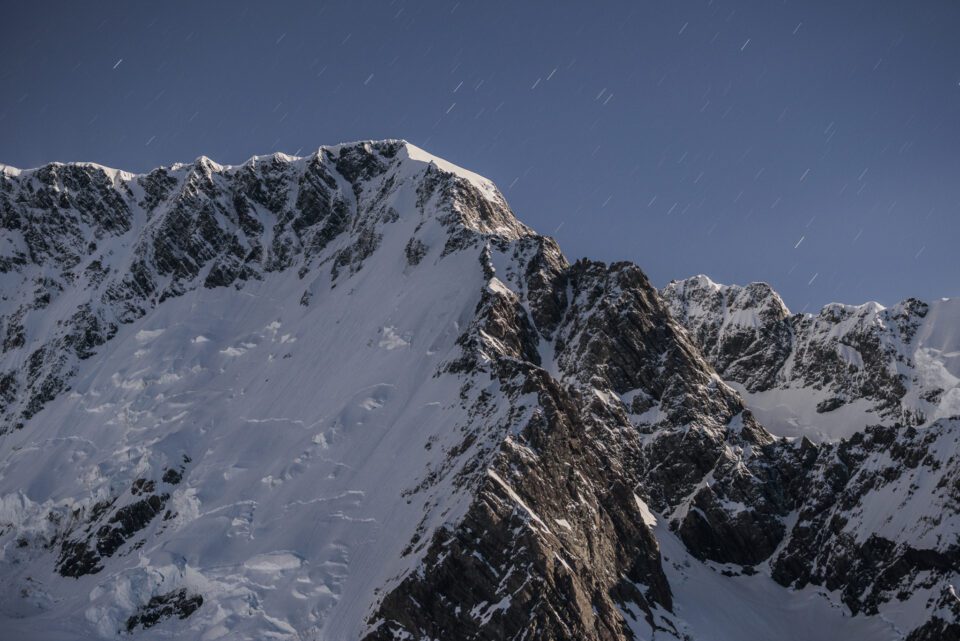
A camera is obviously necessary for photographing landscapes, but which one? Unless you’re printing massive images, landscape photography isn’t that demanding of a genre. You can get away with cheaper cameras without anyone noticing, and you can even use image blending techniques like panoramas and averaging to squeeze more image quality out of them. I love 45 megapixel full-frame cameras (or 100 megapixel medium format cameras) as much as anyone, but you can easily take good landscape shots without them.
I recommend at least a micro four-thirds camera sensor with 16 megapixels or more. A 24 megapixel aps-c sensor is an even better target, and a 30+ megapixel full frame camera or larger is the crème de la crème. There are some potentially helpful features found on advanced cameras like sensor shift or focus stacking that can make landscape photography easier, but again, none of them are strictly necessary. If you have a bigger budget, our best landscape photography cameras article may help you decide. But chances are that whatever camera you already have is enough, so long as it has interchangeable lenses.
Second Camera (3/4)
I never leave on a landscape photography trip without a second camera, but I generally make sure it’s a lightweight (even pocketable) camera that is as easy as possible to carry along. Every camera dies eventually, and you don’t want to be empty-handed if yours stops working in the middle of a shoot. Even a phone can suffice as a backup if you’re happy with yours. Otherwise, pack away a small camera with a built-in lens like the Fuji X100V, Ricoh GR III, or Sony RX-100. I use the Nikon Coolpix A for this purpose – a tiny, discontinued DX camera with an 18mm lens (28mm equivalent).
Drone (2/4)
In recent years, I’ve taken some of my favorite photos with my drone, the DJI Mavic Pro 2. A similar but less expensive option is the newer DJI Air 2S, which also has a 1-inch type sensor – what I consider the minimum for high-quality landscape photography. Drones aren’t universally loved, and they’re also prohibited in many of the places where they’d make for great photos, like a lot of National Parks (rightly so in most cases). But there are still plenty of locations where drone photography is legal and unobtrusive, with great scenery that looks amazing from the air. They’re hardly a necessity but can lead to some great shots that can’t be captured any other way.
Lenses
Wide Angle Lens (3/4)
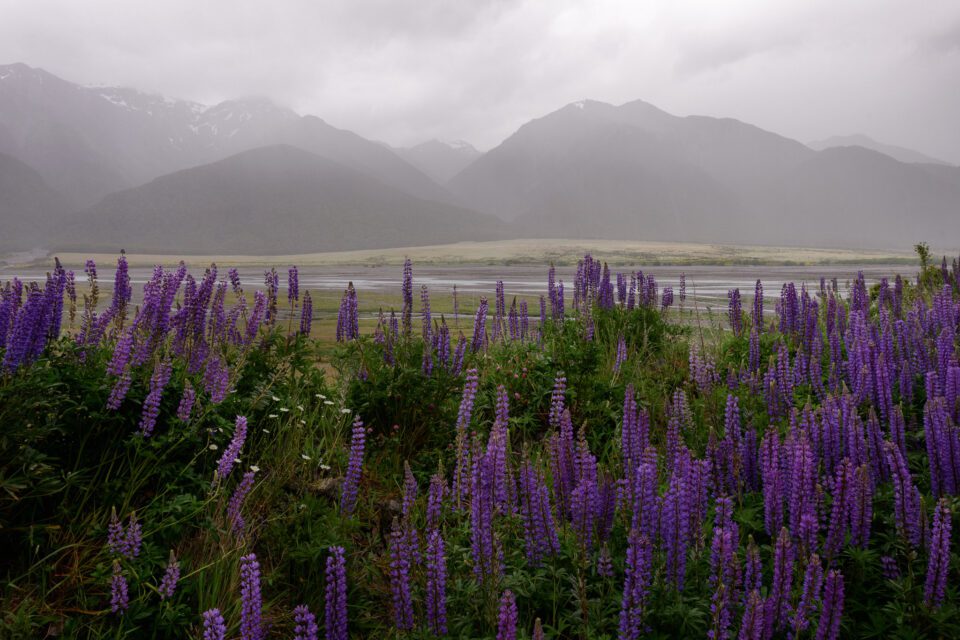
Wide angle lenses (anything about 24mm and wider) are by far the most popular type of lens for landscape photography. But sometimes photographers are a bit overzealous about them. “Beautiful scene + capture as much as possible in one shot” is not always a recipe for great photos. A wide angle lens is very useful for landscape photography, especially if you want to exaggerate the foreground, but it’s not the only way to get good results.
Normal Lens (3/4)
I’d categorize a “normal lens” as something in the range from about 28mm to 70mm full-frame equivalent. These are a bit more maligned for landscape photography as static or boring focal lengths. And it’s true that they don’t give you the exaggerated foregrounds of a wide-angle nor the subject isolation of a telephoto. But they also feel very natural and unforced. The longer I do landscape photography, the more I gravitate to this range of focal lengths.
Telephoto Lens (3/4)
Everyone knows that telephoto lenses are good for wildlife and sports photography, but it’s also becoming more common to see them used for capturing distant landscapes. It seems like every month I see a new article on popular photography websites about using telephoto lenses for landscape photography. There are a couple such articles on Photography Life, too, here and here. Like wide angles and normal lenses, you don’t need a telephoto to take good landscape photos, but it’s very useful.
I recommend that landscape photographers have a wide, normal, and telephoto lens if possible, but any of the three is sufficient to start. I spent a couple years shooting with nothing but a 105mm prime and still consider those photos to be among my favorite landscape shots.
Tripod (4/4)
There are some landscape photographers who say you don’t need a tripod any more. I’d say to ignore them. Sure, high ISO performance is better than it’s ever been, and some specialized post-processing techniques like image averaging can potentially salvage handheld shots even in low light. But tripods do more than just maximize image quality. They also make it easier to use techniques like panoramas and HDR. Any my favorite reason for using them, even in bright daylight, is to make small and careful adjustments to my composition.
Tripods can be heavy and expensive, and some of them aren’t very stable, either. I always like showing this diagram:
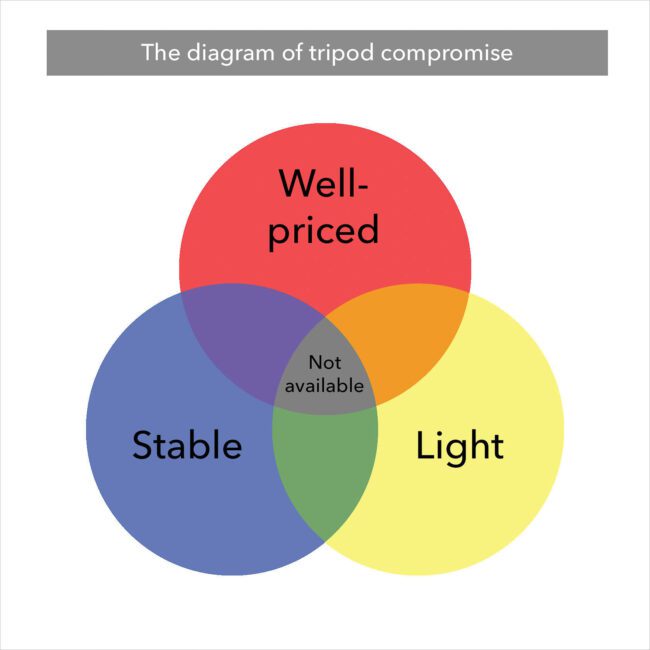
But the truth is that tripods are getting better and better these days. You can find some sub-$200 carbon fiber tripods that are fairly stable and well-built. An earlier guide of ours goes into detail on getting a good tripod for landscape photography – but the important thing is to get one in the first place.
Tripod Head (4/4)
I consider a ball head and a geared head to be the two best types for landscape photography. Ball heads are smaller, lighter, and less expensive while being just as stable. Geared heads are nice for making very fine adjustments to your composition and are preferable if weight and cost aren’t major concerns. Regardless of which type you pick, you can’t use a tripod without a head, so find one that works for you.
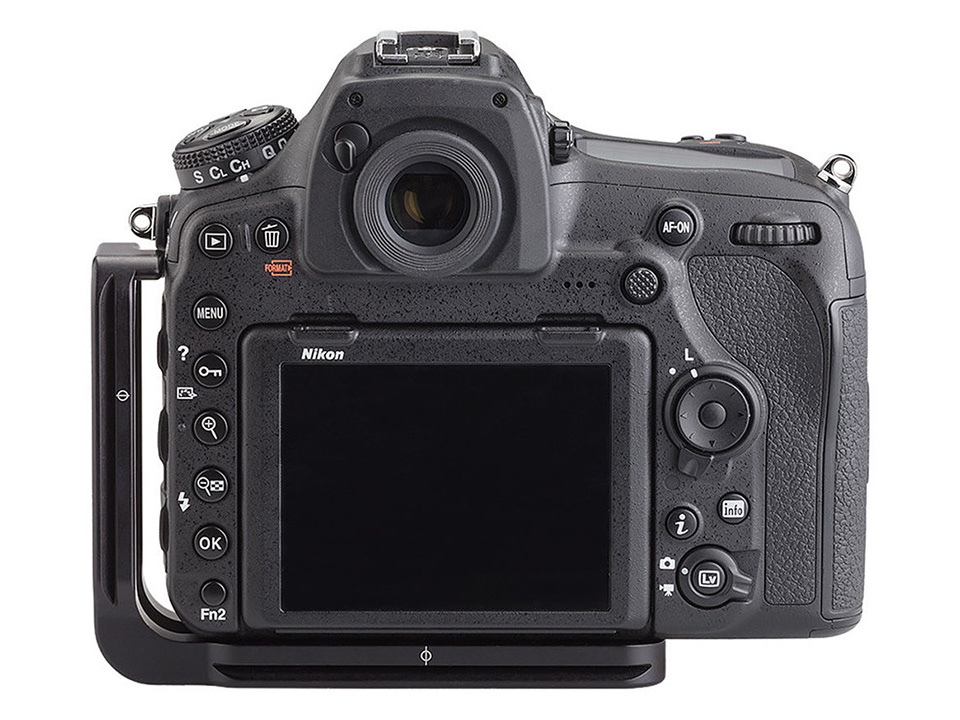
L-Bracket (3/4)
To attach your camera to a tripod, it’s common to put a small lens plate on the bottom of the camera. However, this can make it awkward to take vertical photos with most tripod heads. The solution is to use an L-bracket instead of a small plate. These brackets hug the camera and allow you to attach it vertically just as easily as horizontally.
Panorama Nodal Slide (2/4)
If you like shooting panoramas, especially with a wide angle lens, an important tripod accessory is a nodal slide. It allows you to slide the camera forward and backward on your tripod head so that the “nodal point” of your camera system is exactly centered over the tripod head. When the nodal point is centered, you won’t get any parallax issues in your panorama (where the relative position of objects in the frame changes as you take each photo in the panorama).
I know that sounds really obscure, but dedicated panorama photographers will find these invaluable. You’ll simply have a much easier time aligning your panoramic photos in post-production if you used a nodal slide to center your camera system ahead of time. But it’s also a bit of a special case that doesn’t apply if you don’t shoot a lot of wide-angle panoramas, so I’m not rating it any higher than “can be useful.”
Spiked/Claw Tripod Feet (2/4)
Another tripod accessory that I don’t consider essential is a replacement for the standard rubber tripod feet. The most common replacement is for spiked feet, which are better at digging into sand and sticking there. Another option is for clawed feet, which are meant to grip well on wet or icy rocks.
I have some spiked tripod feet that I will occasionally bring along if I’m expecting to do a lot of seascape photography from a sandy beach. They’re nice to have but not critical.
Filters
Polarizer (4/4)
I think every landscape photographer needs a polarizing filter. By minimizing most types of reflections, they tend to improve the look of foliage and water substantially. They can also darken and saturate the sky – something that’s often doable in post-processing but still easier in the field.
ND Filter (2/4)
Almost everyone agrees that polarizers are useful for landscape photography and difficult to replicate in post-processing. There’s more division when it comes to other types of filters, particularly neutral-density (ND) filters and graduated ND filters.
ND filters are dark, neutral colored filters that allow you to use longer shutter speeds if desired. They can theoretically be replicated in post-processing by taking multiple photos with shorter exposures and averaging them in software like Photoshop.
I rarely find myself in a situation where either is necessary, to be frank. I’m usually happy with the shutter speeds I can get in-camera and don’t need extra motion blur from a long exposure. I tend to bring an ND filter along anyway but find myself using it a lot less than I’d expect.
Graduated ND Filter (2/4)
A graduated ND filter is simply a filter which is dark on one end and clear on the other, smoothly transitioning from one side to the other in a gradient. The idea is that the graduated filter can be aligned to darken the sky in your photo while leaving the ground untouched (thus helping avoid overexposed highlights in the sky).
It’s possible to simulate graduated NDs in post-processing with HDR or other image blending techniques. But there are still plenty of photographers who would rather get everything right in a single in-camera exposure, or who simply prefer the look of a graduated filter over HDR.
As with regular ND filters, I carry along a graduated filter but rarely use it. Nor do I often use HDR – not because I have anything against it, but just because I don’t end up photographing a lot of landscapes which need more dynamic range than my sensor is capable of with proper exposure. But some landscape photographers may consider these (and regular NDs) to be far more essential. It depends on your needs.
UV Filter (2/4)
I’m not a fan of UV filters (AKA clear filters or protective filters), particularly because of the additional flare that most of them add when the sun is in the frame. However, I still consider them a potentially useful accessory for landscape photography.
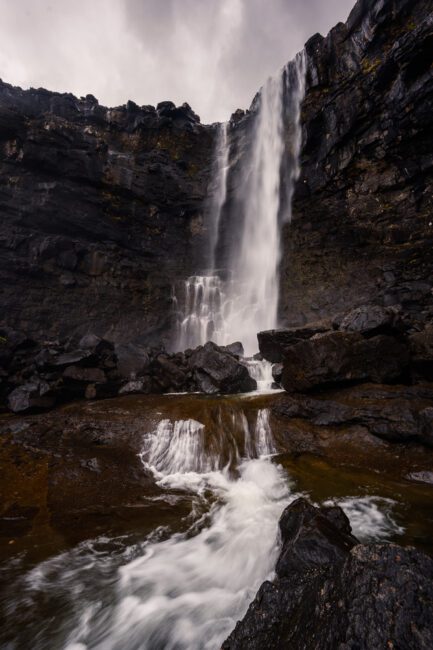
In windy and sandy conditions, it’s possible for the front element of your lens to get scratched even if you’re doing everything else right. A UV filter can take that damage instead. Also, many high-end UV filters these days have water-repelling coatings, while a lot of lenses don’t. If you’re planning to do waterfall or oceanside photography, a UV filter can make it easier to keep your photos free from water droplets.
Other Filters (1/4)
There are almost limitless types of other filters that you can use in photography. I don’t consider any of them to be very useful for landscape photography, at least when shooting digital. (Film photographers may wish to look into some color corrective filters.)
One minor exception is if you want to take exposing to the right to the absolute extreme. If you use a cc30m, cc30p, cc40m, or cc40p magenta filter, you’ll tone down the green color channel of your camera sensor, which tends to clip sooner than the red or blue channels. Technically you can get about 1/2 stop better dynamic range when using one of these filters on your camera at base ISO. I don’t do this or recommend it in general, but it’s worth knowing the effect exists.
Lightning Trigger (2/4)
If you want to photograph lightning, it may seem like a good idea to get a specialized lightning trigger from Miops or similar. And these triggers do work well if that’s your plan. But lightning photography is not something I recommend in general, for obvious reasons – and even if you do want to photograph lightning, a dedicated trigger isn’t necessary.
I actually have a Miops trigger but usually forget it at home. I took the only good lightning photo in my portfolio using the classic “timelapse method” where I set my camera to take photos on an interval and simply reviewed the pictures for lightning later.

Handheld Meter (1/4)
There are different schools of thought on metering in the digital world. I’m of the opinion that the in-camera meter is the only one you need, especially if you’re supplementing it with the camera’s blinkies or histogram. I’ve never met a scene where I’d have gotten better results with an external meter, at least on a digital camera.
Remote Shutter Release (2/4 or 3/4 depending on camera)
The most basic use for a remote shutter release is to allow you to use exposures longer than the normal 30 second limit on most cameras. Another major reason is to reduce camera shake caused by pressing down the shutter button.
However, many cameras these days allow longer than 30 second exposures (such as any Nikon camera with the “Time” exposure mode). And it’s just as easy to reduce camera shake with a self-timer or exposure delay mode, assuming you don’t mind waiting two seconds for the photo to be taken.
Remote shutter releases can still be useful, but I find myself bringing one along less and less these days – in fact, not at all in the past couple years. I know that a lot of landscape photographers would consider these a critical part of the kit, though. Take that as you will.
(Note that there are also much more advanced remote shutter releases such as intervalometers and even camera controllers that have many more features. I consider these to have a similar rating of 2/4 or 3/4 – not strictly necessary but potentially useful depending on your needs.)
Extra Batteries and Memory Cards (4/4)
I always recommend bringing along at least two extra camera batteries and an extra memory card with more capacity than you think you’d need. Personally, I’ve forgotten my memory card at home enough times that I now keep a spare in my car. You won’t be able to take any pictures without these necessities, and they don’t weigh much, so bring an extra!
Waterproof Memory Card Case (3/4)
Any sort of waterproof memory card case does the trick. The lighter the better if you’re planning to hike with it.
USB Battery Charger & External Battery Pack (3/4)
I’ve found that the best way to keep my camera and phone charged in the backcountry is with a generic battery pack (something with at least 10,000 mAh) plus a USB charger specific to my camera batteries. At the end of the day, I’ll plug the USB charger into the battery pack and recharge any empty batteries. One 10,000 mAh pack is equivalent to about four Nikon EN-EL15c batteries. My preferred battery pack is 20,000 mAh and lasts for ages.
Rain Cover (2/4)
Although I give rain covers a 2/4 rating, it really depends on what environments you shoot in. If you’re constantly photographing waterfalls or taking pictures during monsoons, a rain cover may be essential – whereas other landscape photographers may never need one at all. I personally haven’t bought one, but it would have been useful for me at least once, when I temporarily killed my Nikon D800e in a rainstorm several years ago (it was working fine again an hour later).
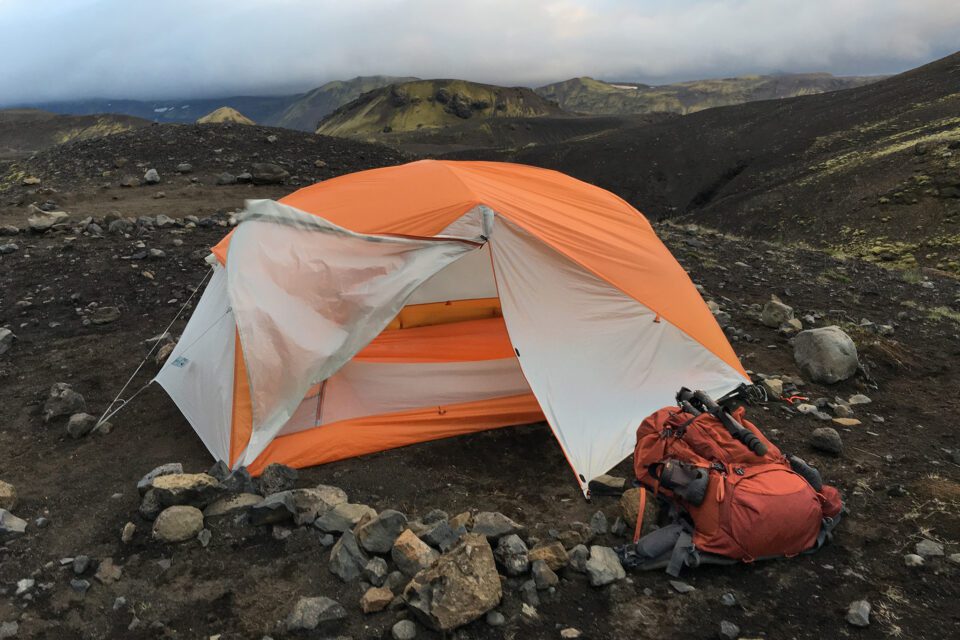
Backpack (4/4)
The best way to carry a camera for landscape photography – particularly with at tripod – is a backpack. Not just any backpack will do. The vast majority of dedicated camera backpacks are uncomfortable for long hikes and not at all designed to carry weight optimally. Even “hiking” camera bags like those from F-Stop Gear and Shimoda are what I’d consider the bare minimum for long hikes.
A much better alternative is to find a dedicated hiking backpack from a company like Gregory or Osprey and simply use it to carry camera gear. Some photographers complain that these bags make it hard to access camera equipment fast, but that’s just not true of many of them. Go to an outdoors store in person and look through the hiking packs. I’m sure you’ll find at least one that has easy access points. Your back will thank you.

Grab Bag (3/4)
When I’m doing landscape photography out of a car, I find that it helps to have a dedicated grab bag in the trunk for little essentials. For example, I may throw my extra jacket, filter kit, USB charger, and a bag of batteries into the grab bag. These are all things that I want to have accessible during the trip, but not things that I need to carry on my back every time I go on a short hike. It also helps for organization and spreading out while I travel. An ordinary canvas or cloth bag works well here.
Sensor Cleaning Kit (4/4)
I’ve found that my camera sensor gets dirty at the most inopportune times. And now that I’m using a mirrorless camera rather than a DSLR, it seems to happen a bit more often than usual (though it’s also a bit easier to clean).
Usually, a rocket blower is sufficient to clear pesky dust particles from my camera sensor. If not, I’ll either use a sensor gel stick or a wet cleaning option (or both) depending on how bad the dust is. While you can generally remove dust specks in post-processing without too much difficulty, it’s a big annoyance if you have to do so for dozens or hundreds of photos from a trip.
Lens Cloth and Cleaning Kit (4/4)
Lenses get dusty and dirty sooner than cameras, and while it’s not as big of an issue, it can still lead to some unwanted effects. That’s especially true if you’re taking pictures in rainy conditions or near a waterfall, when there’s no avoiding some water droplets on your lens. Bring an absorbent lens cloth (I like to use a microfiber towel) to clear the way.
Solar Charger (1/4)
For charging camera batteries or your phone in the middle of nowhere, a solar charger seems like a great solution. And maybe it is under certain circumstances. But I find that a pre-charged battery pack weighs less, packs smaller, and charges enough to easily last a week without issue. I bought a solar charger years ago and have never needed it. Maybe if I ever go on a month-long outing in the wilderness (which I won’t) I’ll change my mind.
Specialized Apps (3/4)
There are apps available these days for almost anything you can think of in photography. My favorites for landscapes are OptimumCS for hyperfocal distance calculations, Photopills for tracking the sun, and The Photographer’s Ephemeris for planning my shoots. You should also look into various weather apps and, if you’re planning to fly a drone, a map to figure out legal restrictions.
GPS Camera Attachment (2/4)
Some photographers like knowing where they took a particular landscape photo, either for the sake of memory or just to make it easier to return there in the future. I’ve never cared too much about that personally, but if you do, there are GPS attachments available for most cameras that will attach the location to each photo’s metadata.
While a GPS attachment for a camera isn’t something I care much about, a GPS for navigation is essential. You’ve got to know where you’re going! I find that the GPS on my phone or Garmin watch usually does all I need, especially in combination with maps like All Trails, Gaia, or even a downloaded Google Map. This applies both to hiking and driving in the middle of nowhere without cell coverage. Make sure to have a map downloaded or printed ahead of time, and a GPS to navigate it.
Other Camping/Hiking Equipment (4/4)
This isn’t an article about hiking gear (I’ll work on one of those at some point) but suffice to say that it’s just as important as all the camera equipment above, if not more so. You need proper clothing, food, and shelter for where you’re going, plus first-aid and safety equipment. Even if you’re only going out on a short hike, don’t skimp. My rule (learned after some scarily close calls) is to consider what would happen if you broke a leg in the middle of the hike; make sure you have enough gear or are in a popular enough area that you would be safe even in such a situation.
Lightroom, Capture One, or Similar (4/4)
As much as I love the field side of landscape photography, the post-processing side is also of utmost importance. Naturally, some photographers prefer to spend as little time editing or organizing their photos as possible – but even then, some sort of software like Lightroom, Capture One, DxO Photo Lab, ON1, etc., is necessary. The built-in software on most computers is fine when you’re starting out, but it’s not geared toward advanced photo editing or organization.
Milky Way Photography Equipment
This article is getting long enough already, but I will soon be publishing a continuation that goes into my recommended equipment for Milky Way photography! There are enough differences compared to “regular” landscape photography that it merits a full article of its own.
I hope you found this guide to be useful, and if there’s anything I missed, let me know in the comments below. Personally, I bring along the equipment I rate as 4/4 on every landscape trip I take, plus most (or all) of the 3/4 equipment and often some 2/4 gear as well. But every landscape photography outing is different, and so is every photographer, so feel free to modify this list as needed for your own work.