Dina Belenko is a creative still-life photographer from Russia. Her artistic images capture magical stories behind everyday inanimate objects. In this tutorial, Dina shares a simple, fun way to capture an image of smoke “flowing” over a hand-crafted scene. Read on, stay inspired, and enjoy!
I love photos with smoke, they always have an eerie and mysterious atmosphere. So when I started to draw a sketch for the photo “At the End of the World,” smoke was my best choice. I wanted to make something beautiful, but a little creepy, with smoke (or mist) which flows down just like water in the ancient pictures of Earth, when people did not know that the planet was round.
I know of only one safe and cheap way to get a lot of smoke: using aroma sticks. Of course, you can always use liquid nitrogen (which would look great) but I live in a small town and it’s simply impossible to buy it here. Not to mention the fact that liquid nitrogen must be stored in special containers — just pouring it into a thermos could burst it… not good.
One photographer also told me about “Smoke Spray in a Can,” but while that seemed like a good solution, I couldn’t find a store that would ship to my country.
That put me back at square one: so let’s see how we can get a flowing smoke effect using common aroma sticks.
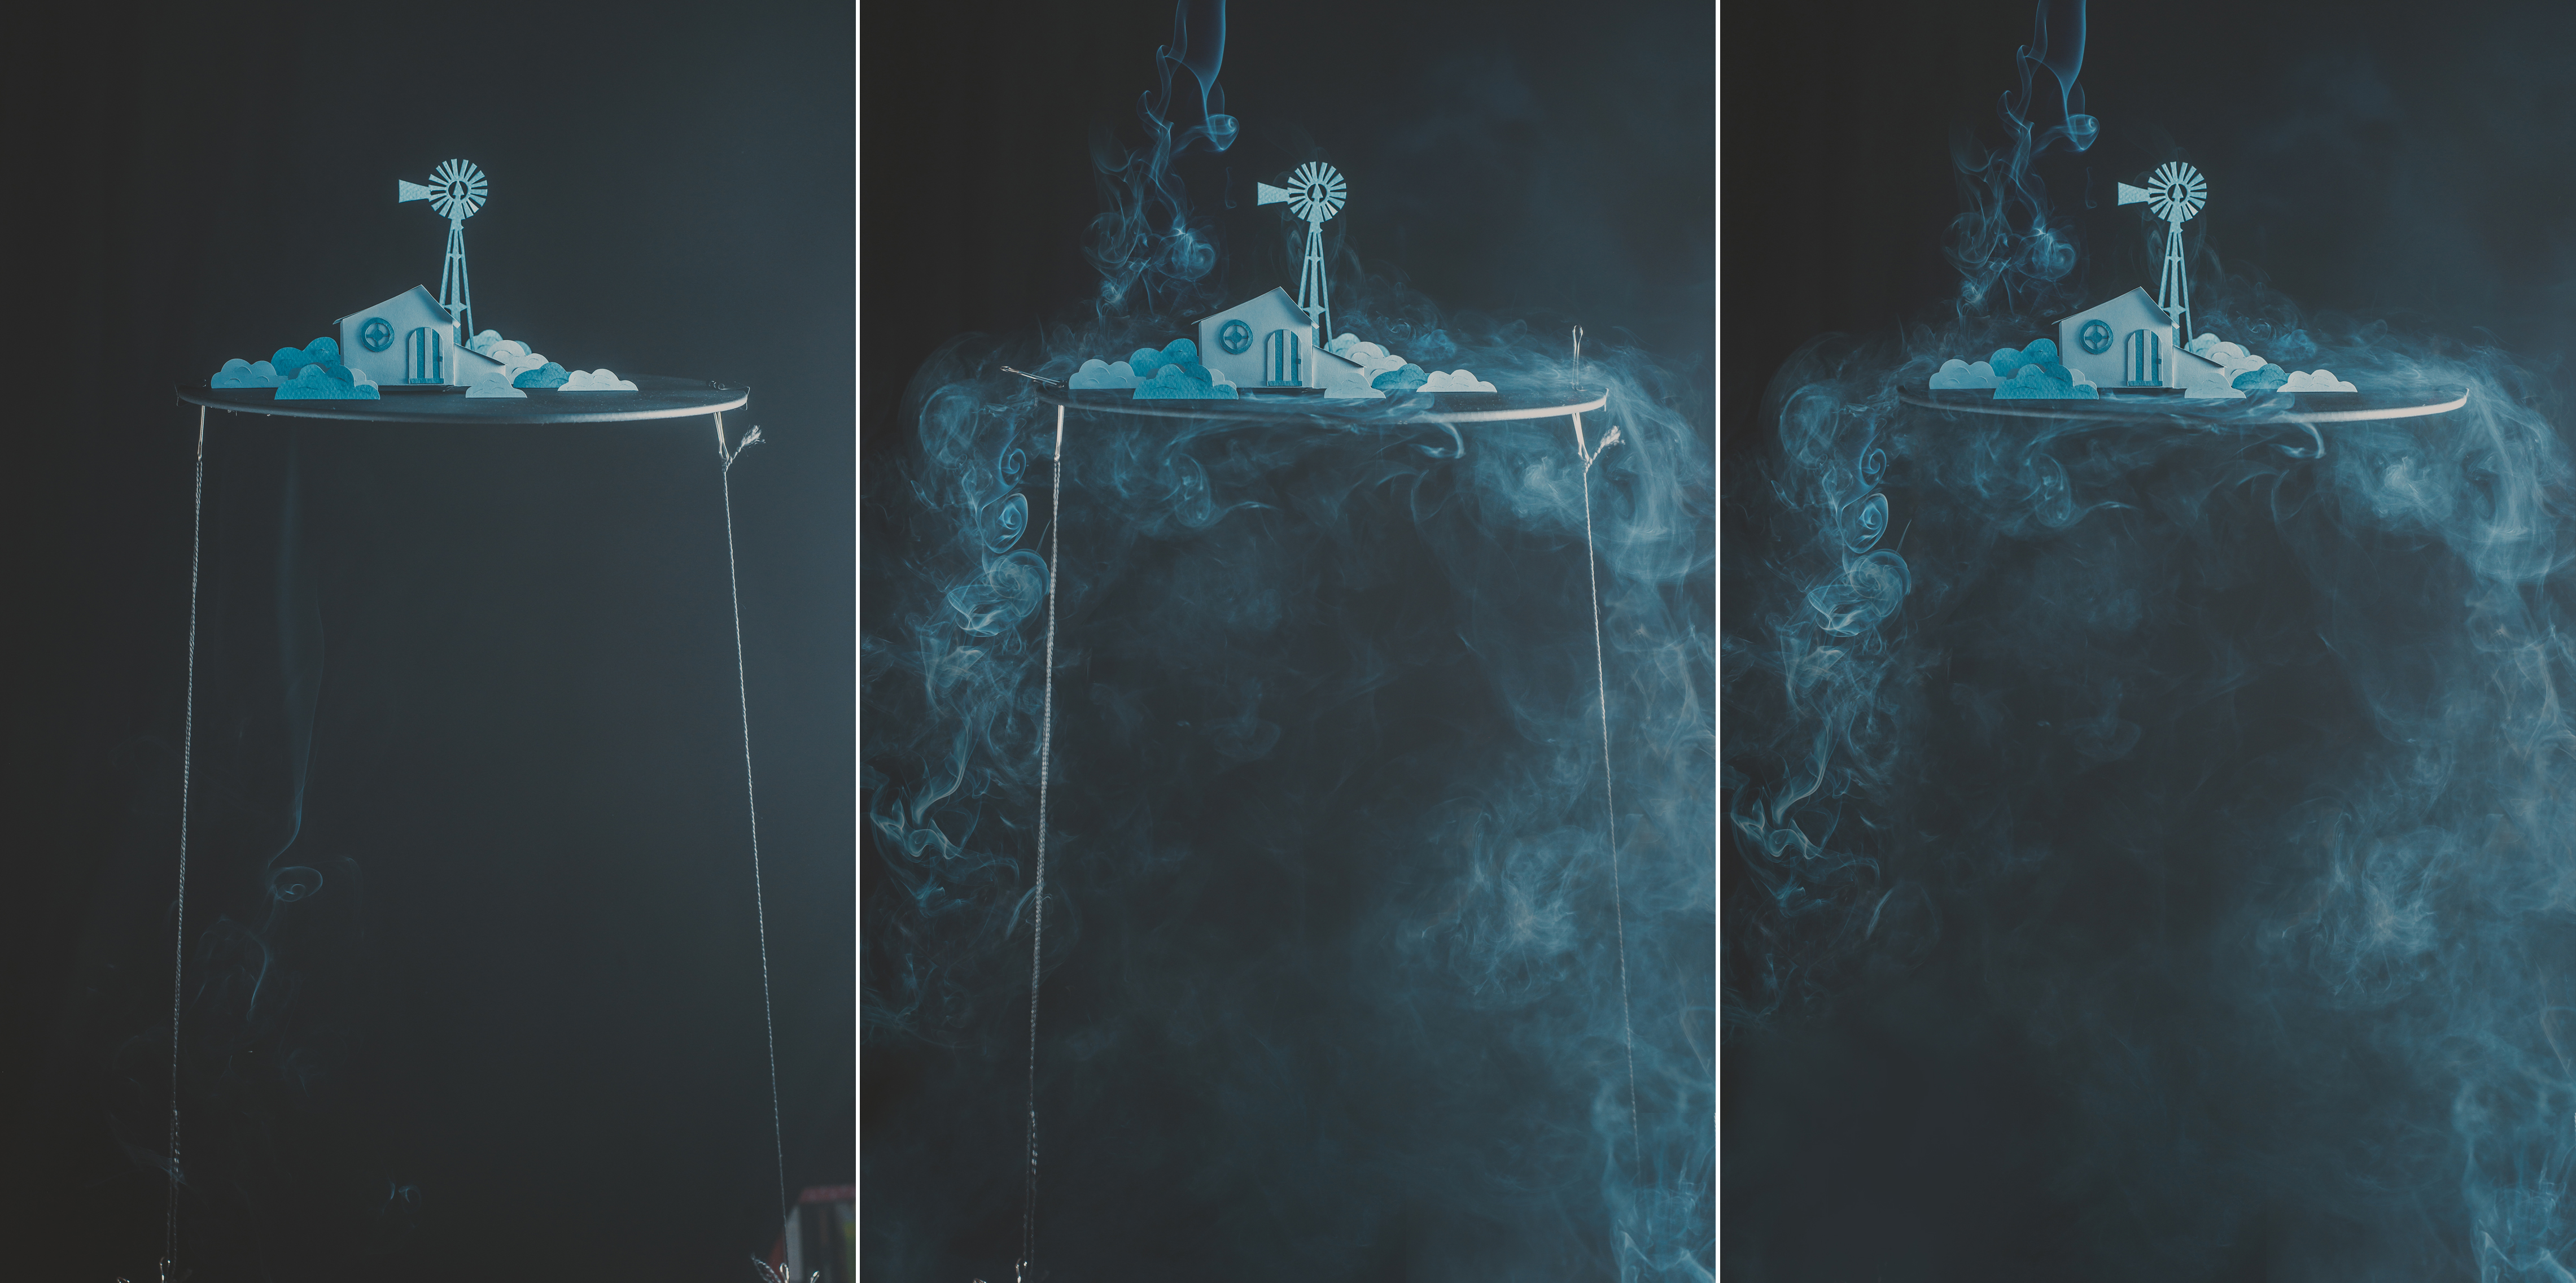
1. Preparation
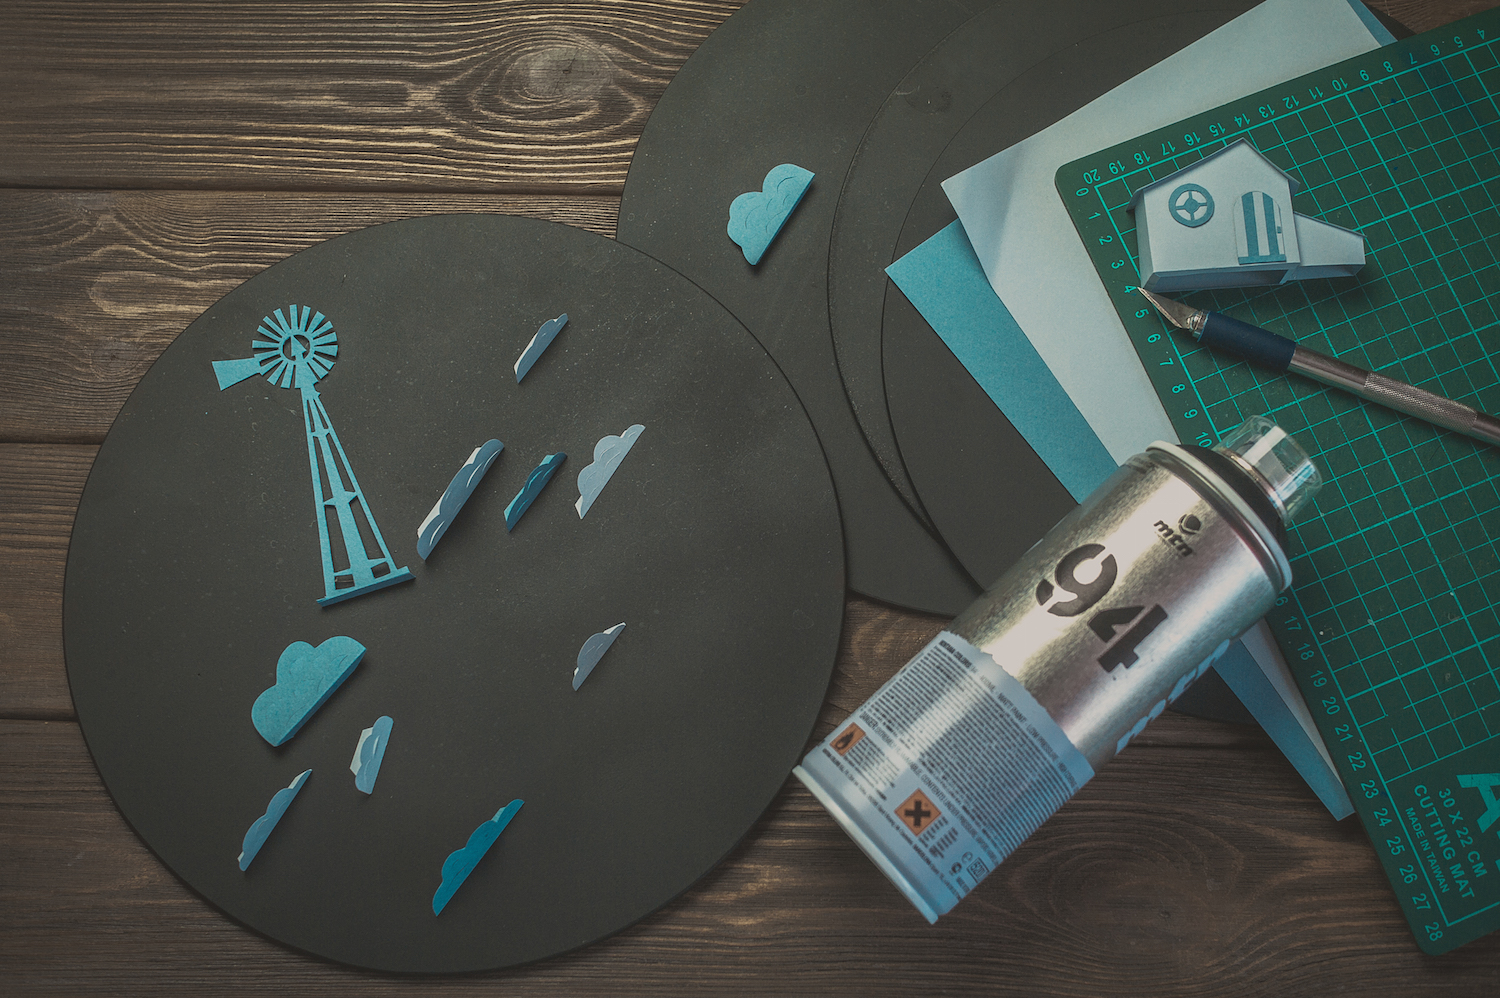
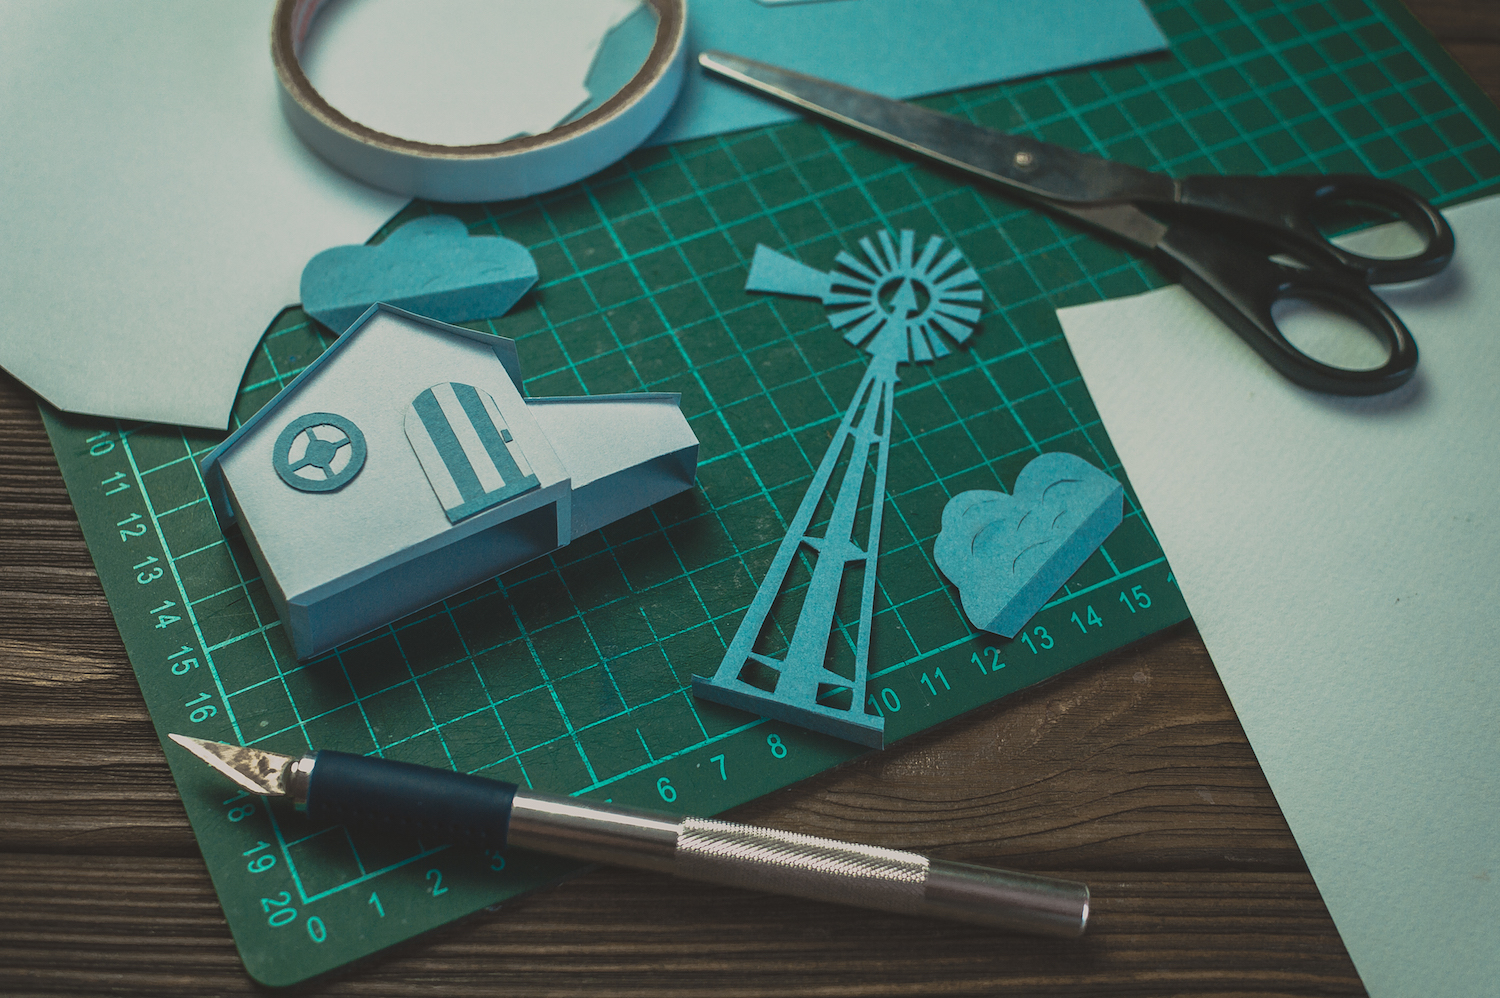
To begin with, I drew a sketch. Then I cut a small house our of paper (as well as a mill and a few bushes, which turned out looking like clouds… oops). All paper figures I then glued to the black disk — our “flat world.” This black disc actually is a glass table mat painted with spray. I think a cutting board would also work well.
Oh, and I prepared a dark background against which the smoke would look more impressive.
2. Setup and Lighting
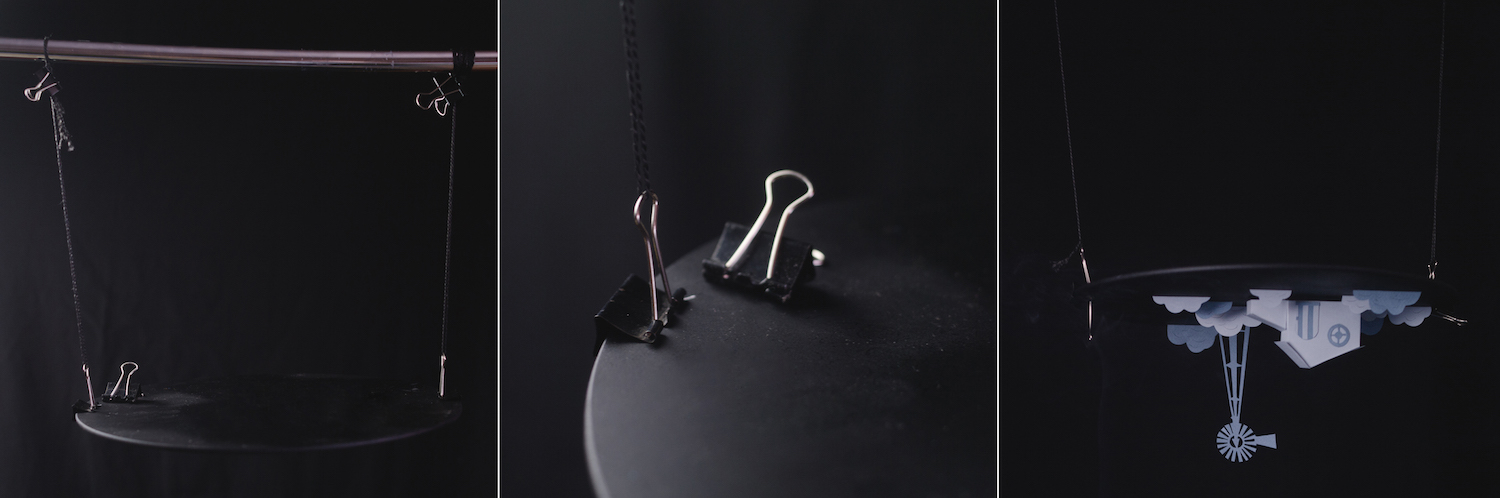
If the smoke obeys the laws of physics and flows upwards, we do not get the beautiful smoke ‘waterfalls’ we’re looking for. So I turned the disc upside down and attach it in this position to a rod for fastening paper backgrounds. To accomplish this, I used a pair of paper clips. Make sure your clamps hold the disk firmly enough (I dropped it once or twice before finding a sufficiently strong clip).
As for the lighting, I put the flash on the left side — so that it lit the smoke, but not the background — and added a reflector to the right side to highlight the paper house. Put your camera on the tripod, and we’re ready to burn!
3. Shooting
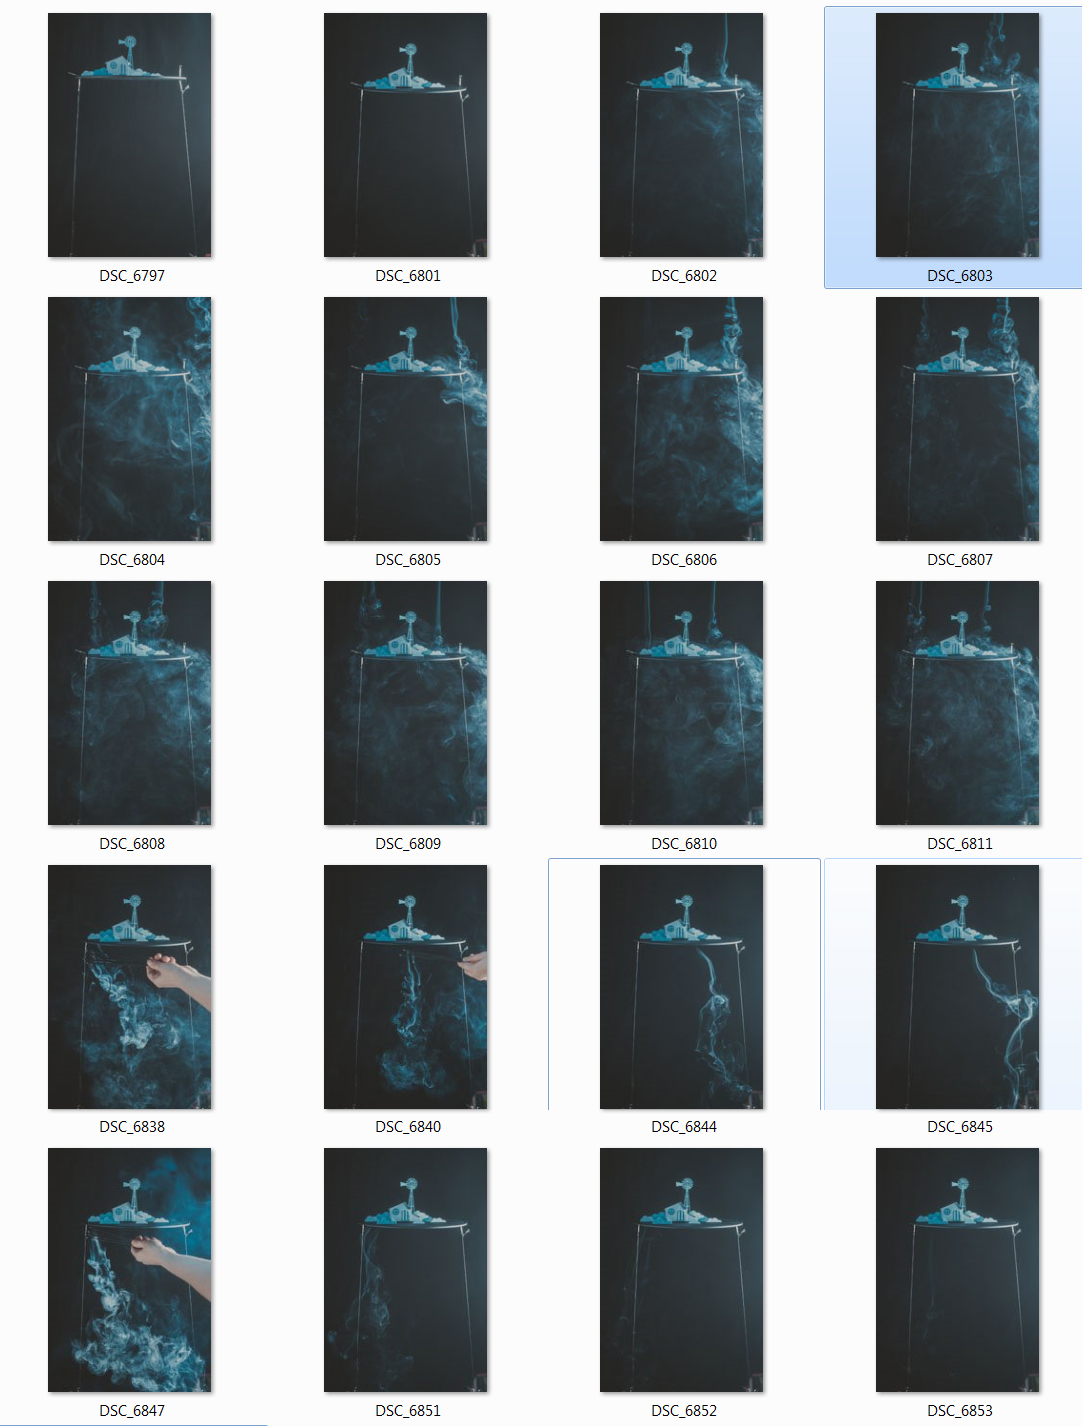
This is my favorite part! Light a few aroma sticks and place them under the disc so that the rising smoke skirts the edge of the disc. Take several shots so you can choose the most beautiful ones to work with.
4. Post-Processing
All that’s left to do it flip all the frames, select the ones where the smoke forms the most beautiful curls, and combine them into a single image. On a plain background, compositing them together should be very simple.
Also, it would be good to remove clips and ropes that hold the disc. After that, I edited the brightness and contrast (and retouched a sloppily cut window). And voila, we’re done!
I think that it is possible to try to do the same trick with water… over to you : )
Stay inspired and good luck!