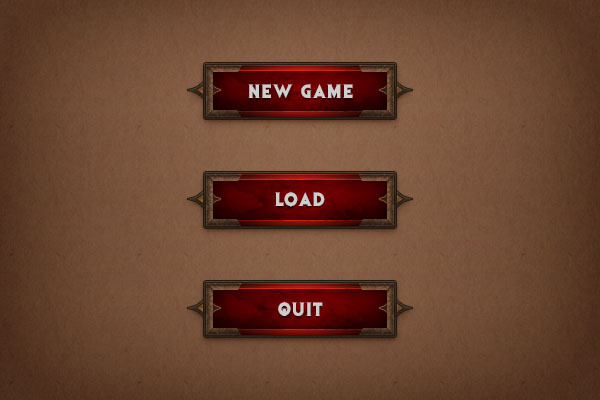
In today’s Photoshop tutorial, you will learn how to create a gaming button inspired by Diablo 3.
Final Image
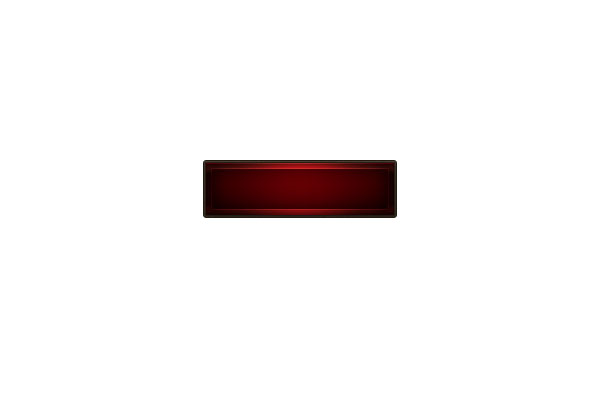
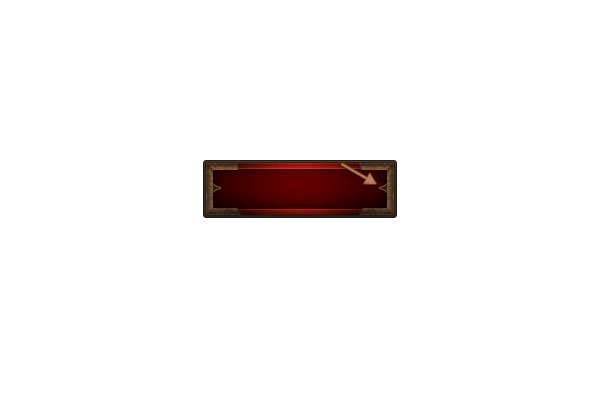
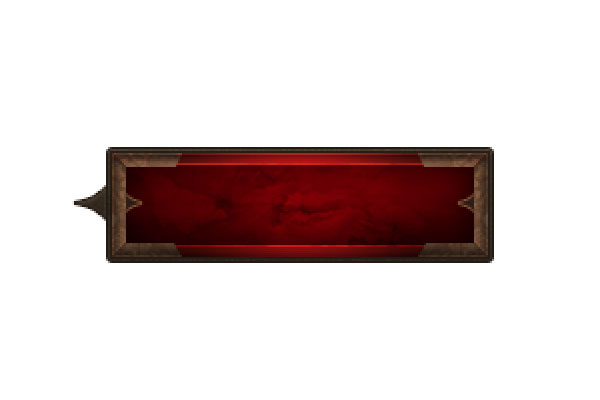
As always, this is the final image that we’ll be creating:

Tutorial Details
- Program: Adobe Photoshop CC
- Estimated Completion Time: 60 minutes
- Difficulty: Beginner – Intermediate
Resources
Step 1
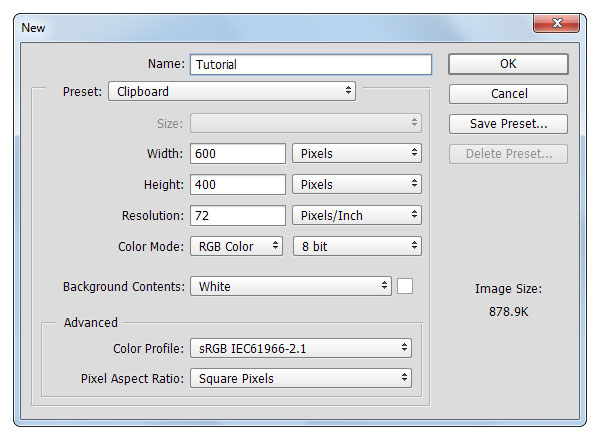
Create a 600x 400px document, go to View > Show > Grid to enable the Grid and then go to View > Snap To > Grid to enable the Snap to Grid. Hit Control + K to open the Preferences window, go to Guides, Grid & Slices and enter the settings mentioned in the next image. Along the tutorial I turned off the grid ( Control + ‘ ) for you to have a better vision. The grid will make it easier for you to create/edit the shapes.
Step 2
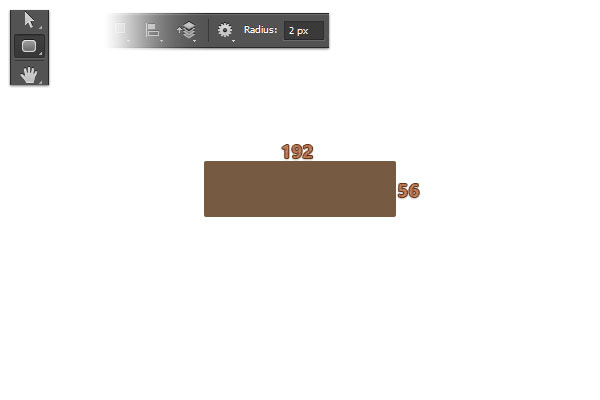
Concentrate on your Toolbar and fill the foreground color with #765B41.
Select the Rounded Rectangle Tool, focus on the top bar and set the Radius to 2px.
Move to your canvas and create a 192 x 56 px vector shape.
Step 3
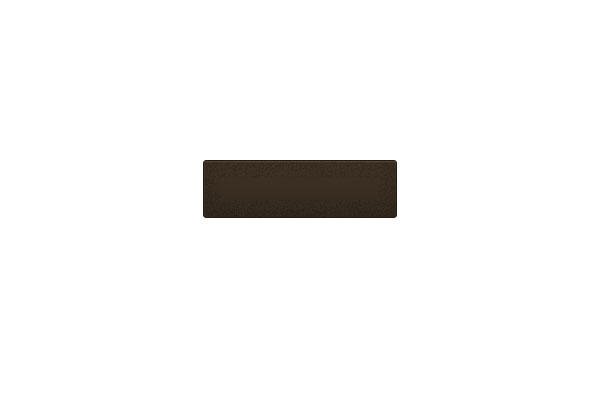
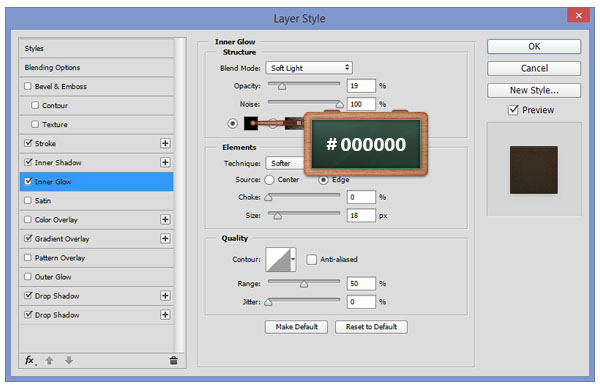
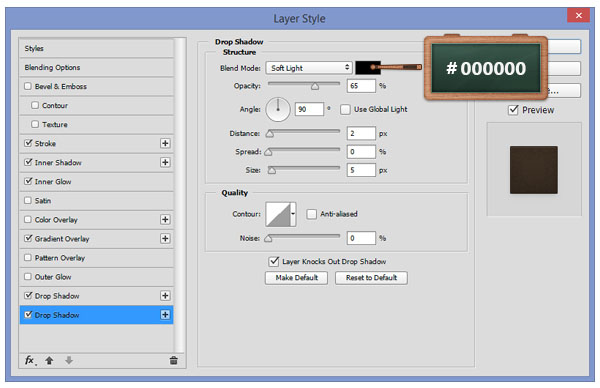
Open the Layer Style window for the existing vector shape and enter the settings shown below.




Step 4
Change the foreground color to #B27777 and pick the Rectangle Tool.
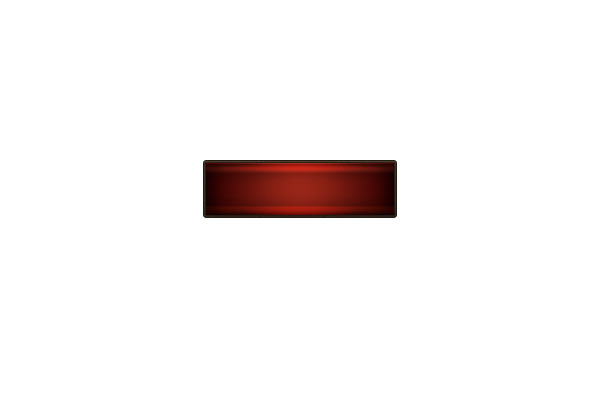
Move to your canvas, create a 188 x 52 px vector shape and place it as you can see below.

Step 5
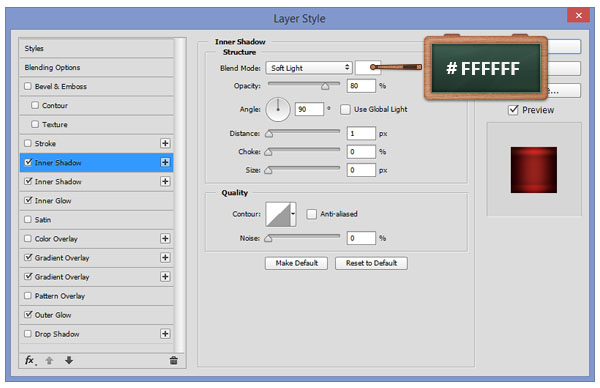
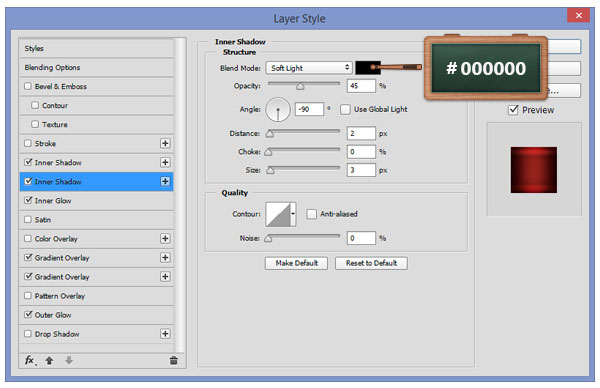
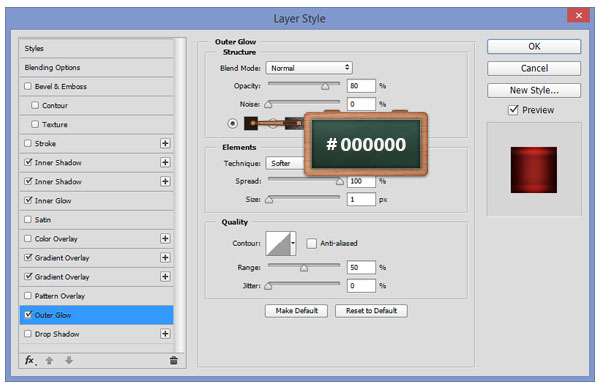
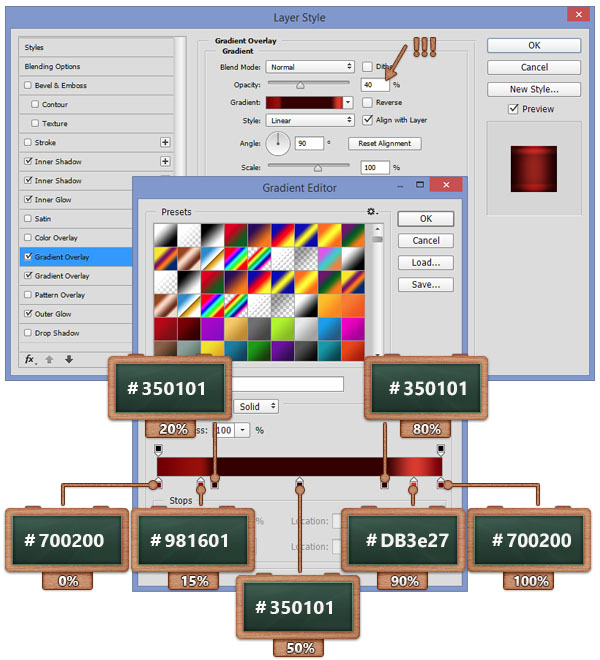
Open the Layer Style window for the vector shape made in the previous step and enter the settings shown below.


Step 6
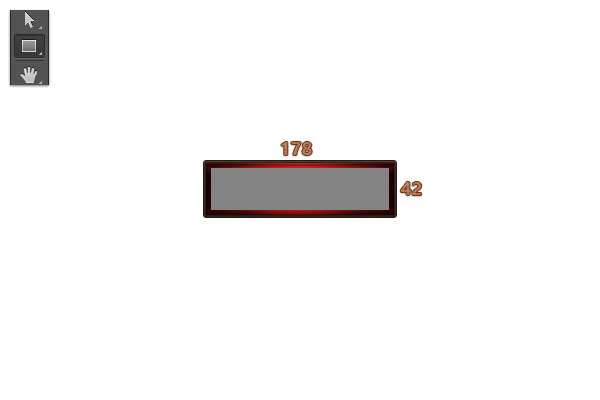
With the same tool, focus on your canvas, create a 172 x 42 px vector shape and place it as you can see in the next image.
Step 7
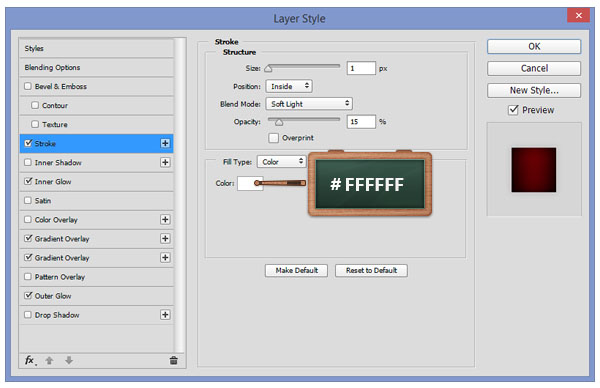
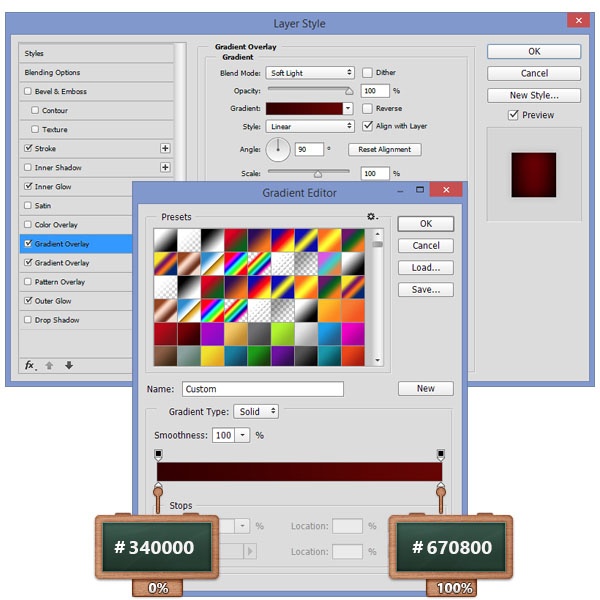
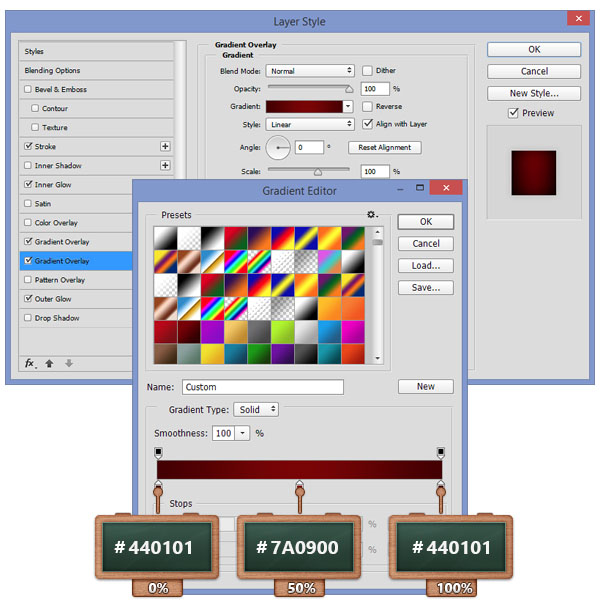
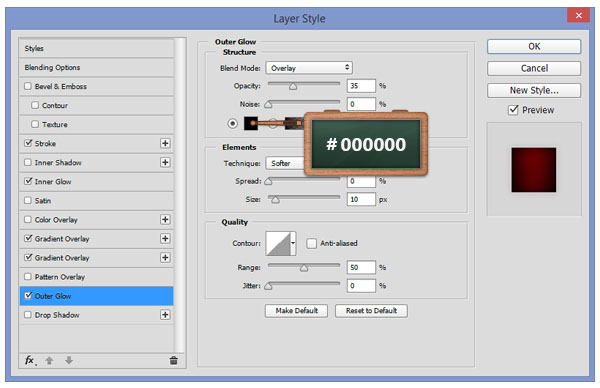
Open the Layer Style window for the vector shape made in the previous step and enter the settings shown below.

Step 8
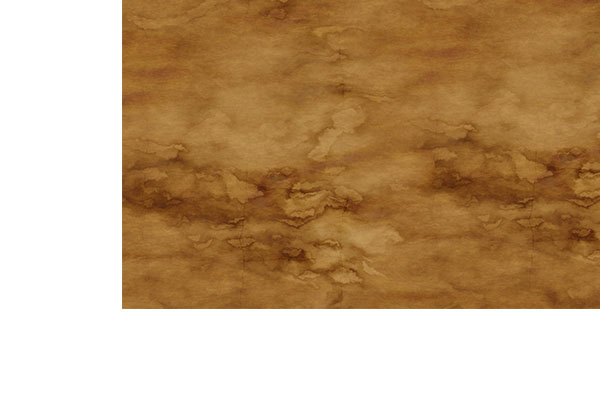
Import this texture to your document and place it over the vector shapes.
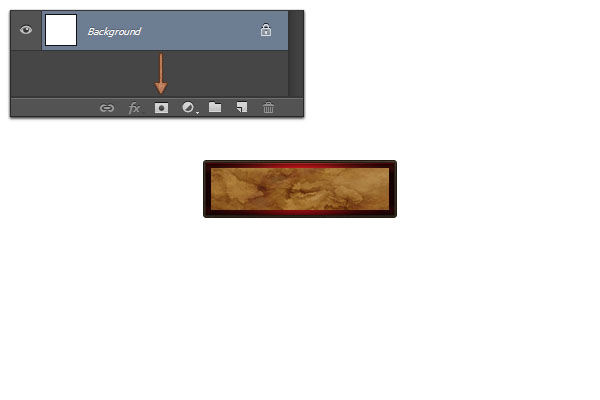
Focus on your Layers panel, hold the Control button from your keyboard and then click on the thumbnail icon that represents the vector shape edited in the previous step to load a simple selection around it.
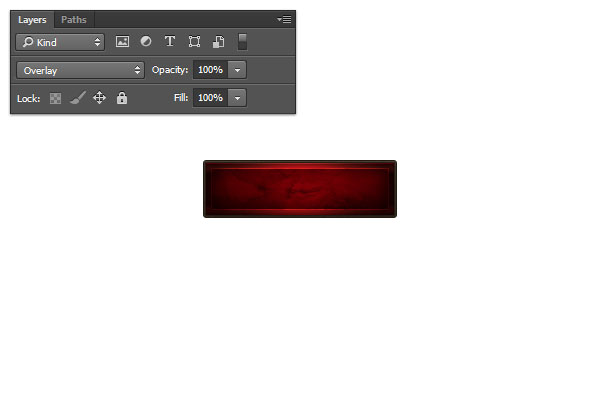
Now, make sure that your texture is selected, click on the Add Layer Mask button and then change the Blend Mode to Overlay.
Step 9
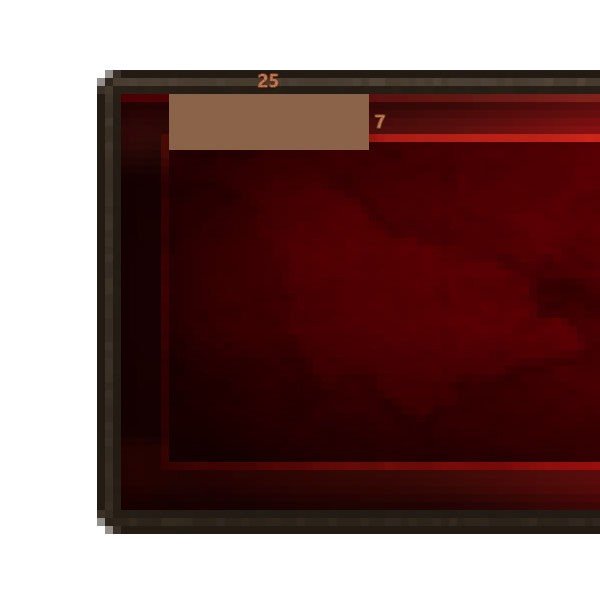
Make sure that the Rectangle Tool is still selected, create a 25 x 7 px vector shape and place it as you can see in the first image.
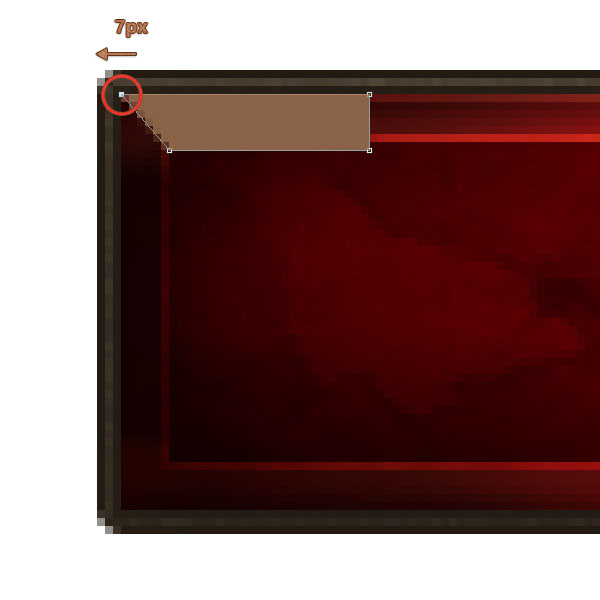
Pick the Direct Selection Tool, select the anchor point highlighted with red and move it 7 px to left.
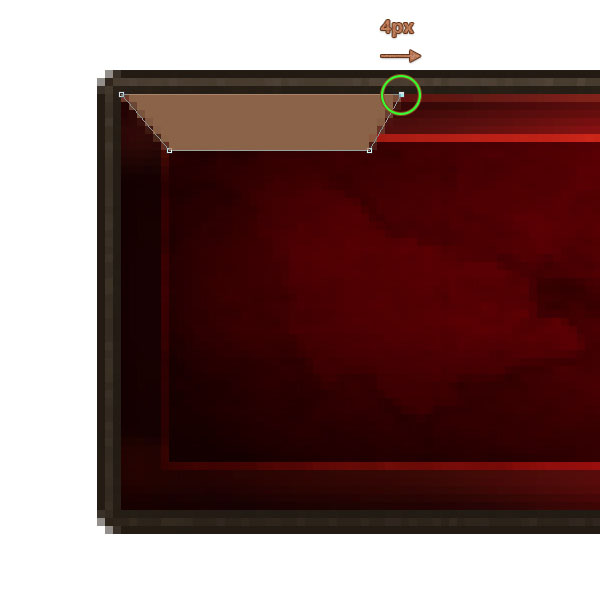
Now, select the anchor point highlighted with green and move it 4 px to the right.
Step 10
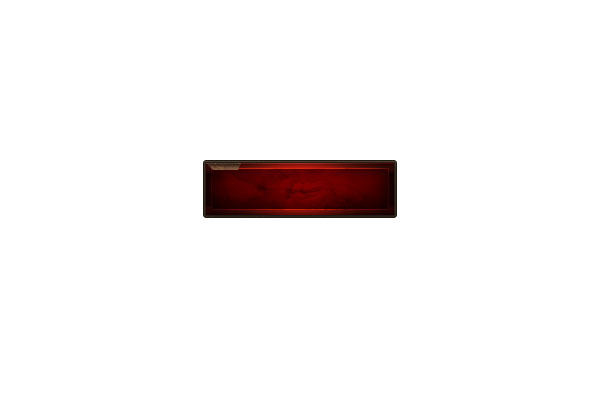
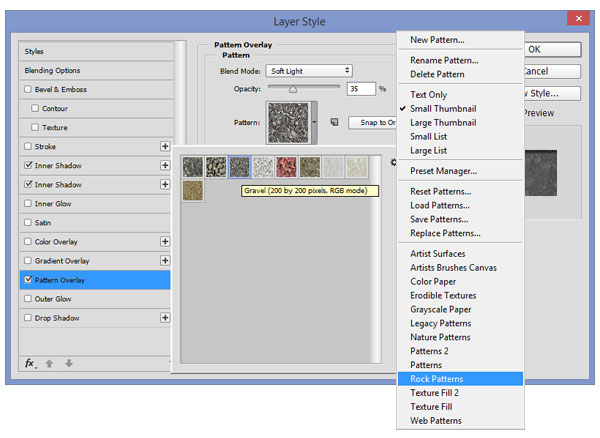
Open the Layer Style window for the vector shape made in the previous step and enter the settings mentioned below.


Step 11
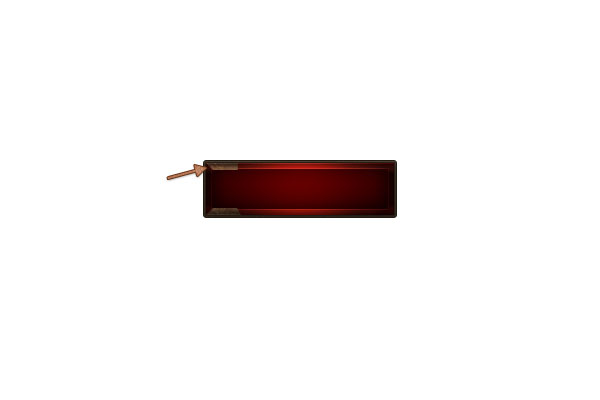
Focus on the Layers panel, select the highlighted vector shape and duplicate it using the Control + J keyoard shortcut.
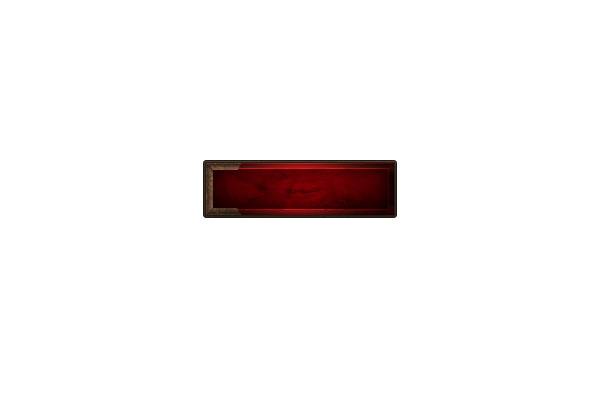
Select the fresh copy, go to Edit > Transform > Flip Vertical and place it as you can see in the second image.
Open the Layer Style window for this copy and enter the settings shown below.



Step 12
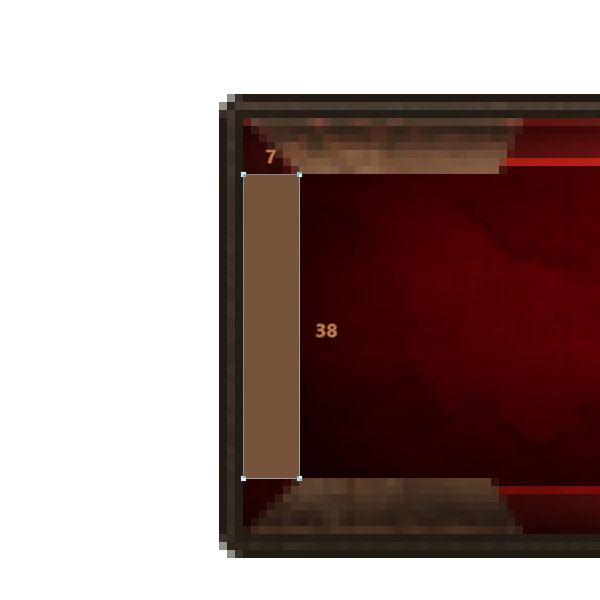
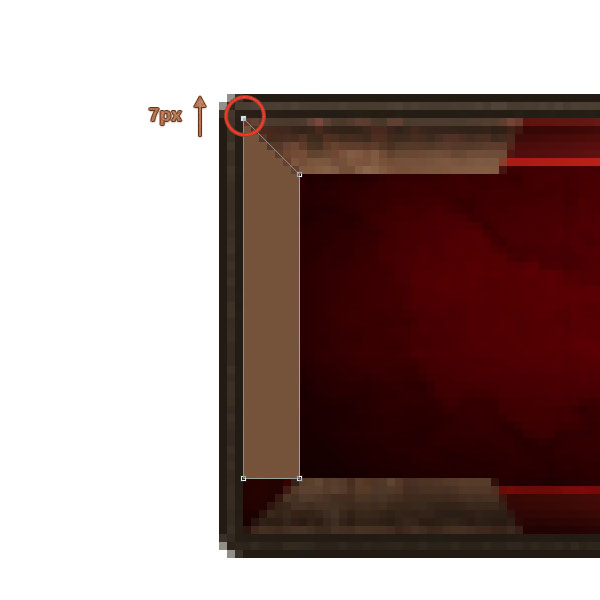
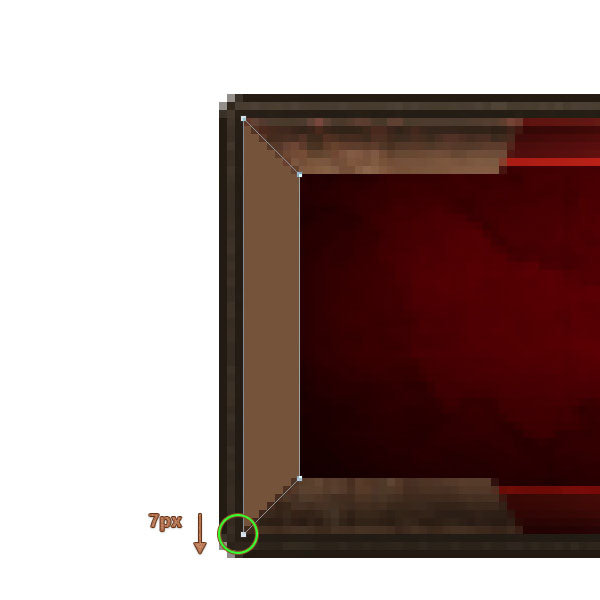
Pick the Rectangle Tool, create a 7 x 38 px vector shape and place it as you can see in the first image.
Grab the Direct Selection Tool, select the anchor point highlighted with red and move it 7 px up.
Now, select the anchor point highlighted with green and move it 7 px down.
Step 13
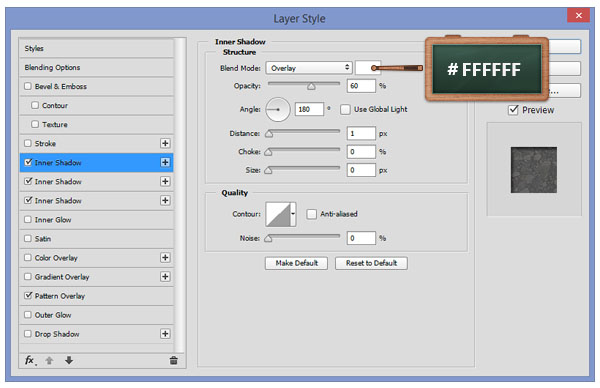
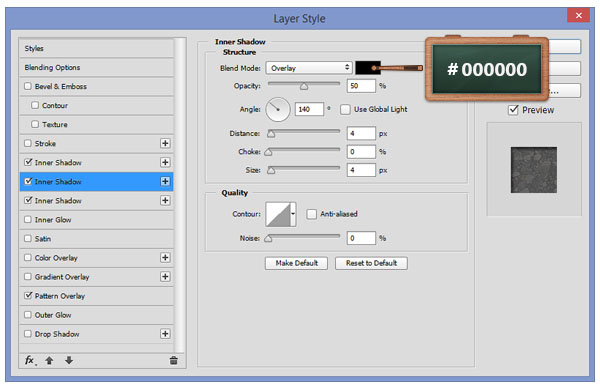
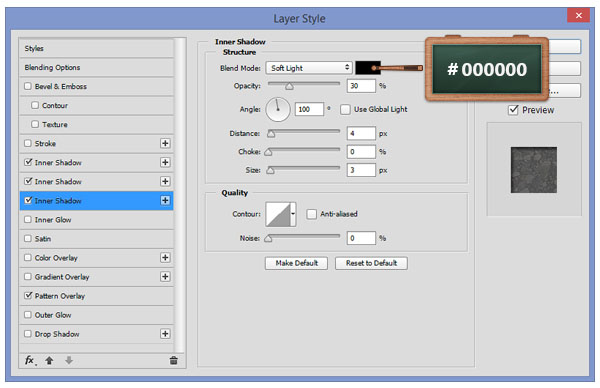
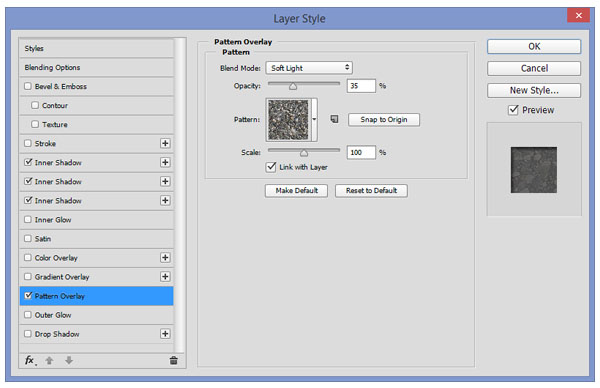
Open the Layer Style window for the vector shape made in the previous step and enter the settings shown below.

Step 14
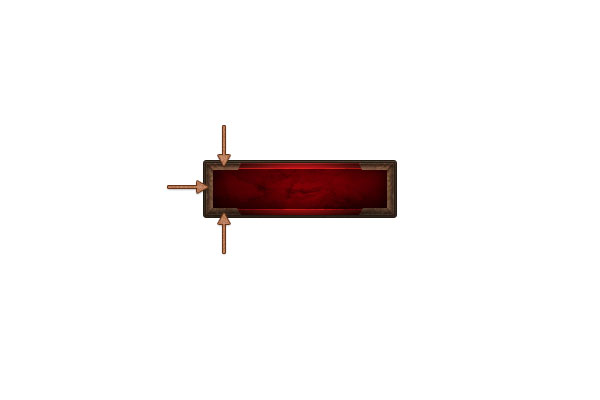
Focus on the Layers panel, select all the vector shapes highlighted in the next image and then duplicate them. Right click on one of them and go to Convert to Smart Object.
Now, make sure that the Smart Object is selected, go to Edit > Transform > Flip Horizontal and place it on the opposite side.
Step 15
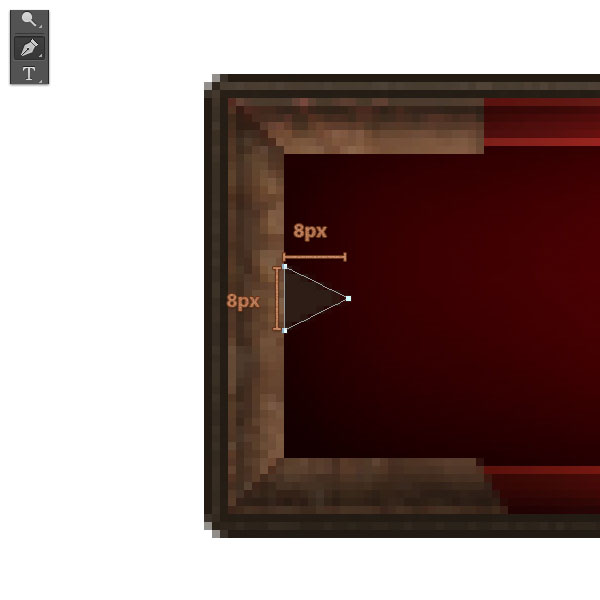
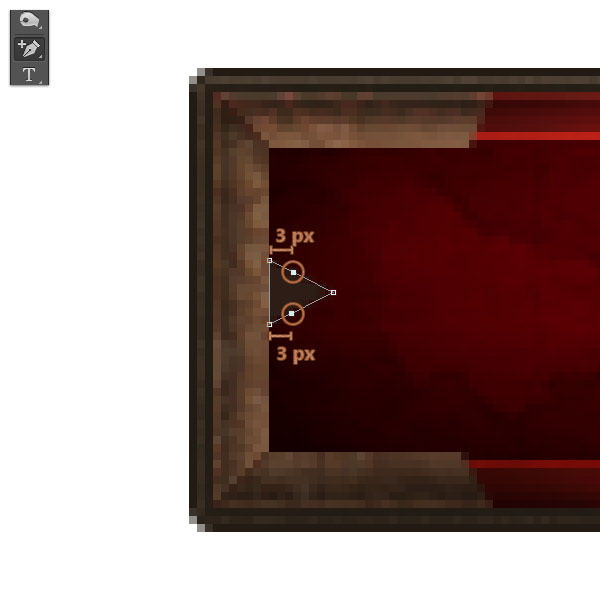
Set the foreground color to #2D1D15, pick the Pen Tool and create the following vector shape.
Grab the Add Anchor Point Tool and add two new anchor points as you can see in the second image.
Step 16
Pick the Direct Selection Tool, select one by one the anchor points added in the previous step and move them 1 px to the center.
Step 17
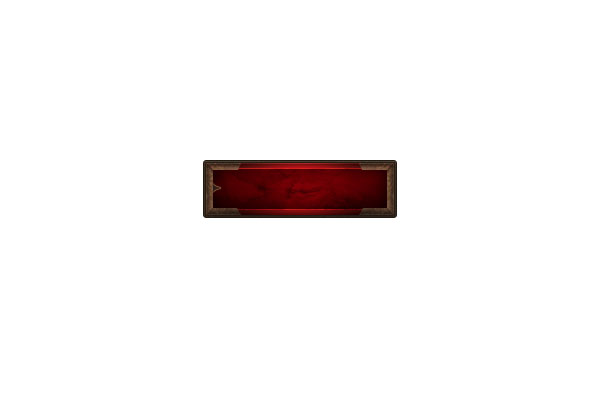
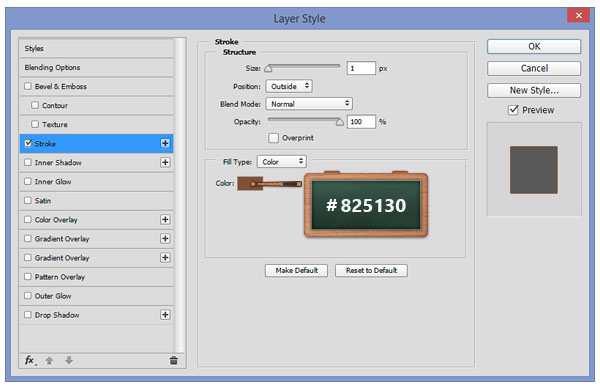
Open the Layer Style window for the vector shape made in the previous step and enter the settings shown below.
Step 18
Make sure that the vector shape edited in the previous step is still selected and then duplicate it.
Select the copy, go to Edit > Transform > Flip Horizontal and place it on the opposite side.
Step 19
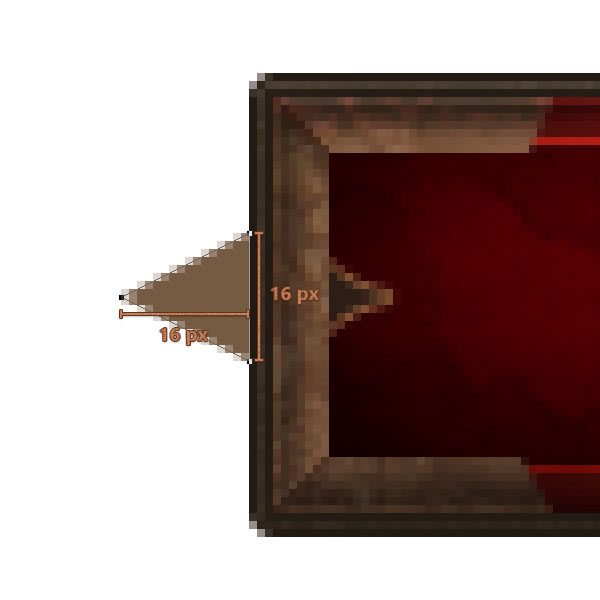
Change the foreground color to #765B41, pick the Pen Tool and create the following vector shape.
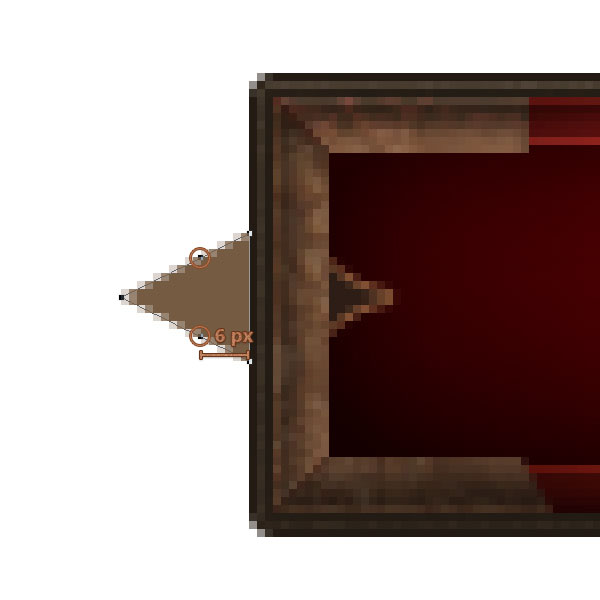
Grab the Add Anchor Point Tool and add two new anchor points as you can see in the second image.
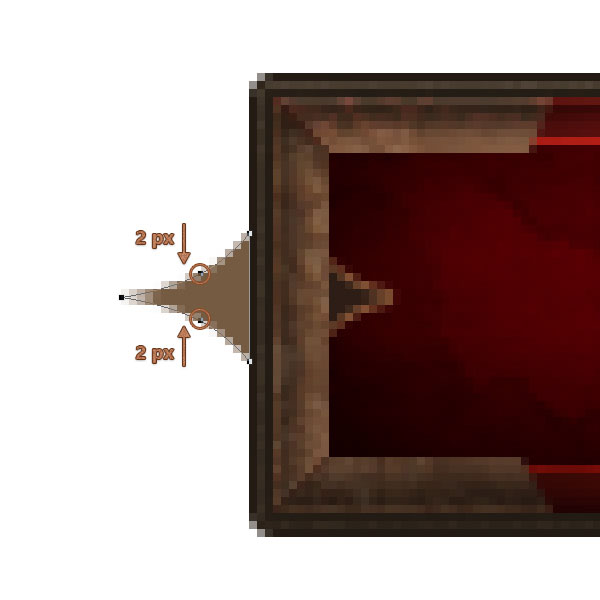
Now, simply pick the Direct Selection Tool, select one by one the anchor points added in this step and then drag them 2px to the center. The result should be the same as you can see in last image.
Step 20
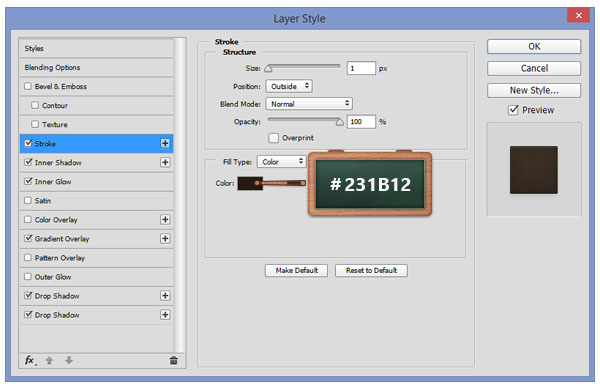
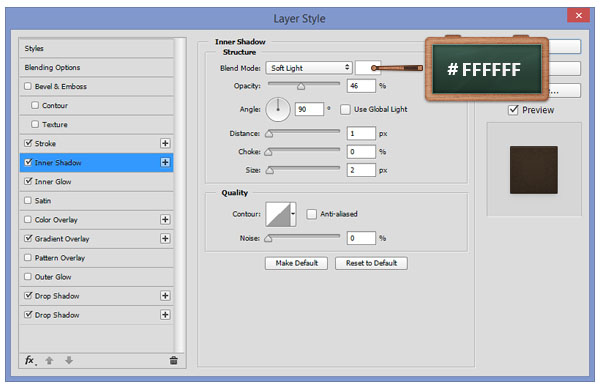
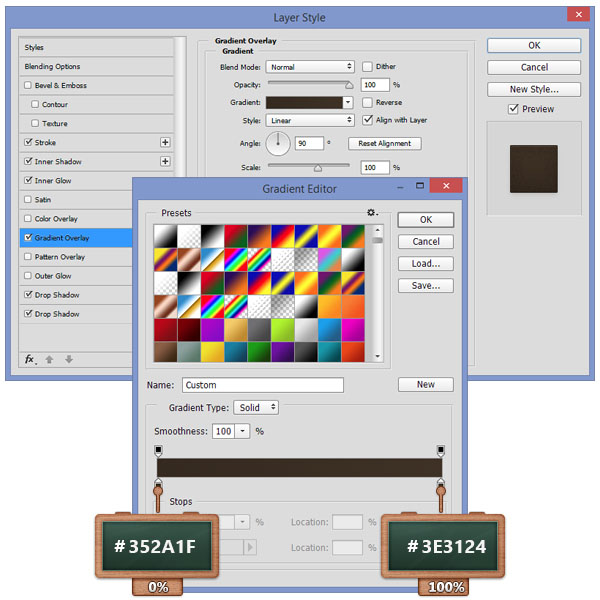
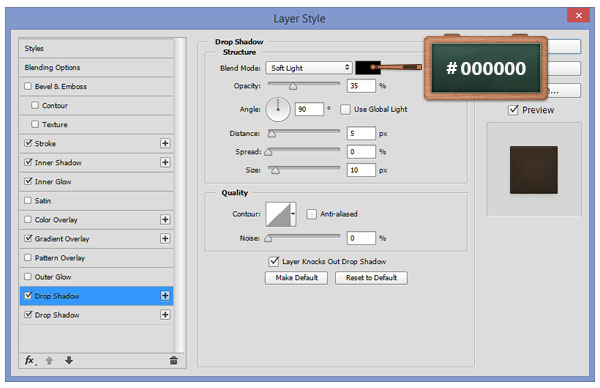
Open the Layer Style window for the vector shape made in the previous step and enter the settings shown in the next images.


Step 21
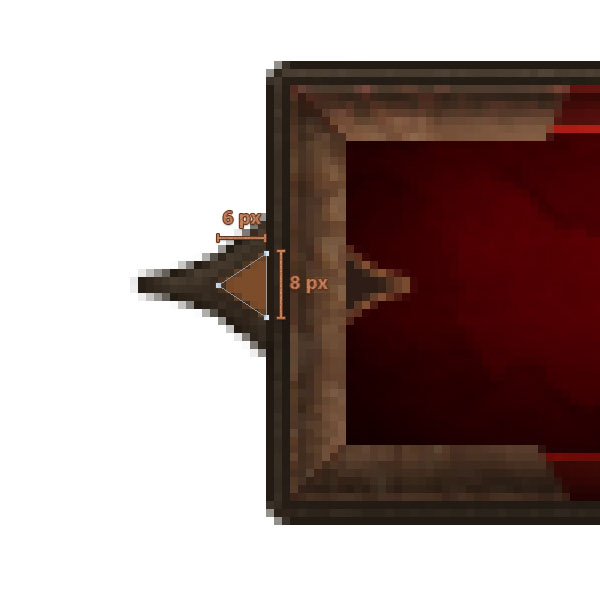
Pick the Pen Tool, move to your canvas and create following vector shape.
Step 22
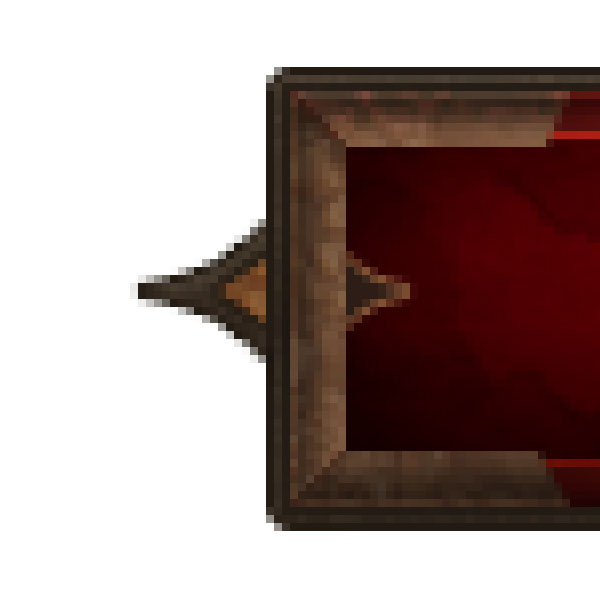
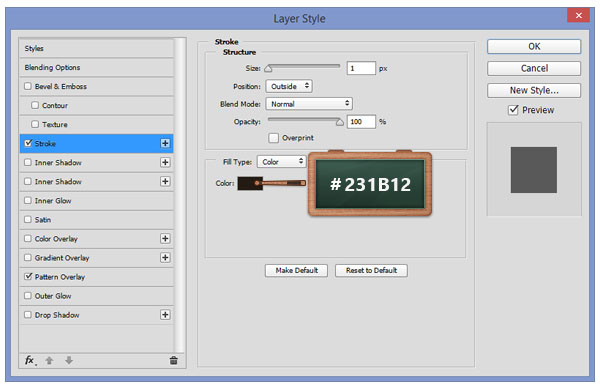
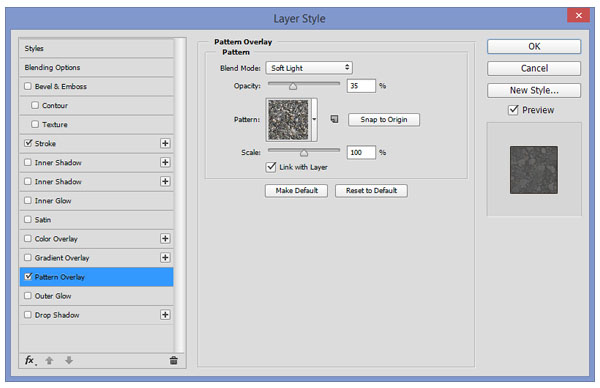
Open the Layer Style window for the vector shape made in the previous step and enter the settings shown in the next images.
Step 23
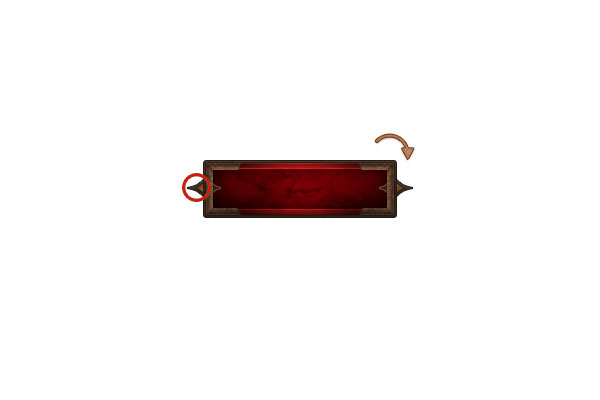
Select all the vector shapes from the left side of your button and duplicate them. Select the copies, go to Edit > Transform > Flip Horizontal and place them on the opposite side.
Step 24
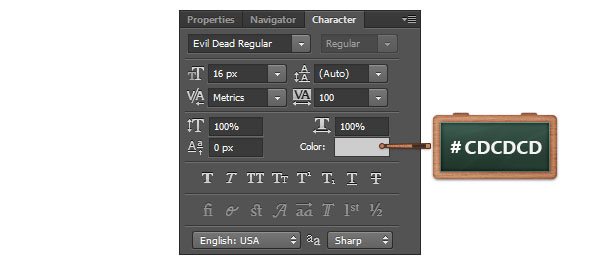
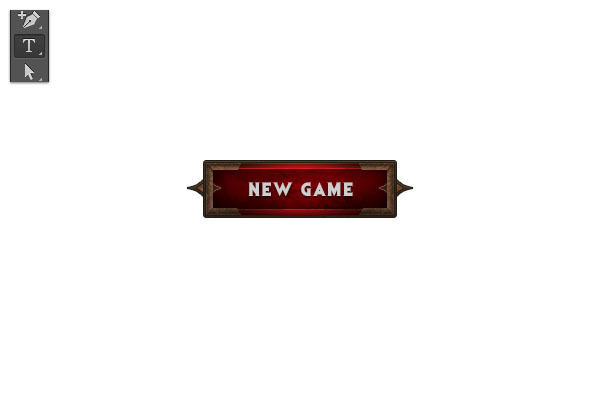
Open your character window ( Window > Character ) and use the Evil Dead Regular font.
Change the color to #CDCDCD, set the size to 16 px and then enter the text as shown below.
Open the Layer Style window for this text, go to the Drop Shadow section and enter the settings shown below.
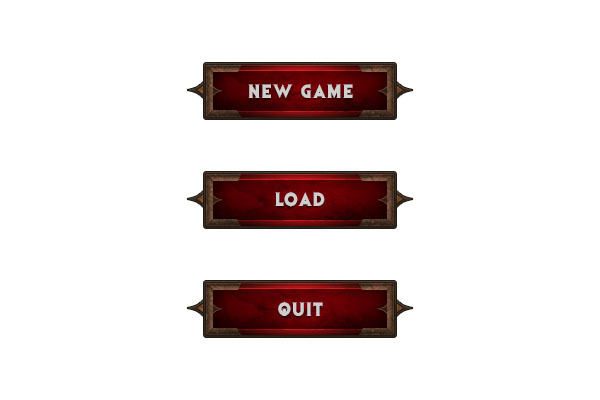
Since the button is done, you can select all the shapes that make up your button and group them using the Control + G keyboard shortcut. Now you can duplicate your button whenever you want.

Step 25
Focus on the Layers panel, select the Background layer and click on the padlock icon to unlock the layer.
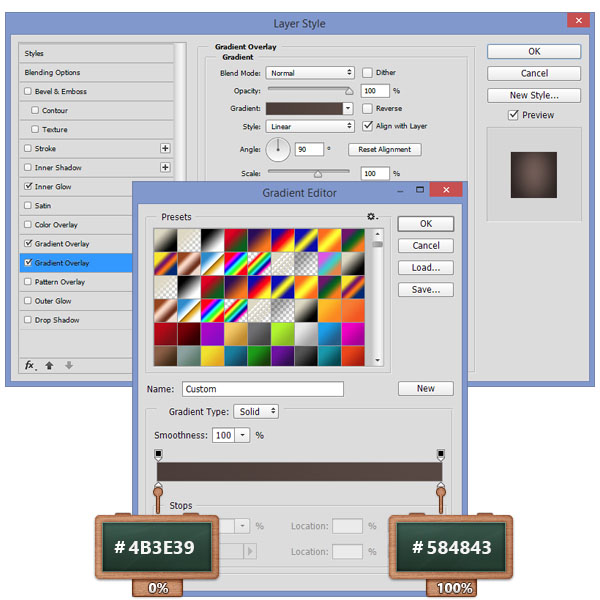
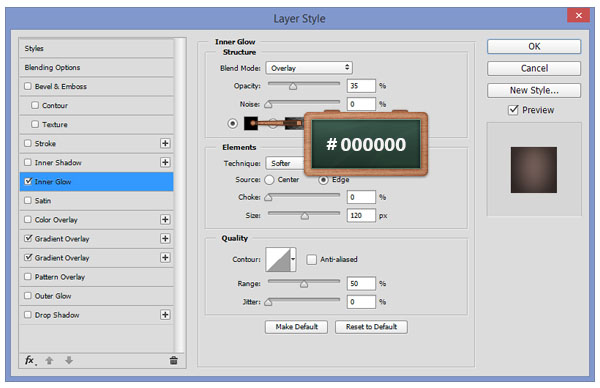
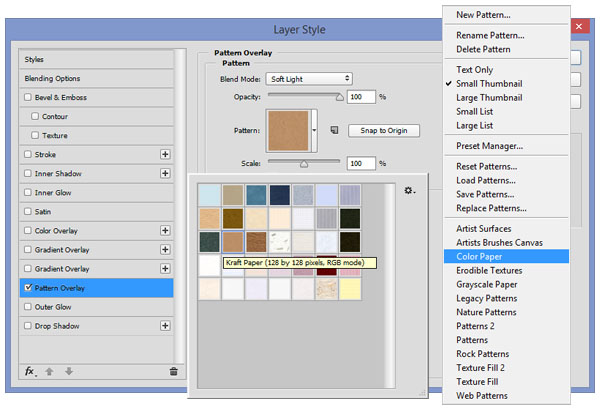
Open the Layer Style window for this layer and enter the settings shown below.

Step 26
Focus on the Layers panel and duplicate the layer made in the previous step. Make sure that the fresh layer is selected, right click on it and go to Clear Layer Style.
Make sure that the fresh layer is still selected and lower the Fill to 0%.
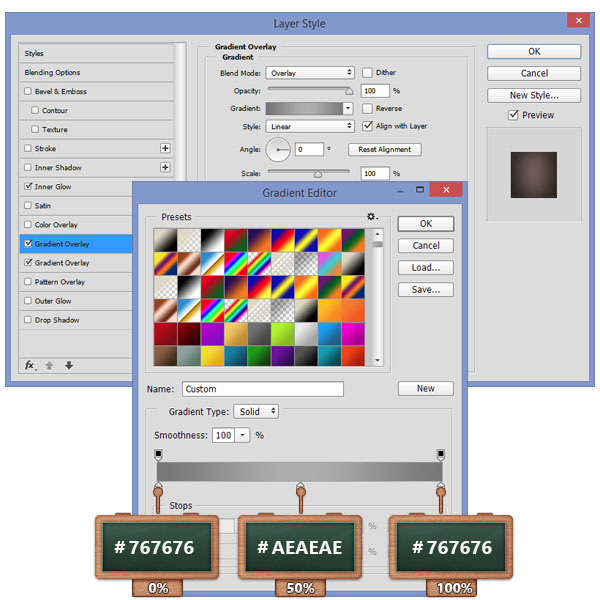
Now, simply open the Layer Style window for this fresh layer and enter the settings shown below.

And We’re Done!
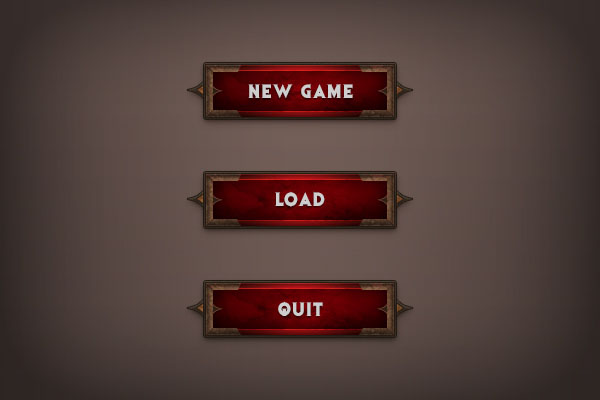
Here is how your final result should look.
