In the following tutorial you will learn how to create a detailed pacifier illustration using Adobe Photoshop.
Photoshop Star Premium Members can login now for full access to this tutorial. Premium Members get access to exclusive tutorials for Photoshop and Illustrator. Also access to dozens of tutorial source files.
Get a Premium Membership now.
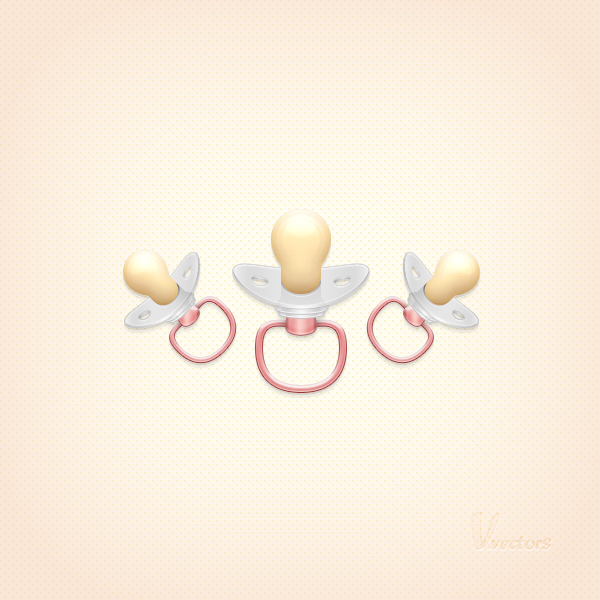
Final Image
Step 1
Open Photoshop and hit Control + N to create a new document.
Enter all the properties shown in the following image and click OK.
Enable the Grid (View > Show > Grid) and the Snap to Grid (View > Snap To > Grid). For starters you will need a grid every 2px. Go to Edit > Preferences > Guides, Grid & Slices and focus on the Grid section. Enter 2 in the Gridline Every box and 1 in the Subdivision box. Also, set the grid color to #a7a7a7. Once you set all these properties click OK. Don’t get discouraged by all that grid. It will ease your work later. You should also open the Info panel (Window > Info) for a live preview with the size and position of your shapes.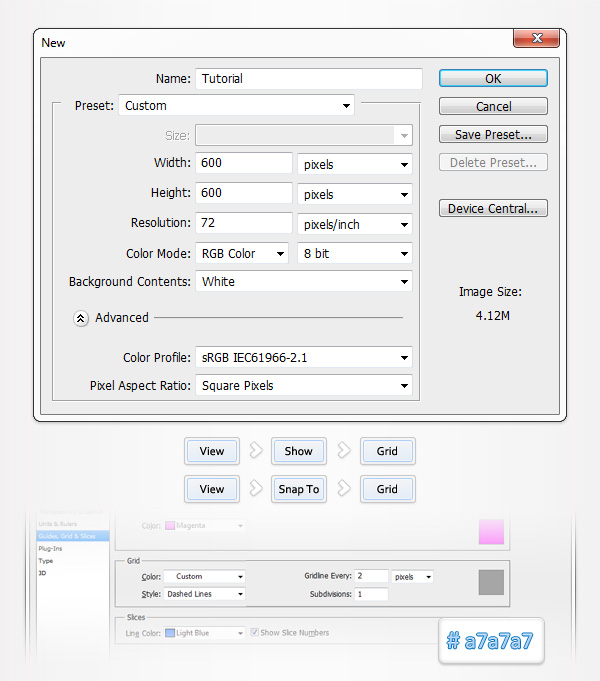
Step 2
Set the foreground color to #d37469, pick the Ellipse Tool, create a 92 by 122px vector shape and make sure that it stays selected.
Focus on the top bar, check the Subtract button and draw a 76 by 106 px vector shape as shown in the second image.
Switch to the Direct Selection Tool and focus on the top side of this vector shape. Select the two anchor points highlighted in the second image and simply drag them 34px down. The Snap to Grid should ease your work.
Continue with the Direct Selection Tool and focus on the bottom side of your vector shape. Select the two anchor points highlighted in the third image and drag them 14px up. In the end your shape should look like in the fourth image.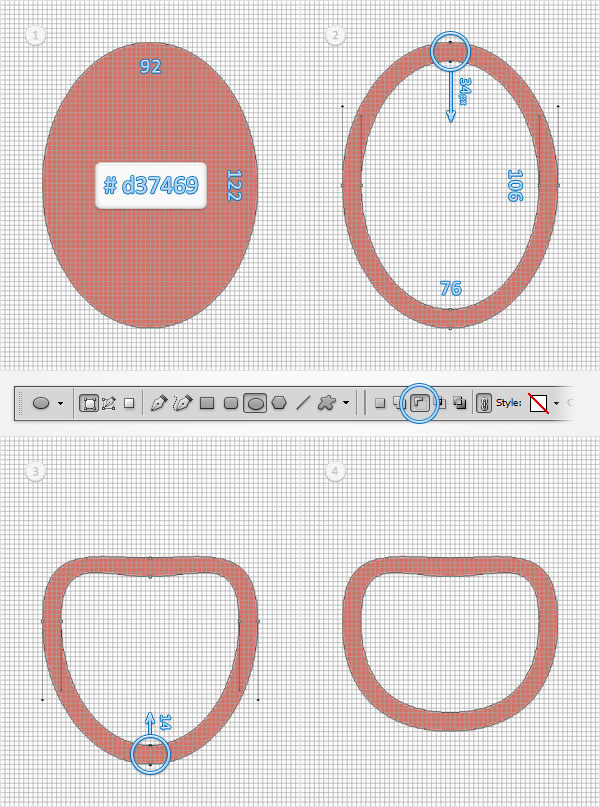
Step 3
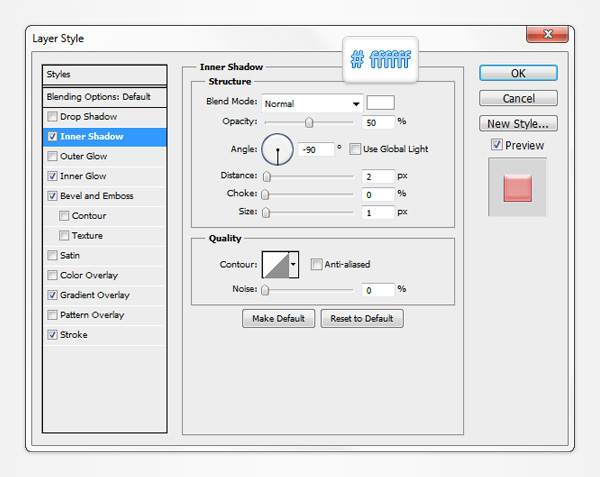
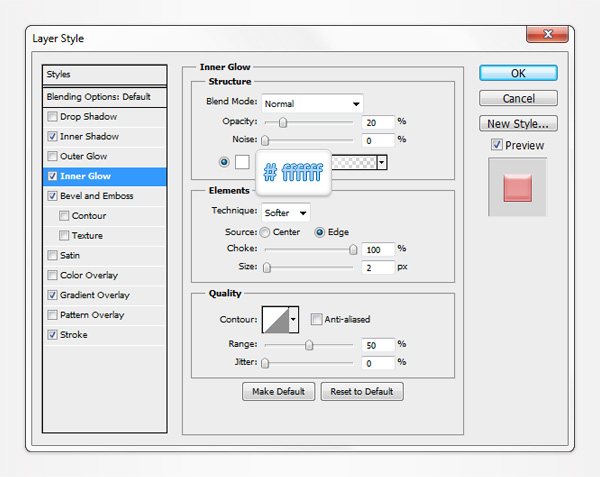
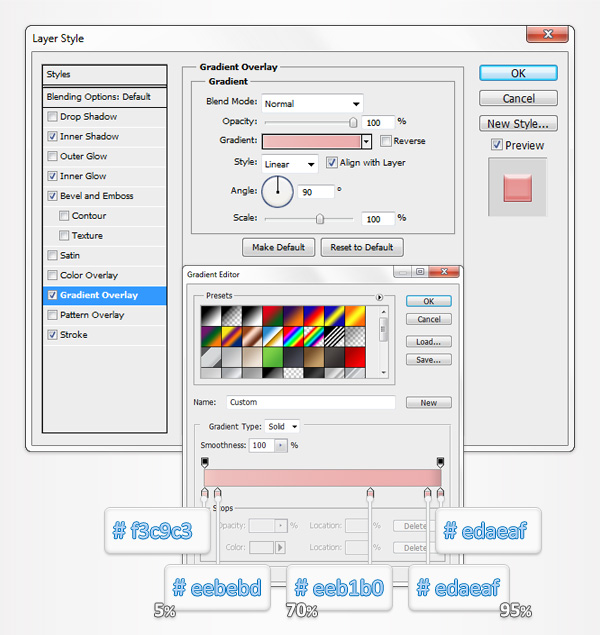
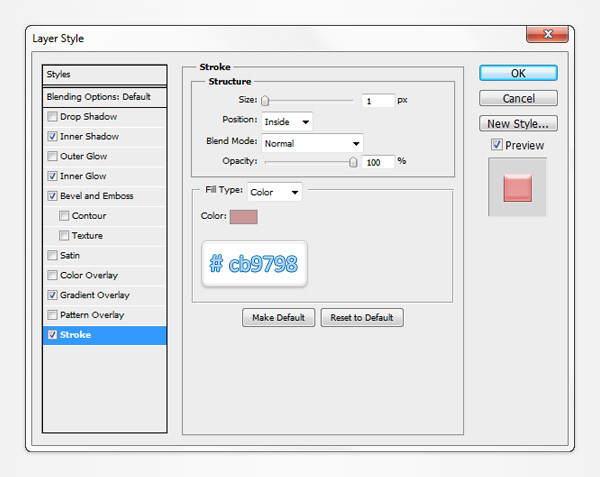
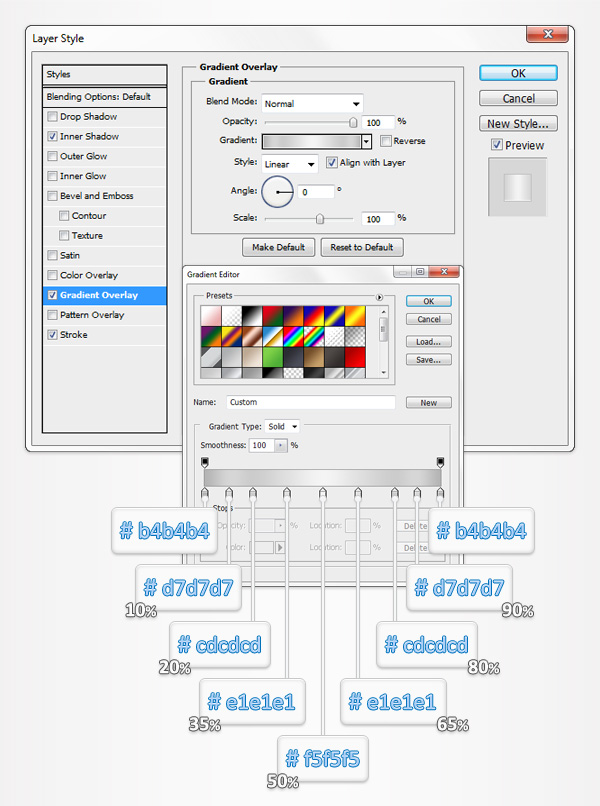
Focus on the Layers panel and double click on the vector shape made in the previous step to open the Layer Style panel. You need to adjust the Inner Shadow, the Inner Glow, the Bevel and Emboss, the Gradient Overlay and the Stroke applying the properties shown in the following images.
Step 4
For the following steps you need a grid every 1px. Simply go to Edit > Preferences > Guides, Grid & Slices and enter 1 in the Gridline Every box. Set the foreground color to #d37469, pick the Rounded Rectangle Tool and set the radius at 5px.
Create a 26 by 25px vector shape, place it as shown in the first image and go to Edit > Transform Path > Warp. Select Arc from the Warp drop-down menu, enter -10 in the Bend box and hit Enter.
Make sure that this new vector shape is still selected and go again to Edit > Transform Path > Warp. Select Arch from the Warp drop-down menu, enter -30 in the Bend box and hit Enter.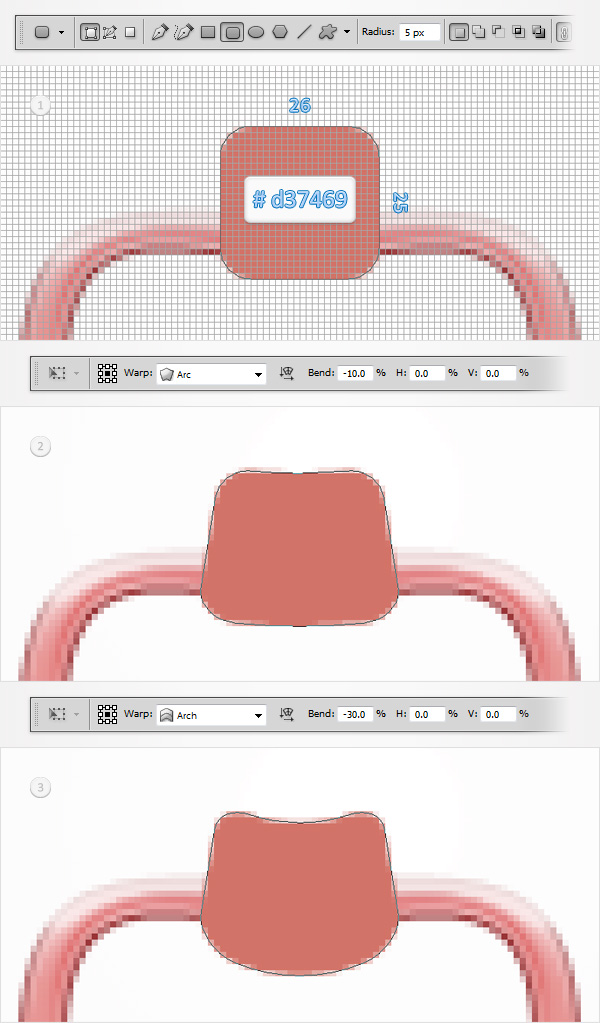
Step 5
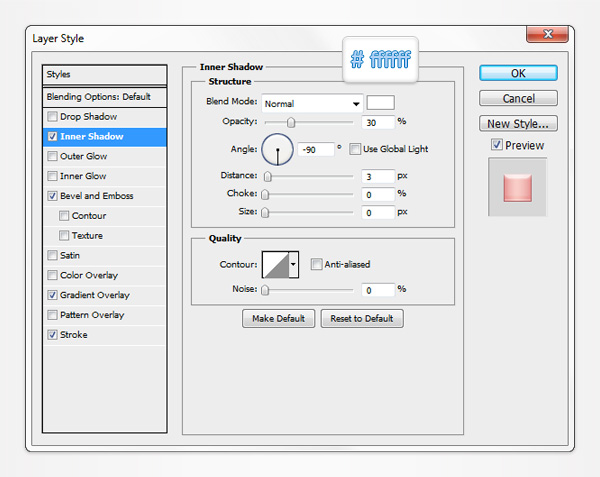
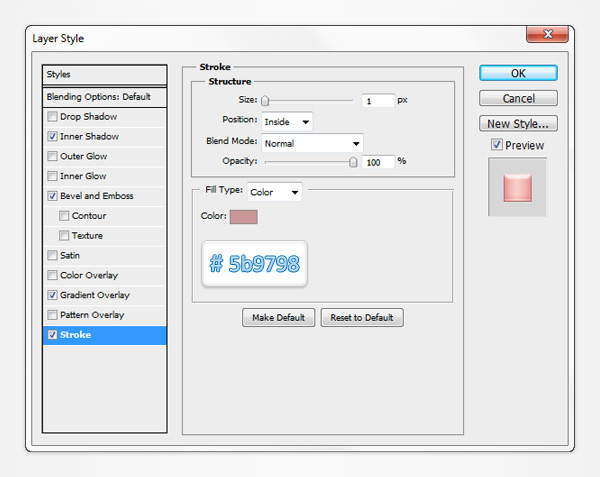
Open the Layer Style window for the vector shape made in the previous step and enter the properties shown in the following images.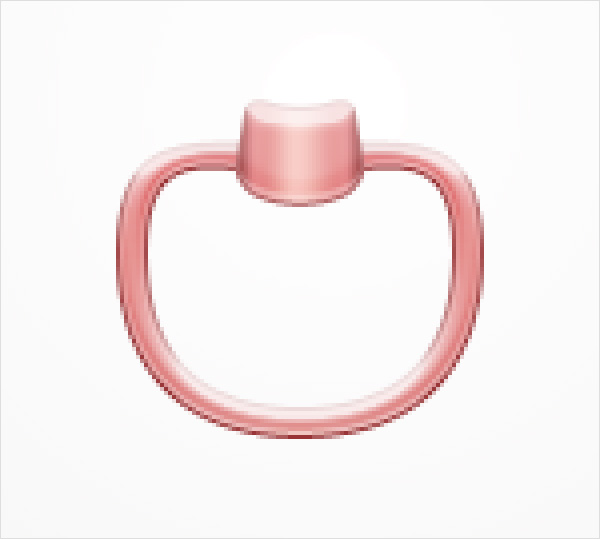


Step 6
Hit Shift + Control + Alt + N to create a new layer, focus on the Layers panel and drag it between those two vector shapes.
Set the foreground color to black and grab the Brush Tool (B). Pick the Soft Round brush, set the Size to 40px and the Hardness set at 0%. Make sure that the new layer is still selected, focus on your artwork and add a simple shadow as shown in the first image.
Move to the Layers panel, hold Control and click on the bottom vector shape. This should load a simple selection around your shape. Keep this selection active, select the layer made in this step and simply click on the “Add layer mask” button from the bottom of the Layers panel. In the end your masked layer should look like in the third image.
Finally, hit Control + D to get rid of that selection.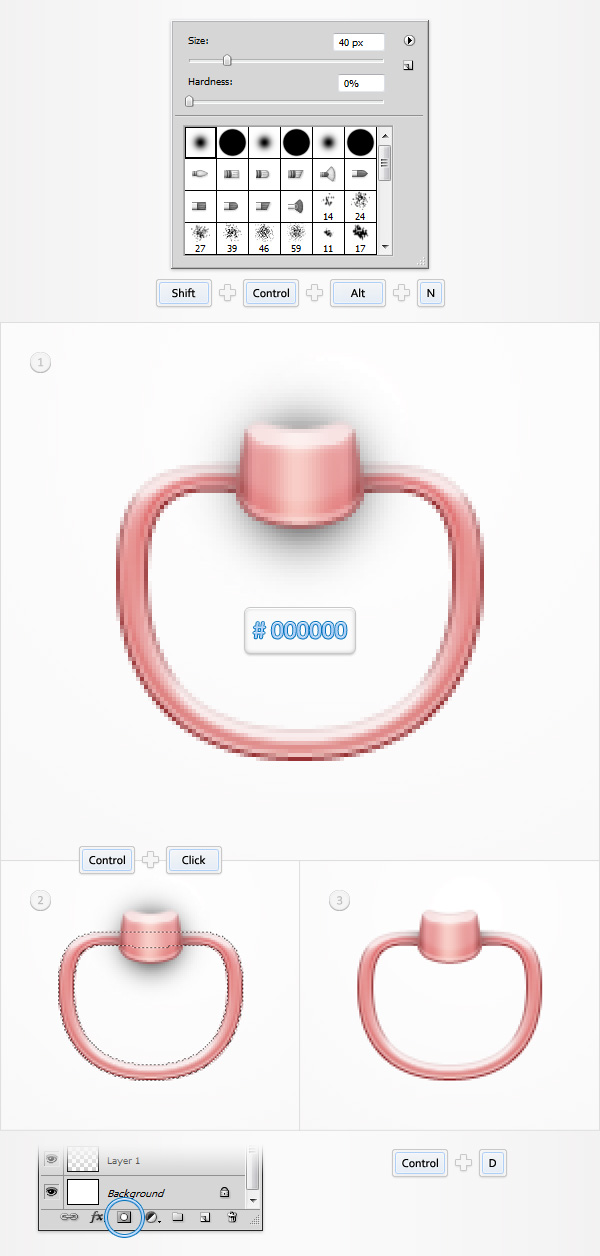
Step 7
For the following steps you need a grid every 2px. Simply go to Edit > Preferences > Guides, Grid & Slices and enter 2 in the Gridline Every box. Set the foreground color to #959595 and pick the Rounded Rectangle Tool.
Set the radius to 4px, create a 36 by 20px vector shape and place it as shown in the first image.
Make sure that this new vector shape is selected and go to Edit > Transform Path > Warp. Select Arc from the Warp drop-down menu, enter -20 in the Bend box and hit Enter.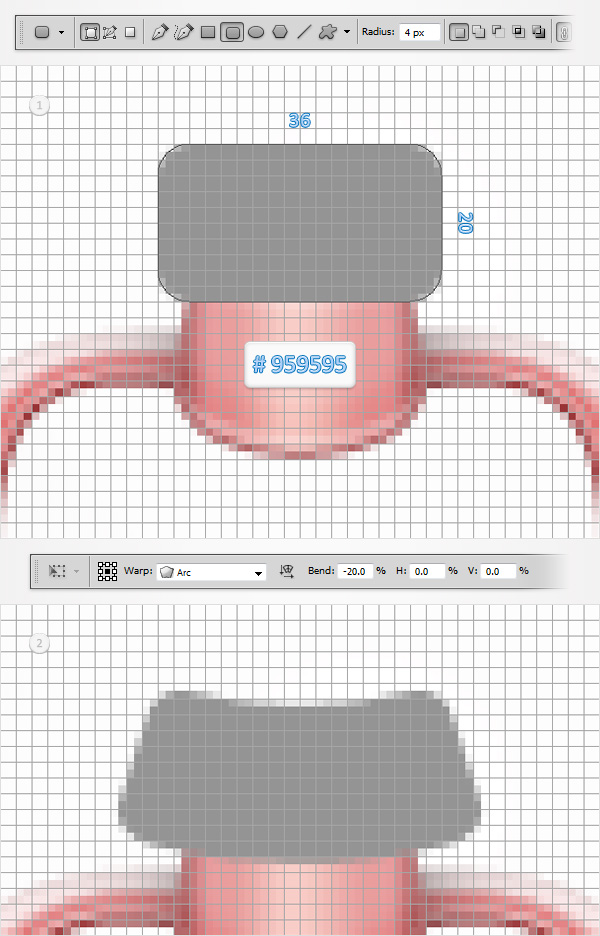
Step 8
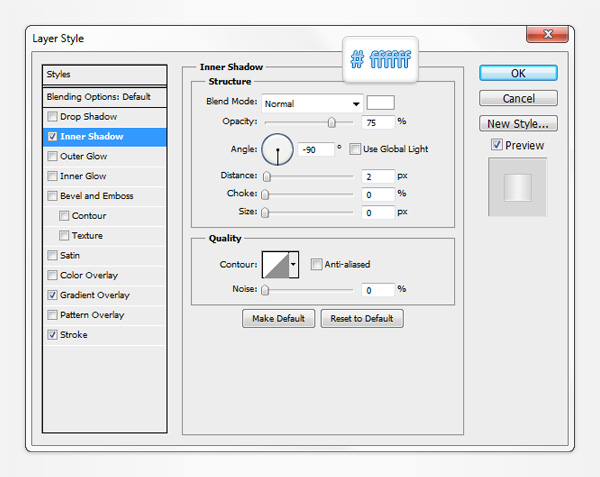
Open the Layer Style window for the vector shape made in the previous step and enter the properties shown in the following images.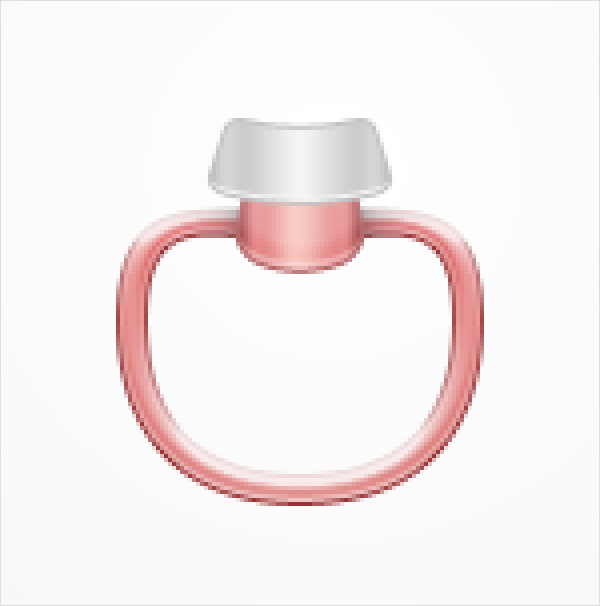

Step 9
Pick the Rounded Rectangle Tool, set the radius to 10px, create a 48 by 20px vector shape and place it as shown in the first image.
Make sure that this new vector shape is selected and go to Edit > Transform Path > Warp. Select Arc from the Warp drop-down menu, enter -20 in the Bend box and hit Enter.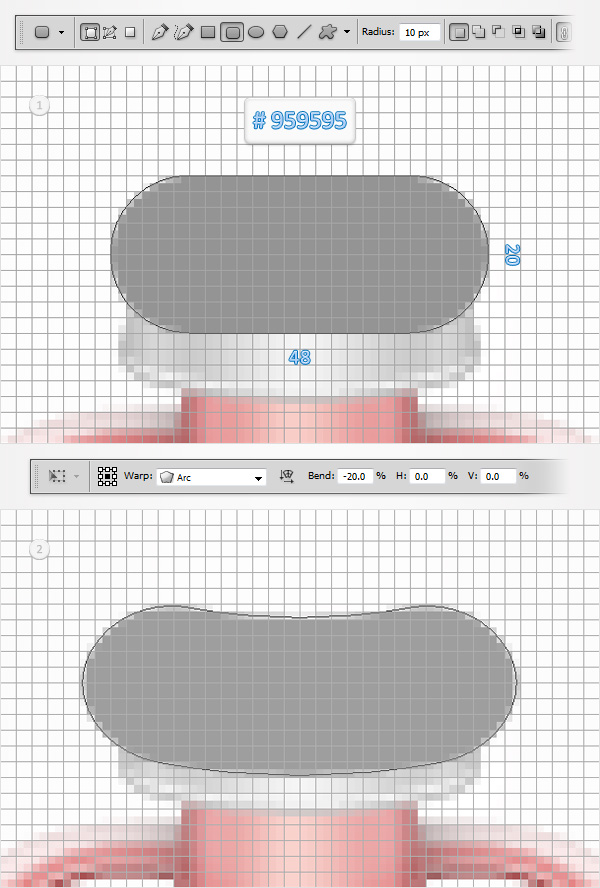
Step 10
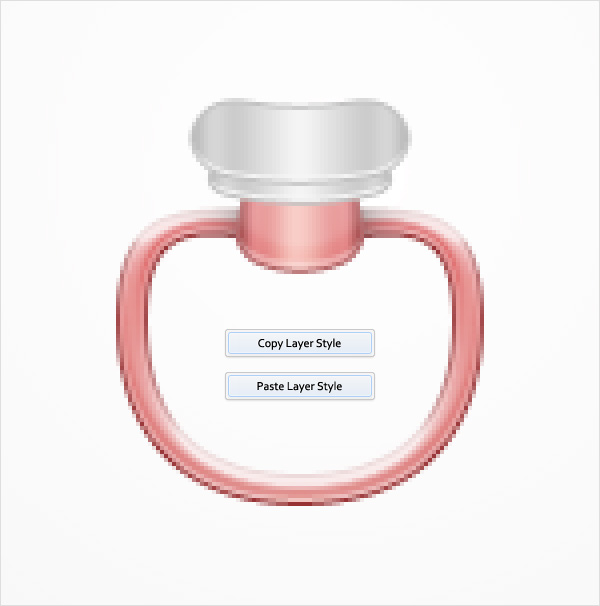
Focus on the Layers panel, right click on the vector shape edited in the eighth step and go to Copy Layer Style.
Move to the vector shape made in the previous step, right click on it and simply go to Paste Layer Style. In the end things should look like in the following image.