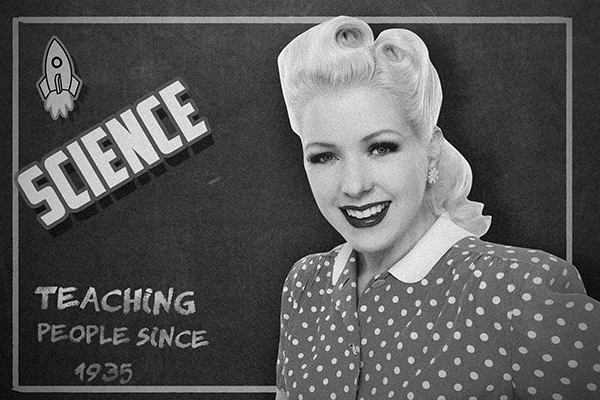
In this Photoshop tutorial we will create a retro chalkboard scene with a lovely teacher and some wacky fonts.
Final Image
As always, this is the final image that we’ll be creating:

Tutorial Details
- Program: Adobe Photoshop CS2
- Estimated Completion Time: 40 minutes
- Difficulty: Beginner-Intermediate
Resources
Step 1
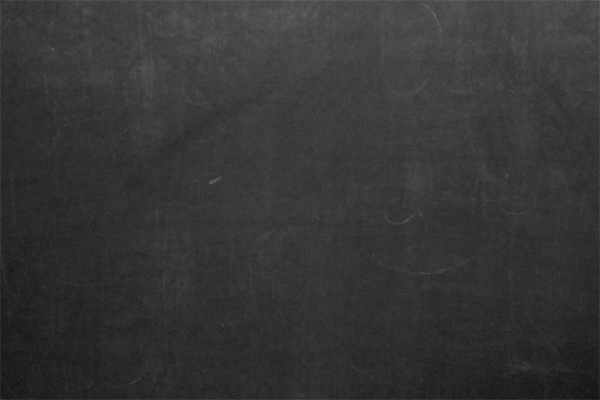
Open Photoshop and create a new file 1920×1280 (Ctrl + N). Open the file “Chalkboard” and select all by pressing Ctrl + A. Copy (Ctrl + C) and go back to our newly created document.
Press Ctrl + V to paste. You can move the pasted layer around and resize it by pressing Ctrl + T (Free Transform) and Shift-dragging the handles.
Step 2
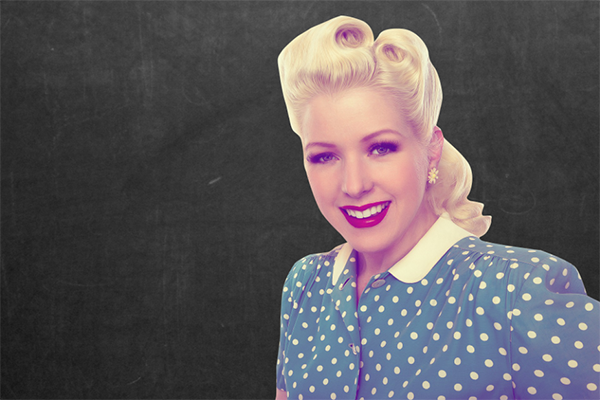
Open the file “Woman”. Choose the Pen Tool (P) and create a path around the woman. Once you’re done press Ctrl + Enter to transform that path into a nice crisp selection.
Press Ctrl + C to copy the selection and go back to our document. Paste (Ctrl + V) and use Free Transform (Ctrl + T) to position the woman/teacher as shown below. You can also use a picture of another person if you like.
Step 3
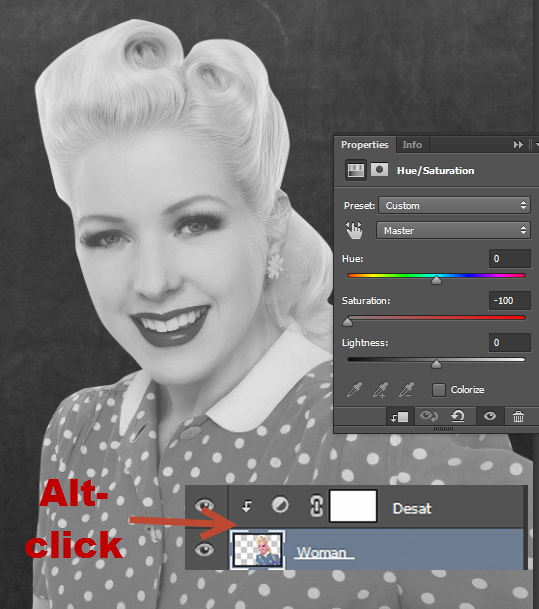
Because this is going to be a retro photo manipulation we have to desaturate the woman layer. Create a Hue/Saturation Adjustment Layer (Layer > New Adjustment Layer > Hue/Saturation) and clip it to the woman layer (hold the Alt key and click between the two layers in the layer palette). Drag the saturation slider to -100;
Step 4
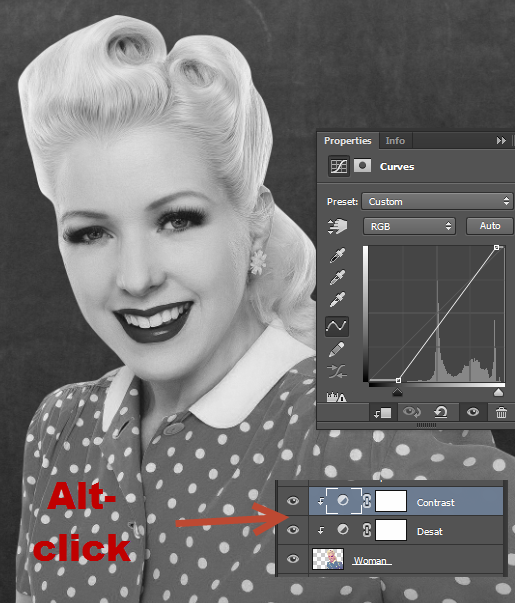
The woman layer colors are a little washed out so let’s boost the contrast. We will do that by using a Curves Adjustment Layer. Go to Layer > New Adjustment Layer > Curves and clip the newly created adjustment layer to the woman layer (alt-click between the curves layer and the already clipped hue saturation layer in the layer palette). Drag the sliders as shown below to boost the black and white colors and thus increase the contrast.
Step 5
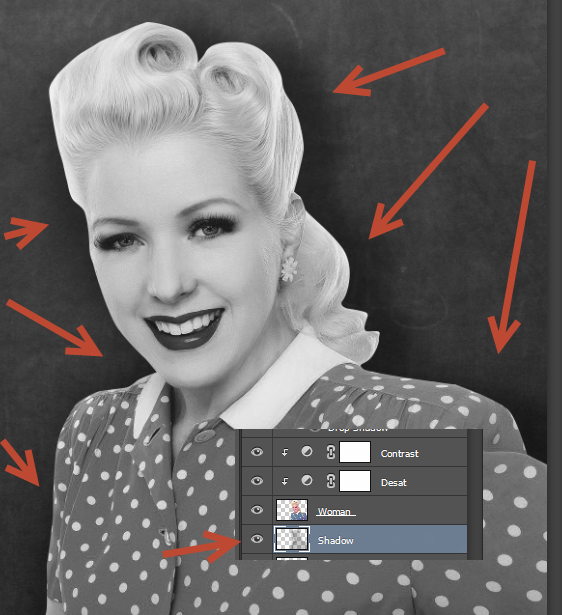
In order to make the woman look more realistic let’s add a shadow behind her falling on the chalkboard.
Create a new layer (Ctrl + Shift + Alt + N) and move this layer below the woman layer in the layers palette. Choose the standard round soft brush from the Brush Preset palette (Window > Brush Presets) and lower the opacity to 50%.
Paint with black a subtle shadow following the contours of the woman.
Step 6
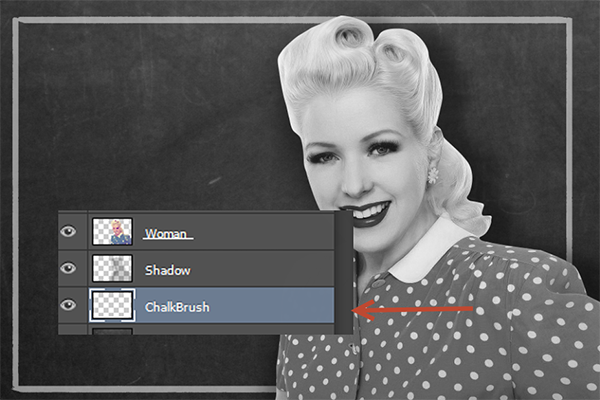
Let’s create a white rectangle on the chalkboard to frame our scene better. First create a new layer (Ctrl + Shift + Alt + N) and move it below the shadow layer. Choose the standard chalk brush and paint with white the rectangle shown below (hold shift while dragging the brush to restrict the movement to perfectly vertical or horizontal). Lower the fill of the layer to 50%.
Step 7
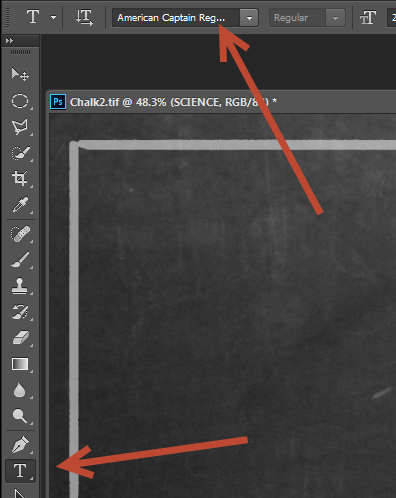
Let’s add some retro fonts to our scene. Download and import the “American Captain” font (double click on the font and choose install if you are on Windows 7, otherwise Google to see how to install fonts on your specific operating system). Go back to Photoshop and select the Type Tool (T). Select the American Captain font in the area indicated below.
Step 8
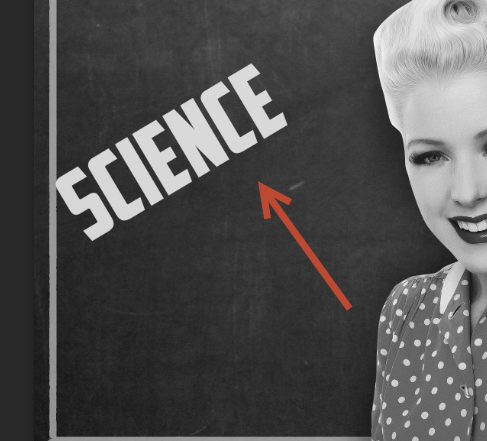
Now type “SCIENCE” (font size 275pt and white color) and use the Free Transform tool to position the text as shown below.
Step 9
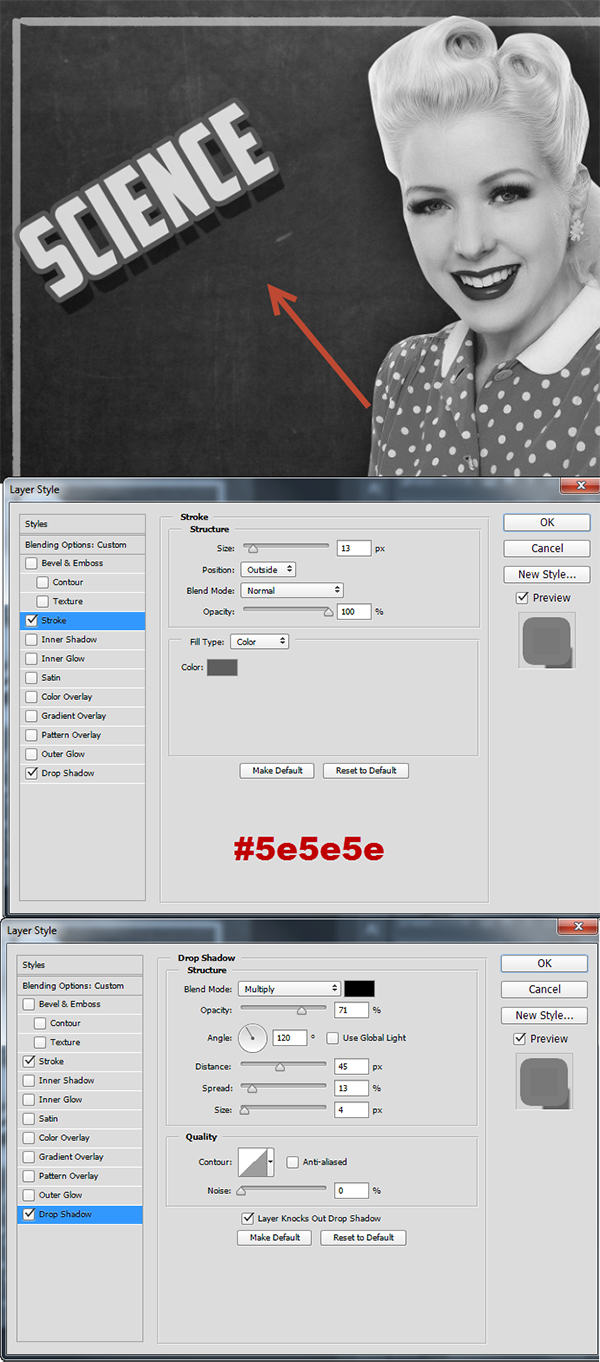
Let’s make this font truly retro by adding some contour lines and a drop shadow effect for better visuals.
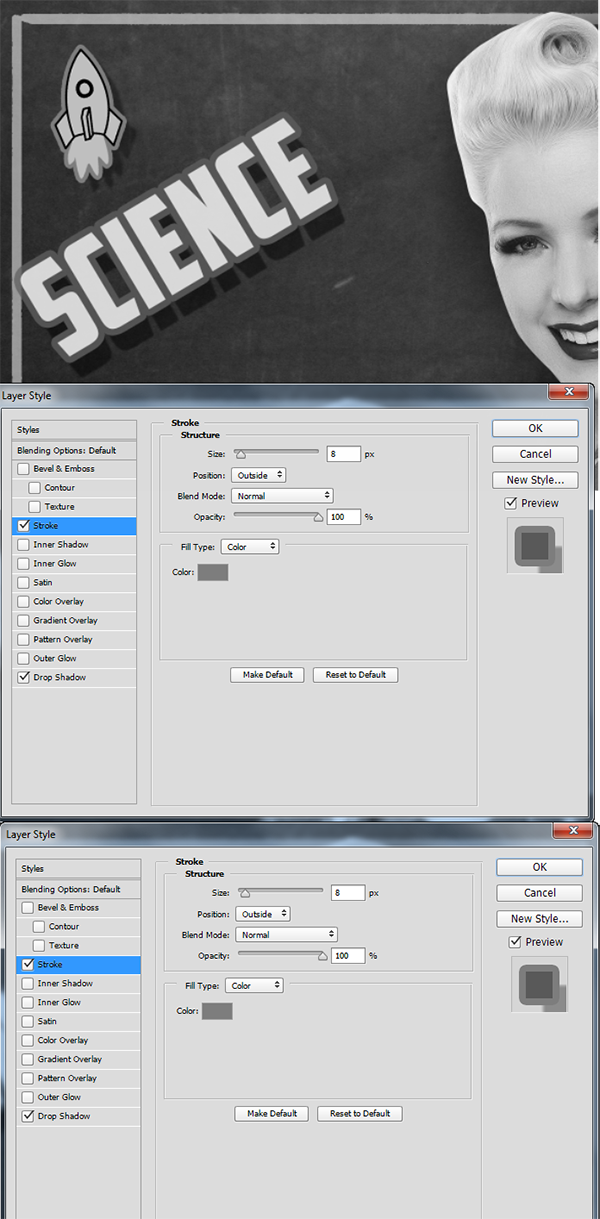
Right click the font layer and from the drop down menu choose “Blending Options”. Add a 13px gray stroke and a drop shadow effect as shown below.
Step 10
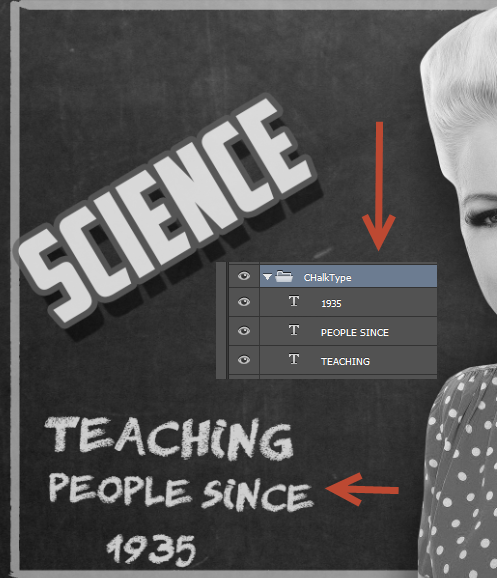
Let’s add some silly text below the science text. Import the “Chalk Font” and use the type tool to write something silly (or serious) – “Teaching people since 1935”. I used three type layers, each for every line of text – on the first layer I typed “Teaching” with font size 87, on the second layer I typed “people since” with font size 68 and on the third layer I typed “1935” with font size 68. Finally I selected all these type layer (by Shift –clicking on each) and grouped them together (Ctrl + G).
Step 11
Since this is supposed to be chalk and chalk writing is never this regular or white let’s add a bit of randomness.
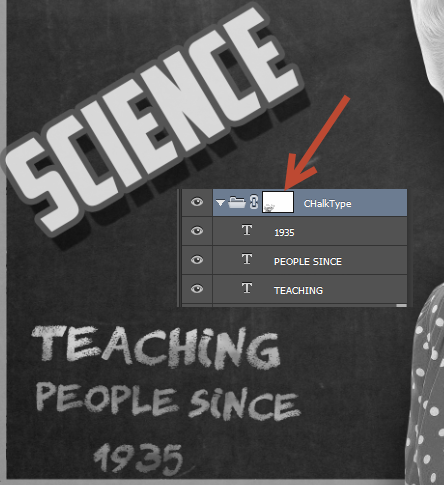
Add a layer mask to the chalk writing group we created in the previous step (Layer > Layer Mask > Reveal all) and in the layer mask paint with the standard chalk brush at 40% opacity with black here and there over the text to partially hide it (black in a layer mask hides and white reveals). I also lowered the opacity of the group to 70%.
Step 12
Let’s add some more silly graphics to our scene. Open the image “Rocket” in Photoshop and copy/paste it in our scene. Use the Free Transform tool (Ctrl + T) to position it above the “science” text layer.

Step 13
Double click the rocket layer to open the Blending Options window and add a gray stroke (just as we did for the “science” text in step 9) and a drop shadow effect.
Step 14
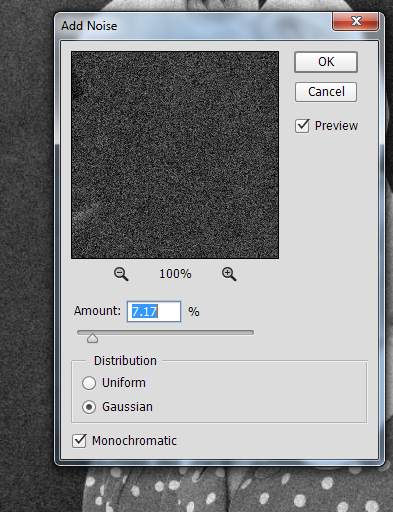
Since this is a retro scene and back then most of the black and white photos were grainy let’s do the same for our scene. Create a new layer from all the visible layers by pressing Ctrl + Shift + Alt + E and go to Filter > Noise > Add Noise to add a little bit of noise.
Step 15
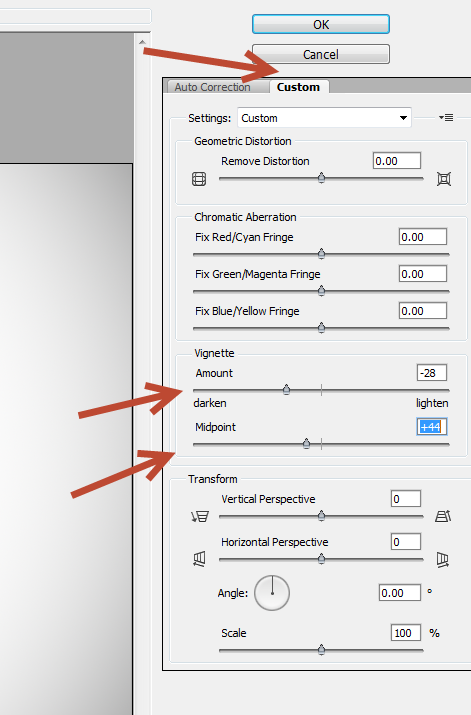
As always let’s add a vignette effect to our scene. Create a new layer and fill it with white (Shift + F5).
Go to Filter > Lens Correction and click on the Custom Tab. Use the settings shown below and press ok. Change the blending mode of the layer to Multiply and voila – vignette effect.
And We’re Done!
