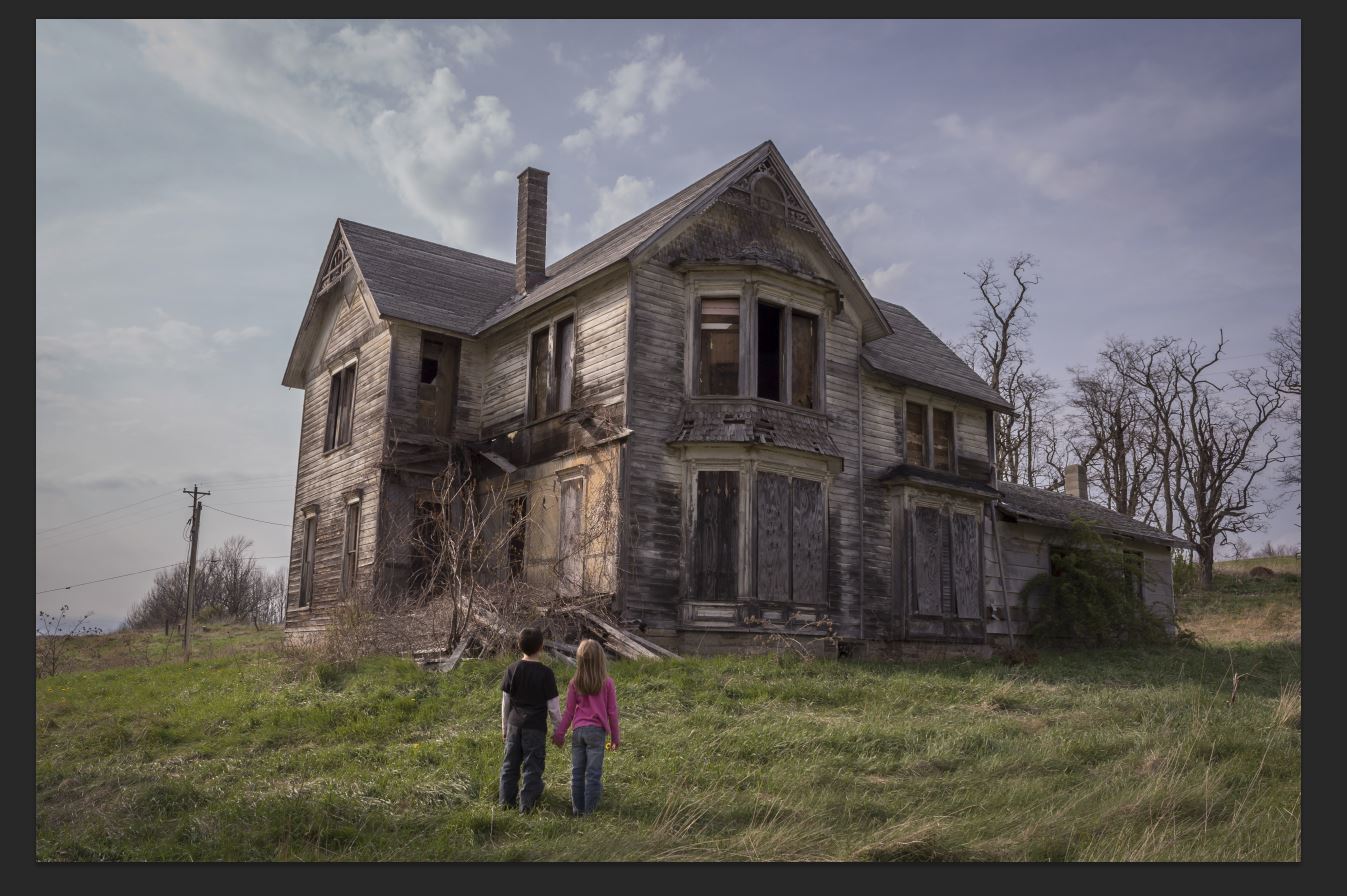
Happy Halloween! Making the rounds in 500px’s Popular page today is photographer Tracy Parker’s “The House”. From the desolate location to striking composition to its nostalgic mood—this photo has eerie haunted house horror movie scene written all over it.
In this exclusive tutorial, Pennsylvania-based Tracy Parker will show you how to recreate this image. Read on, and get great insights into creating atmospheric scenes for your next themed photo shoot!
THE CONCEPT
When I headed out to shoot this photo, my original plan was to just take a photo of the house. I’ve always loved this house with all its details, and the many stories it creates in my head every time I see it.
After taking a couple shots of it, I knew something was missing from the story forming in my head. My kids were playing behind me, so I asked them to stand in front of the house and hold hands while looking up at the windows.
Then, I framed the house and the children, making sure to include the trees behind the house to finish off the story. The shot I chose was the one that had the best exposure of them while the sky was blown out. I knew that—with some post-processing—I would be able to add and blend all the elements together.
THE EQUIPMENT
Canon EOS Rebel T3i
Lens: Kit lens 18-55mm
Tripod
POST-PROCESSING
The shot below is the RAW image from the camera:
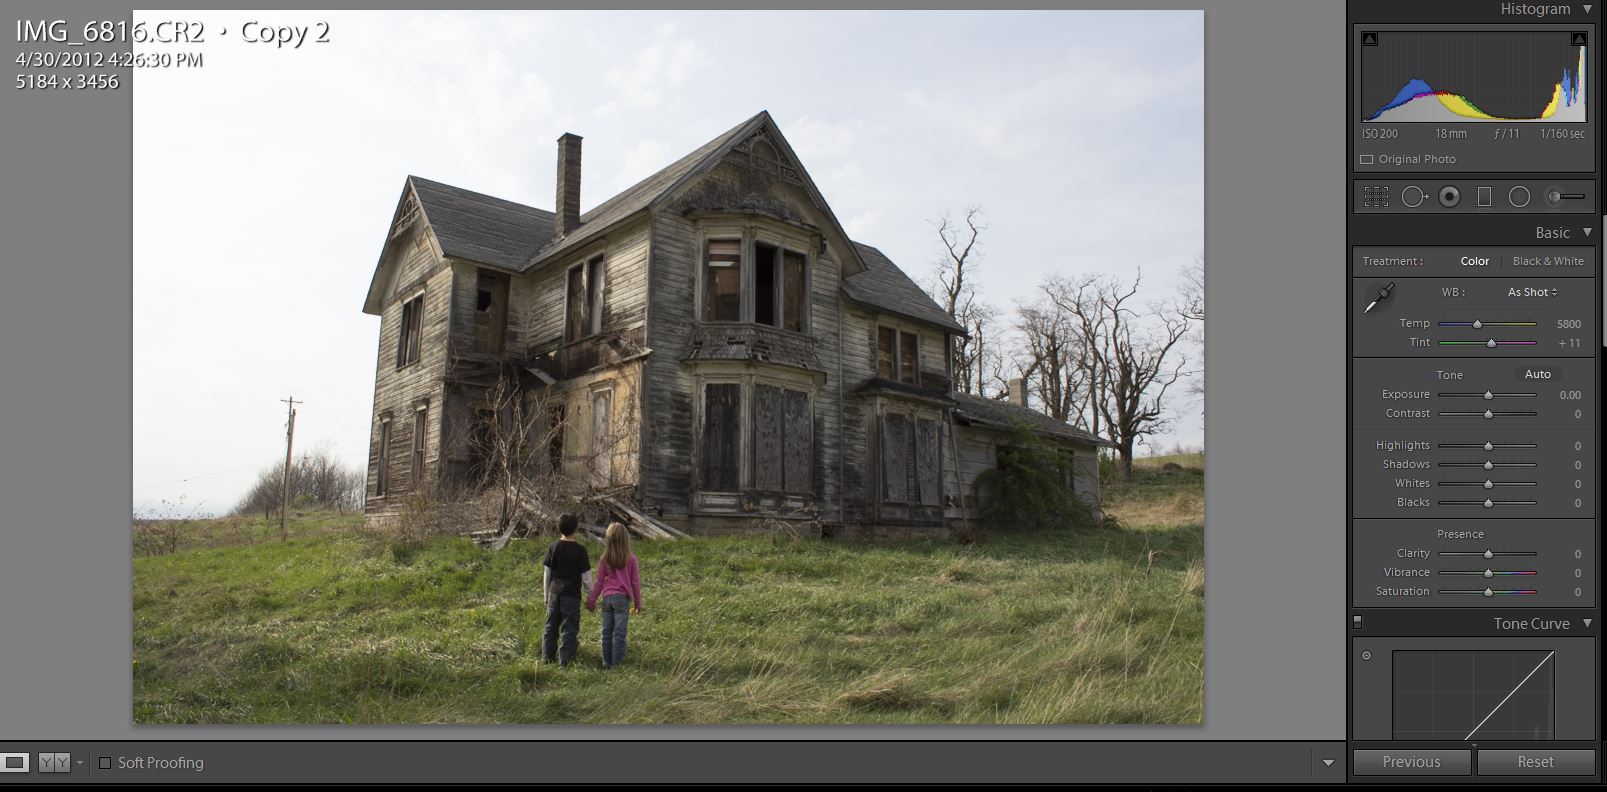
Then, after I set all my standard settings in Lightroom, I achieved my base exposure for the children, foreground, and also the house itself. See the shot below:
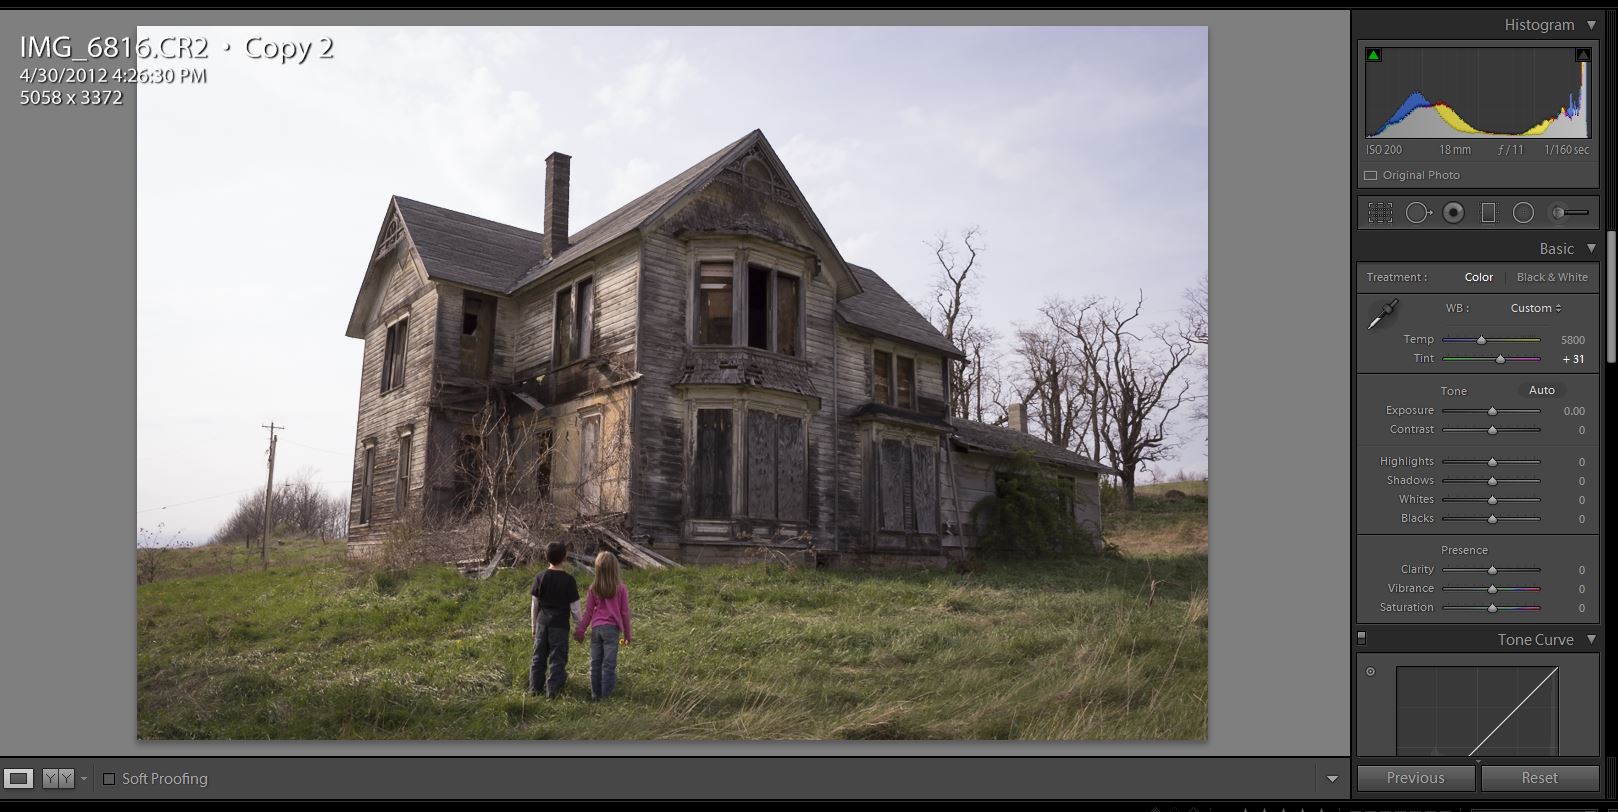
Then, I set my exposure for the sky and trees. I like to try to use just one shot instead of multiple shots, because I find that the images tend to fade together much better. Make sure to open up the shadows on the house to make it easier to layer them together in Photoshop, which you will see in the next step.
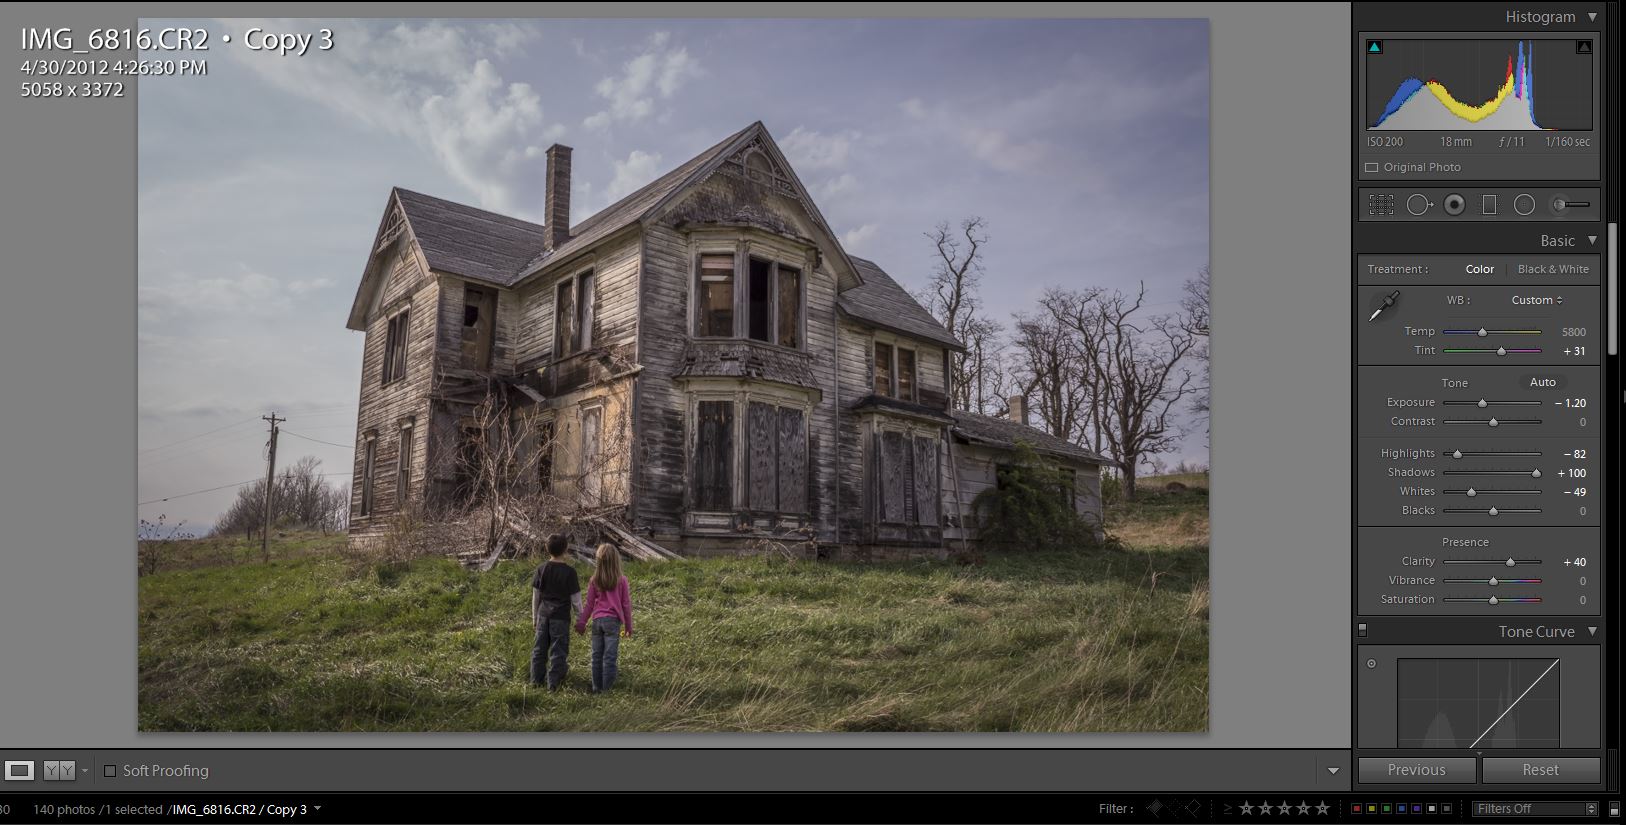
Next, I took the two photos from Lightroom into Photoshop, and placed the sky exposure on the bottom. Then, using a layer mask on the other photo, I brushed back the foreground and house exposure. I made sure to overlap the roof lines just a little bit to keep the Halo effect from happening. This is the reason why I made sure to open up the shadows in the sky photo.
After that, I merged the two layers together:
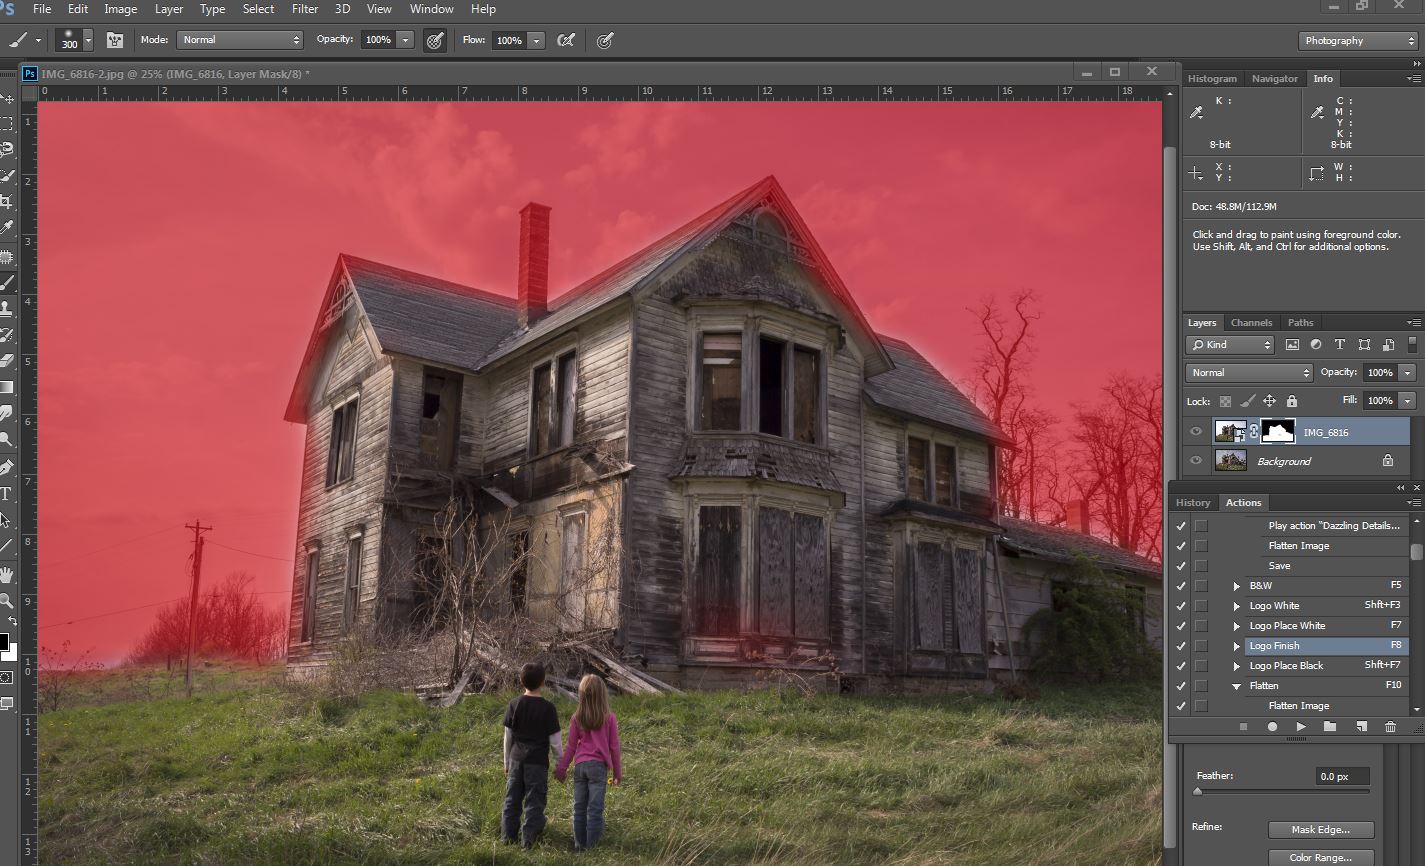
Next, you want to remove the elements that don’t really tell the story and distract the eye from the subject.
So I removed the electrical pole on the left of the house, and the electric lines out back of the house that go through the trees. It takes lots of cloning to make this all disappear, but it makes such a difference in the end.
With the bare trees in the back of the house, the clouds just over the top of the house—plus my kids standing watch over the house, I knew that the image just needed to be black and white. So I used a few layers to bring out some more details in the sky using the B&W converter in Photoshop. Then, I added some more contrast to deepen the details of the house and trees.
With the way the light is on the house, I knew it would move well, from left to right, in the way I wanted people to see the story from the start. You begin with a clean sky to an old house, then move onto the kids staring up at the empty windows, and you finish by resting your eyes on the creepy trees in the background.
The last thing I did was to sharpen the image.
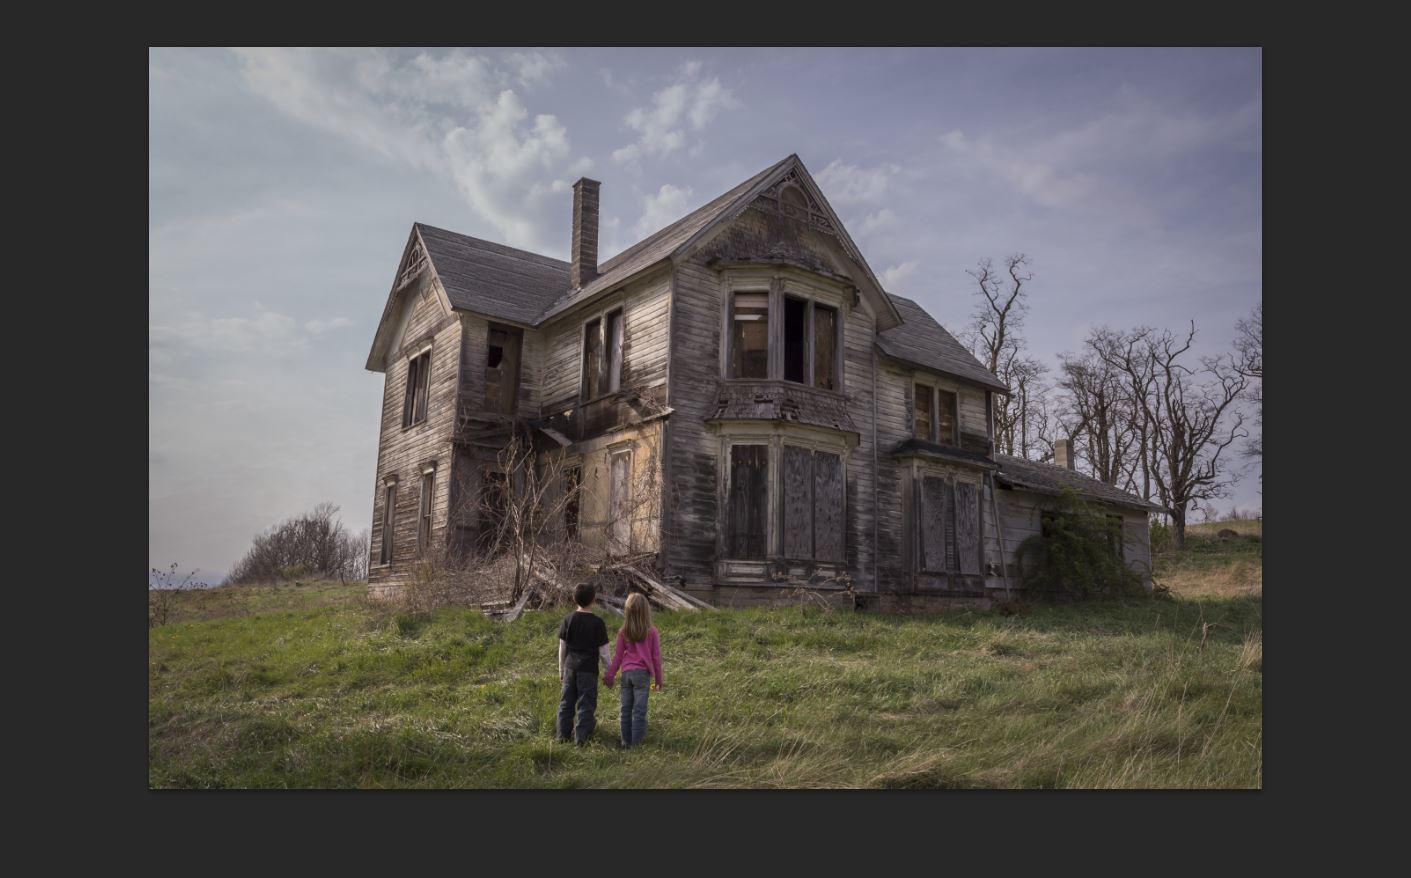
ANOTHER VERSION
For the image above, I returned to the house with the same idea in mind, but I used a different angle on it. This time, I made the subject—my daughter—fill up the shot a little more.
Once again, the light came from the left. It maintains the same idea of moving the viewer’s eyes from left to right on the photo. On the day of this shoot, I felt all the elements came together to tell the story in color this time—with the wind blowing, and the color of the sky and grass. It still has a spooky atmosphere. But I think with the color tones, it tells more of a story of love, loss, and hope for the viewer.
I also wanted to see if I could make the photo better with the new equipment that I have now versus the equipment I started with. But after taking the shot, I realized that even though the image is sharper and clearer, it didn’t tell the story any better than the first time.
As professional photographers, we sometimes get too caught up in the need to capture the stories we want to tell with the best equipment. We forget that a great photo isn’t just made by the equipment, but by the artist that creates a story with the tools at hand. As artists, we must first be able to tell a story. And then, leave the worrying about equipment to create the shot for last.
Since then, I have gone back many times to this location. I would take many more photos of this particular house, even with a few clients, requesting me too shoot photos of them in front of it.
I still visit the house from time to time and stare at it in wonder. To this day, I continue to wonder about all the untold stories it holds within its walls.
To see more of Tracy Parker’s stunning images, scroll down.
You can follow Tracy Parker on 500px to see more of his work, or visit his website. To connect with him, visit and follow his Facebook page.
Got questions for Tracy about his photos and tutorial? Leave a comment for him below!