Panning is a technique you can use to add a sense of motion and drama to your images. If you are like most new photographers you probably struggle with getting images sharp, and eliminating problematic blur issues. In this method you get to blur on purpose, and it’s fun! So here are a few panning photography tips to help you create “moving” (sorry for the pun, couldn’t help myself) images.
Let’s look at two examples – one image frozen and sharp, compared to a panned and blurred image
Examples of panning
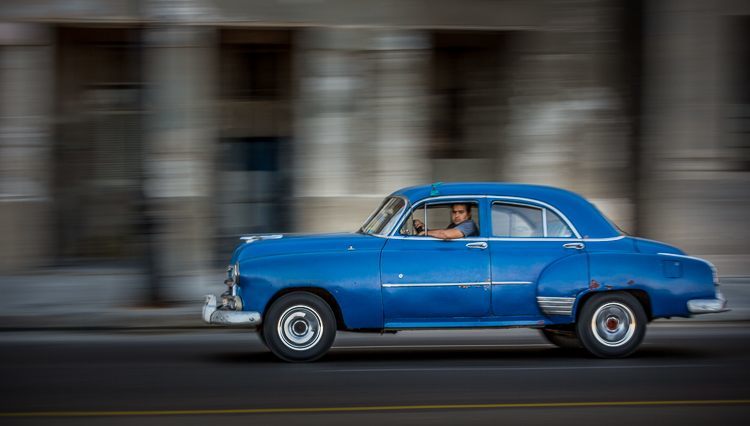
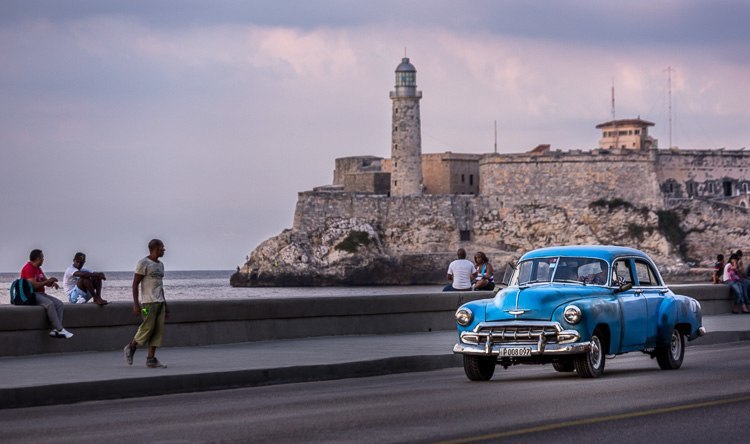
The images above were both taken on the same street next to the famous Malecón in Havana, Cuba. You can see they are both good images but they have different feelings. The sharp one is more like a moment in time – frozen – even the man walking is frozen mid stride. It’s almost relaxed in way, a feeling of calm which is enhanced by the soft colors in the fading evening light. The panned and blurred one has more of a sense of movement, motion and speed. You get a feeling of life rushing by, of being in a hurry, of a busy bustling city.
Which is right?
The answer is – they are both right! There is no right or wrong here, it’s all about knowing what you intend with your image. Think about what mood and message you want your image to send to the viewers. Then choose the appropriate method.
How do you do panning?
Here’s a simple way to set up your camera to start trying some panning shots:
- Choose your ISO
- If you are shooting in the bright sun you’ll want a low number like ISO 100, or you could even pop it into Auto ISO and let the camera choose that for you. If there is plenty of light it will be low so you shouldn’t have any issues with noise. If it’s evening then the ISO might get cranked up quite high but you’ll need that in order to even get a good exposure in dim light.
- Set your camera mode to Shutter Priority
- (Tv on Canon, S on Nikon and most other brands)
- Set the shutter speed to about 1/30th of a second
- This is just a starting point. If you are shooting race cars you may have to increase that to 1/125 or even faster or they’ll just be a blob. You’ll need to experiment to find the right shutter speed but start there and increase it (to 1/60th or faster) if you have a fast moving target and decrease (to 1/15th or slower, but be careful there is a point there it’s just “too slow” to get anything) it for a slow moving one.
- Set your camera on burst mode
- Or continuous shooting so that when you press the shutter and hold it, the camera takes multiple shots in rapid fire.
- Set your focus dot or zone
- If your camera has zones set it to the center but larger than one single point. This will allow the camera to find focus on the moving car as you pan. If you have single dots only set it so the camera chooses which one to focus on (all dots activated). Just make sure nothing gets in front of the object you are shooting because the camera will focus on the closest thing.

Panning technique
Once you have your camera set up you’re ready to start panning. Find yourself a moving target that is moving across your field of view. Ones moving towards or away from you will NOT work. Look in the direction the subjects are coming from and wait (i.e., if the cars are moving right to left like the red one above start facing to the right). Make sure you look through viewfinder (eye piece) not the LCD screen on the back of the camera.
When the right subject approaches, start shooting as soon as it reaches the range between ten and two o’clock (a 30 degree window). Keep shooting through that full range. Follow the subject to keep it in the viewfinder the whole time, so you will be rotating to match the speed of the moving object.
Summary: shoot between 10-2 o’clock. Rotate between 9-3 o’clock.
Practice, practice, practice – patience, patience, patience
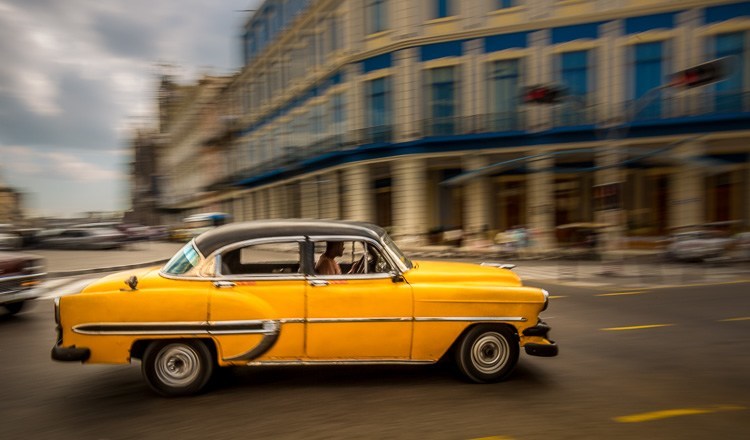
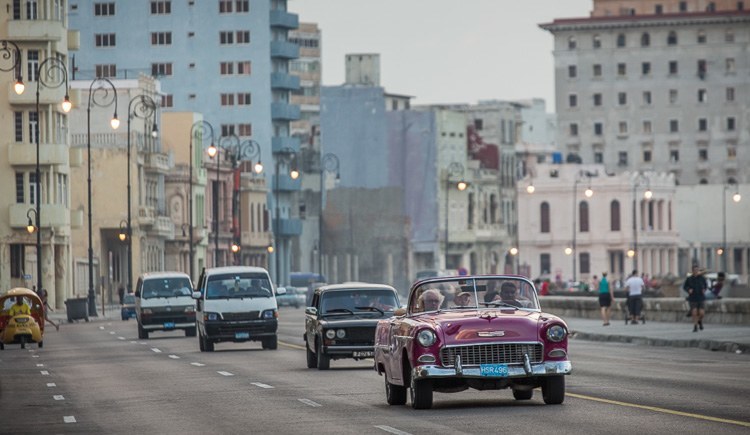
This is not something that you can nail on the first try, so go easy on yourself if at first you don’t succeed. Even once you get the hang of it, you still may need to shoot a lot of frames just to get one usable one. For most of the images above I shot 10 or more of each, just to get one good one. Sometimes I shoot a lot more than that. The red car above, shot as dusk in Viñales, Cuba, I took almost 30 images of different cars going by until I literally ran out of light.
So panning is an exercise in practice makes perfect, but patience is also important. Wait for just the right subject to go by. Move to the other side of the street if the light isn’t just right. Or come back at another time of day if it’s simply to bright to work effectively.
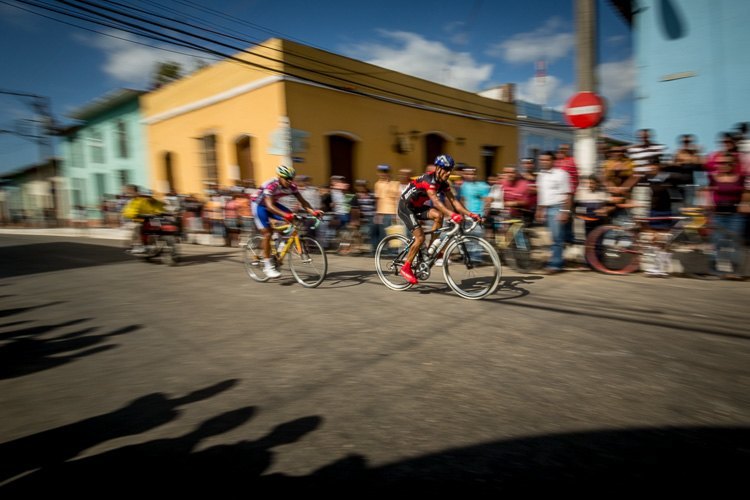
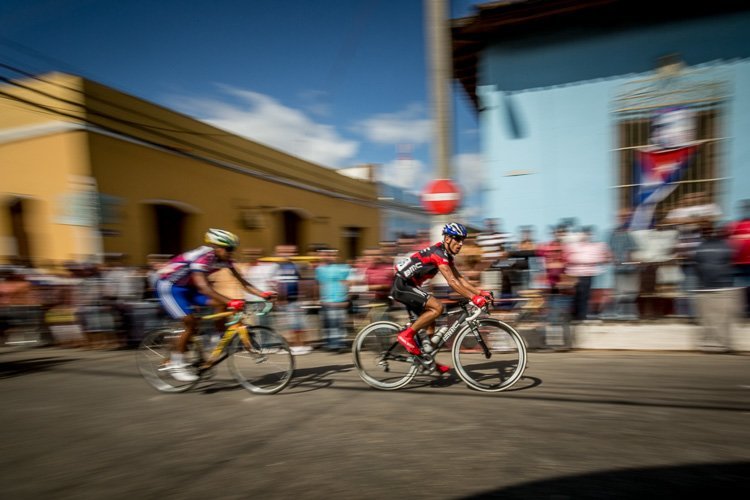
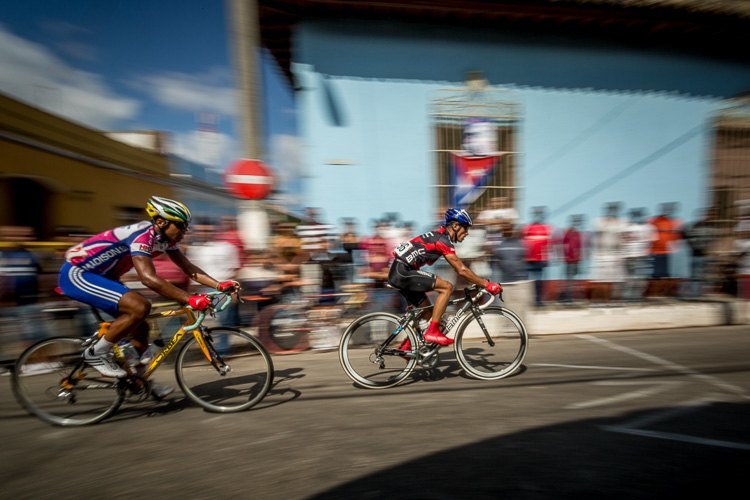
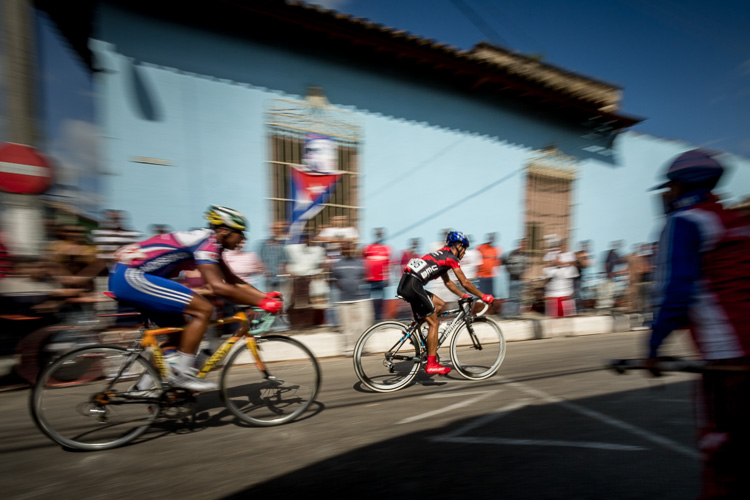
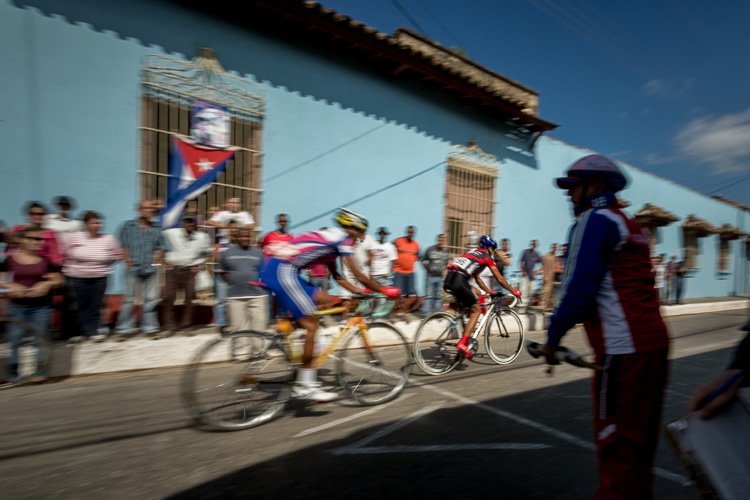
In the series of images below, I just stumbled upon some sort of bicycle race. My Spanish is limited but I was able to figure out that I was actually at the finish line and they were moments away. So I waited and panned as the winner crossed the line. In the fourth and fifth images you can see the guy with the checkered flag. Notice there are five images in the series, these are all the ones I shot in sequence as the bikes sped past me – this will give you an idea of the range or motion you need to have as you shoot. Special thanks to the nice lady in front of me that saw my camera and let me go right in front of the crowd.
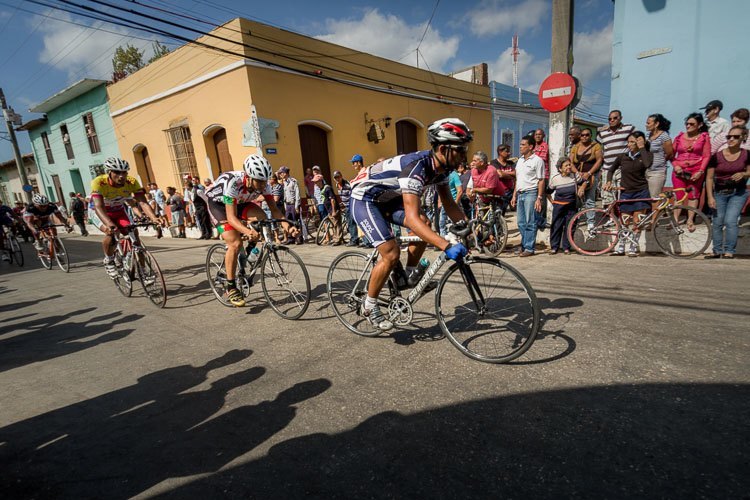
For comparison sake, I’ve included this last image where I changed my settings and froze the cyclists. To me it doesn’t have the same sense of speed and excitement even. It just looks stiff, static, like they are statues not athletes.
Action plan
Okay now it’s your turn. Have you got some good panning examples, please share them in the comments below. If you haven’t tried it before, get out and give it a go. I’m pretty sure you’ll find it a lot of fun and you’ll be hooked. This is really a simple technique that can be used to wow your family and friends with images they couldn’t image or do themselves.
For more reading on using on this topic try: Using Shutter Speed to Freeze or Blur Motion
Cheers,