Ursula Abresch is a photographer based in the West Kootenays in British Columbia, Canada. She has a degree in Education with a concentration in Art and History. Currently, she is the Artistic Director at the VISAC Gallery of Art in Trail, BC. Outside of that, she dedicates most of her time to photography. A few weeks ago, we shared Ursula’s striking bokeh-laden image, “Seedling” on our social media pages—the response was popular enough, with many of you asking how the picture was created. In this tutorial, Ursula reveals how she shot and processed “Seedling” so you too can recreate this eye-catching effect, as seen in the image below.
How I Created the Bokeh Effect in “Seedlings”
by Ursula Abresch
For this tutorial, “bokeh” refers to the light circles in the image. These circles are out-of-focus points of light. They vary in size, with the smaller circles being closer to the focal plane, and the larger ones further away. The focal plane in the image is very shallow. There is just a sliver of sharpness throughout the photo—the rest is all blur. It is this combination of the sliver of sharpness with all the colorful circular blurs that “makes” the photo.
GEAR
I shot this image on a Nikon D7000, using my macro lens—the Sigma 150mm f/2.8, without filters and flash.
SETUP
The image was shot indoors. I had my camera on a tripod. The seedling was sprayed with water in a vase, and I captured it at ISO 100, f/5.6, 1/800 sec. The light was from sunshine through a window, creating a backlight for the seedling.
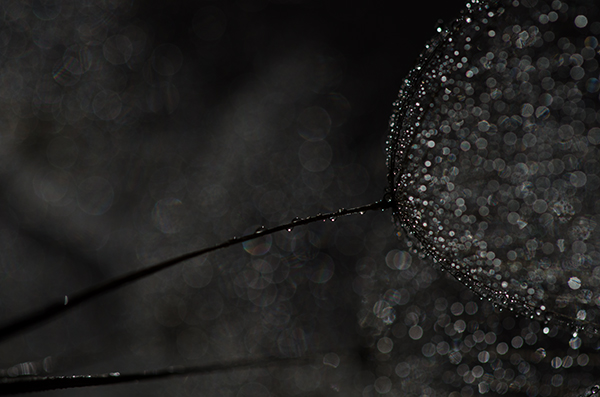
The image was intentionally underexposed by 2 full f/stops as part of a series of 3 bracketed images to possibly combine in HDR software. However, I decided to use the dark (underexposed) image by itself. This is the image as shot:
PROCESSING
I opened the image in PSCC without any Camera RAW adjustments. I liked the right-hand side of the image, and I liked the many colors I could see throughout the lighter parts of the image, in spite of it being so dark.
First, I decided to crop to a square, and rotate a bit to get the angle I wanted:
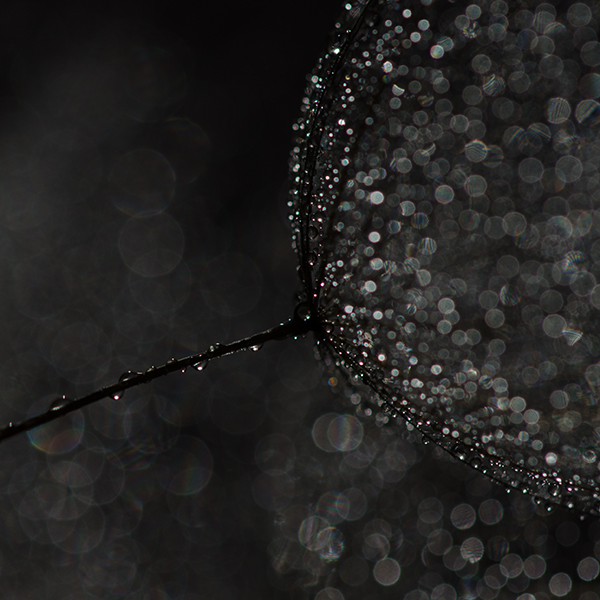
Then I processed in Photoshop CC:
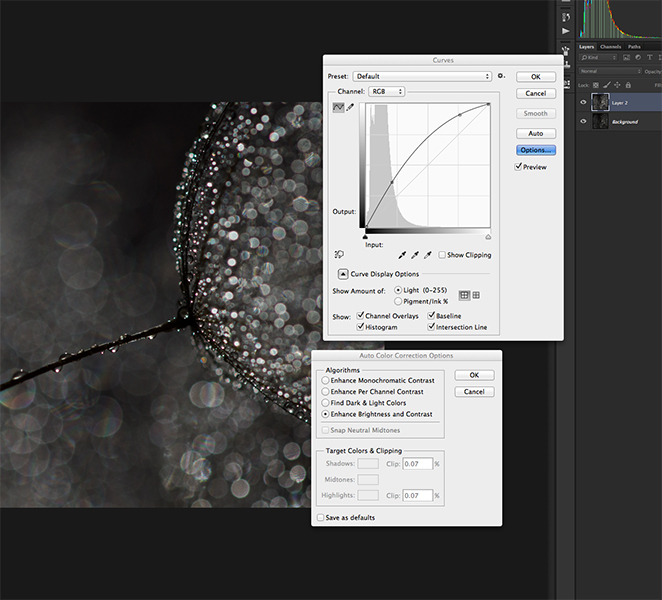
1. Create a copy layer to work on (Layer 2), and apply auto curves to this copy layer: Image -> Adjustments -> Curves -> Options -> Enhance Brightness and Contrast
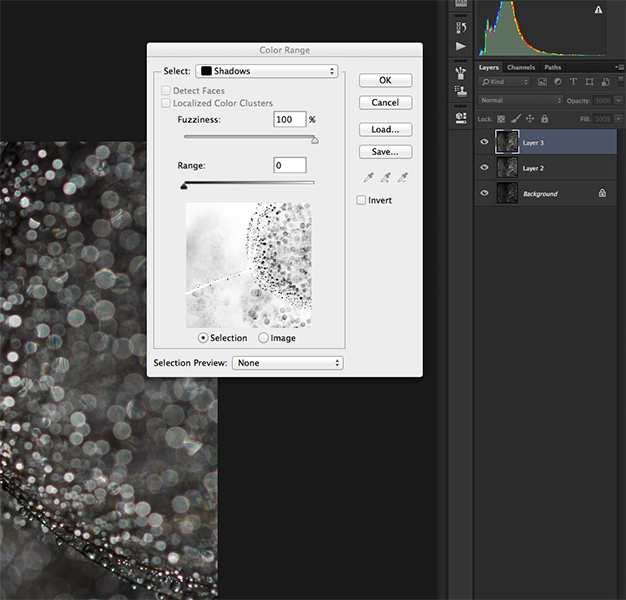
2. Create a copy of the adjusted Layer 2 (Layer 3), and select shadows in this new layer: Select -> Color Range … -> Select Shadows, Fuzziness 100%, Range 0 -> Hit “OK”
3. Clear the selection, effectively leaving all but shadows in Layer 3: Edit -> Clear and then Command + D.
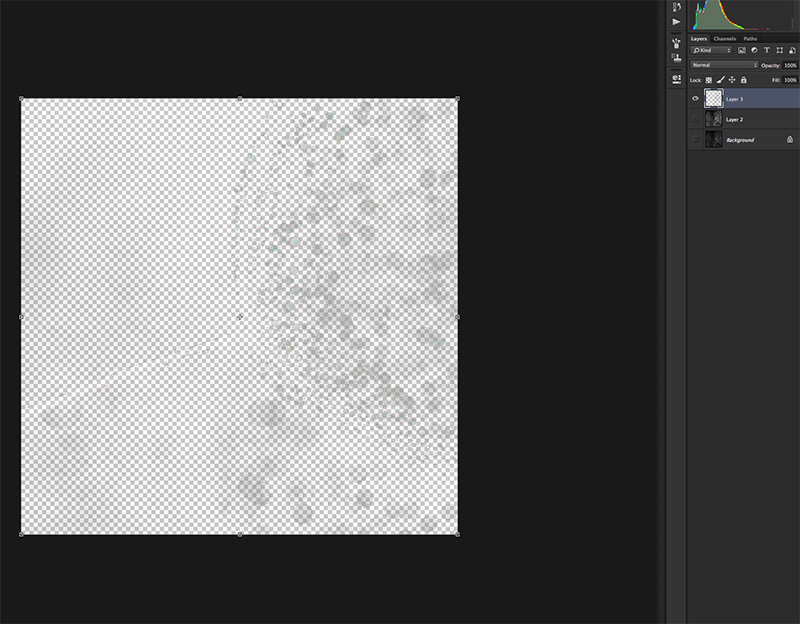
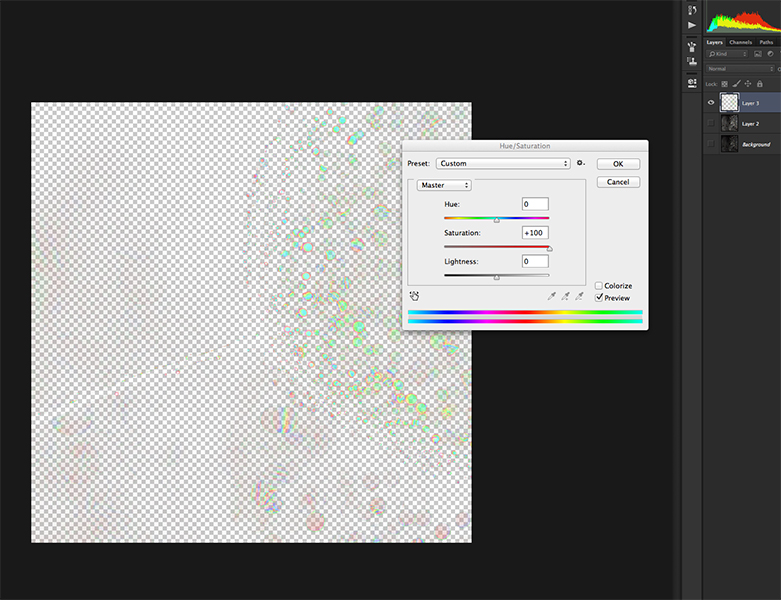
4. Over-saturate Layer 3: Image -> Adjustments -> Hue/Saturation -> Leave all as is, except move middle slider (Saturation) to +100
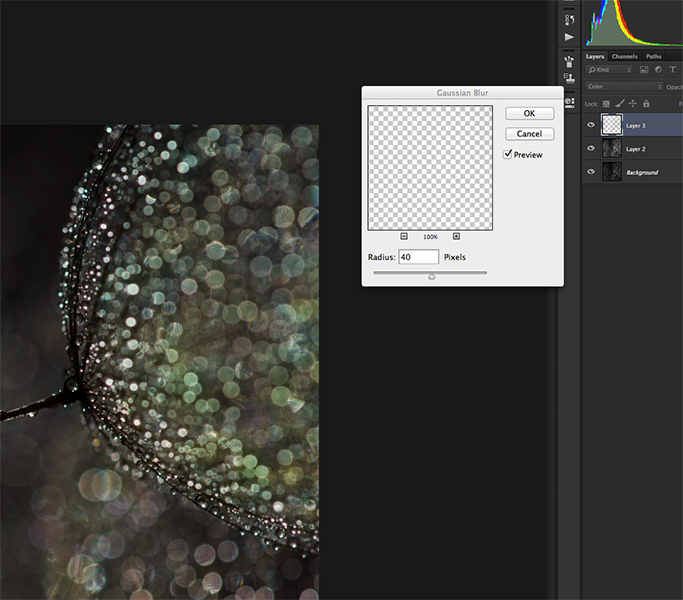
5. Set blending mode on Layer 3 to “Color”, and blur the layer using Gaussian Blur (at Radius 40)
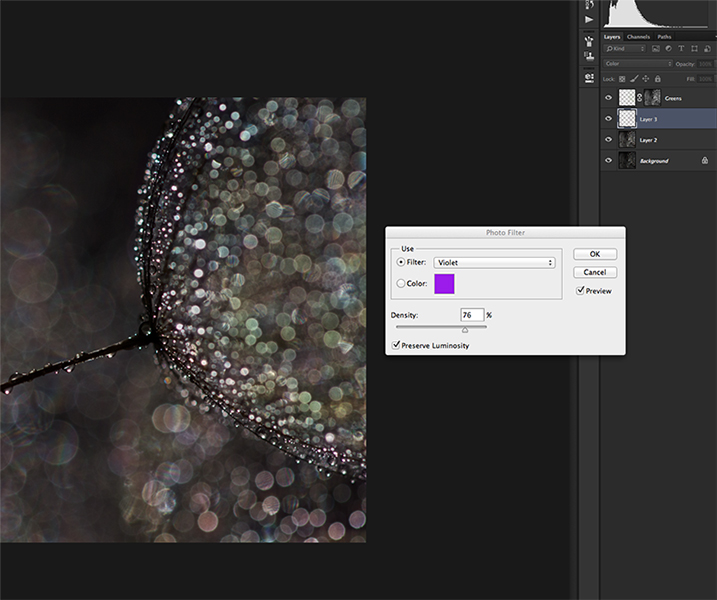
For this next part, you can use whatever method you prefer to adjust the colors until they look right. I used 2 copies of the colour layer, applied a violet filter to increase the pinks and tone down the greens in one, and brought back the greens with the second one by masking the green channel only. There are so many different ways to work with adjusting colour, it really doesn’t matter which one you use, as long as the final image is what you had in mind!
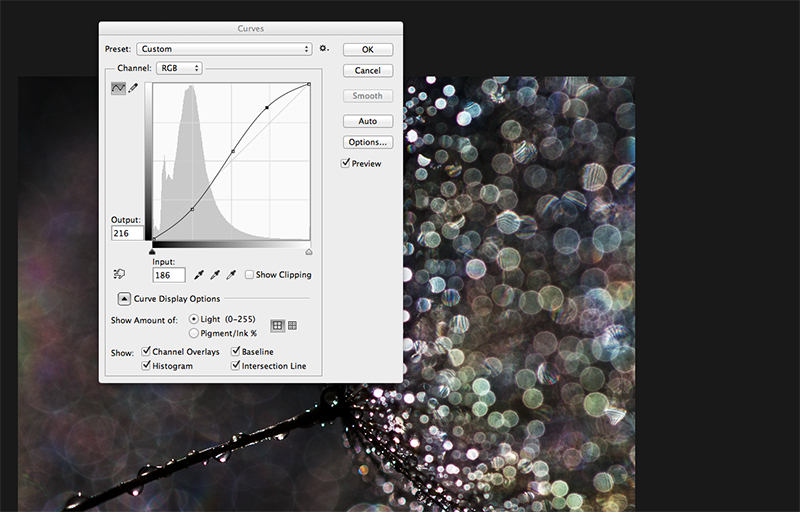
6. Create a new layer (Layer 4) with all adjustments so far: Select -> All; Edit -> Copy Merged; Edit -> Paste. In this case, I made some final Curves adjustments to this layer to get the contrast and brightness to be as I wanted it.
The resulting image is not identical to “Seedling”. This is a new edit, but this is the exact process I used to create “Seedling”.
Remember, there are many ways to achieve similar results when you are processing images. Each photographer has their own preferred ways to work. For me, it is often difficult to explain exactly how I made something or another. The beauty of it all is in experimentation, trying many different ways to shoot the images you want to shoot, and then trying many different ways to process your images, so that you get the image that expresses what you wanted to say with it in the first place.
To see more of my work, you can follow me on 500px, or visit my websites below:
www.ursulasphotos.com
www.ursulasphotos.ca
If you have any questions for me about my process and my images, please leave a comment for me below.