When you return from a trip are you disappointed that your mountain photos don’t seem to contain the same sense of scale and wonder that you witnessed firsthand? In this article, I’ll provide some mountain photography tips for improving your photos.
The mountains are calling and I must go. – John Muir
You may have seen this quotation countless times online and in your social media feeds.
There’s something about the mountains that inspire us to dream. When we see them we can’t keep ourselves from having a brief moment of awe and wonder. It’s when we start to photograph them that things seem to get complicated.
Let’s start things off with a story
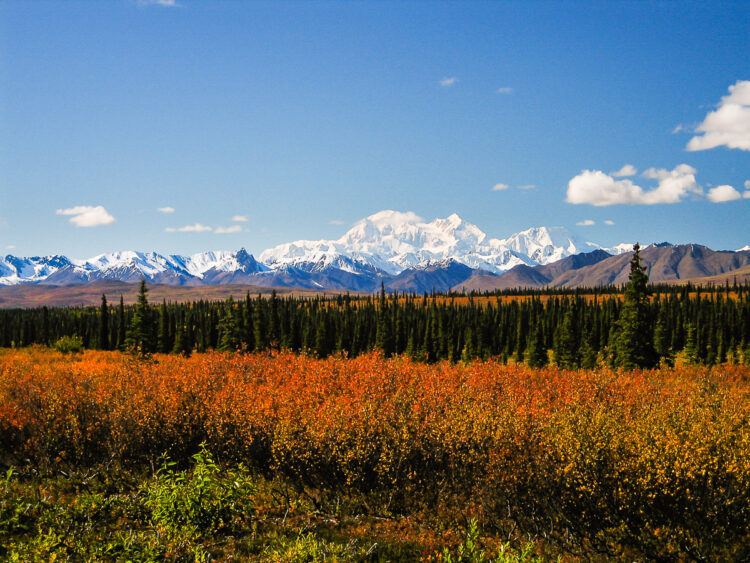
In 2006, a friend and I bought plane tickets to Alaska to cover as much ground as we could. When we were near Denali National Park we saw the mountain for the first time. Like you may have done, I said, “Pull over, we need to take a picture of the mountain!” so we stopped by the side of the road.
I jumped out of the car and snapped this photo of Denali in the distance (image above). It is not the most interesting capture, but it represents a pretty standard practice for road warriors (photographers that shoot from the roadside).
There’s a white mountain in the distance, clear blue sky, and some stuff in the foreground. At first, looking at the back of the camera I said, “Cool, look what I did!”.
Later on the same trip, my buddy and I took an aerial tour of the park. During that adventure, I captured the following photograph.
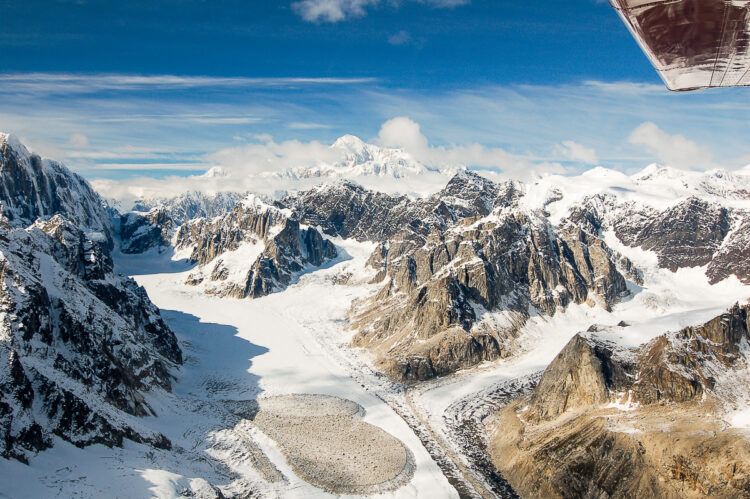
Which of the two images above do you find more interesting? Why?
I shared this story with you because I want to demonstrate the point that mountains are so inspiring that we often just pull the car over and start snapping away without much thought.
However, to get more interesting and more powerful photographs, you need to do a bit more work. So, let’s jump into some basic methods that you can use to improve your landscape and mountain photography.
Mountain Photography Tips – The Basics
These things are applicable to any photograph.
Whether you are taking a photo of a mountain or a portrait of a loved one, there are some common practices that are universally applicable.
Advanced Planning
Making a good photograph requires a bit of work. To take your photography to the next level, start asking yourself where, when, and why.
Does the weather, moon phase, direction of the sunrise or sunset drive your decision on when to shoot?
How will you get to your destination?
These and many more questions are addressed in the planning phase. Planning can take place days, weeks, months or years in advance.
For more information on planning your landscape photography, read one of my previous articles here: Get Your Best Landscape Photos When You Plan Your Trip First.
Defining Your Subject
The next basic technique for improving your photography is defining your subject.
In the picture below, the subject is the woman looking at the mountain. If I had zoomed in to only take a picture of the woman with no context, that would have made a pretty boring image.
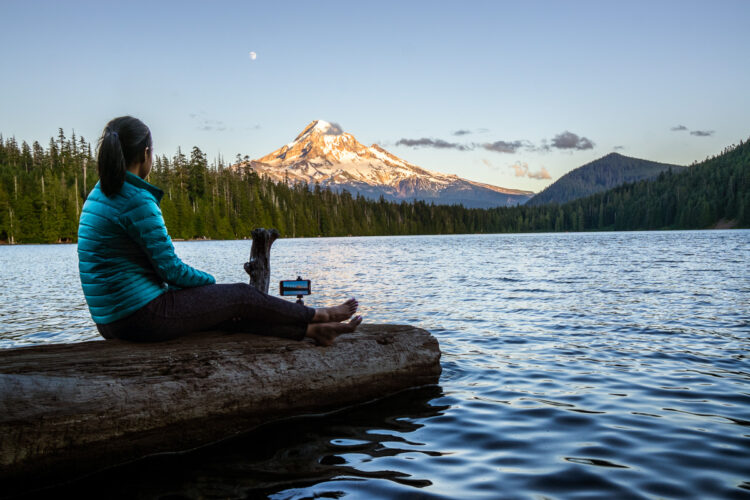
However, by showing her sitting on the log in the lake it’s created a more interesting composition.
As I’ve grown in my photographic experience I’ve learned to take my time when I arrive at a scene. I like to ask myself a series of questions. Use these to help you define your subject.
- What should be the subject of this photograph?
- What do I want a viewer to see when they look at the image?
- What is the most important part of the scene?
- What do I want my viewers to notice or think about right away when the view the image?
Check out the article I’ve written on this topic on my website here.
Composition Theories
The next thing to think about is compositional theories. Again, another global set of practices for any photographic styles.
The Rule of Thirds, negative space, triangles, leading lines, etc. are the compositional methods used to draw your viewer to your subject and create more interesting photographs.
Once you know the subject you want to capture, using good composition methods will help you create more interesting photographs.
See a more in-depth article on this topic here: 7 Composition Techniques for Better Landscape Photos.
Photographing in the Field
What Gear Should I Bring?
The answer to this question is, it depends.
The gear you bring will be influenced by the type of photograph you envision capturing and any limitations you might anticipate. For instance, you might not want to pack 30 pounds of camera gear in a backpack to hike up 4,000 feet of elevation gain.
With that said, my normal kit includes a mid-range zoom lens (16-70mm) and a slightly longer one (70-200mm). I find that for the type of images I like to create these lenses provide good coverage. If I want really wide images, I shoot panoramas and stitch the images together later.
You will want to have a tripod to mountain photography. I won’t presume to tell you what tripod to buy. As long as you know how to use it well to get the type of work you like, then any tripod will do for you.
Here are some other optional accessories that are nice to have:
- Filters (neutral density filters, graduated ND filters, a polarizer)
- A level
- An L-bracket
You can find a list of recommended items for long exposure photography here (the items work for this too).
What Time of Day is Best to Photograph Mountains?
When it comes to determining the best time of day to do mountain photography, your best bet is during the golden hour.
These are the periods of time around sunrise and sunset when the sun is lower on the horizon. This results in warm (orange/yellow) light blanketing the landscape, accompanied by long, interesting shadows. The colors and shadows at golden hour can be used to create far more interesting landscape photographs than the harsh light and lack of shadows at high noon.
Although the golden hour is the ideal time of day to be photographing, sometimes you don’t have a choice.
You might be up high on a mountain and need to capture some action at midday. I have definitely summited more than one mountain near midday. If you find yourself in similar conditions, embrace the challenge and get creative.
TIP – When shooting from far away, golden hour should be your target.
Location Scouting
Next up is location scouting.
You know where and when you want to photograph and have completed your planning. You booked your plane tickets, packed your van, and driven/hiked to your spot.
With a weather report in hand now things start to get real. Things look different in person than they do on Google Earth. The renderings are fantastic, but nothing beats being in the field.
This is when you really start to refine your vision. You have an idea of your subject then you start working on the fine details to craft your photograph. Move around the area a lot to test different compositions and compare them to your original concept.
NOTE: I suggest you take this step because even if your planning was really good, you’ll likely find something better. This happens to me often.
Next, capture “a safe shot” then keep working the scene until you run out of light, get bored, or find something better than you had originally planned.
Patience
Things can go wrong in a variety of ways.
The weather may not cooperate. Your equipment might fail. etc. You might find yourself waiting until the situation changes for the better.
This is an overlooked component of landscape photography.
Working in the mountains is no different. The weather can be unpredictable and, sometimes dangerous. You might have to break down all of your equipment to seek shelter when an unexpected storm overtakes your position. Patience and perseverance are the names of the game for landscape photography.
Creating Interesting Mountain Photographs
You’ve now completed all the planning and preparation. You’ve considered your subject and how to make it shine. Things are going well.
Next, let’s discuss some additional techniques you can use to make your mountain photos more interesting.
Add a human element
The first way to create an interesting mountain photograph is by adding in a human element, in other words, show people doing stuff.
There are plenty of strictly landscape photographs of mountains in the world. However, people will likely stop a little longer if the photo contains something to which they can relate. Folks are more likely to relate to an image of another person being active in the landscape.
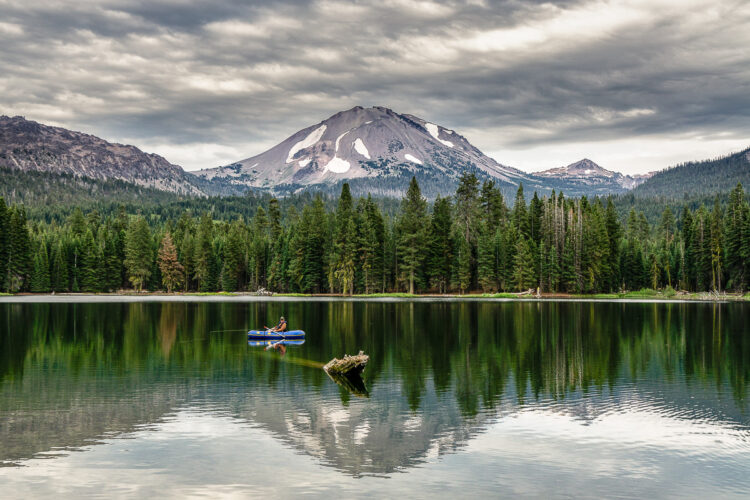
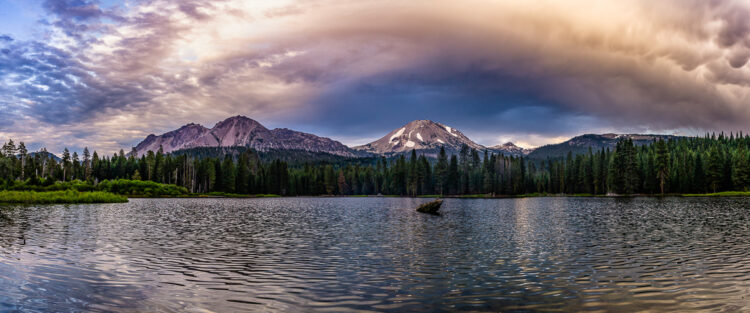
The first example is the photo below of a fisherman floating in a raft on a relatively calm lake in Lassen Volcanic National Park.
I watched this guy casting his line over and over again for more than an hour. He had this peaceful presence about him that I wanted to share. The man didn’t seem to mind the ominous clouds rolling in overhead. He just enjoyed his time alone on the lake.
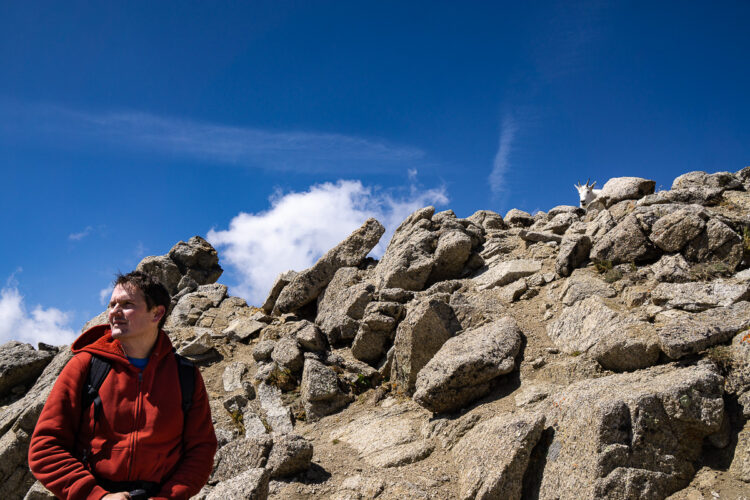
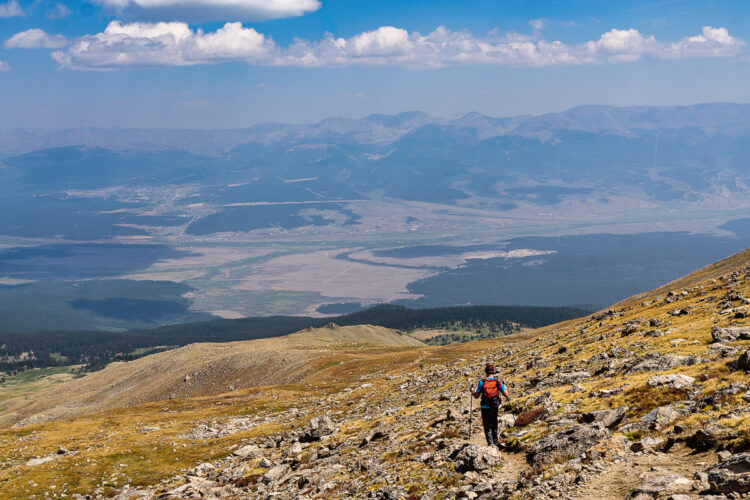
The next series of images are from a trip I took with a friend to the top of Mt. Massive in Colorado.
I grouped them together to tell the story of the ascent.
The interaction we had with a mountain goat and the beautiful views from the top before we headed down for the day.
This series is about sharing a trip to the second highest peak in Colorado. I included them as an example of working on the mountain.
You will notice that the midday shadows aren’t very long or interesting. Thankfully, there were some clouds hanging around to add some interest to the sky.
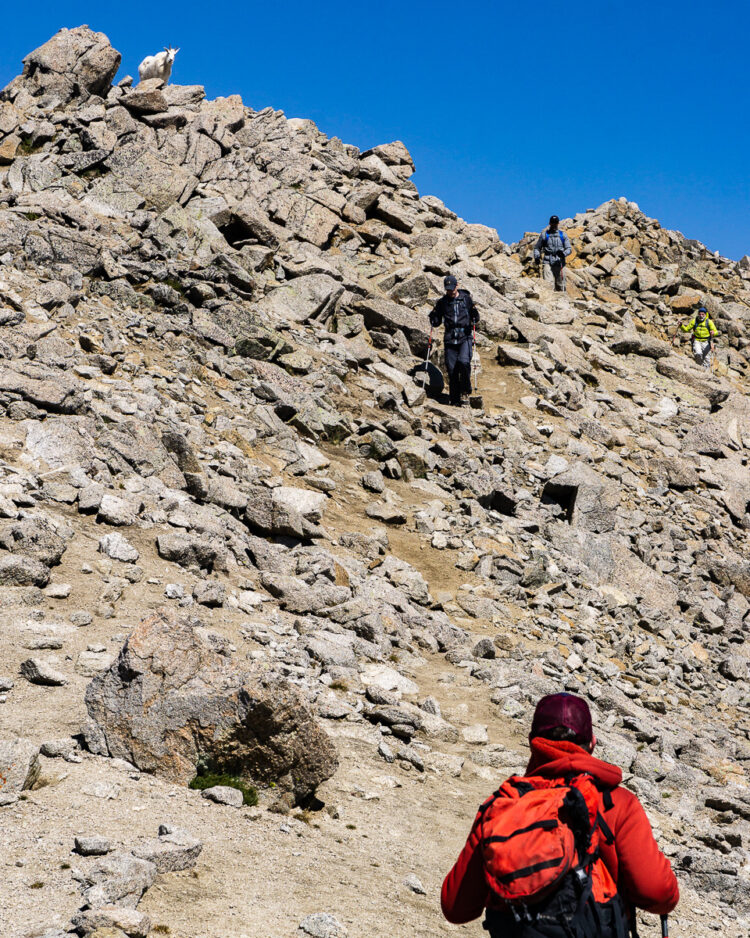
I particularly like the image of the mountain goat below. To me, it looks like he is just peeking out to look at my friend.
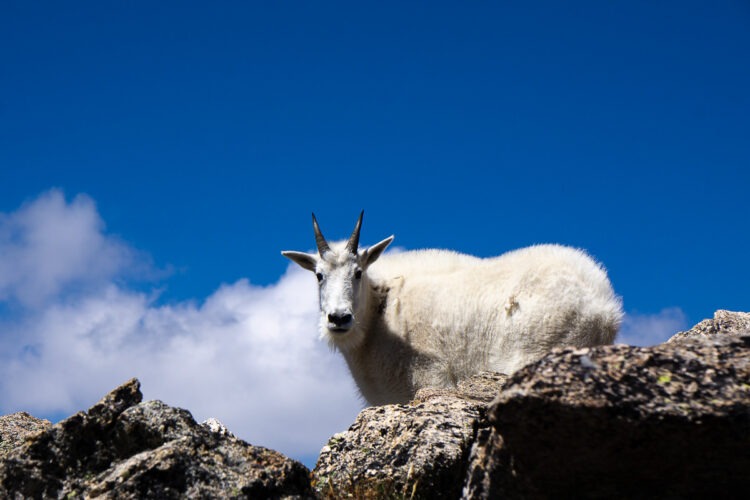
In the following two images the goat became my subject. He was gracious enough to let me capture a couple of different frames share with him.
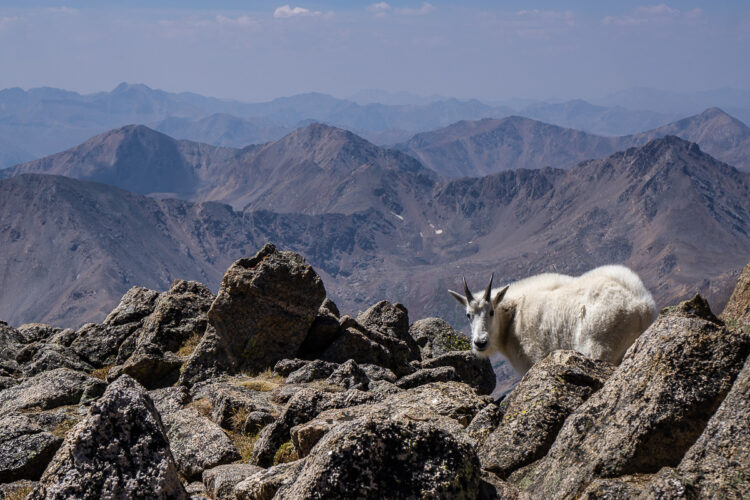
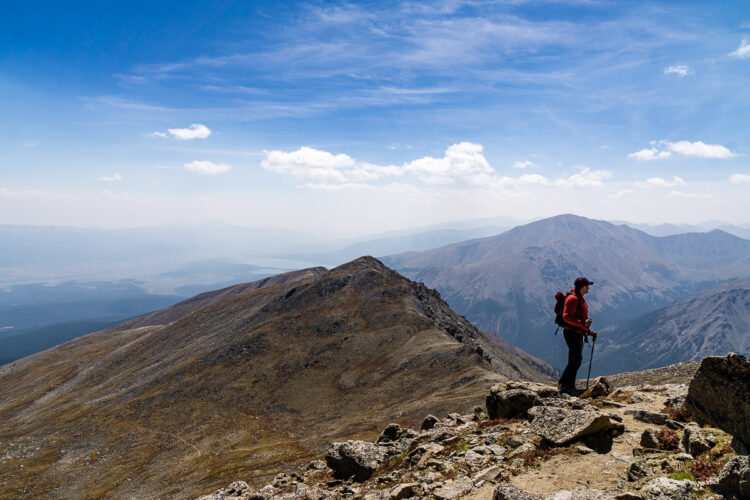
The next frame was taken to show the scale of the landscape. The reward for reaching a summit is usually a pretty spectacular view. Thus, the view from the top was an important part of the story I wanted to capture.
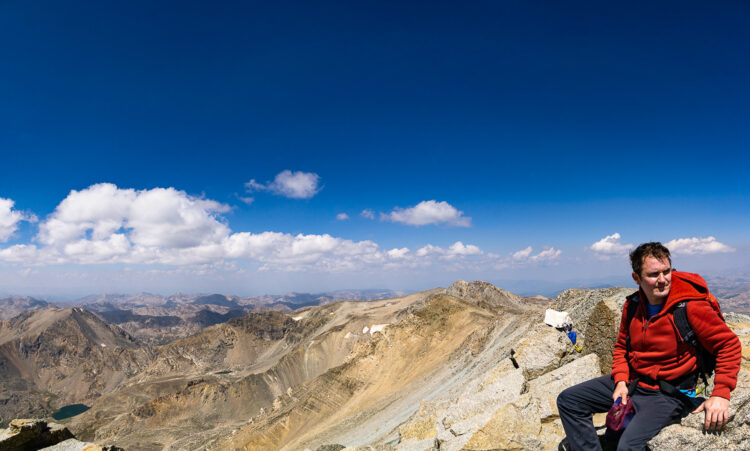
Finally, the shot of my friend heading down the mountain shows the difference between the higher and lower elevations we covered that day. Notice that the higher elevation is more barren the lower elevation still has some green vegetation and tree cover.
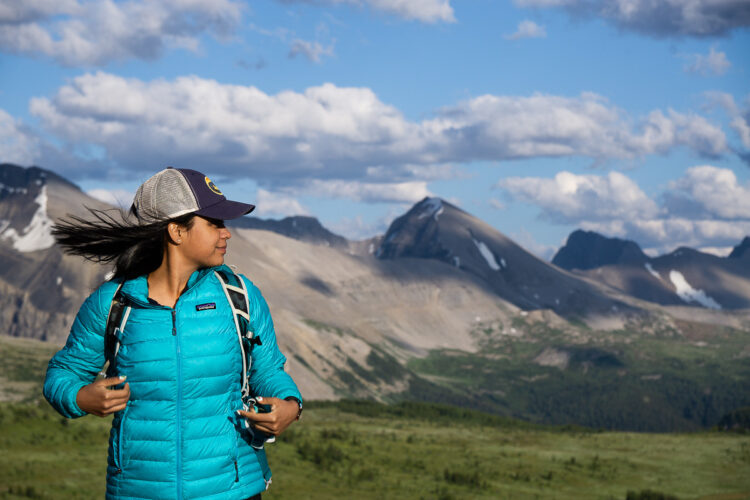
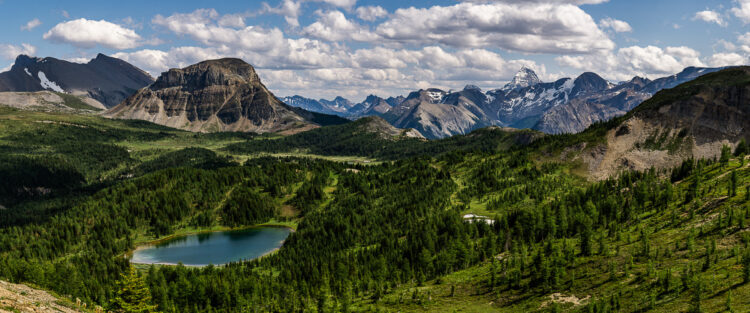
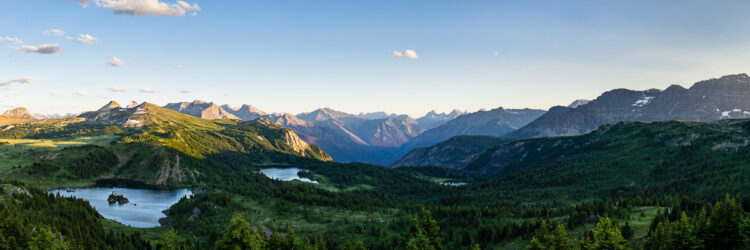
The next series of images come from a recent visit to Banff National Park in Canada. The first image has a good balance of color between the blue tones in her jacket and the magenta and green as she looks out onto the scene.
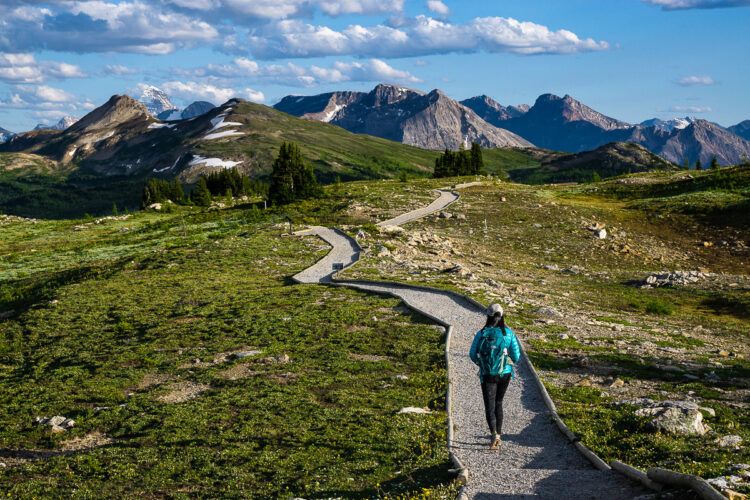
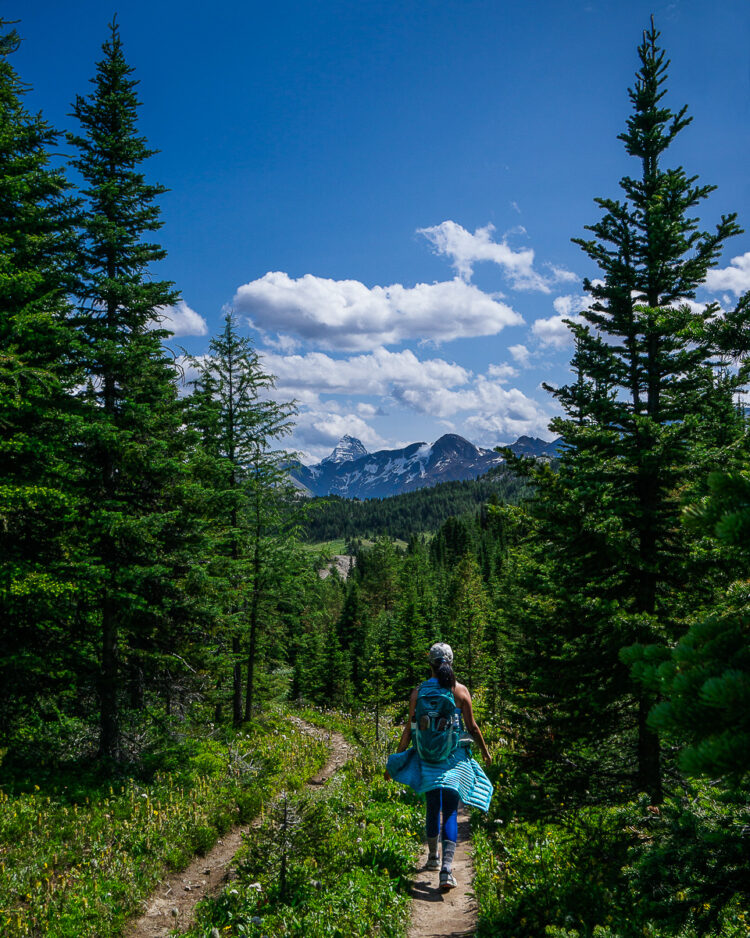
The second and third images (above and below) are examples of using leading lines to draw viewers into the scene.
This third image (below) also uses the trees to create a natural frame with the mountains in the distance.
Don’t these look like hikes you would want to experience with a friend or loved one? Or, are you reminded of some great hikes you have taken recently?
Don’t be afraid to shoot in portrait orientation
My next mountain photography tip for creating interesting photographs is to shoot in portrait (vertical) orientation.
If you create an interesting landscape in portrait orientation you will often catch your audience off guard. The next few images demonstrate that it is okay to show the world in portrait orientation.
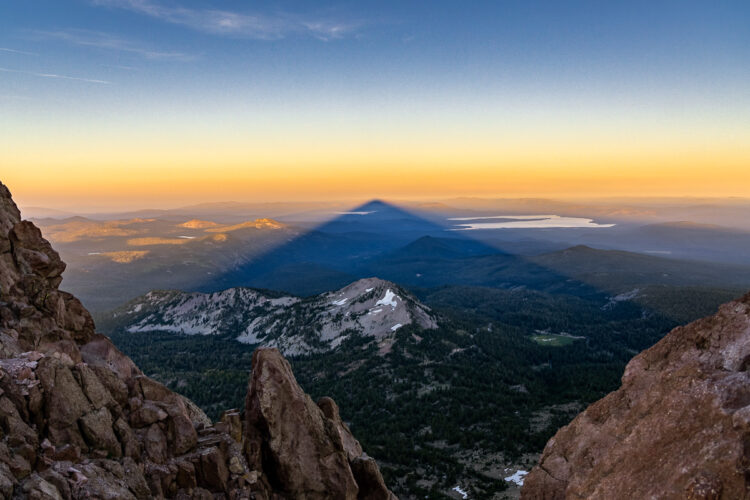
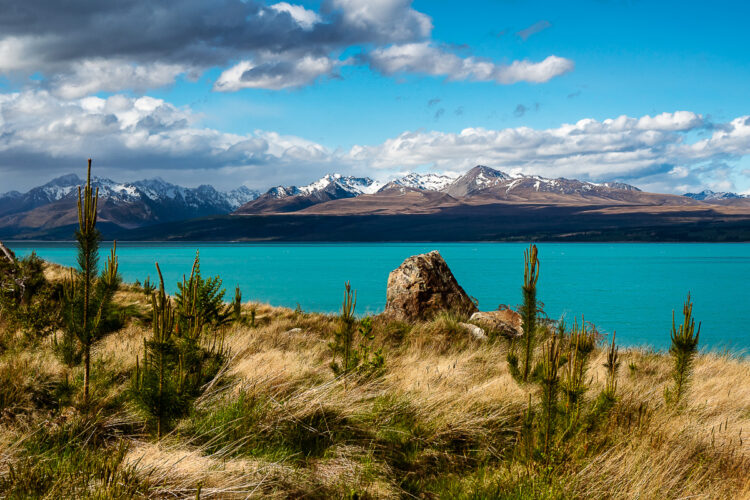
The first image is an example of the layers you can see from shooting at higher elevations in the mountains.
I chose this composition because I liked the almost mirror-like nature of the scene. There is a defined break between the uneven layer of snow in the foreground and the distant layers of mountains in the background.

Again, you also have the coolness of the snow in the foreground balanced with the warm, orange glow of the setting sun in the background that draws your eye into the scene. These are called complementary colors.
Additionally, because there is such a well-defined landscape on the horizon your eyes are drawn to Mt. Shasta in the middle of the frame. Finally, because there are faint details on Mt. Shasta you will stop for at least a brief moment to look more closely at that area.
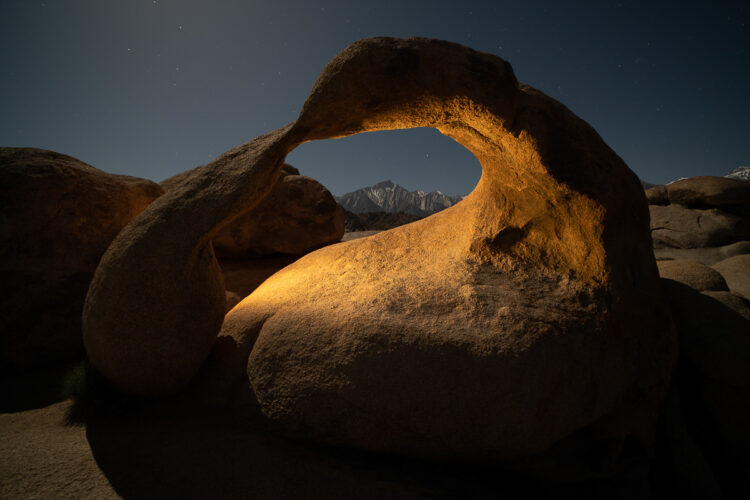
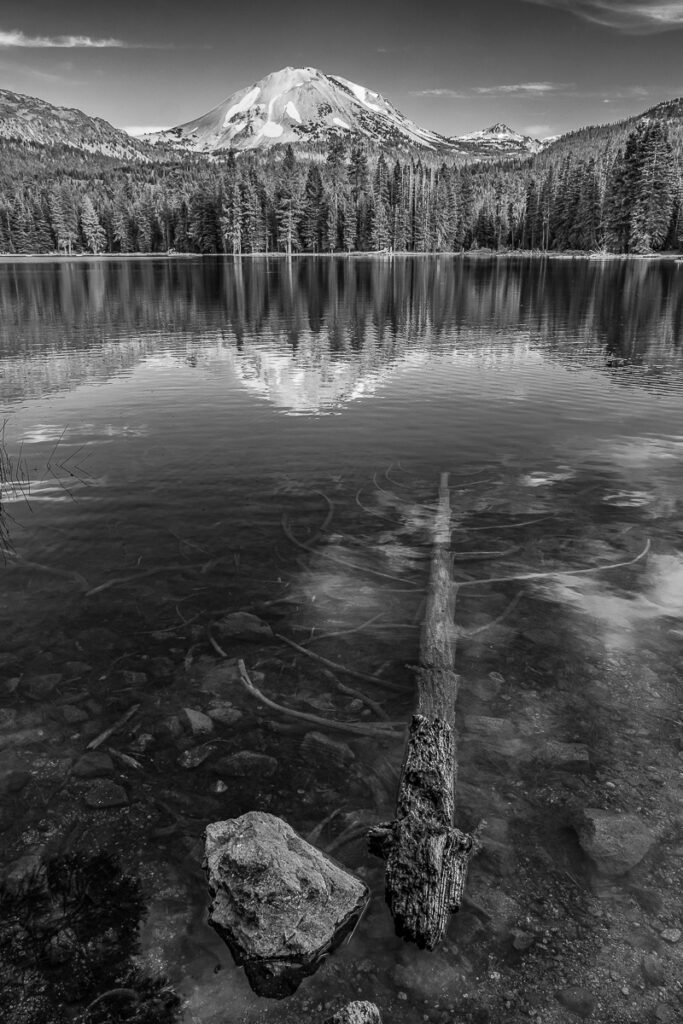
In the following example, I used portrait orientation because I couldn’t capture the sunken tree in the foreground and the full mountain in the background shooting horizontally.
My lens wasn’t wide enough and I couldn’t eliminate enough extraneous details to capture the tree (who knows how long). There isn’t a grand explanation for it as there is for the image above. I just liked the composition of the sunken tree in the lake. Something about it just said this was a timeless moment.
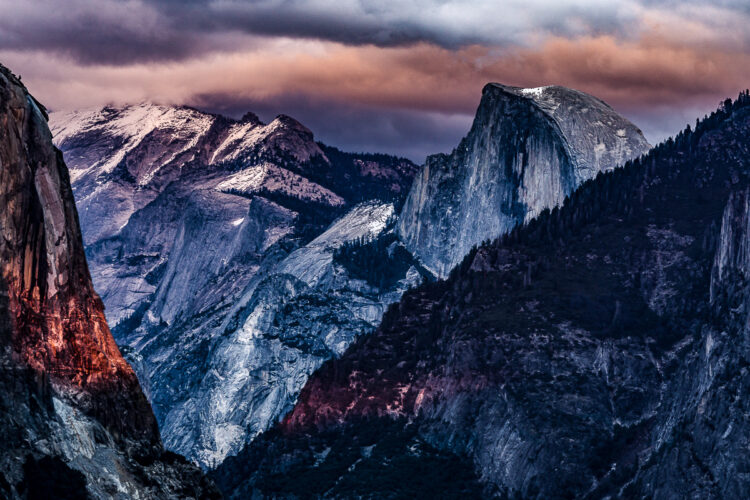
The final example of portrait orientation for landscape mountain photography is from a famous lookout in Yosemite National Park.
Making the mountain the focal point of the image was easier to accomplish in portrait orientation. In landscape orientation, there was just too much extra stuff that needed or didn’t add anything to the composition.
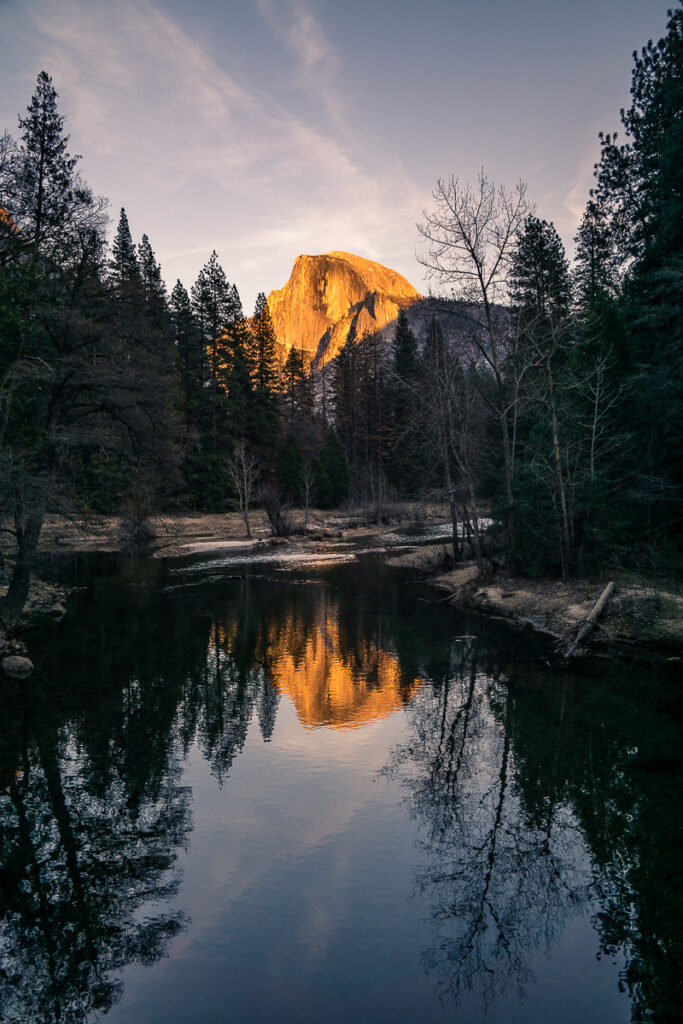
By shooting vertically, I was able to create two pairs of leading lines. The trees above the river and in the reflection serve as two Vs that draw your attention to the brightest part of the image. In this case, that is the last light of the day striking Half Dome.
Working WIDE (Panorama)
The last method for creating interesting mountain photographs is to create panoramas.

Since last year I have spent a good deal of time working to improve my skills at crafting panoramic landscape photographs.
I really enjoy creating large scale panoramas.
They can capture more detail and retain a sense of scale that can’t necessarily be accomplished by using a wide-angle lens.
In some of these examples, 15 or more individual frames were stitched together to capture the whole scene.
When I zoom in on these images on my work computer I can see sharp details throughout the scene. This wouldn’t necessarily the case if I had used a fisheye lens instead.
For an in-depth look at creating your own panorama photographs check out this article.
Summary
At this point, hopefully, you are feeling the urge to go photograph in the mountains. However, I want to finish up here by revisiting something I mentioned earlier.
Preparation and expect the unexpected
My final tip has nothing to do with photography, and everything to do with life.
How many times have you canceled or cut a trip short because the weather was bad? Maybe you got too cold or forgot sunblock, etc. Working in the mountains is no different.
If you are at a higher elevation, you need to take care of yourself with enough clothing, food, water, etc. Accept the fact that you can’t control the weather. Plan for the best but prepare for the worst.
Thanks for reading. See you on the trail.