There are two kinds of photographers. Those who admit they crop, and those who claim they don’t. The latter are glistening bastions of photographic purity whose souls glow at a constant Zone 10. They graciously lecture us heathens on the evils of cropping and try to exorcise the post-processing devils from our souls. They abhor us croppers, whom they consider inferior photographers – low down scum worse than fixer stains or a piece of grit in a bulk loader. They realize that cropping leads to even more sinful behavior, such as high speed bursts and shamelessly shooting above base ISO. I could go on, but they’ll pick up where I left off in the comments section. For us sinners, why not explore the process of cropping images in Lightroom and understand why it is done in the first place?
Now that I’ve convinced you that cropping is an express train to Photo Hell, how can you join the fun? Ah, not so quick Bucky. Before we discuss the how of cropping we need to address the why.
Why to Crop
There is only one reason to crop a photo – to make the photo better. Judiciously used, cropping can strengthen composition.

The wind is whipping up and this grebe is taking on the surf, but in a ho-hum manner it seems.

A little help from the cropping tool and the dull part of the photo is gone. In addition the new narrower horizontal format accentuates the motion of the water versus that of the bird.
The Anti-Croppers will say all composition should be done in camera. That waiting to crop until in post is lazy. While it would be wonderful if every scene we photographed fit perfectly within a 2×3 ratio square (that used by DSLRs), in reality that isn’t the case. If it were, we’d have a real naughty time trimming all of Ansel Adams’ photos taken on 8×10 negatives to conform to the 2×3 standard. Winter Sunrise at Lone Pine? Trim the top and bottom equally to get a 2×3 ratio and the little horsey gets chopped off at the knees.
Throughout the history of photography there have been many different film and digital dimensional formats. Some popular film sizes were 24x36mm (35mm film format and 2×3 full frame and APS-C DSLR sensor formats), 2 1/4 inch by 2 1/4 inch square as used by the fabled Hasselblad and Rolleiflex cameras, 4×5, 5×7 and 8×10 sheet film in view cameras, 4×3 in many point and shoot and mirrorless cameras, 16×9 widescreen and so forth. Golden Mean be damned, there is no one perfect ratio for photography and there never will be.
So shouldn’t we constrain ourselves to only cropping one dimension of a photo? That would allow us to explore every rectangular permutation, but minimize post-processing induced laziness. Sounds good on paper, but wait, most lenses lose sharpness in the corners.
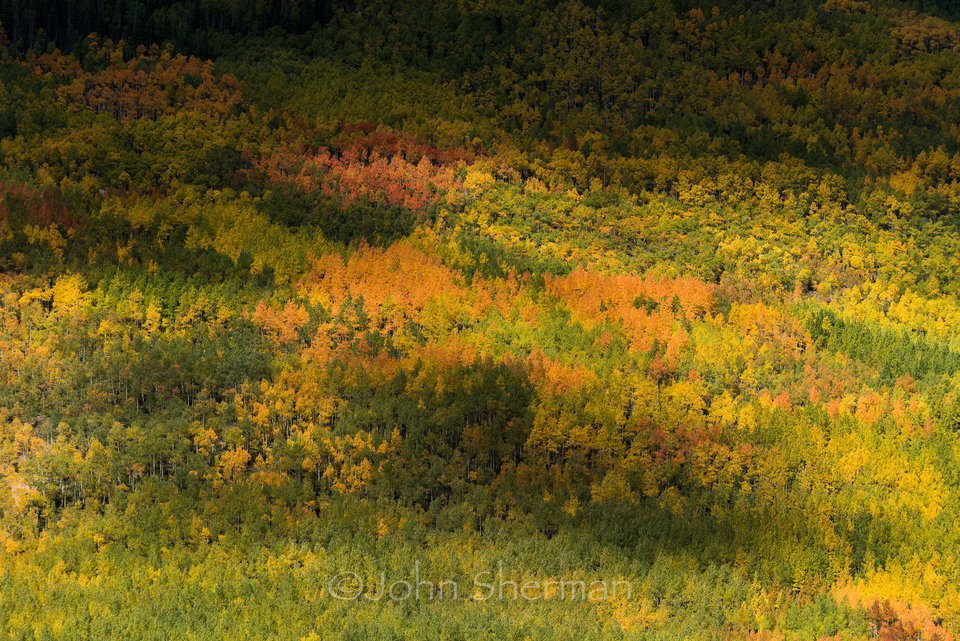
Here’s some nice fall foliage in Colorado’s San Juans. I’m shooting my Nikkor 70-200mm f/4 which I know is soft in the corners from 135-200mm.
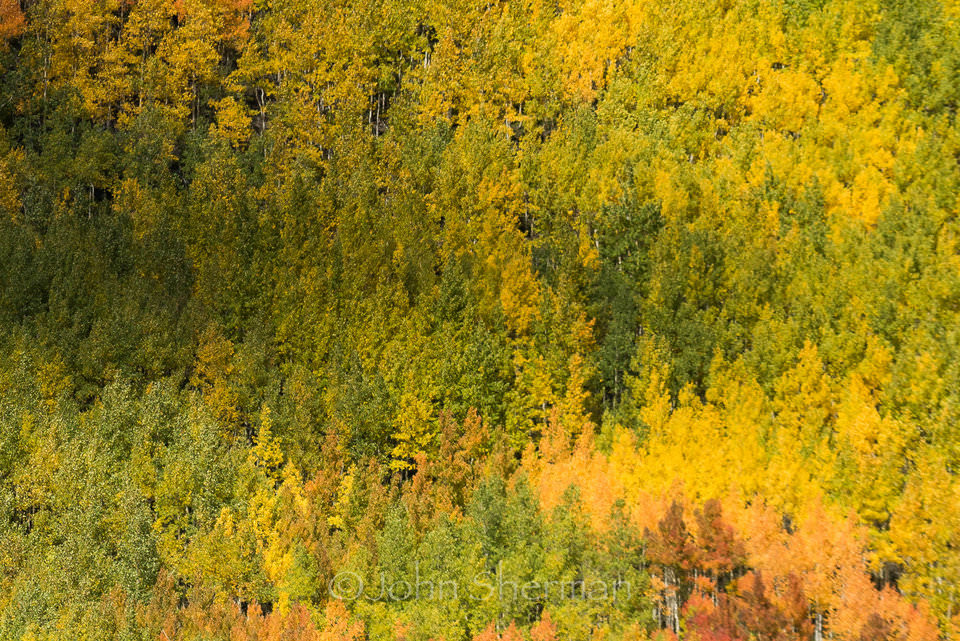
A close up of the lower right corner shows some yucky blurred out trees, not the crisp foliage I want to capture. If we compose a bit loosely in camera, then crop away the soft corners in post we’ll have a sharper corner-to-corner final output.
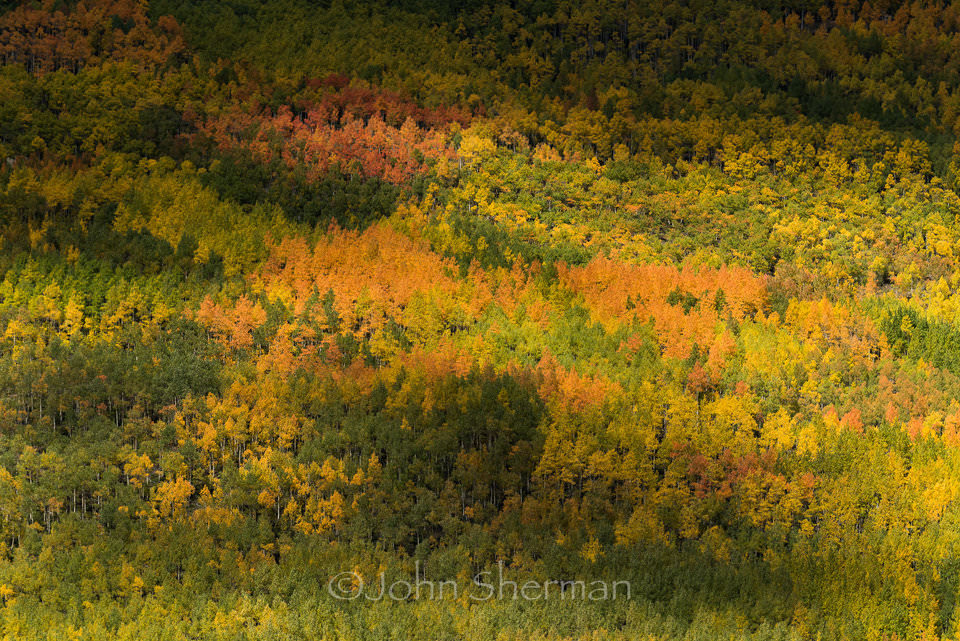
This is why any self-respecting Anti-Cropper will only shoot crop-sensor bodies with full frame lenses attached or at least keep their D810 in 1.3x mode.
Another nice benefit of cropping is the ability to crop away distractions in an image.
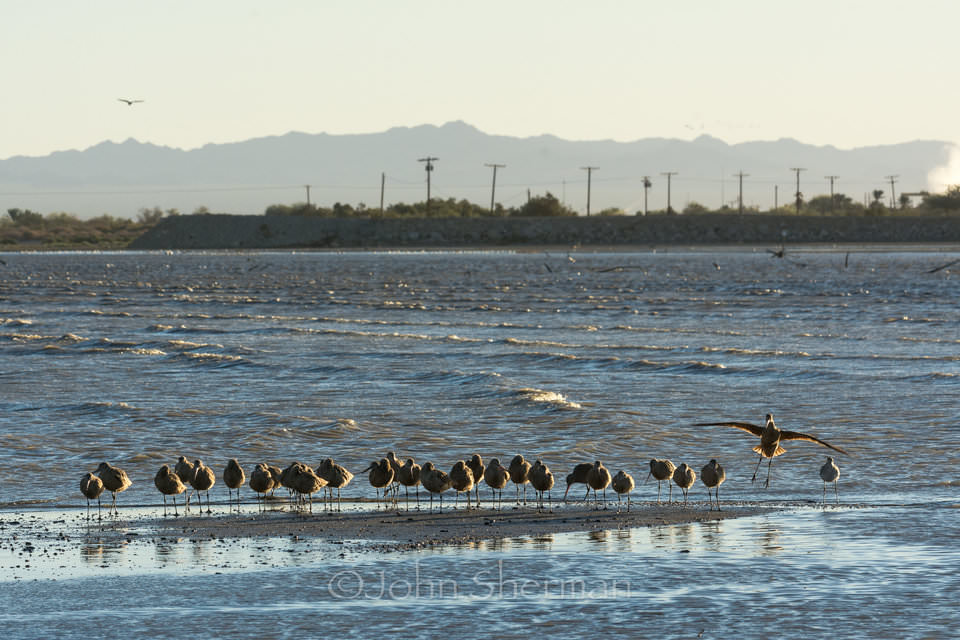
Even though they’re coming from a geothermal plant, the power lines on the horizon just aren’t doing it for me.
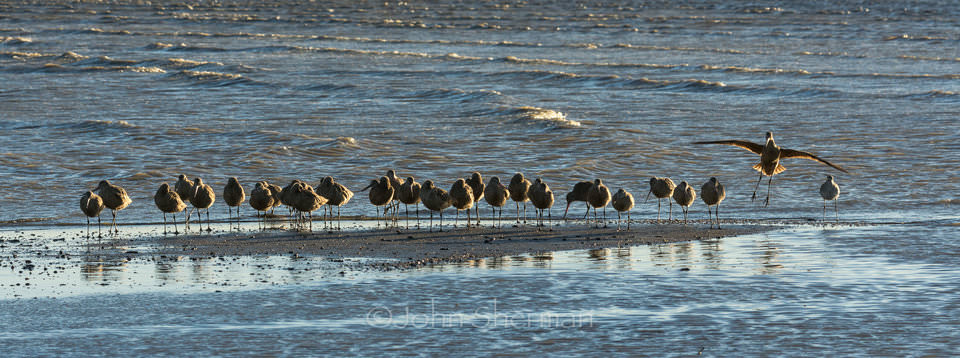
Ah yes, now we have a shot that shows what I want to share about this scene, a cool lineup of Marbled Godwits with nice curving ripples running through the shallows. If a chunk of an image is doing nothing to help convey what your vision is, then crop it away.
If you’re shooting fast-paced action you might not have time to perfectly frame your photo. What’s that? Fido is “hugging” Uncle Ralph’s leg in the last portrait shot of him before the aliens took him away? Bring on the crop tool and voila, a nice three-quarter portrait.
When shooting fast action where I’m distant enough I know I’ll have room to crop, I’ll center my subjects (taking advantage of the more accurate AF-points near the center of the array), then use the crop tool to my benefit later. That way I won’t miss something like this.
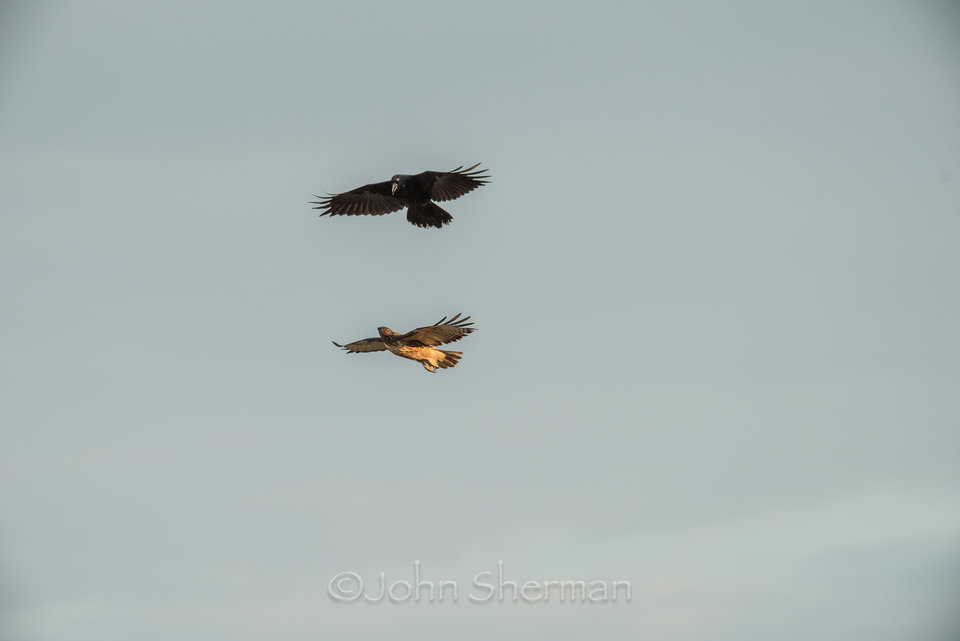
Now later in post I can get this. (To quickly switch from a horizontal to portrait crop box, hit the “X” key.)
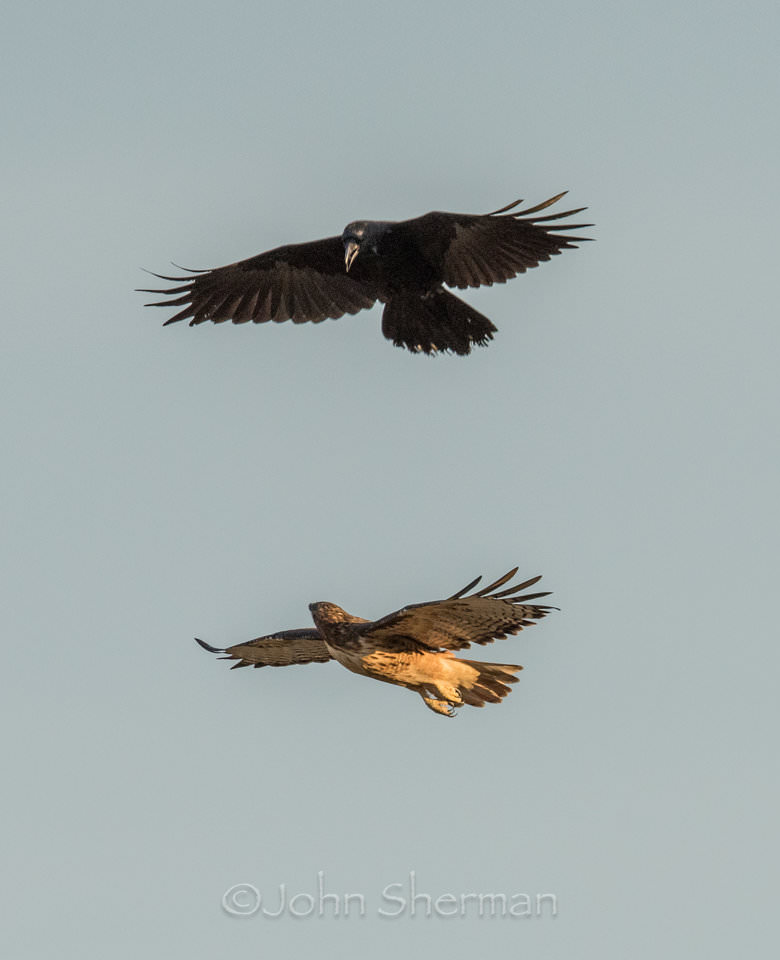
Ravens can be really antagonistic birds, and will use their huge size and aerobatic flying skills to mess with their neighbors, even if it’s a Red-tailed Hawk. By utilizing all the tools at my command, both in camera and in post, I can optimize my chances of capturing such decisive moments.
Extra reach is another benefit of cropping. Many subjects don’t require this as you can simply move closer, but what if it’s a rattlesnake with one bad eye and a disposition to match?

Cropping lets you keep your distance from shy or dangerous subjects, allowing them to relax and behave normally. This makes for better photos. More importantly, is allows us not to disturb the wildlife to where it wastes precious energy stressing out and/or trying to evade us.

Going for all the reach I can muster gearwise – crop sensor 1.5x factor plus 1.4x teleconverter and 500mm lens and it’s still not enough. Time to crop for extra reach so we can see that tilapia the gull has snagged.
The big take away here? Just like the camera body and the lens, the crop tool is just that – a tool to help you express what you felt when taking the photo. Not all tools work in all situations. Don’t use a hammer when you need a wrench – only crop if it makes your image stronger or you can’t or shouldn’t get closer to your subject.
How to Crop
I’m about to give you the Lightroom keyboard shortcut that will damn you forever. Ready?
Hit the “R” key. In any Lightroom module that will take you directly to the Develop Module and into the crop tool.
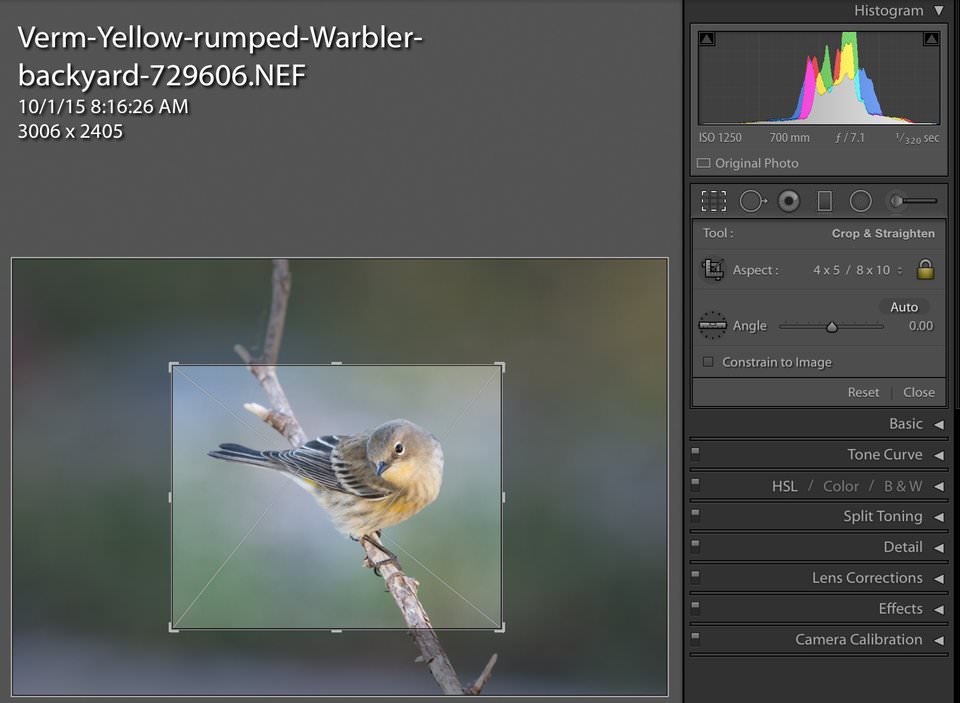
You can also access the crop tool by hitting the dashed rectangle on the left side of the tool icons below the histogram. Here we see a 8×10 ratio was chosen for cropping this image, though this is purely subjective.
We’ve already discussed how standard photo ratios don’t always concur with the best composition for a photo. For those reasons I suggest going to the cropping tool lock icon and clicking it open.
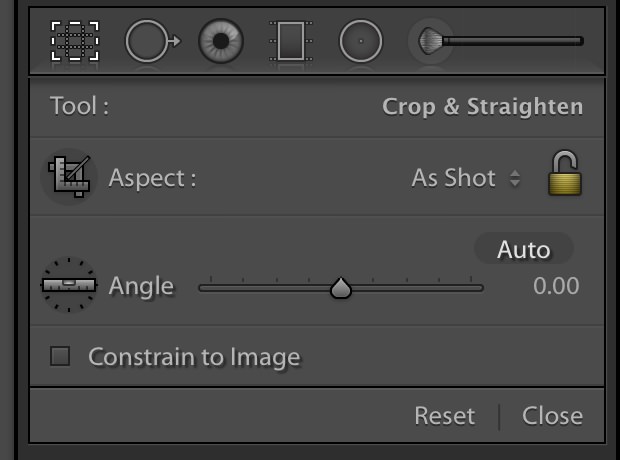
Now the cropping borders can move independent of each other. At this point you can place your mouse icon over one of the borders or a corner and drag it into whatever position you like. You might just move one border, two, three or all four. It’s up to you to judge how balanced and aesthetic the resulting composition is (this is a topic that goes way beyond this primer).
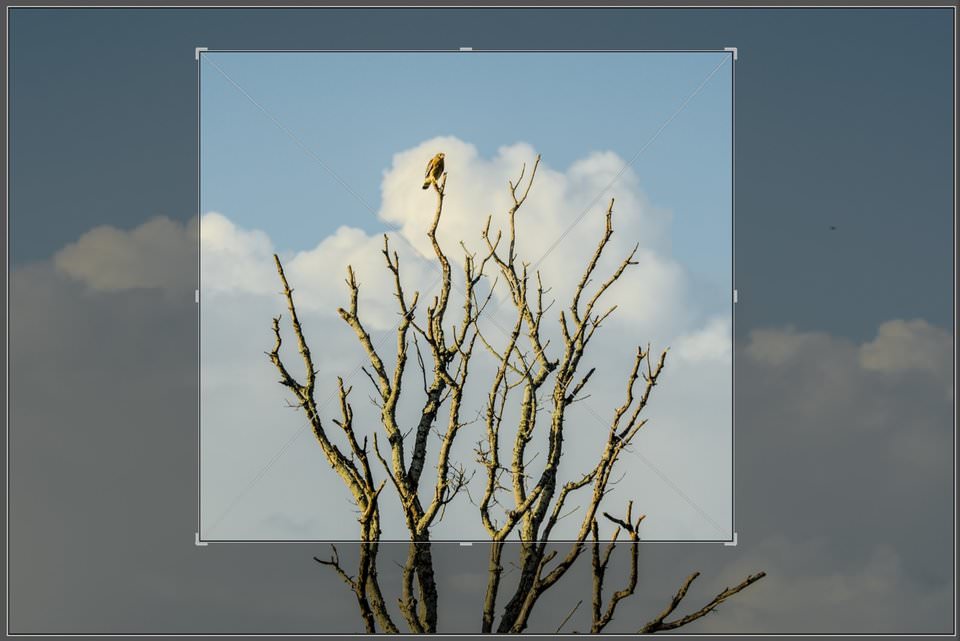 Adjusting all four edges into a rough square.
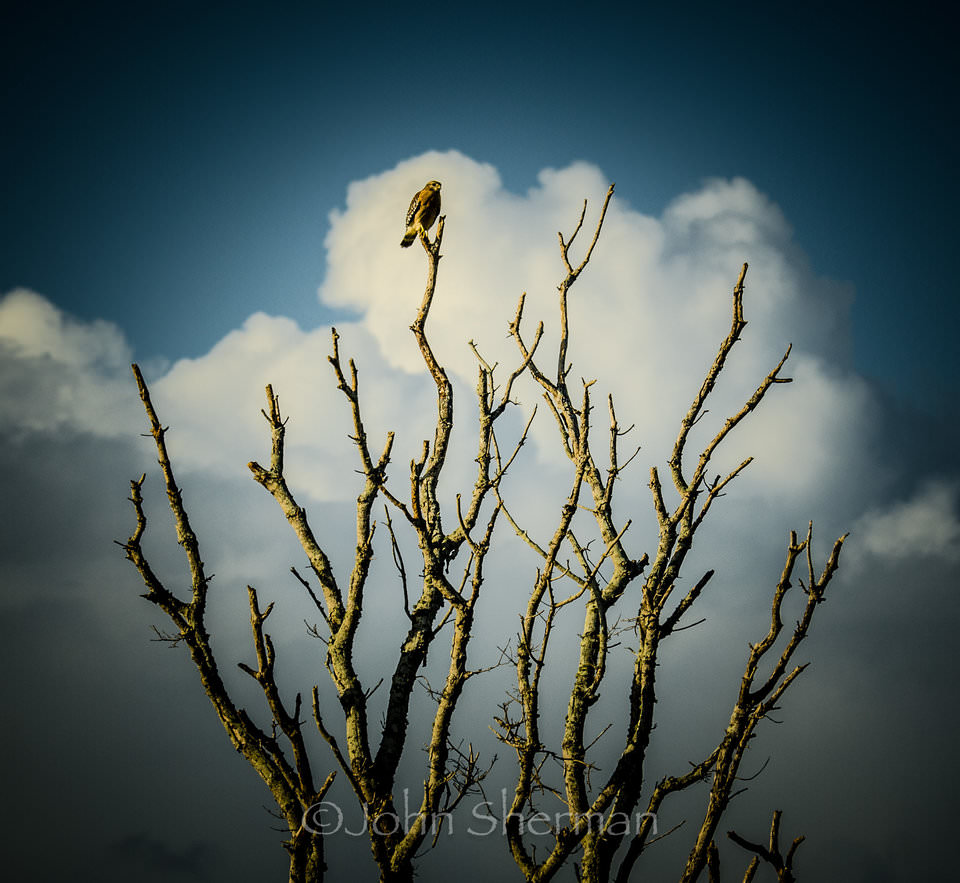
And, d’oh! Who hasn’t gone through a grunge bird phase?
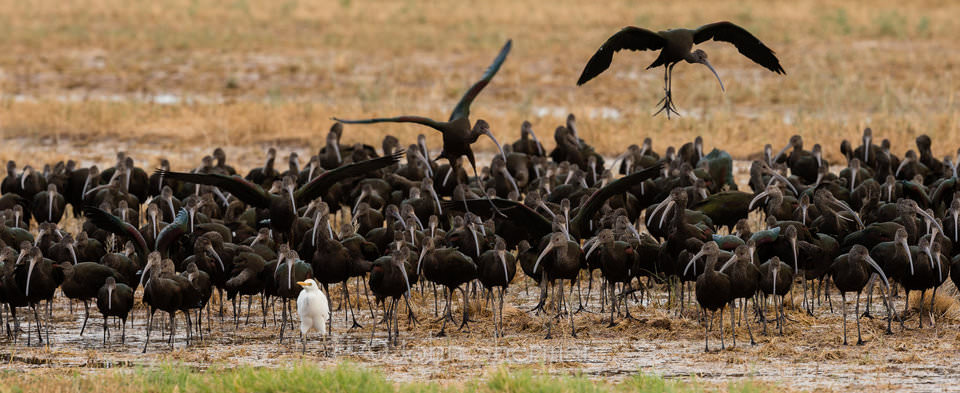
This scene lent itself to a narrow horizontal crop.
If your photo needs leveling you can hover your cursor outside the crop tool borders and a curved icon with two arrowheads shows. Click and hold down the mouse button while pushing the mouse in the direction you want to tilt the image – release the mouse when you get the image the way you want. Alternatively, you can use the “angle” slider to tilt the image. Either way, a grid automatically overlays the image to help you straighten horizons, etc. (If your image contains obvious horizontal lines, say the edges of a building, an ocean horizon or Nebraska, then the “auto” button can be clicked and Lightroom will automatically level the picture.)

Horizon tilted above.
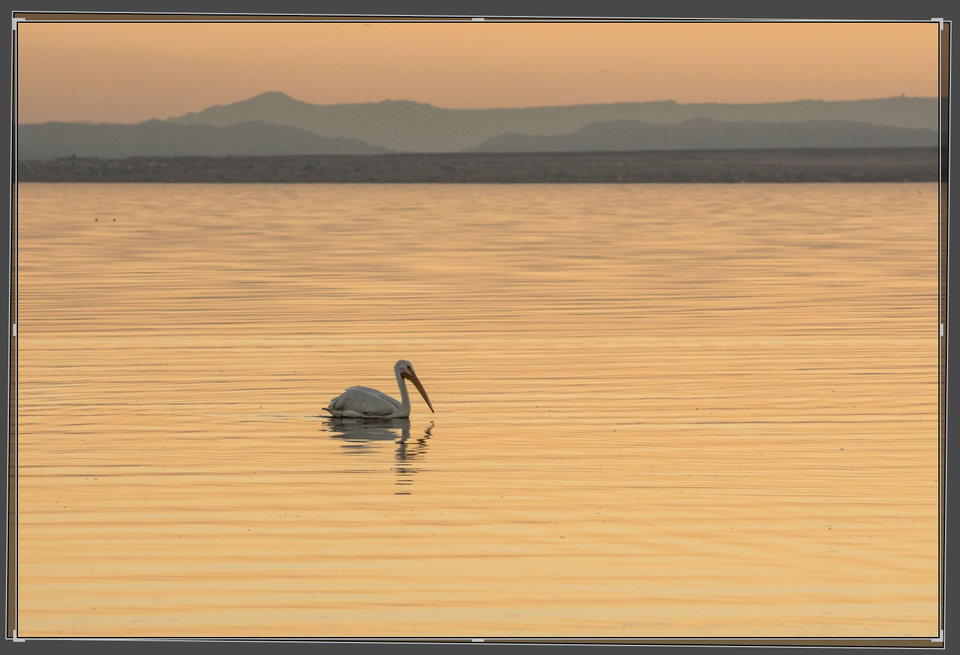
Now with “auto” straighten clicked. Lightroom tilts the image until the horizon levels out. Just click return to save the result.
If you like your crop dimensions but prefer to shift it slightly left, right, up or down, just tap the corresponding arrow keys and the frame will move in small increments.
If you have set dimensions you need to crop to – say a page layout that demands a 8.5×11 ratio image, you can click on the up/down arrow icon just left of the lock icon and a dialog screen with several standard image ratios will appear.
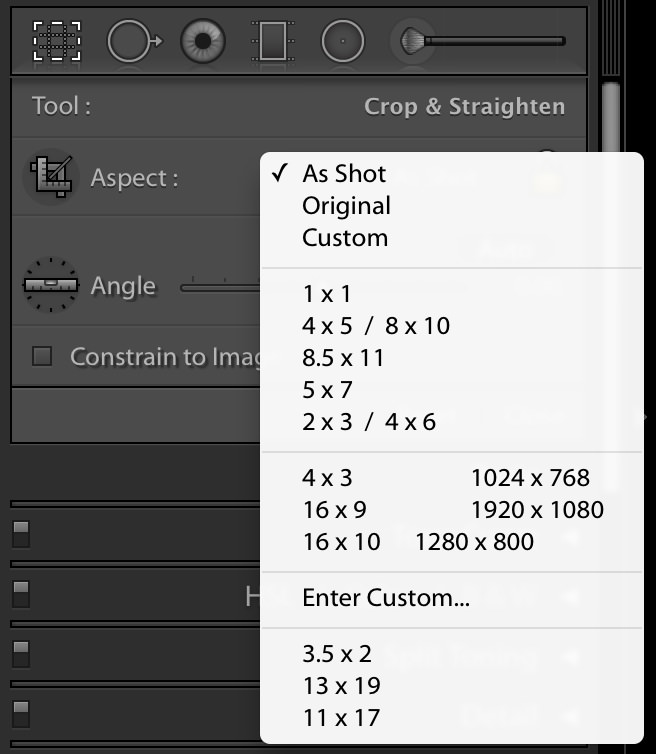
Choose one (or if none match your needs you can create a custom one by clicking “enter custom” then filling in your own ratios to the dialog box – I have three of my own added here, such as 3.5×2 for business cards) then click the lock icon so it shows locked. Now when you drag a border or corner the other borders shrink or expand to keep the ratio constant.
A visual aid I like to use when cropping is to “turn the lights off.” Hit the “L” key once and your screen will dim except for what’s inside your cropping tool borders.
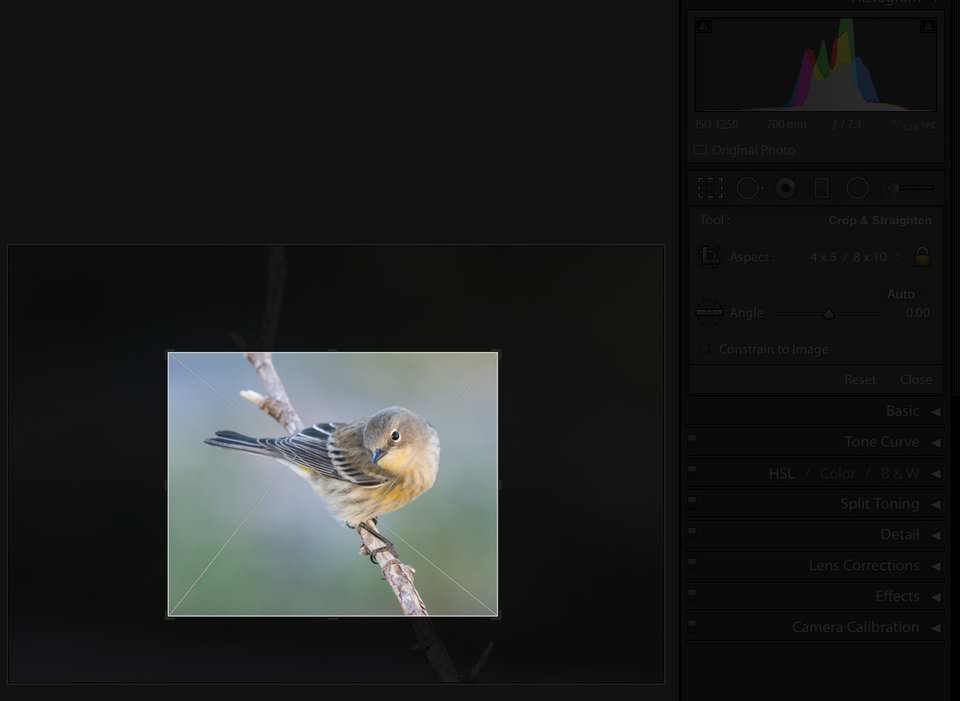
Hit “L” again and it will go black outside the borders. Either helps minimize the distraction of seeing the entire image with a border overlay and lets you focus on what the final image will look like.
Another way to judge this if you don’t hit “L” is to watch the small thumbnail in the Navigator box at the upper left of your screen – that will show the cropped version.
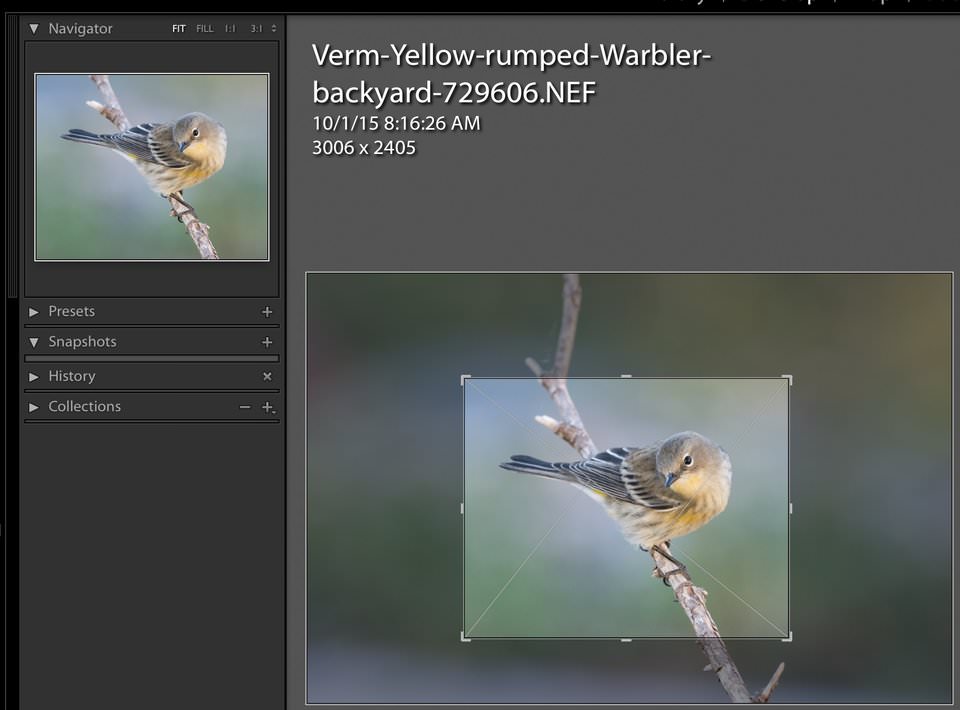
Often looking at the small version makes it quickly apparent if the crop is working – if it looks catchy small, it will look even better at final output. The small image size lets the eye pull in the bigger composition details and not get lost in the minutiae.
If you want hints as to composition, there are several overlays that give translucent white lines or curves that line up with different ratio formats, the rule of thirds, the Golden Ratio, a Fibonacci spiral, etc.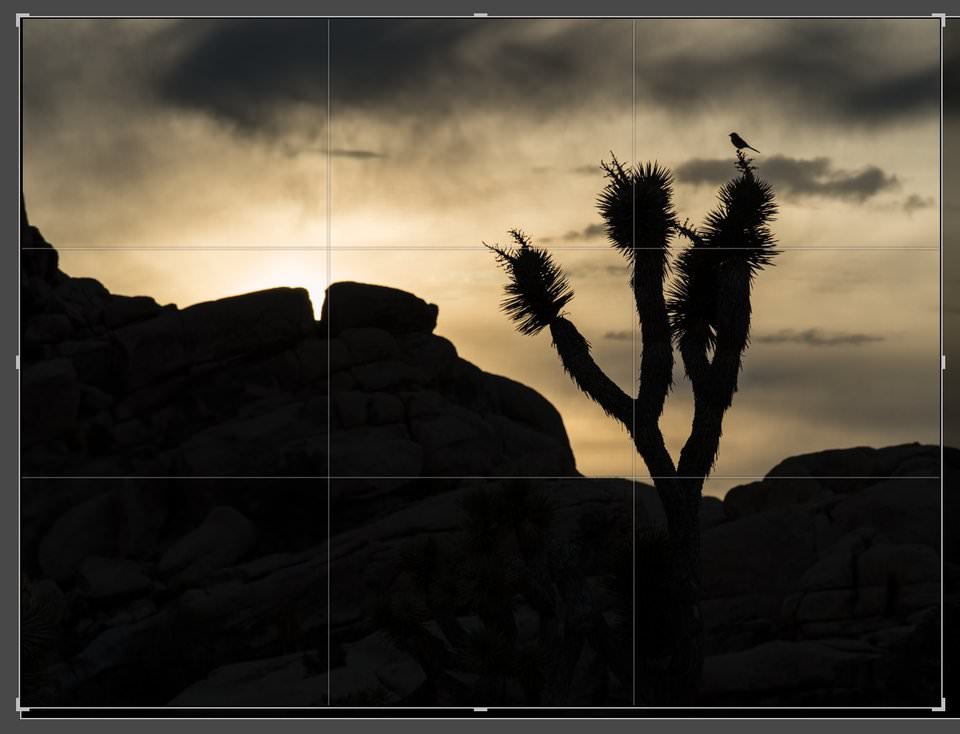
Rule of thirds grid.
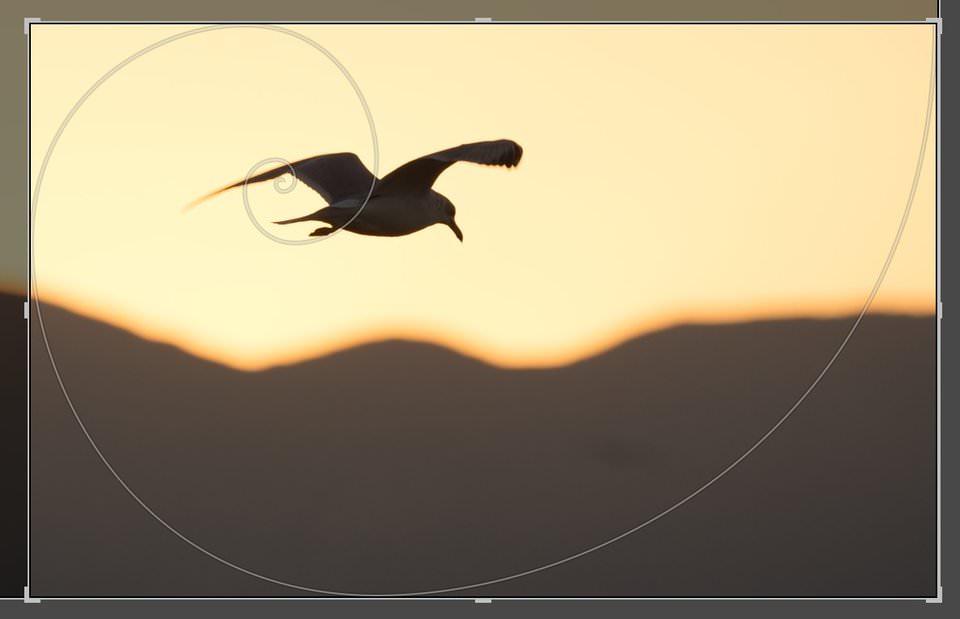
And Fibonacci spiral.
You can scroll through these by hitting the “O” key – if you want to flip an overlay, hold shift and click “O”. If, like me, you hate being told what to do, then you can turn these off by hitting “H” (hide) or by going to Tools>Tool overlay>Never Show. If you hit “O” again the overlays will come back and you can cycle through by hitting “O” repeatedly.
If you don’t like your crop and want to quickly return to the original click “reset” at the bottom of the crop tool box.
Warnings
Cropping throws out pixels and thus information. The less info in your files, the less defined the details are and the more magnified any imperfections, such as image blur or noise, become. As well, the smaller the file, the smaller a print you can make from it without sacrificing resolution. I have my develop module info overlay set to give cropped dimensions in the loupe info (Develop>View>View Options>choose “cropped dimensions” for one of your boxes – shown here as third box in Loupe Info 1).
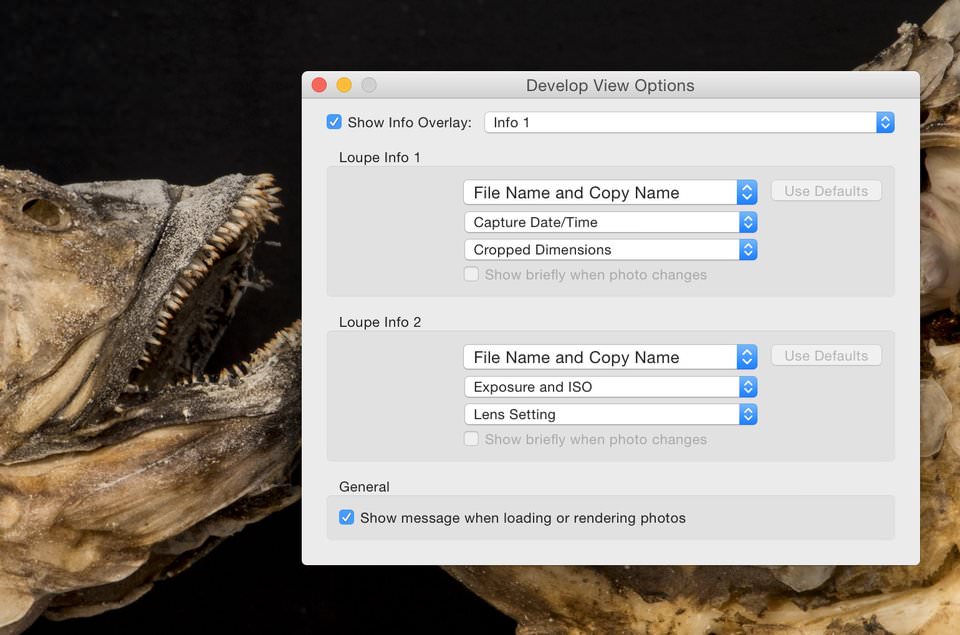
That way when I crop an image to how I like it, I can check the cropped dimensions and have an idea if it will print good as a magazine cover or only be big enough for a postcard. If you find the info overlay distracting you can turn it off by hitting the “I” key until it disappears.
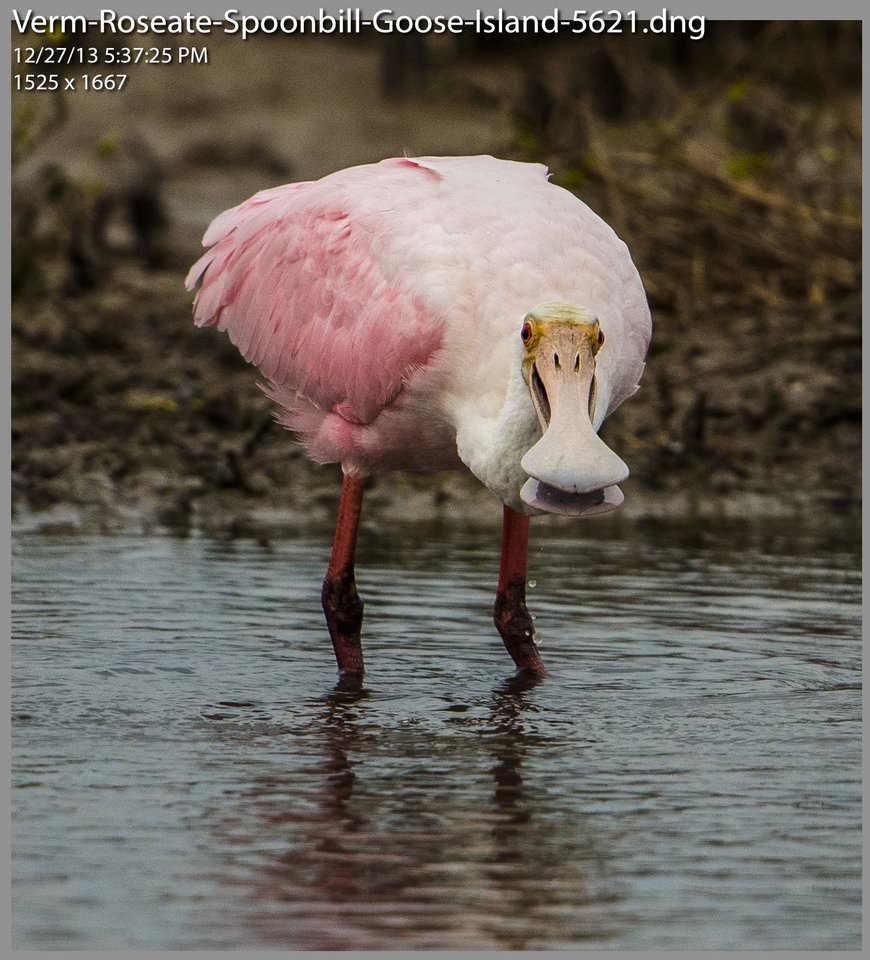
Looking at the cropped dimension in upper left we see that this is 1525×1667 pixels, a small file suitable for web sharing, but not more demanding use. Probably a good thing as this might be the least flattering Roseate Spoonbill shot ever taken.
Cropping in Lightroom (Video)
Here is a video by John Bosley on using the crop tool in Lightroom, which beginners and enthusiasts might appreciate, since it covers the crop tool in a very easy to understand way:
How to Deal with Naysayers
The naysayers are right that cropping as a first resort can lead to photographic laziness, but they’re wrong when they insist that “cropping is just for farmers”. When used judiciously, cropping can turn good photos into great photos. If you need convincing just study the famous portraits taken by Arnold Newman. The tight face shot of Picasso? Stravinsky dwarfed by his grand piano? Both carefully cropped into the iconic photos they became. “Ah,” the naysayers will quip, “but the master of The Decisive Moment, the Godfather of street photography, Magnum Photos co-founder and all-around legend of photography Henri Cartier-Bresson would include the negative borders on his prints and submit them to publishers with a stamp warning them not to crop his images. Your lazy ass will never understand the level of perfection that he and I embody.”
That may well be so, but you know Cartier-Bresson’s super-famous photo of the dude hopping over the puddle in Paris? Gare Saint Lazare? Big time crop job. Even Cartier-Bresson knew some photos improve with cropping.
For more on Verm’s struggles with cropoholism, please visit his blog here.
All contents © John Sherman, no reproduction without prior written permission.