Clipping a subject from its background is one of the fundamental procedures that is required for a variety of Photoshop projects. I’ve covered the best selection methods for a range of situations in my video titled How To Cut Anything Out in Photoshop, but cutting out hair always proves to be the most challenging, especially when dark or detailed backgrounds are involved where there isn’t sufficient contrast between the portion you want to keep and the areas you don’t. In today’s Photoshop tutorial I’ll show you some advanced techniques for cutting out hair, even difficult real world scenarios where the subject isn’t conveniently placed against a clean studio backdrop!
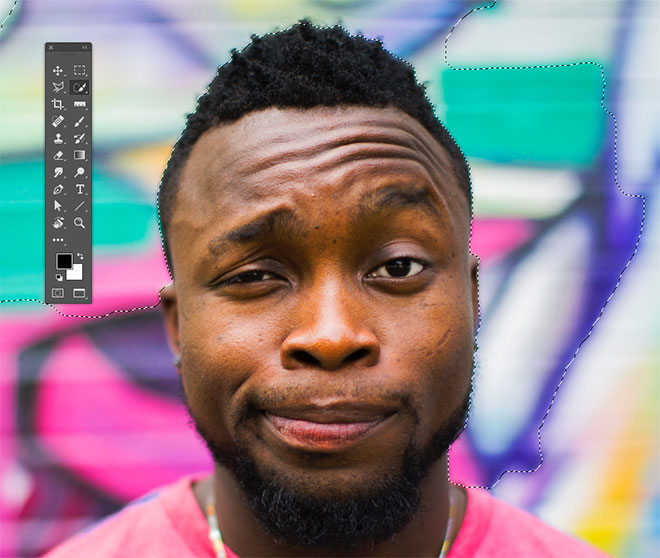
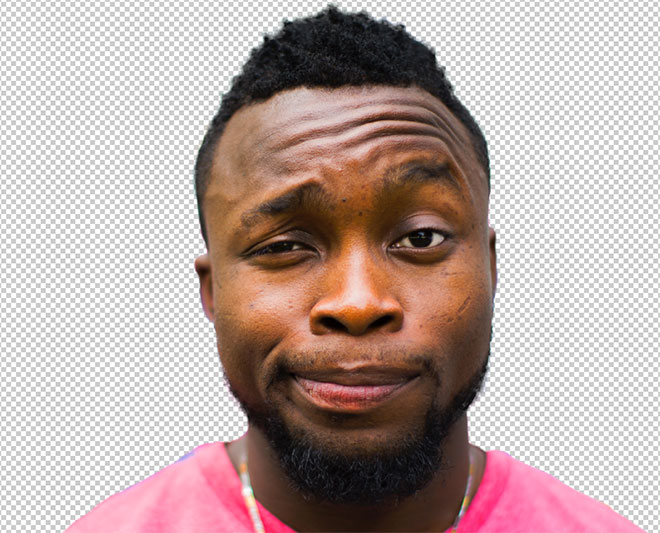
If you have a subject with relatively short hair or fur that has good contrast with the background, like this photo by Ayo Ogunseinde, Select and Mask tool is a reliable tool to produce a clean clipping. Begin by tracing the subject with the Quick Selection tool. Follow the subject’s outline closely to allow the mask to snap to the edges.

Correct any mistakes by holding the ALT key and paint with the Quick Selection tool to add portions of the subject back in, that might have been missed. If there isn’t enough contrast for the Quick Selection tool to work, manually add to the selection with the Polygonal Lasso tool.
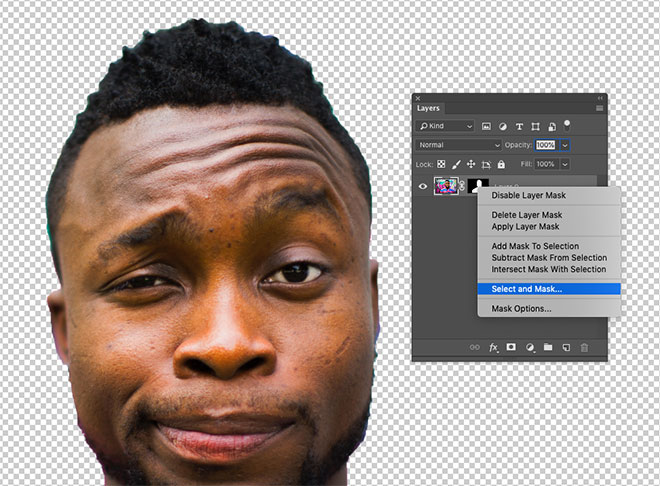
Apply the selection as a Layer Mask, then right click the mask thumbnail and choose Select and Mask to bring up some advanced options to refine the clipping.
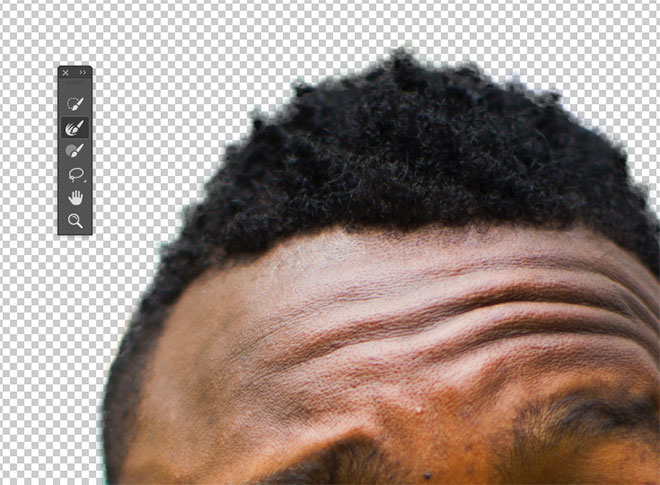
As well as the various sliders that allow you to fine tune the outline as a whole, the Refine Edge brush is ideal for perfecting hair selections. Paint over the hair outline to make a cleaner clipping.

Longer hair has so many fine strands it’s impossible to draw a selection of them all, but as long as the subject is against a clean background, the Channles method will generate perfect results.
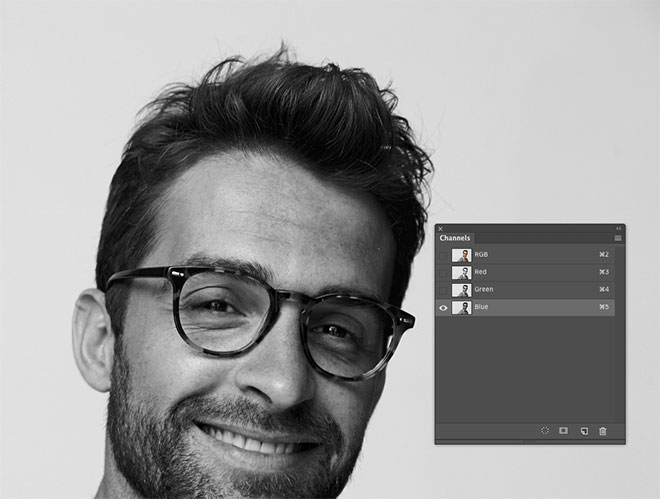
In the Channels panel, find the channel with the most contrast. In this example of A Happy Guy in Spectacles from Shutterstock, the hair is darkest in the Blue channel. Make a duplicate of the channel by dragging it onto the ‘New’ icon.
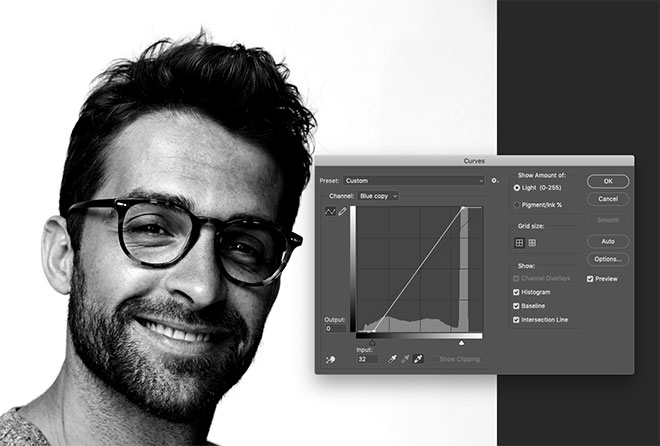
Use the Levels or Curves tools from the Image > Adjustments menu to set the background as the white point. The shadows can then be clipped to darken the hair, but don’t go too far, otherwise it will leave a white outline around the hair selection.
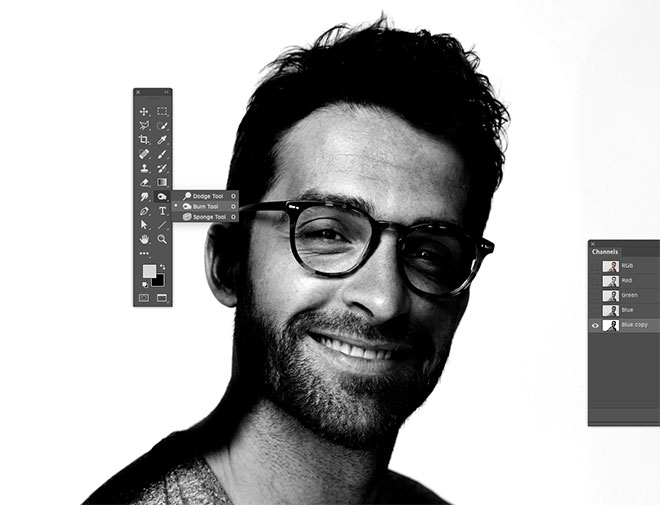
A silhouette of the subject needs to be created for the mask to make a full selection. Select the Burn tool and set the option to Shadows in the top toolbar. Paint around the subject to safely darken the edges of the face and body, without needing to accurately trace the outline.

The remainder of the subject can be quickly painted over with a black brush to complete the black and white mask.
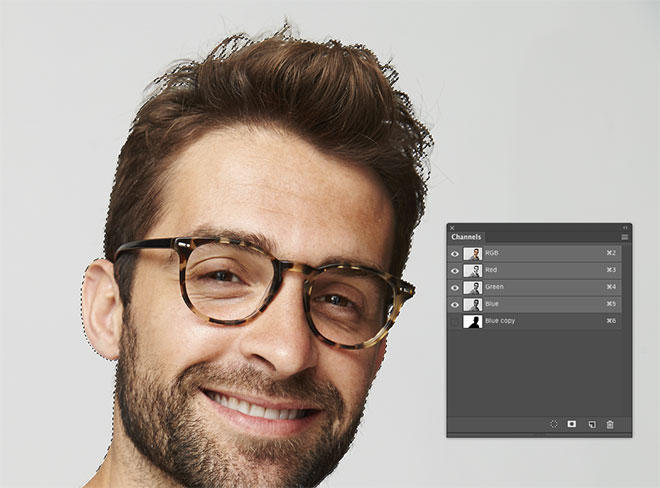
Hold the CMD key (or CTRL key on Windows) while clicking the new channel thumbnail to load its selection. Activate the RGB channel to bring back the full colour image in order to copy/paste onto a new layer or apply a layer mask.
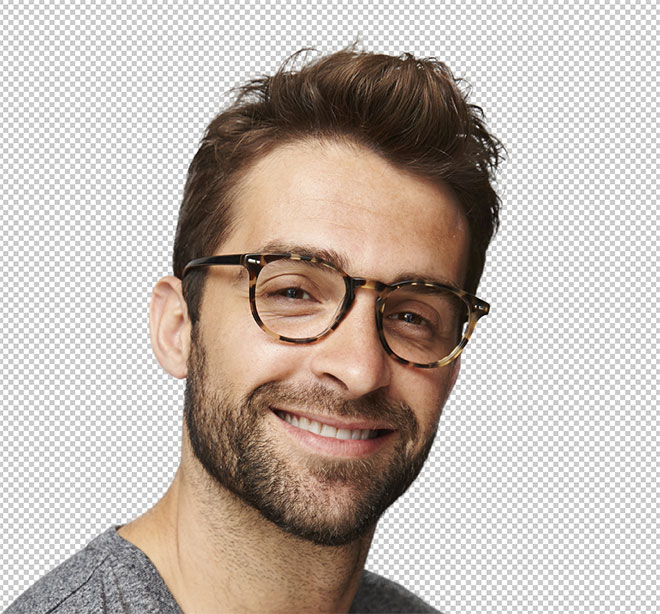

In the real world, your source photographs aren’t always conveniently shot against a perfectly lit studio backdrop. Things start to get tricky when there’s no contrast between the subject and its background. In this photo by Ana-Maria Nichita the mottled colours make it impossible to find a channels selection or find the edges with the selection tool.

Use the Pen tool, or Polygonal Lasso tool to manually trace the subject. When it comes to the hair, just make a rough selection of the main body of hair. Make the selection, then Copy/Paste onto a new layer.
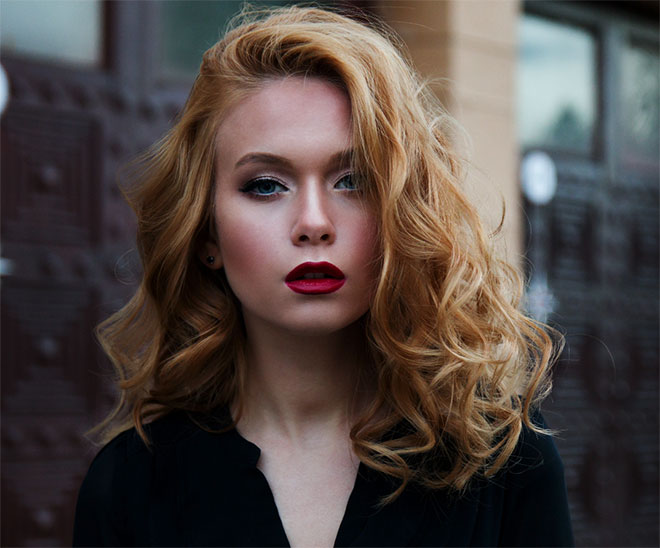
Rather than try to rescue the hair from the original photograph, just paint in some new hair! Select the Smudge tool and set up the brush tip with the Size control set to Pen Pressure under the Shape Dynamics section of the Brush Settings.

Set the opacity of the original layer to around 70% as a reference for where the hair needs adding, then begin drawing new strands of hair in the relevant directions. Begin with a brush size of around 4px, then gradually reduce the size to add finer hair strands. It sounds like an extremely tedious process, but it doesn’t take too long, especially if you have a graphics tablet.
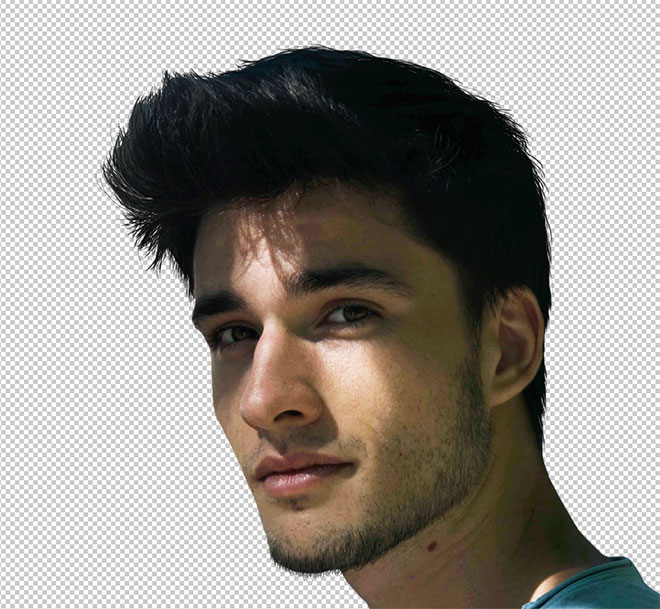

As the subject’s hair gets longer, it becomes too difficult to manually draw the hair back in. In these situations it’s possible to produce a decent cut-out with the help of Photoshop ‘Hair’ Brushes.
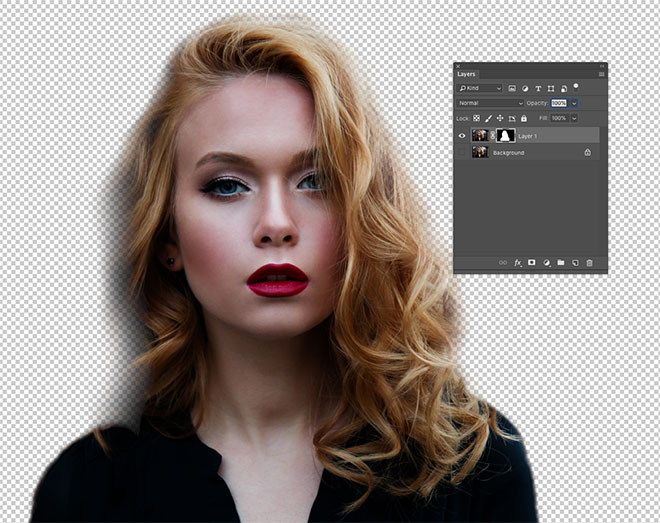
Make a selection of the subject as accurate as possible and apply a layer mask. Use a soft brush to fade out the hair where it meets the background.
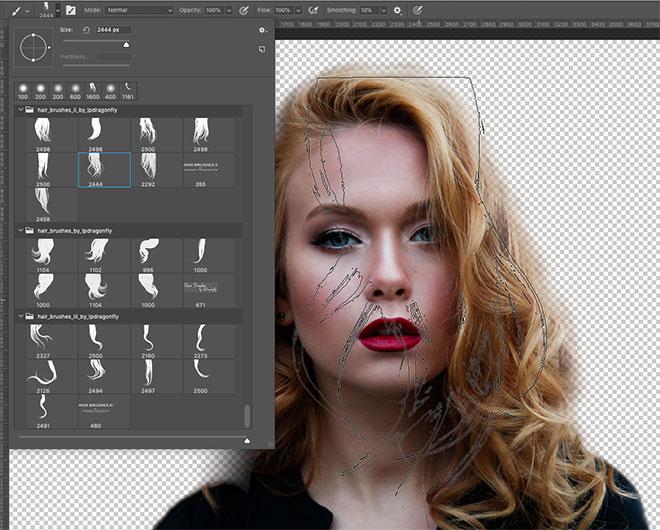
Rather than paint in individual hair strands, Photoshop hair brushes provide a series of curls and ringlets that can help generate a completely new outline. Ivadesign has 3 Photoshop hair brush sets you can download for free.
Each brush can be scaled in size with the [ and ] keys and rotated by adjusting the angle icon within the Brush Settings panel. Also use the Flip X option to orientate the hair brush to follow the natural flow of the subjects hair.

Create a new layer, then use the colour picker to sample the original hair colour near the area the brush will be placed.
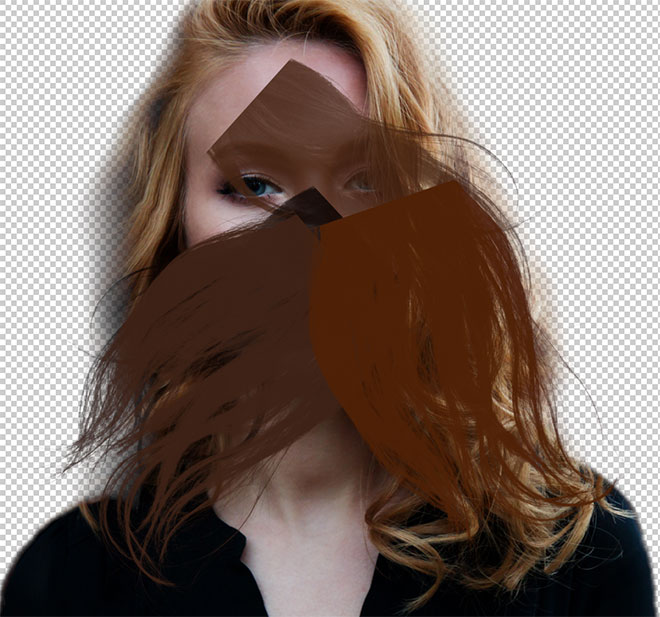
Make a single click with a brush, then find an alternative lock of hair to use in a different part of the outline. Change the colour selection, orientate the brush, then dab an instance of the hair strands.

Change the blending mode of the hair layer to Hue so the original subject is still visible. Continue adding new hair to construct a completely new outline.
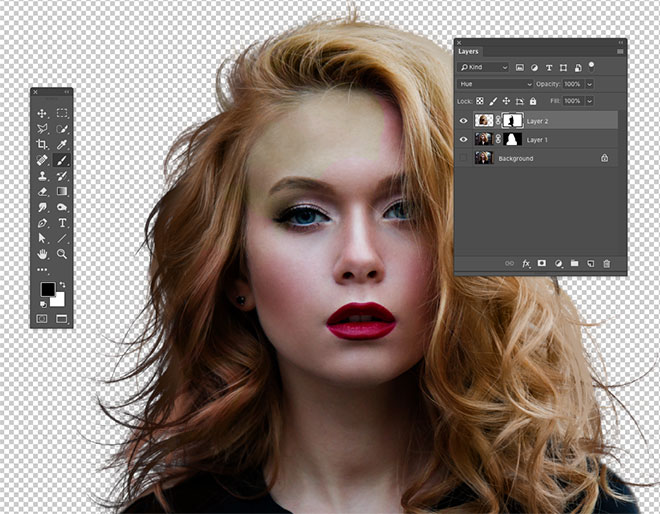
Once the new hair outline has been created, apply a layer mask and erase the coloured areas from the subject’s face with a regular black brush.
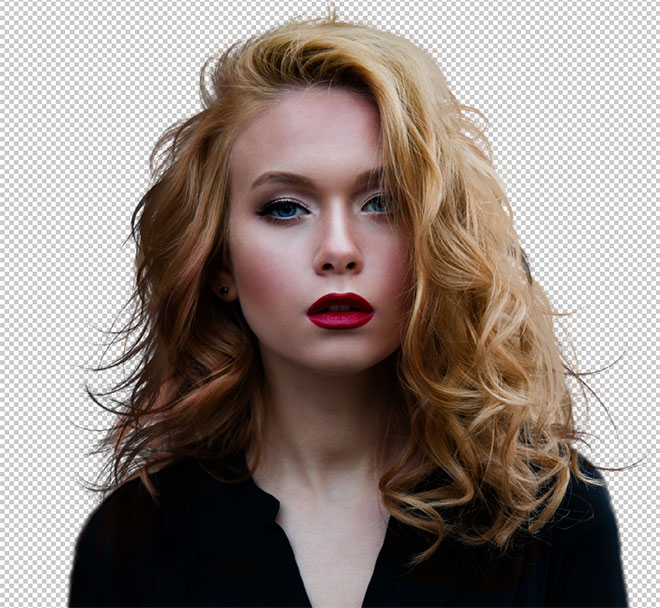

Photoshop brushes of long flowing locks of hair aren’t going to be suitable for all hair types, but the same technique can be applied to other hair styles. It just involves finding an alternative portrait of a person with similar hair that is selectable against a clean background. New Photoshop brushes can then be derived from the donor image.
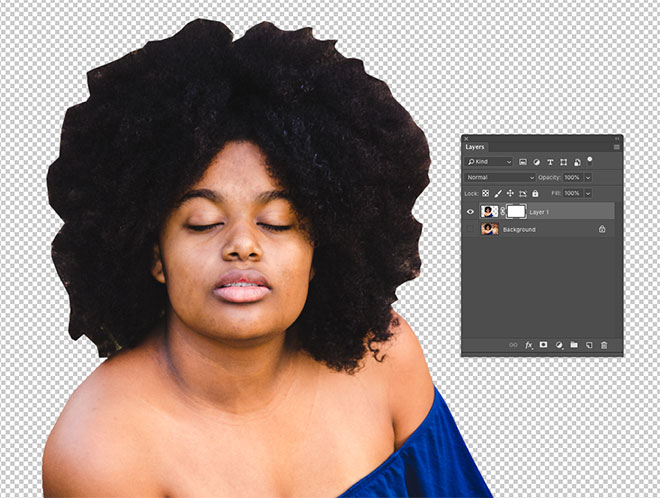
Draw a path around the subject with the Pen tool, roughly outline the hair, then apply a layer mask.
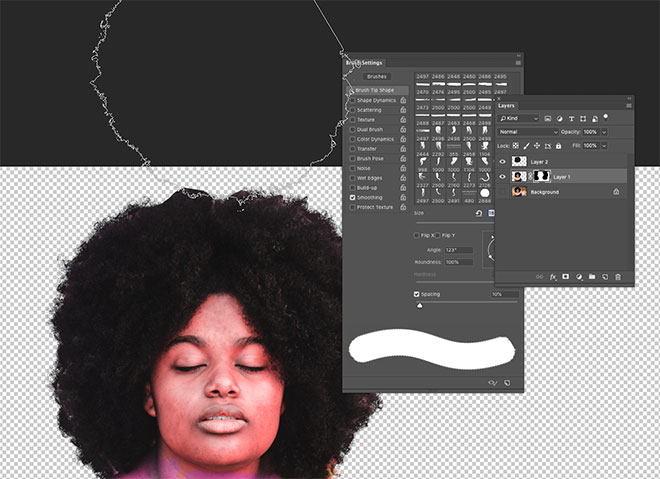
This photo of a Beautiful Afro Business Man from Shutterstock features a similar hair style that is selectable using the Channels method.
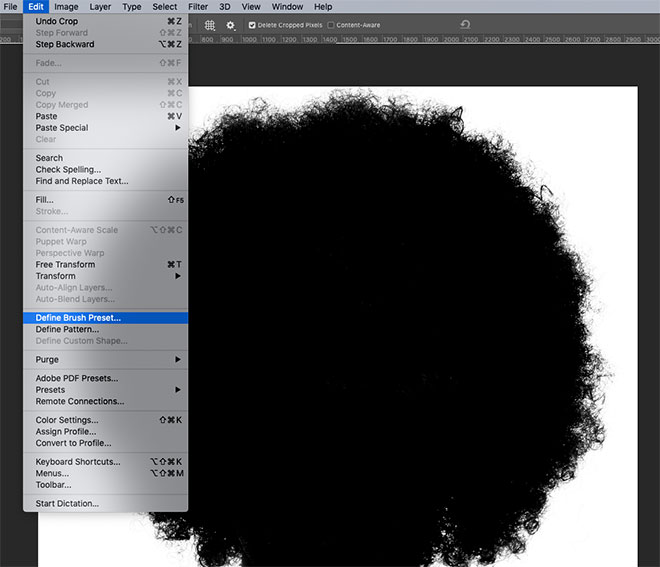
Trim the canvas to contain the hair silhouette, then go to Edit > Define Brush Preset.
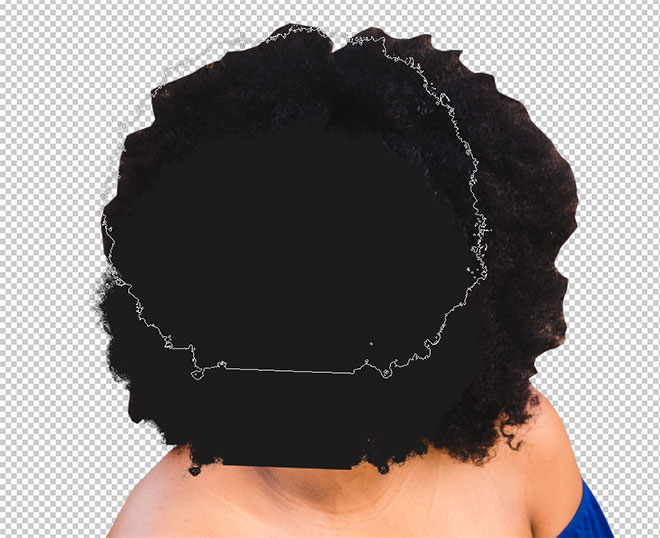
Back in the main document, create a new layer and begin painting in a new hair outline, remembering to sample the colour from the original photograph.

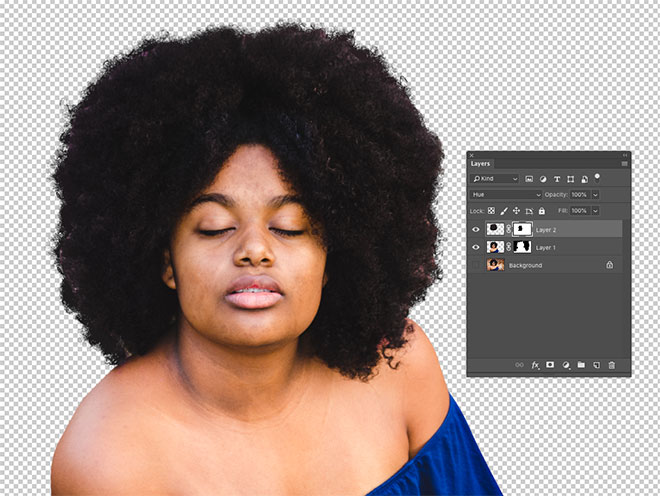
Change the new hair layer to Hue so the subject is still visible. This brush can also be used to remove the hard outline from the original clipping. The tight curls will blend with the new outline.
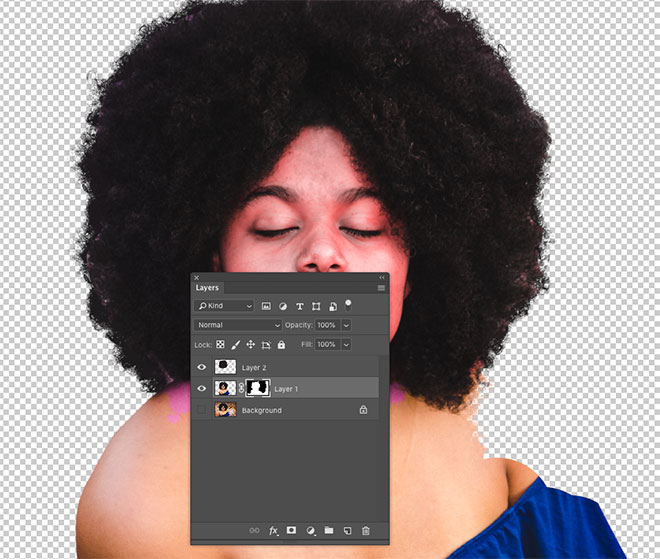
Switch the colour to white and paint back over the shoulders and body to restore any areas that have been removed.

Apply a layer mask to the new hair layer and erase the portion that overlaps the face to remove any discolouration.
