In this article, I’ll explain how to use the equipment you have to do panoramic landscape photography that you can print huge and hang on your wall. Beginning with a brief discussion of what exactly is a panoramic photograph, then I’ll walk you through the process I use in the field.
This includes defining your subject, working the scene, and setting up your gear. Finally, I’ll show you a quick Lightroom workflow to create a panoramic photograph.
Along the way, I’ll share some tips and tricks to help you capture scenes that inspire you.
Why make a panorama?
While hiking along a trail you come to an overlook that presents an amazing view. You are in awe of this vista, you have a tripod but didn’t bring your wide angle lens. With your setup, you can’t capture the entire scene with one frame.
Disheartened, you pull out your phone to take a quick panoramic shot. You know you really would have preferred to print this scene for all your friends and family to see and the phone just isn’t going to do it justice. But is that all you can do? What if I told you there is still hope, there is a way?
What is a panoramic landscape photograph?
To begin, the word panorama has its roots in English and Greek, combining the terms creates the meaning “to see all”. Panoramic photos are composed of a series of two or more photos merged together to capture a scene that is larger than is possible to capture in one single photo.
This can be done horizontally, vertically, or spherically. Does that make sense? If not, think about using your phone’s pano mode to capture a scene much wider than a single picture would allow.
I’ll be using the phone as an example in other portions of this article because it is a good tool for learning. However, to create photographs that can be printed large and maintain sharp details, you are better off using your “big camera”.
Gear
***Disclaimer: While you can take a panoramic photograph free hand, these recommended pieces of equipment will help you achieve more consistent results.
Getting started, a minimum list
- A tripod with built-in level
- Ball head
- A camera with a mounting plate
Intermediate list
- Everything above plus…
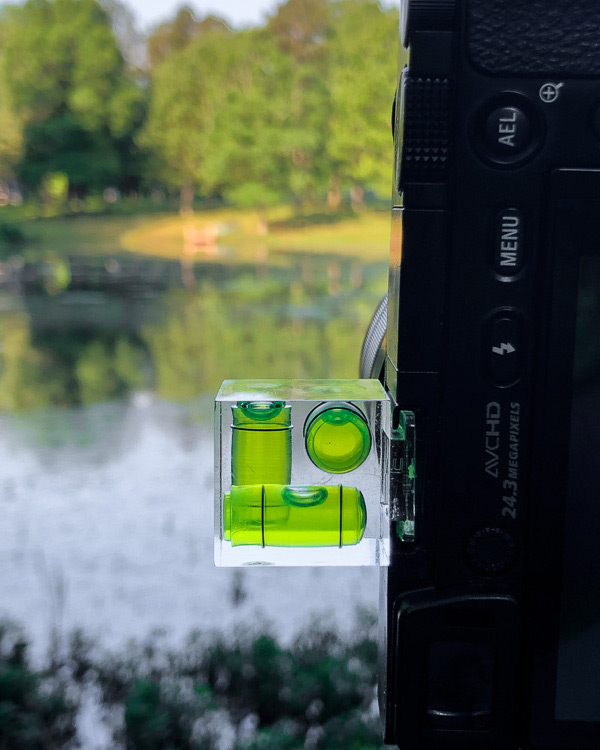
- A 3-axis bubble level that fits onto your camera’s hot shoe (see Top 15 Photography Accessories under $25)
- An L-bracket
- Shutter release
- A ball head with degrees of rotation marked
This is the setup I’ll show you because it’s what I use to create my panoramic landscape photographs.
Dream list
- Everything above plus…
- A tripod with leveling base
- A pan-tilt tripod head with discretized degrees for both panning and tilting rotation
Procedure
Step #1 – Determine your subject
The subject is the thing that caught your attention. It’s what made you want to pull out your camera to take a photo. Whether it’s a grand vista or a single flower blooming in a desert, it’s a moment you want to share.
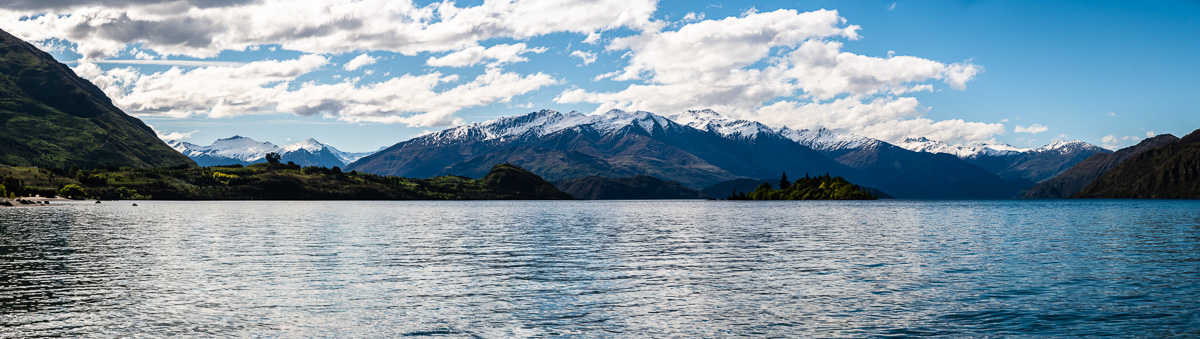
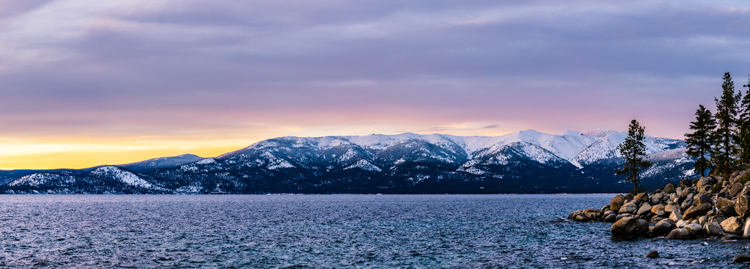
For this article, I’ve chosen a panoramic photograph from my trip to New Zealand last year (see below). While walking along the shoreline of Lake Wanaka, the light falling on the green hills and gleaming white peaks stopped me in my tracks. That scene was what I wanted to share, and thus, my subject.
To me, taking the time to consider what caught your eye and the message you want to share about the moment is very important to furthering your skills as a photographer.
Step #2 – Scout the scene and determine the composition
Going back to the hypothetical scene of stepping into a marvelous outlook on a trail, it’s easy to get overwhelmed. There’s so much to see that you just start snapping photos. Often, this means you’ll miss out on a really unique composition though.
As an example, think of how many nearly identical landscape photographs you have seen on Instagram for certain famous locations. People tend to go to a place to take “the picture” without considering other perspectives.
Here’s my suggestion. Once something has captured your attention, take a moment to walk around the scene before you start shooting. Your willingness to explore will pay off in dividends for your final photograph.
Now is the time to start thinking about composition. How do you want to capture the subject? Start thinking about what you want to include or exclude from your final photo. Is there an object that might obstruct part of the scene that you need to work around, etc.
Begin to visualize what you want as your final result, because after this step you’ll be setting up your gear to achieve this goal.
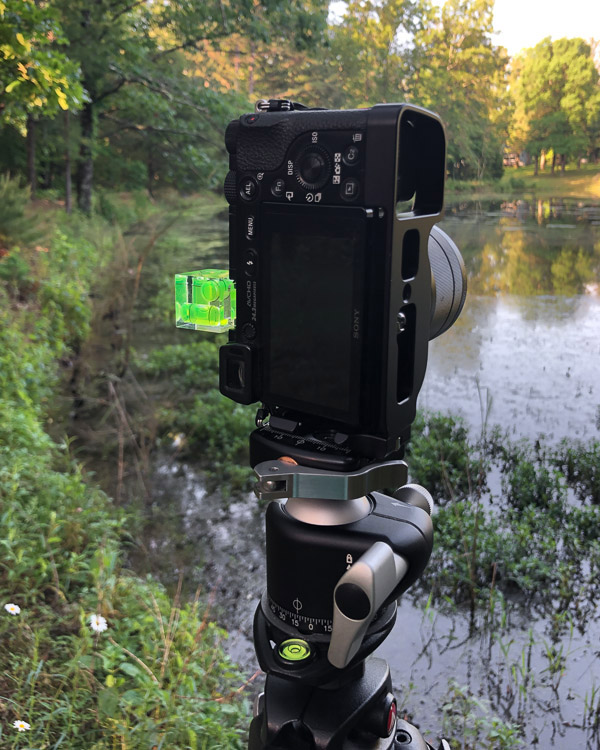
When you find your desired shooting location, make sure you can safely set up your tripod. Then, place your camera in portrait orientation (shooting vertical images) atop the tripod to make sure you can capture the desired composition while panning.
Step #3 – Set up your gear
To this point, you have selected a subject, chosen your vantage point, and found solid footing for your tripod. Now it’s time to set up your gear to capture the moment.
During this step, it is important to be as methodical as you can because it will save you time when you begin to post process your photographs.
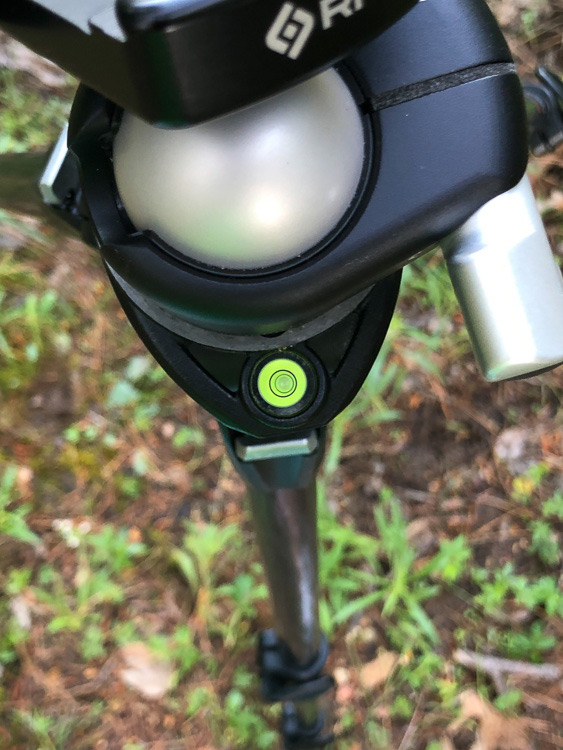
I take a somewhat ground-up approach to setting up my gear. This begins with leveling the tripod. Starting with a stable, level base is important because you will be panning your camera left to right, and up/down to capture the landscape.
The goal is to keep your individual images tracking horizontally so that when you begin merging you will not lose any of the cool portions of the scene you are photographing. A level tripod means that your ball head is level. This means that you should be able to smoothly and evenly pan (rotate) left/right, up/down across the scene.
As you see in this example below, the individual photos are not perfectly aligned. Depending on the composition I had in mind I might lose some details in the top or bottom of the final image.
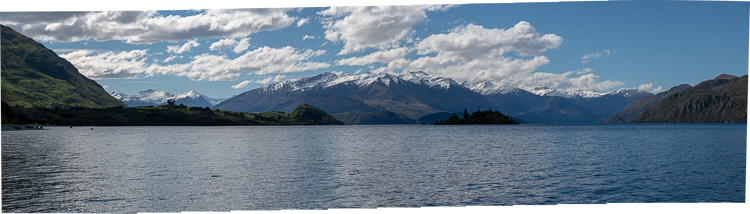
This portion of the setup is no different than the horizontal line that your phone shows you to follow when you use it to take a panoramic photo. If you stray too far above or below that line your result will be gnarly. If you haven’t done this, give it a try to see the result.
***Note: Depending on your equipment this can be straightforward or take a bit of patience. However, the effort will pay dividends when you begin post-processing.
Set the exposure
With your foundation established, now it’s time to make sure you are properly exposing for the scene.
Since you are breaking the scene into a series of individual photos, having each one exposed differently will just not look right when you merge them. Also, it causes a lot more work when you start post-processing. The solution is to maintain a consistent exposure from one frame to the next by using Manual Mode.
 Manual mode can be intimidating but don’t worry, we’re going to ease into things.
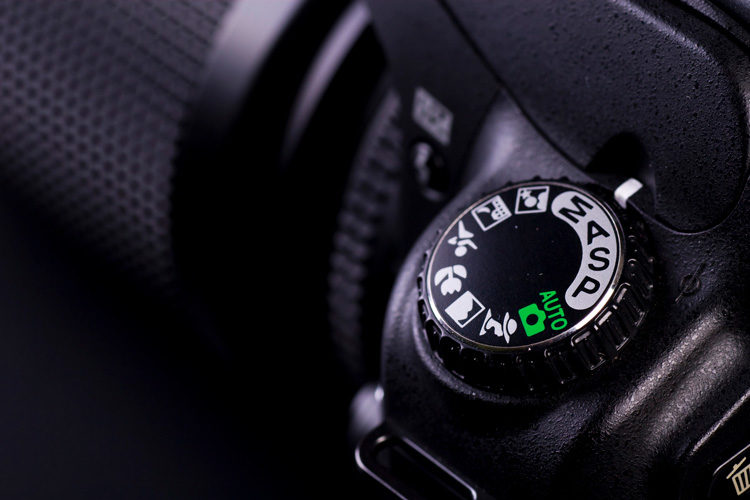
First, put your camera in Aperture Priority Mode. Next, set the ISO and aperture you plan to use to shoot the panoramic landscape. Then with your favorite metering mode, measure a few different spots in the scene to get an idea of the amount of light. Pick the shutter speed that yields the most detail in the highlights and shadows.
Then, switch to Manual Mode and enter that shutter speed, aperture, and ISO combination and voila! You’re ready to shoot with consistent exposures across the entire scene.
Attach the camera to the tripod
With the camera mounted in portrait orientation, level the camera with the horizon. Camera orientation is important for panorama photography because of the way we are accustomed to seeing widescreen. This is analogous to how you take panoramic photos with your phone. Aesthetically, portrait mode results in the most pleasing viewing ratio.
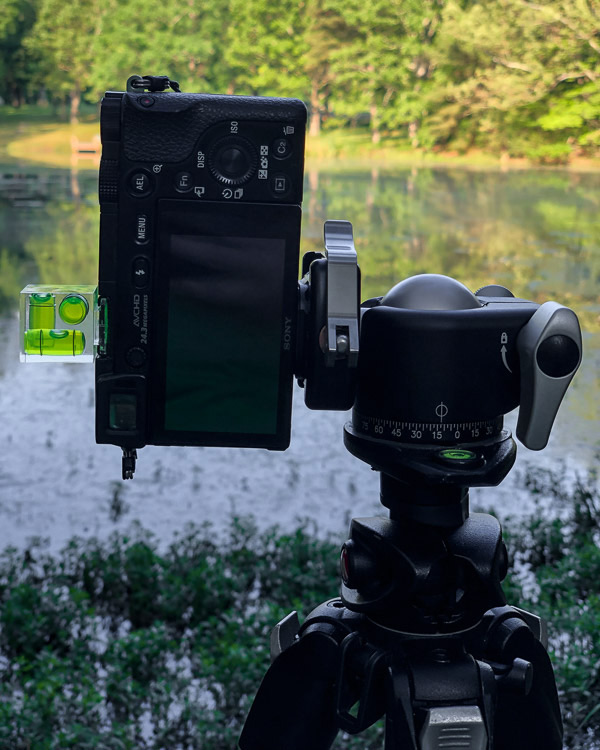
In this step, level the camera body with respect to the horizon. The lens can be tilted up or down to capture more or less above your horizon. Just as leveling your tripod provides the foundation for panning, leveling your camera will keep you from cropping important parts of the landscape. Leveling the camera prevents the individual frames from being tilted.
Dial in the focus
Just like you want a consistent exposure for your individual frames, you need to consider what part of your photo you want in focus. To do this I like to start using autofocus, then fine tune with manual focus before setting it for the scene.
NOTE: You need to either use back button focus or switch it to manual focus so that the camera doesn’t attempt to refocus from one frame to the next.
Double check your settings
Check your exposure, focus, and make sure everything is level before you start shooting. Use the histogram to make sure you have not clipped any highlights.
TIP: Consider using a scene identifier for indicating the start and stop points of your panoramic photo. I sometimes take an extra picture of one finger for the start of the panorama, and two fingers to indicate the last frame. Then, when scanning my photos in the Lightroom catalog it’s easy to pick out the right files to merge.
Step #4 – Shoot your scene
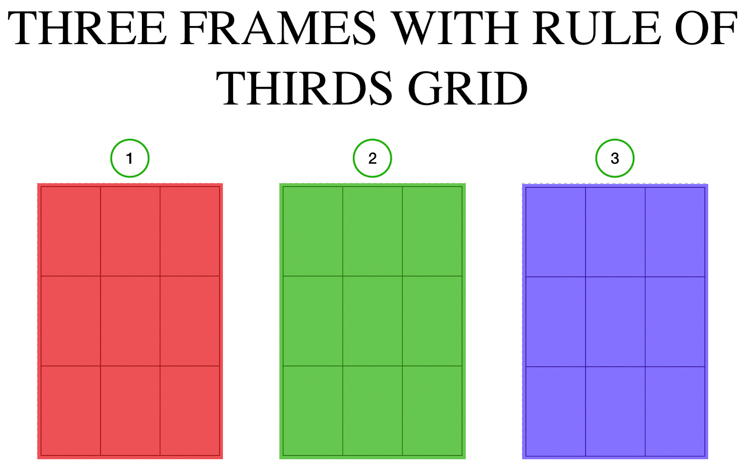
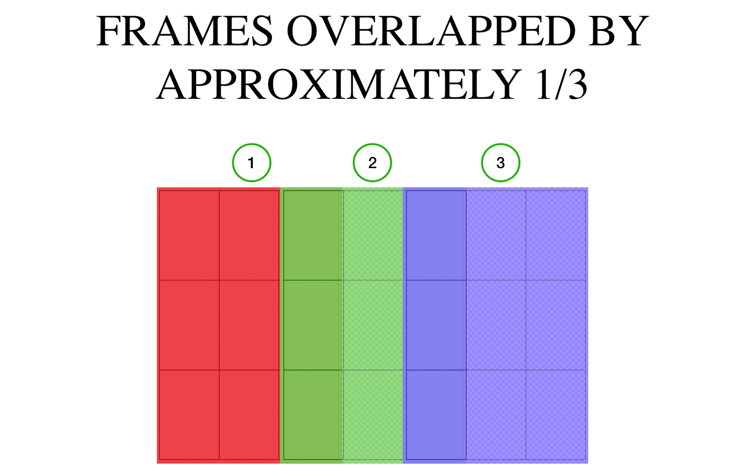
When you are taking the pictures you plan to merge, you need to give the editing software a chance to put all the pieces together successfully. This means you need to capture overlapping portions of the scene. For best results, a rule of thumb is to overlap one picture to the next by 1/3 of the previous frame.
I’ve seen suggested ratios of up to 1/2, but I haven’t found this to be unnecessary and makes for extra frames.
TIP: Have your rule of thirds grid activated on your camera if you’re using a digital overlay. This will make things significantly easier for you.
Here is the set of 15 images I shot for making the panoramic photo above. You can see how each image overlaps the previous one, and the next one by about one-third of the image.


Step #5 – Shoot the scene again – data is cheap
Repeat the same steps and do it again exactly, or do something different. You’ve done all this work, why not experiment? Try a different composition. Wait for the light to change.
Step #6 – Post-processing magic via Lightroom
If you don’t have Lightroom, use whatever program you do your processing in normally. This discussion covers a quick and dirty creation of panorama landscape photographs in Lightroom.
My way is not the only way, but the method that I’ve used with success. If you are using Lightroom, I’m making the assumption that your images are imported and you are ready to make some big photos of your landscape.
Follow these steps:
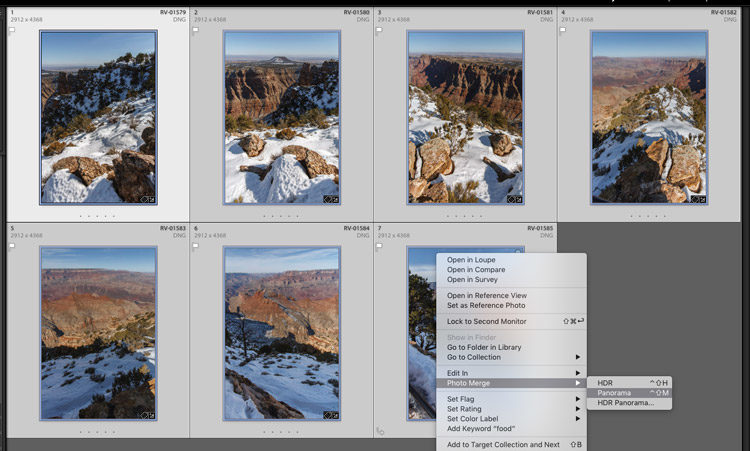
- Select the images you want to use for your panorama.
- Ctrl+M on Mac and Windows brings up the panorama dialog box (or right-click and choose “Photo Merge > Panorama”).
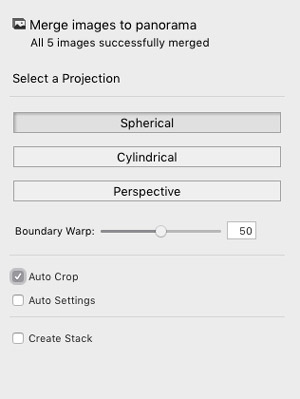
- Choose your Projection mode, usually spherical works best.
- Boundary warp is your friend. Adjust that to suit your taste.
- Click “Auto Crop” if you want LR to crop the white parts off the edges for you (or you can do it later manually using the crop tool).
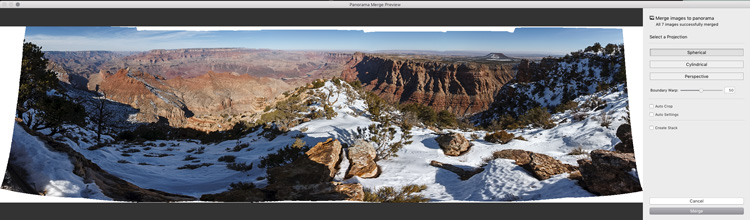
- Click “Merge”.
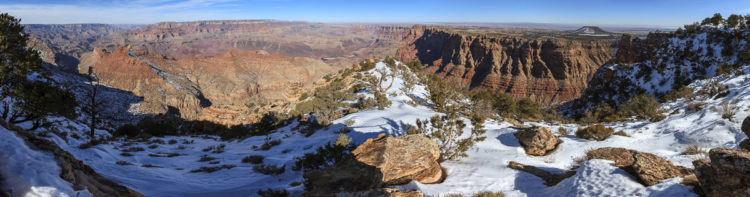
- Continue editing the panorama image like any other photograph until you’re happy with the final result.
Advanced techniques
After you become comfortable with the technique outlined above, I suggest trying the following advanced techniques to create even more original work.
Multi-row panoramas
The same technique is used as with single row except you overlap your frames both horizontally and vertically to create a panoramic photograph of two or more rows. I like to use this when I want to use my telephoto lens to capture the finest details in subjects that are farther away.
HDR panoramas
 For scenes with challenging lighting, you can shoot a series of HDR frames that can be combined to create a panoramic photo.
One of Lightroom’s latest features has now streamlined the process so you don’t have to merge HDR frames prior to creating your larger panoramic image. There is a command in Lightroom called HDR Panorama (under Photo>Photo Merge…) which does both at once.
It’s a pretty neat feature that I have used with success.
A final tip for making panoramas
For scenes with objects moving horizontally in the frame, shoot your frame opposite their motion to avoid multiple occurrences in your photograph.
For example, a person walking through your frame from right to left. If you don’t want to see that person in multiple locations in the same photo, pan opposite the direction they are walking so go left to right.
Conclusion
I hope you found this process interesting and useful for your own photography. My wish is for you to take these lessons into the field to capture moments that inspire. Happy shooting.
About Matt Chesebrough
 Matt is a professional dream chaser. He stepped away from a successful engineering career to become a professional landscape and commercial photographer. Over the last two years, Matt has traveled the world chasing light and capturing one-of-a-kind landscapes.
He enjoys sharing his adventures with family, friends, and strangers along the way. When he is not hiking to a remote location, Matt enjoys volunteering for local and national conservation organizations. His mission is to share the world with people, inspire a sense of adventure, and to make a difference for the planet.
You can see more of his work on his website www.mattchesebrough.com, connect with him on Facebook or follow him on Instagram.