This tutorial explains how to dramatically light a hair product group — or any other health and beauty product — using entry-level gear and a home studio. The accessible and repeatable workflow delivers vibrant and punchy images that are catalog-ready.
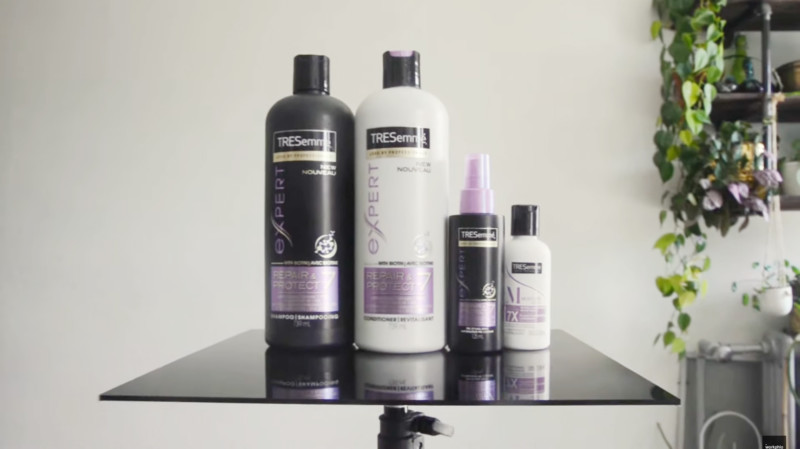
On his YouTube channel Workphlo, photographer Dustin Dolby shares tutorials and advice on various commercial product photography setups, some of them featuring just one light. In one of his latest videos, he showed how to build up a well-lit product shot of a group of hair care bottles in varying sizes and colors.
Dolby sets out to create what he describes as a “silky” shot with a slight glow to it — a popular aesthetics choice for other hair care brand shots — using three speedlights instead of more expensive studio lights. Before setting up his lights, Dolby makes sure that the haircare bottles are positioned so that everything, such as nozzles and bottle caps, is straight and facing the camera head-on to save fixing it up in post-processing.
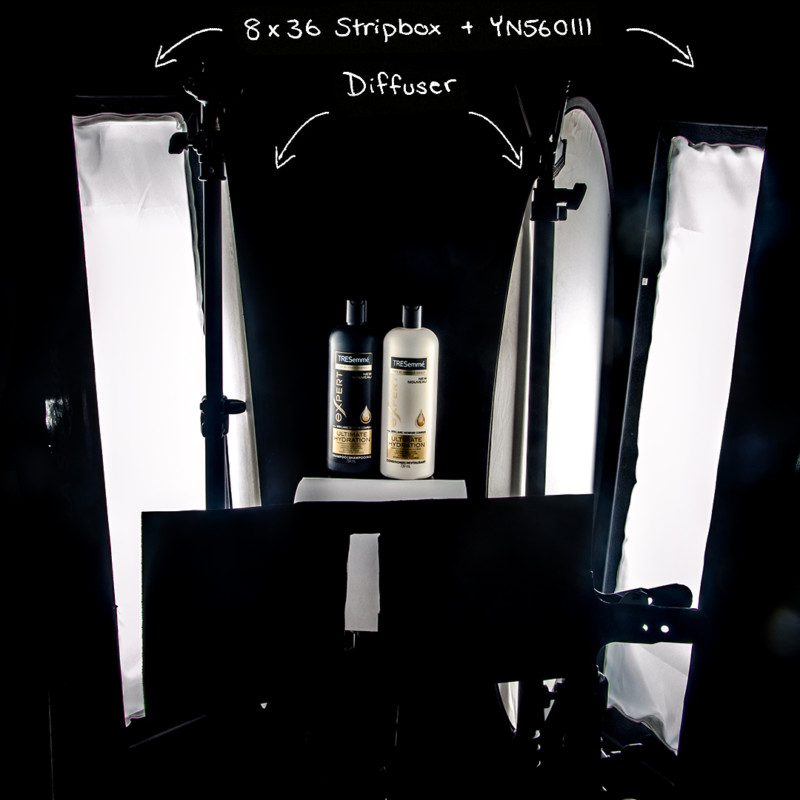
Dolby uses a thin black acrylic surface — that he also sells on his Workphlo shop — which produces sharp reflections of the products. First, he sets up one 8 x 36 inch strip box and a Yongnuo speedlight to the left of the products and another strip box and Speedlight directly opposite and placed symmetrically.
To help even out the light on the bottle labels, Dolby adds two round basic nylon diffusers in front of the strip boxes to help catch the light passing through and help distribute it better. If the image doesn’t retain enough contrast, he recommends cutting a set of paper in the shape of a small window and placing it in front of the lens, which helps block unwanted light.
An advertisement shot like this requires a step-by-step process of building up the set and checking each shot to see what needs to be adjusted or if additional exposures need to be shot for post-processing. As it’s a static setup, it’s easier to make minute alterations throughout the shoot.
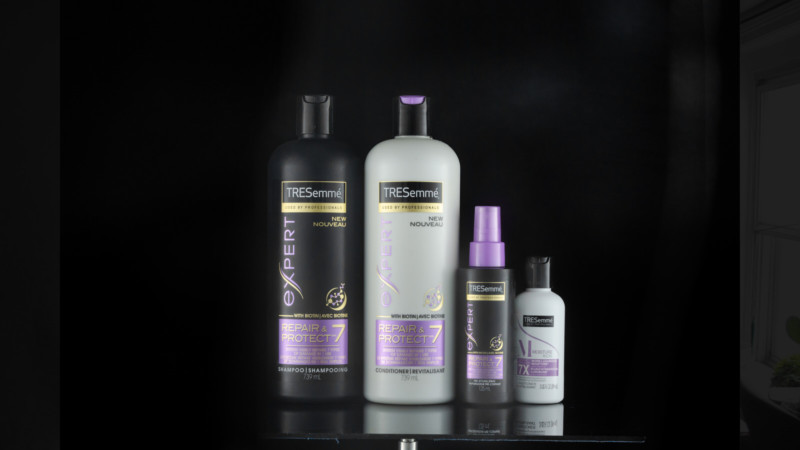
Before adding a colorful back glow in post-production, Dolby introduces one last exposure that captures the light reflected in the front of the scene by using a reflector card. This adds a final touch to the product labels and the bottom of the bottles and illuminates them, and is a simple step that can make the products stand out even more.
In the video above, Dolby shares how he adds the brand’s purple splash of color — sampled from the bottle cap using the eyedropper tool — behind the products in Adobe Photoshop with the help of a radial gradient. He uses a mixture of actions that involve creating masks, painting with a brush, feathering the edges for a softer natural look, and more, to reveal a polished final edit.
More of Dolby’s product photography tutorials can be found on his YouTube channel and Instagram.
Image credits: Photos by Dustin Dolby and used with permission.