In this Photoshop tutorial, you will learn how to draw a sweet donut (or doughnut if you prefer it that way).
We are going to draw manually and combine it with layer styles. In the end, we are going to draw its plate too. Let’s begin.
Final Image
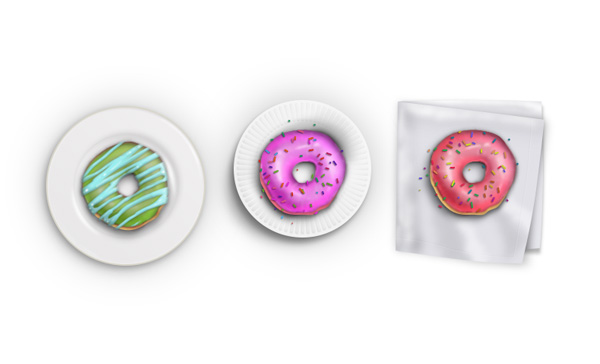
Tutorial Details
- Program : Photoshop CS+
- Estimated Completion Time : 60 minutes
- Difficulty : Intermediate
Step 1: Drawing the Donut
This is the basic donut we are going to draw. Start by creating a new file (Ctrl + N).
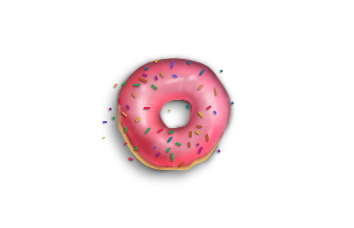
Step 2
Let’s draw the donut’s topping. Activate the Pen Tool with Shape mode selected in the Option Bar. Click and drag to draw a circle. Make it as unperfect as possible to make it realistic.
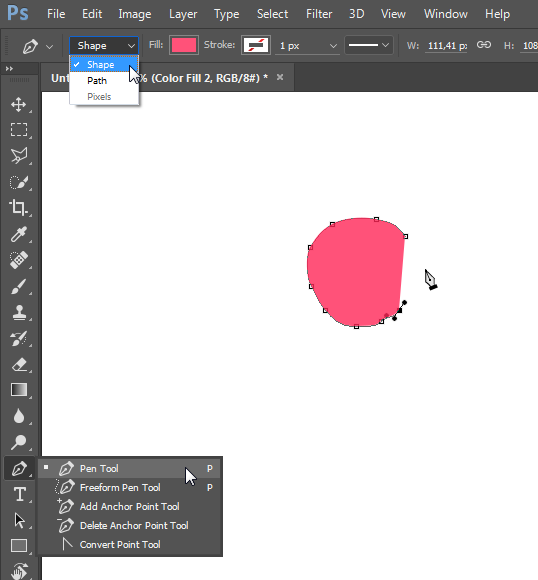
Step 3
Add another path inside the donut topping shape. Set its mode to Subtract Front Shape in The Option Bar.
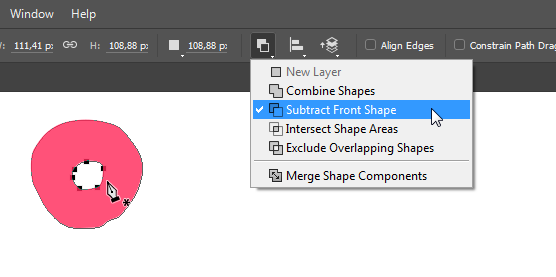
Step 4
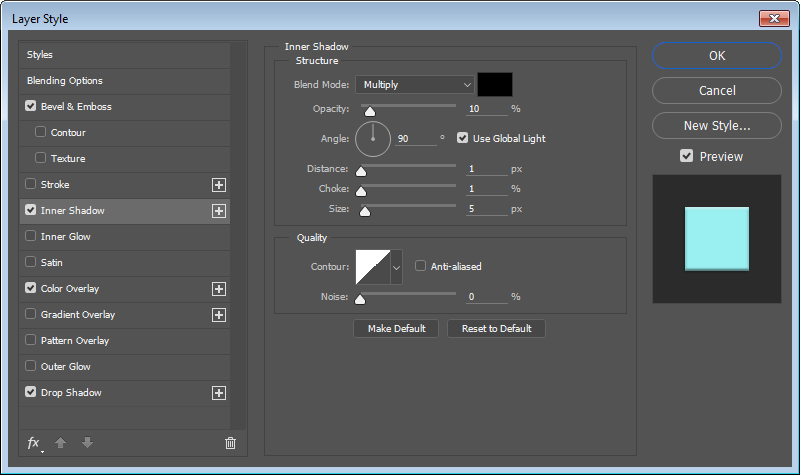
Double click the donut topping and then add the following Layer Styles.
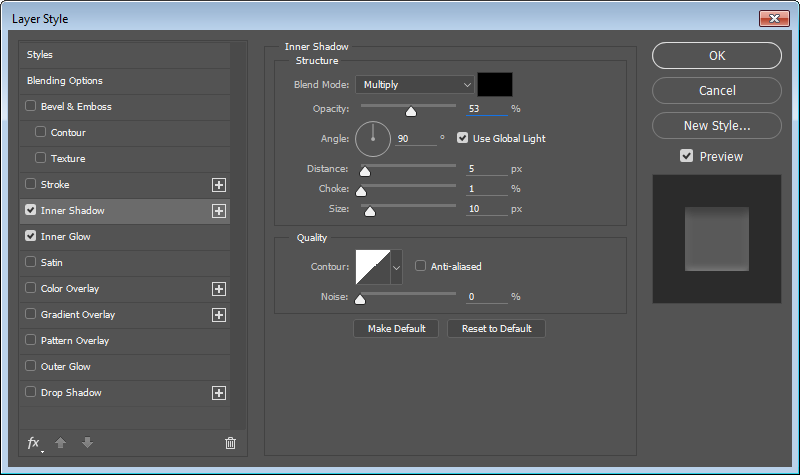
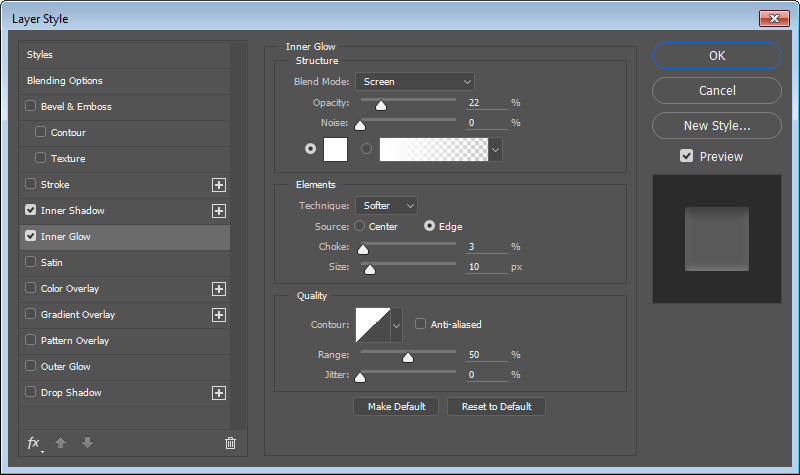
So far, here’s the result. Really unattractive, but we’ll fix that in a moment.
Step 5
Create a new layer. Activate the Brush Tool and then paint a white line on the center of the topping.
Step 6
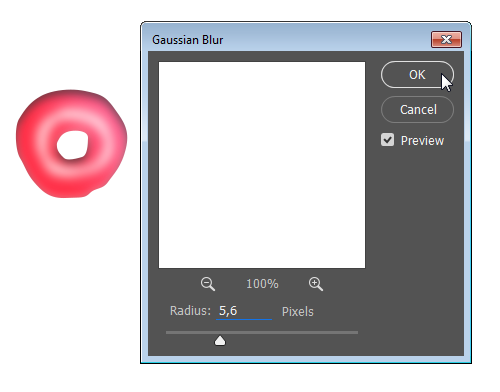
Click Filter > Blur > Gaussian Blur to soften the white line and add some highlight on the center of the topping.
Step 7
Use the Eraser Tool to erase some of the highlight. We want the highlight to be irregular since the topping surface is never perfect.
Step 8
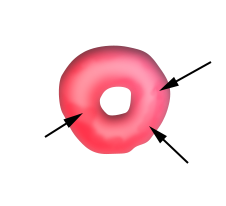
Keep adding highlight onto the topping surface. Use the same method, paint with white and then soften it using the Gaussian Blur filter.
Step 9
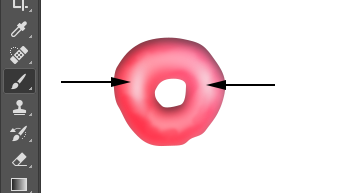
Add a white stroke, this time using a smaller brush. We are going to add some stronger highlights onto the topping surface.
Step 10
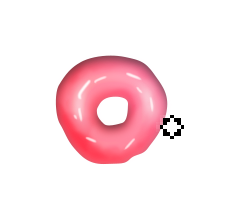
As in the previous step, apply the Gaussian Blur filter to soften the lines.
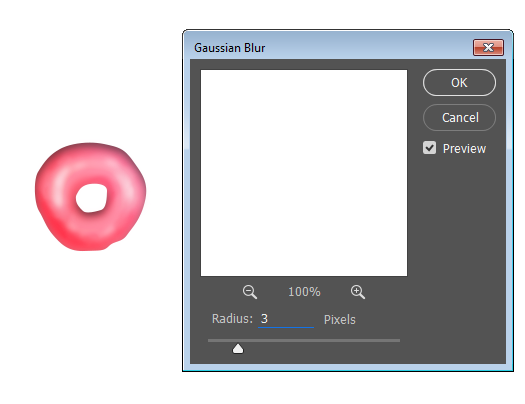
Step 11
Now, add another layer and then draw short white strokes coming from the center of the donut. Use a small brush for this.
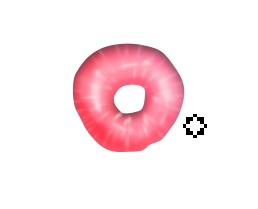
Step 12
From The Layers Panel, reduce the layer opacity.
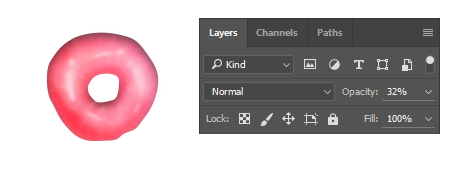
Step 13
Earlier, we added lots of highlights. Next, we do the opposite, add shadow to the topping. You just simply paint soft lines with black. Apply the Gaussian Blur filter and reduce the layer’s opacity if needed.
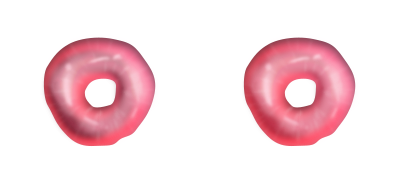
Step 14
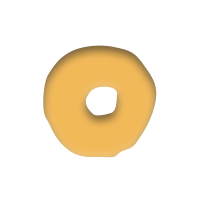
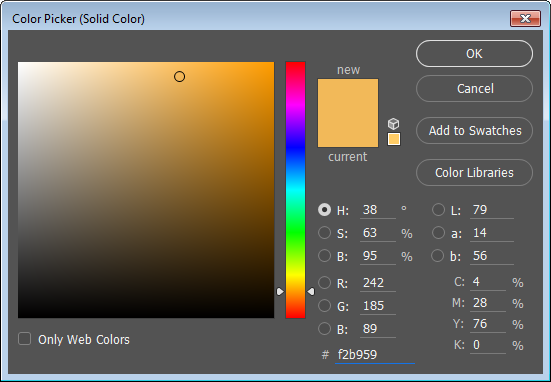
We’re almost done. Next is drawing the dough. Draw this shape with color#f2b959 and place it underneath the topping. The dough should be a litle bit bigger than its topping.
Step 15
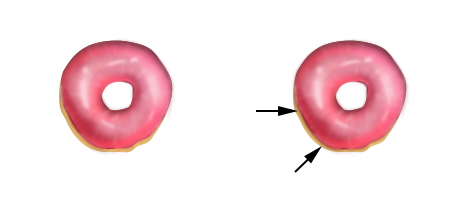
Add new layer between the dough and its topping. With a soft black brush, draw some shadows on the dough surface.
Step 16
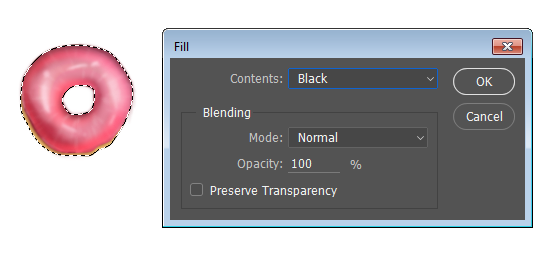
Let’s add a shadow underneath the donut. Ctrl – click the dough layer to make new selection based on its shape. Click Edit > Fill and fill the selection with black.
Step 17
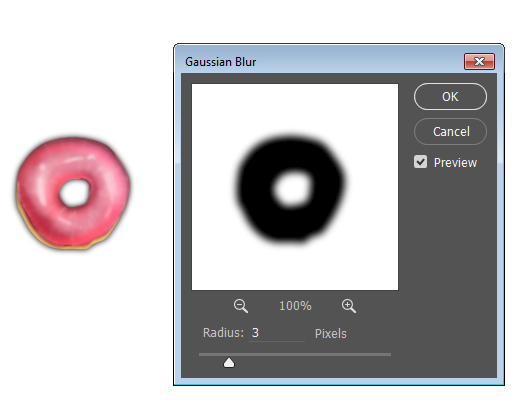
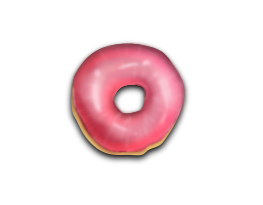
Hit Ctrl + D to remove the selection and then apply a Gaussian Blur to soften the black pixels underneath the donut. This is going to be the donut’s shadow.
Activate the Move Tool and then hit the Left and Down Arrow a few times to move the shadow.
Step 18
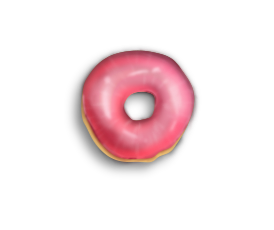
Repeat the previous step to create another shadow, this time make it softer by applying a bigger Gaussian Blur and lowering the layer’s Opacity.
Step 19
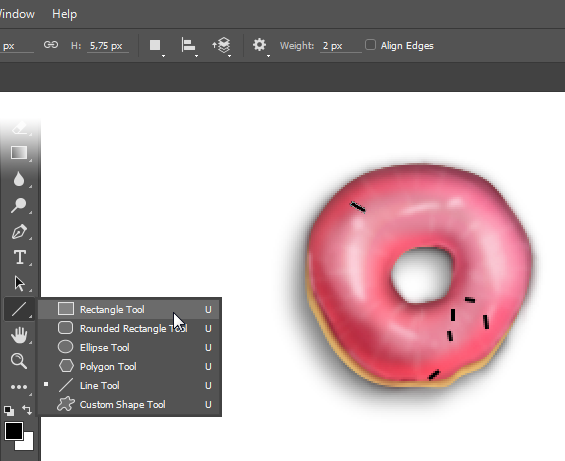
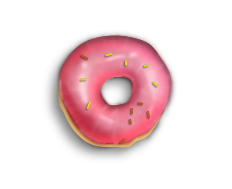
We’re done with the donut, but not tasty enough if we don’t put chocolate sprinkles onto the topping. Use the Line Tool with Weight: 2 px to draw a short rectangular shape. You can use any color. Shift + Click – drag to add another sprinkle onto the topping. Put all the chocolate sprinkles layer inside a group for easier editing by selecting them and hitting Ctrl + G.
Step 20
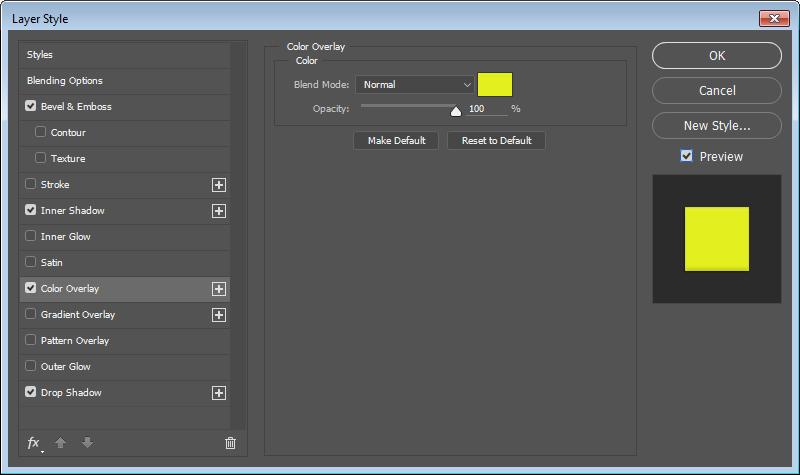
Double click the chocolate sprinkles layer and then apply Layer Style Color Overlay to change its color.
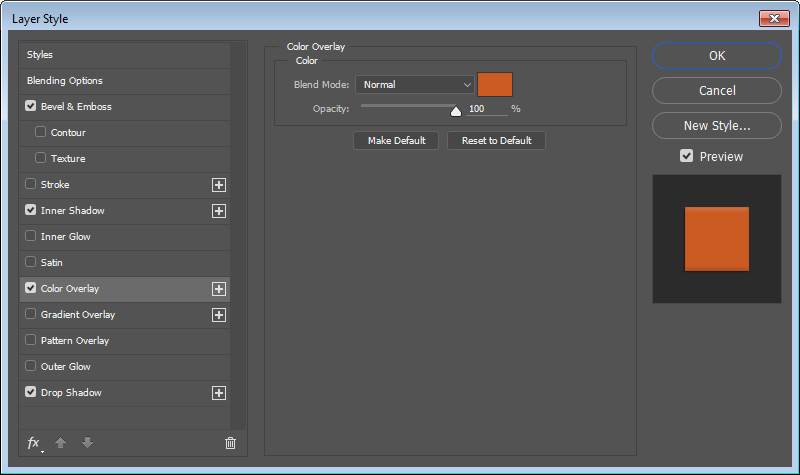
Step 21
Keep adding other layer styles to turn the sprinkles into three dimensional shapes.
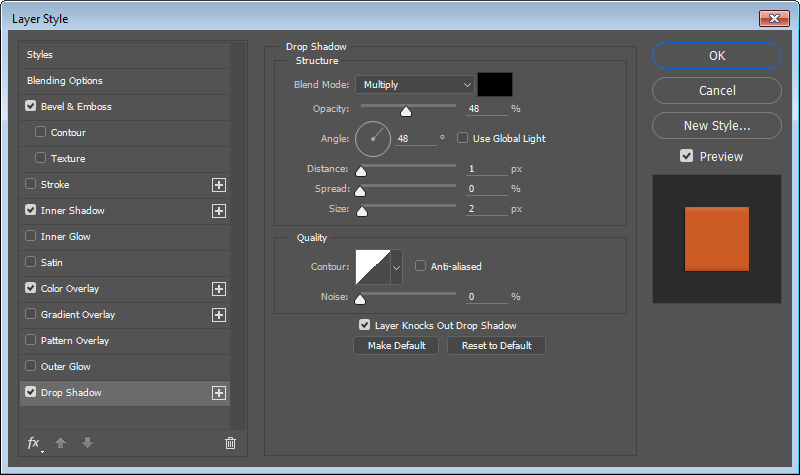
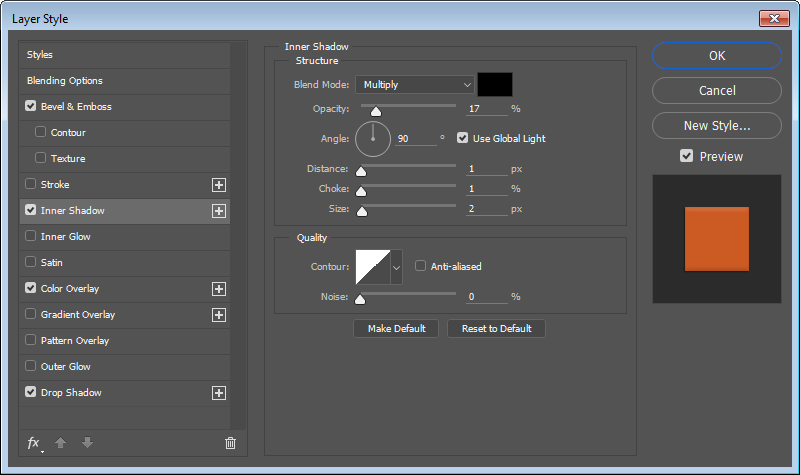
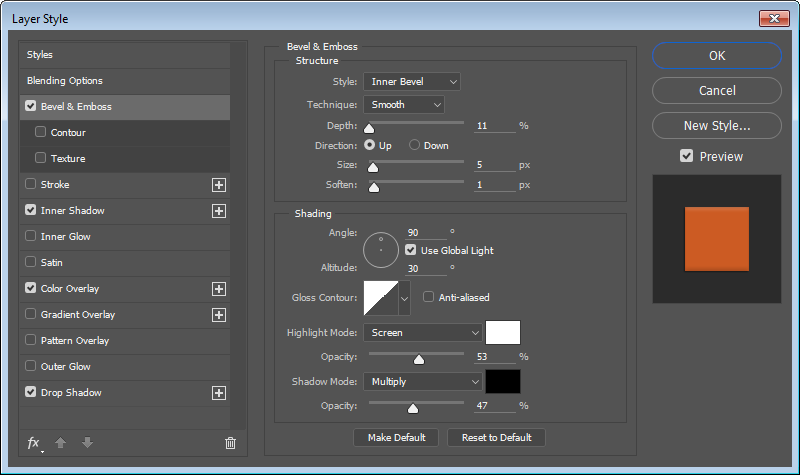
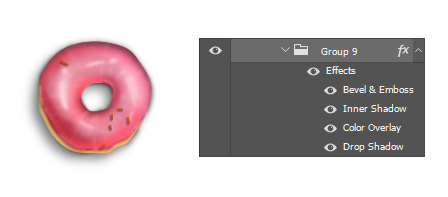
Step 22
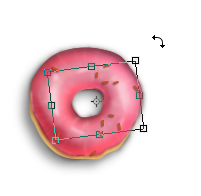
While the layer group is selected, hit Ctrl + J to duplicate the chocolate sprinkles. Hit Ctrl + T and click and drag outside the transformation bounding box to modify its position and keep them unique.
Step 23
We want them to be different. Double click their Color Overlay layer style and then change the color.
Step 24
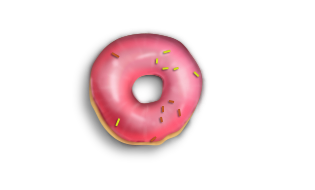
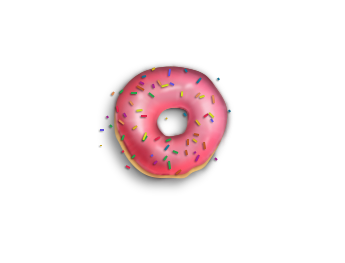
Keep on adding more sprinkles onto the donut. You will need to spread the sprinkles and probably place them laying next to the donut.
Step 25: Bake More Donuts
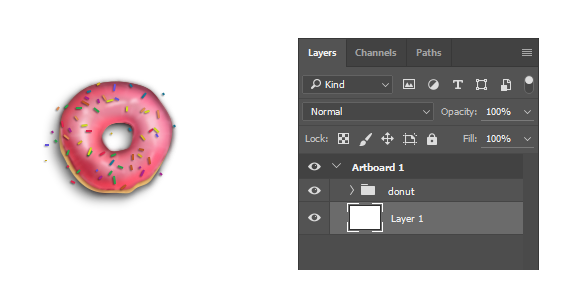
And now we’ve just had a donut. Let’s bake some more. We will use the same donut that we drew earlier. It’s going to be easier if we put all its layers into a group layer.
Step 26
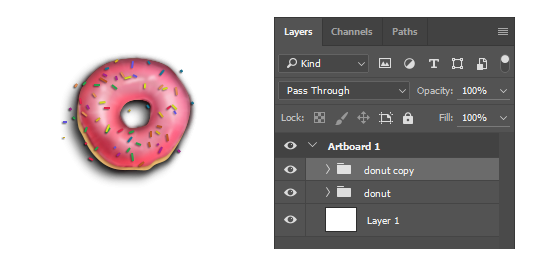
To add another donut, simply Alt – click and drag the donut using the Move Tool.
Step 27
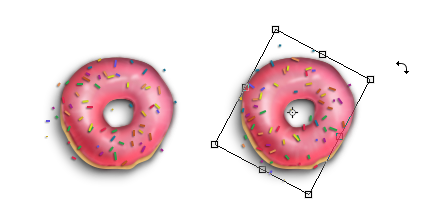
Select the chocolate sprinkles and then rotate to make them unique.
Step 28
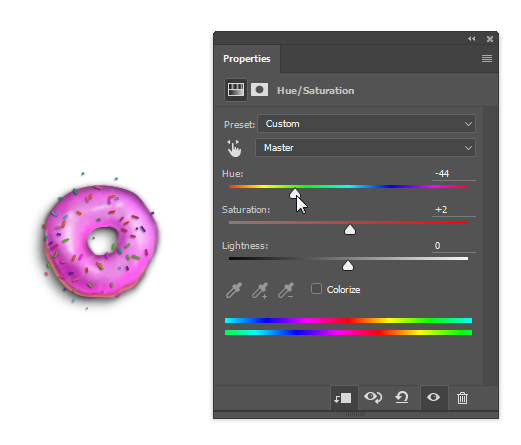
Add an Adjustment Layer Hue/Saturation on top of the donut’s topping. Hit Ctrl + Alt + G to convert it into a Clipping Mask. In the Properties Panel, slide the Hue slider to change the topping color.
Step 29
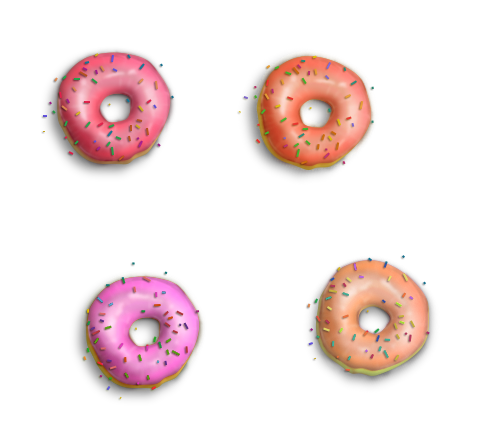
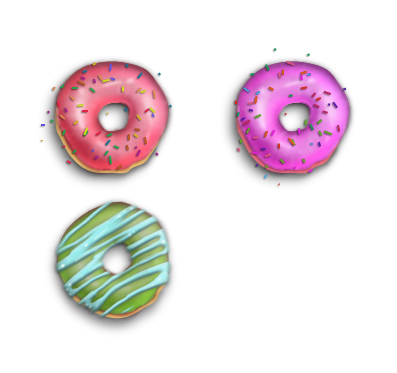
Do this to all the remaining donuts. And now, we have lots of donuts. Unique donuts. You see? We don’t clone them, we really bake them.
Step 30: Change The Topping
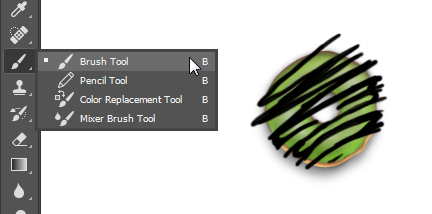
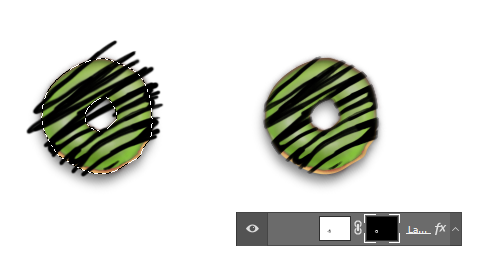
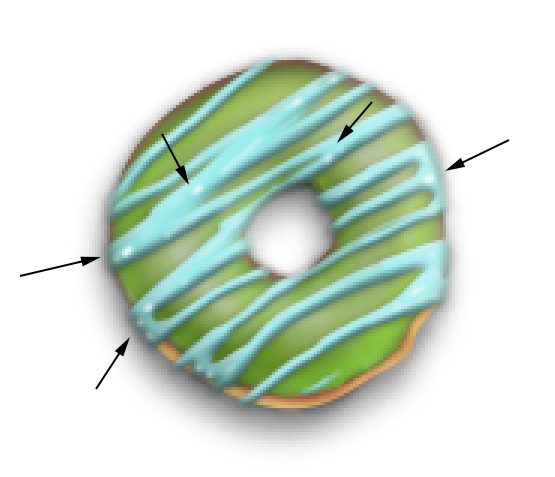
So, you don’t like sprinkles on your donut? Want less fat and a healthier donut? Okay. Let’s try cream topping! Remove all the sprinkles and topping layers. Make a new layer on top and then paint with the Brush Tool. You can use any color. Make sure to set Hardness for The Brush Tool to at least 80%.
Step 31
Ctrl – click the dough layer to make new selection based on its shape. Click the Add Layer Mask icon to add a mask to the new topping and make it appear placed on top of the dough.
Step 32
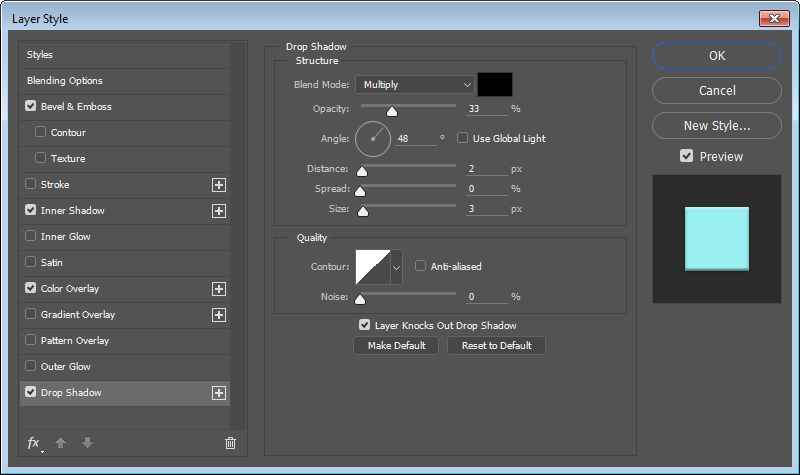
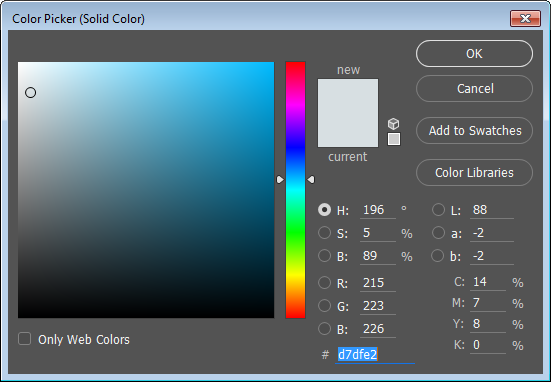
Turn it into a realistic three dimensional shape by adding the following layer styles.


Step 33
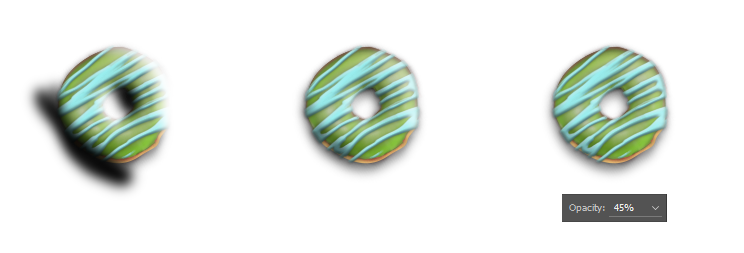
Add a new layer underneath the dough and then paint some shadow.
Step 34
To make the topping appear realistic, we need to add some highlights to it. Add a new layer. Use the Brush Tool to paint white on the toppping’s edges.
Step 35: Add Paper Plate
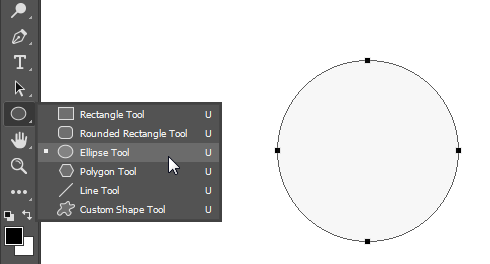
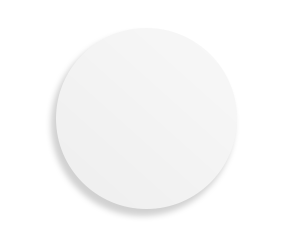
Let’s continue by adding a paper plate for the donut. Start by drawing a circle shape using the Ellipse Tool. Hold Ctrl while dragging to get a circle shape. For its color, use light grey.
Step 36
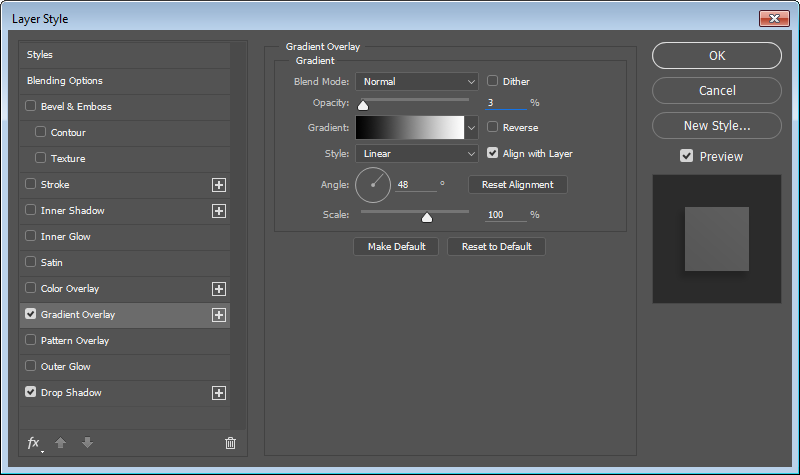
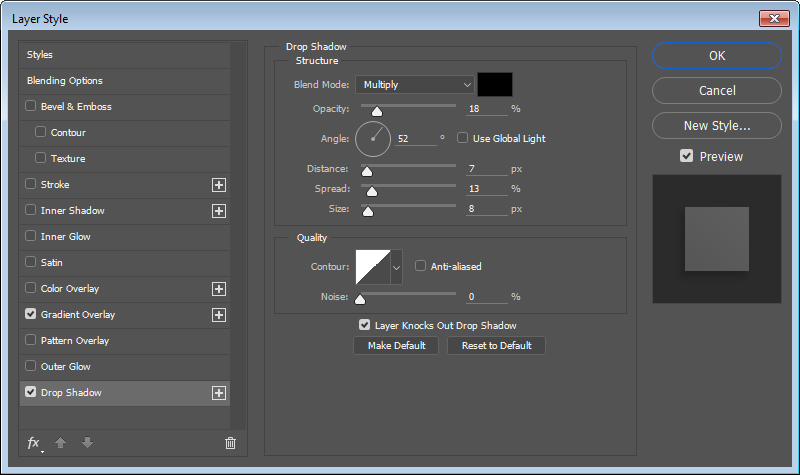
Apply the following layer styles to the shape.
Step 37
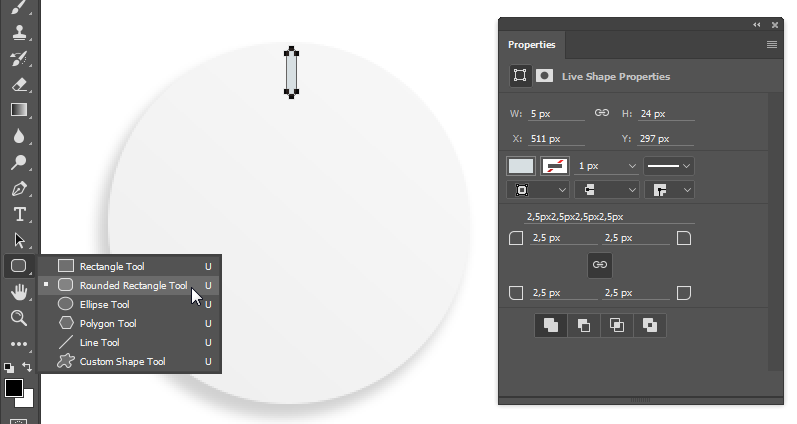
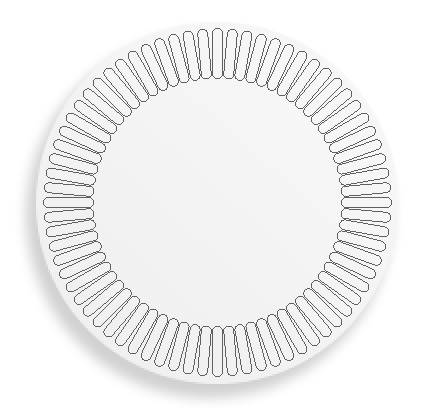
Draw a rounded rectangle using the Rounded Rectangle Tool. Place it at 12 o’clock position on the circle shape.
Step 38
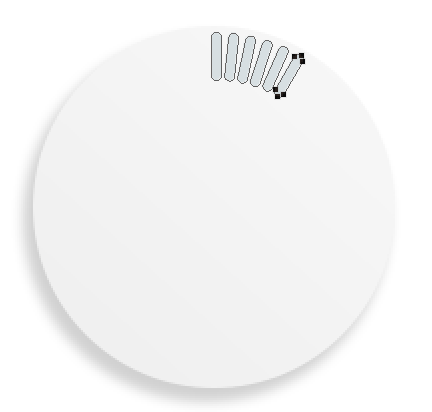
Make sure the rounded rectangle path is still selected. Hit Ctrl + Alt + T to duplicate the path. Drag its transformation pivot to the center of the circle shape. Outside the transformation bounding box, Click and drag to rotate the new path 6°.

Step 39
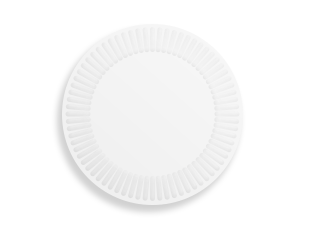
Repeat the process by pressing Ctrl + Shift + Alt + T. Keep doing this until we have the shape covering all the outer edge of the plate.
Step 40
Set its color to be slightly lighter than the plate.

Step 41
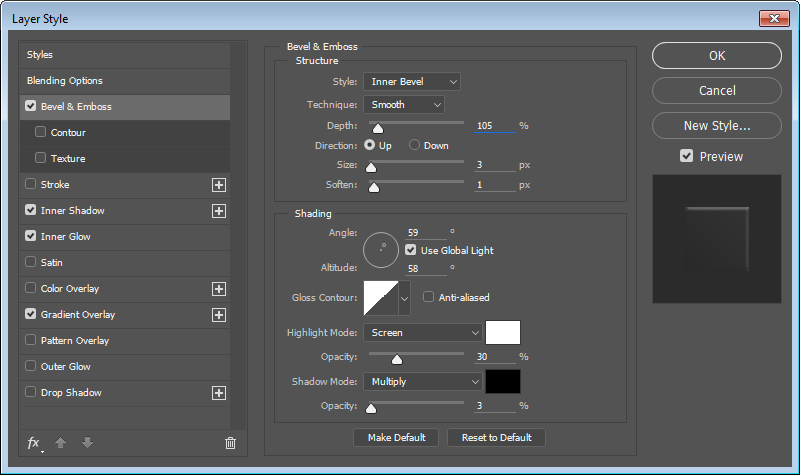
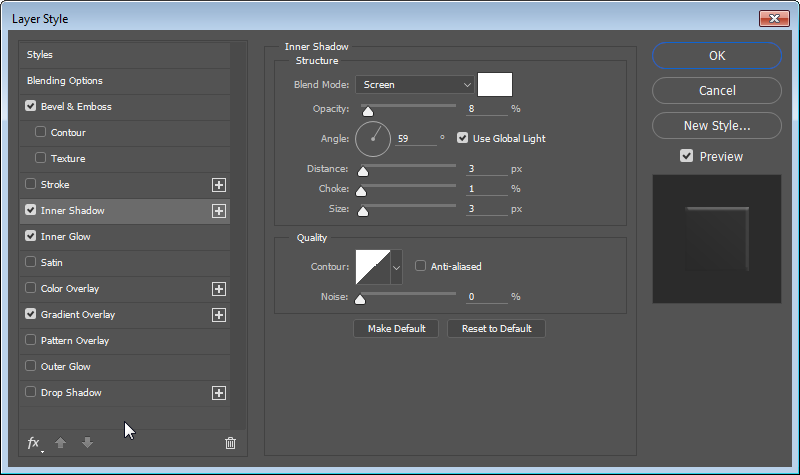
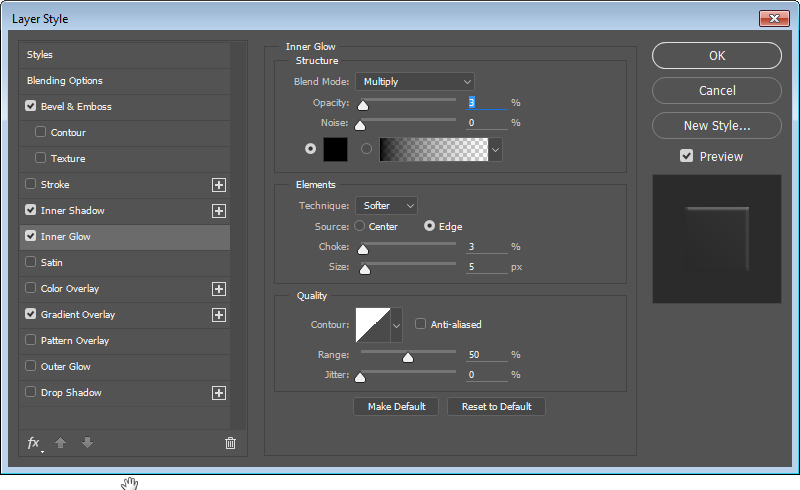
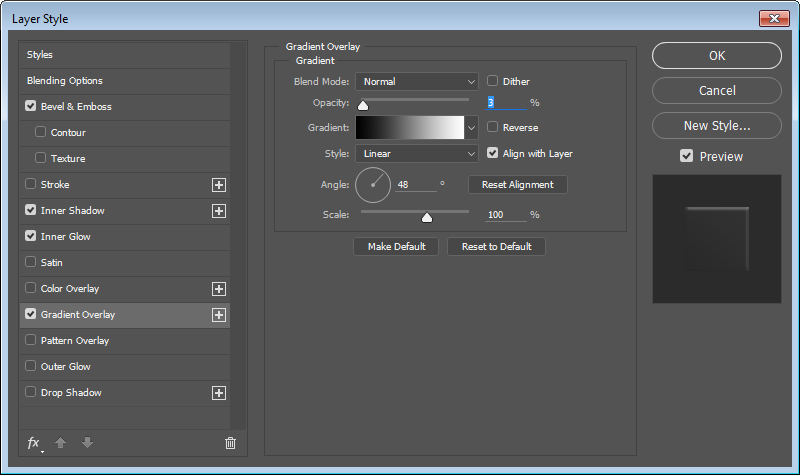
Add the following layer styles to the shape.
Step 42
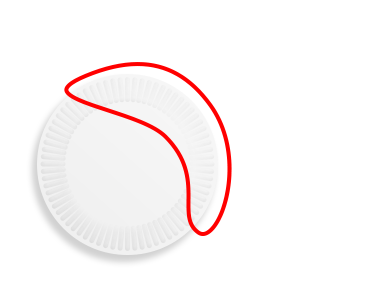
Add a layer mask and then paint the upper right corner of the shapes with black until they fade.
Step 43
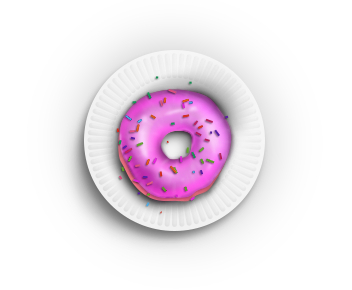
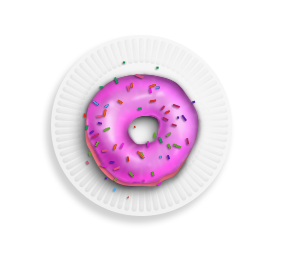
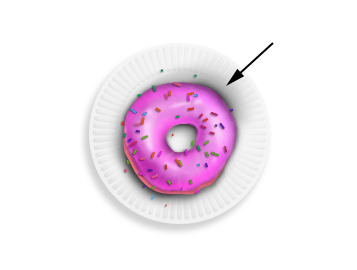
Now, place the donut on the paper plate.
Step 44
Paint a shadow underneath the donut. Make sure to paint it on a separate layer.
Step 45
You can lower the layer’s Opacity or add the Gaussian Blur filter to soften the shadow.

Step 46: Add Plate
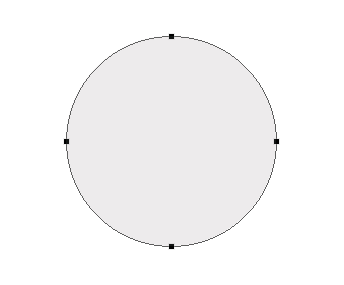
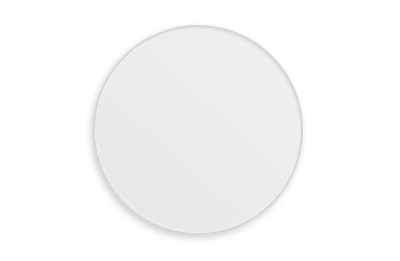
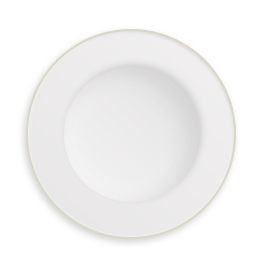
Now, we want to add a ceramic plate. Start by drawing a circle shape.
Step 47
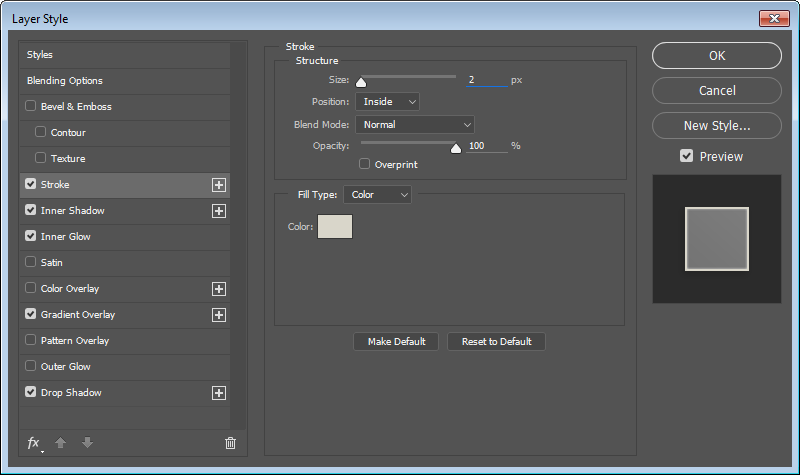
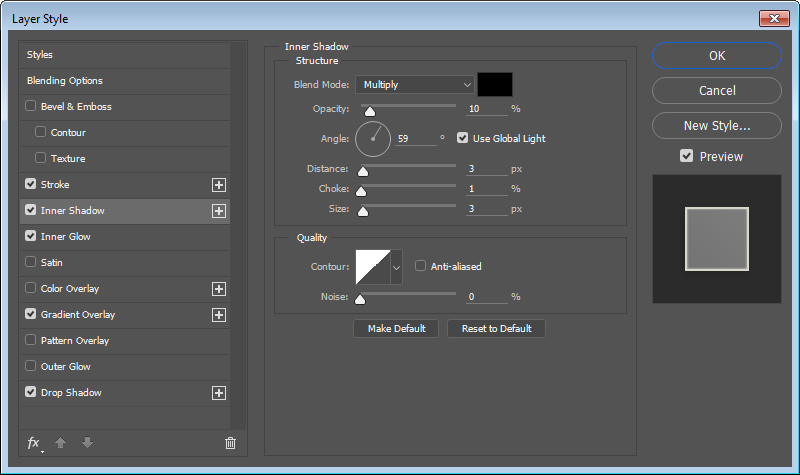
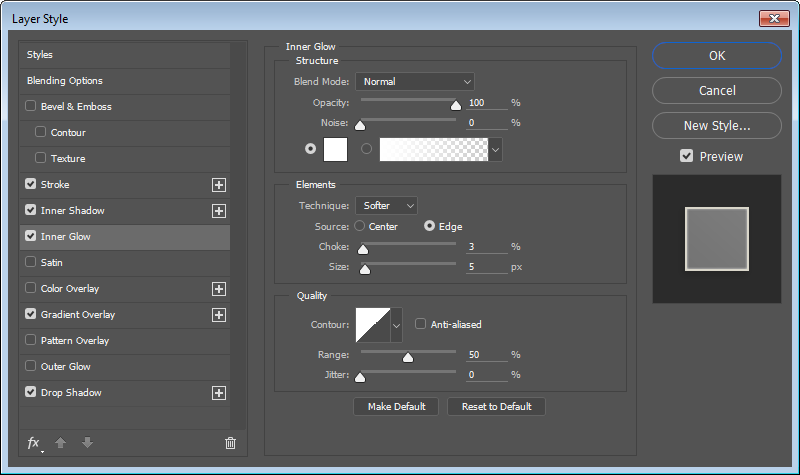
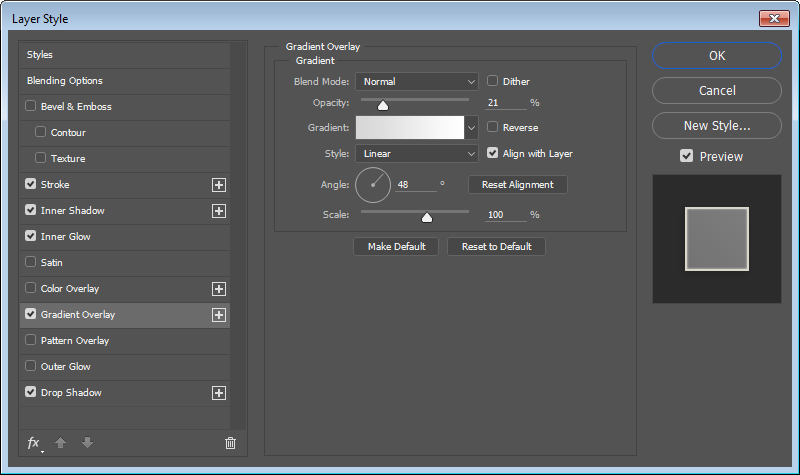
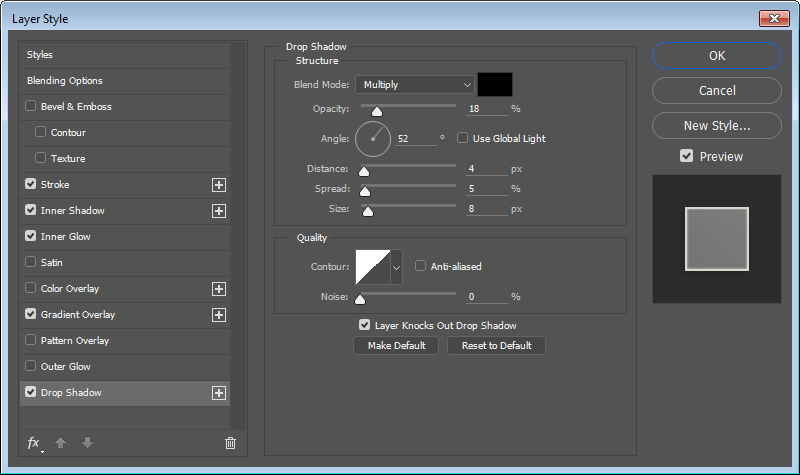
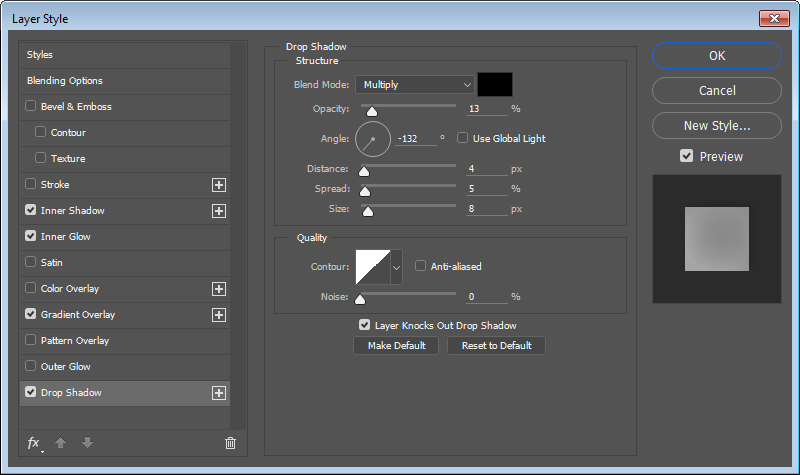
Add the following layer styles.
Step 48
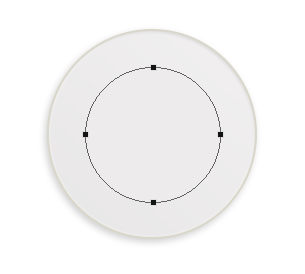
Add another circle shape, this time smaller.
Step 49
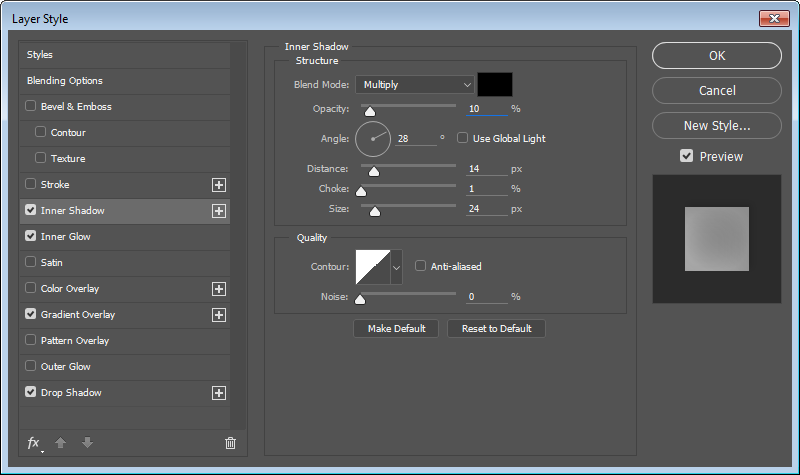
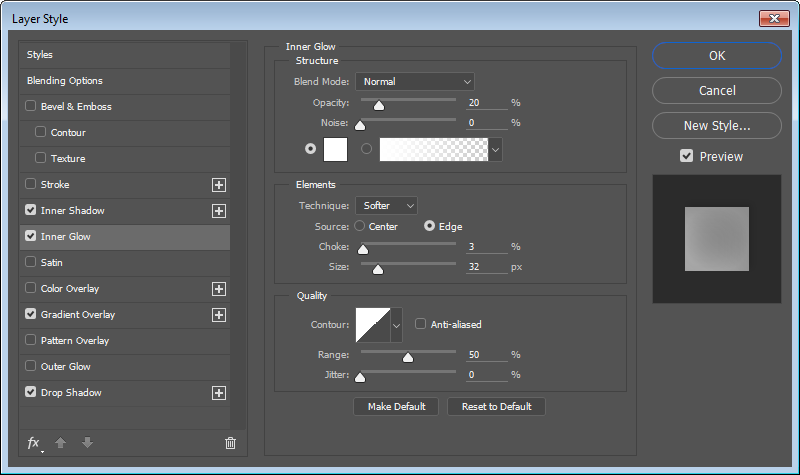
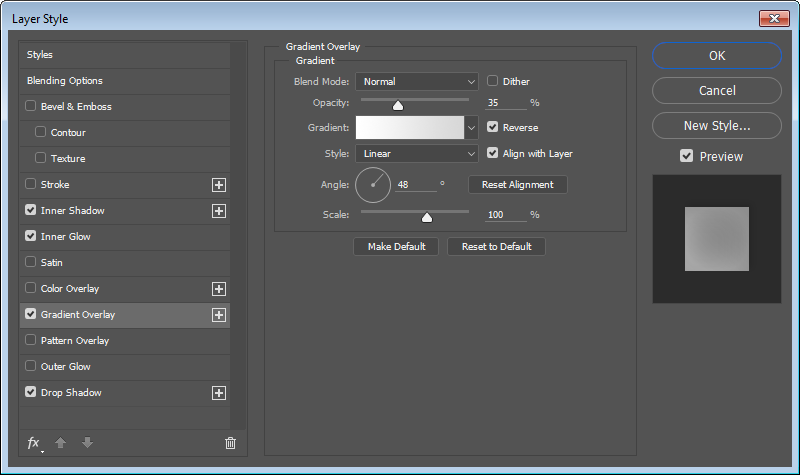
Add following layer style.
Step 50
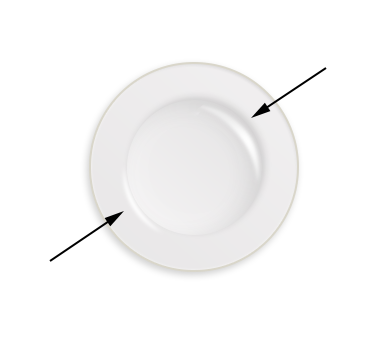
Add a new layer and then paint white with the Brush Tool to add a highlight on the plate’s surface.
Step 51
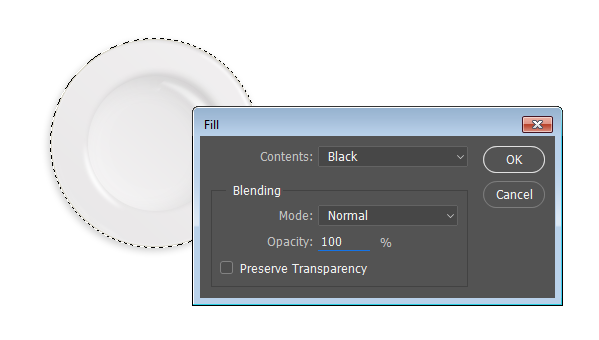
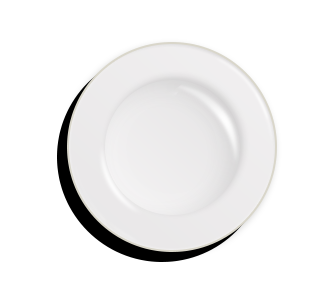
Time to add some shadow. Add a new layer and place it underneath the plate layer.Ctrl – click the plate layer thumbnail. Click Edit > Fill and then fill the selection with black.
Step 52
Hit the Up and Down Arrow keys a few times.
Step 53
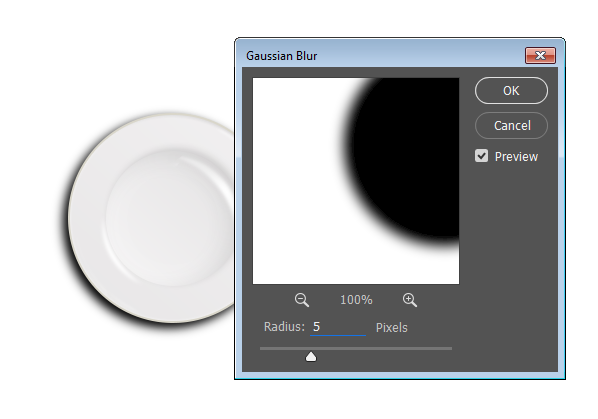
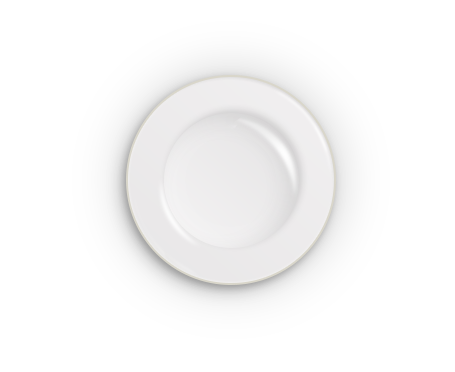
Soften the shadow by applying the Gaussian Blur filter and reduce the layer’s Opacity.
Step 54
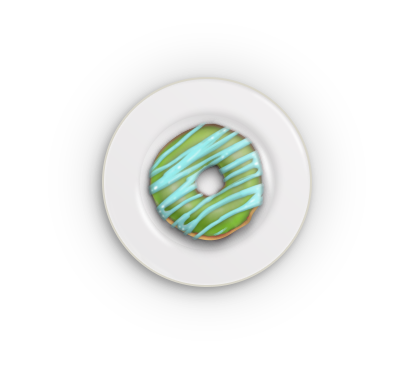
And finally, put the donut on the plate.
Conclusion
We are done. If you look closely, you will find that we are basically using simple techniques. What’s important is to try keeping all the details by adding manual highlights and shadows. I hope you have learned one or a few tricks from this tutorial.
