Lightroom presets are an easy solution for those in need to quickly and easily apply a consistent look to their images. In this post, we will give you step-by-step instructions on how to install Lightroom presets:
How to Install Lightroom Presets in Lightroom Classic CC (2018 & 2019)
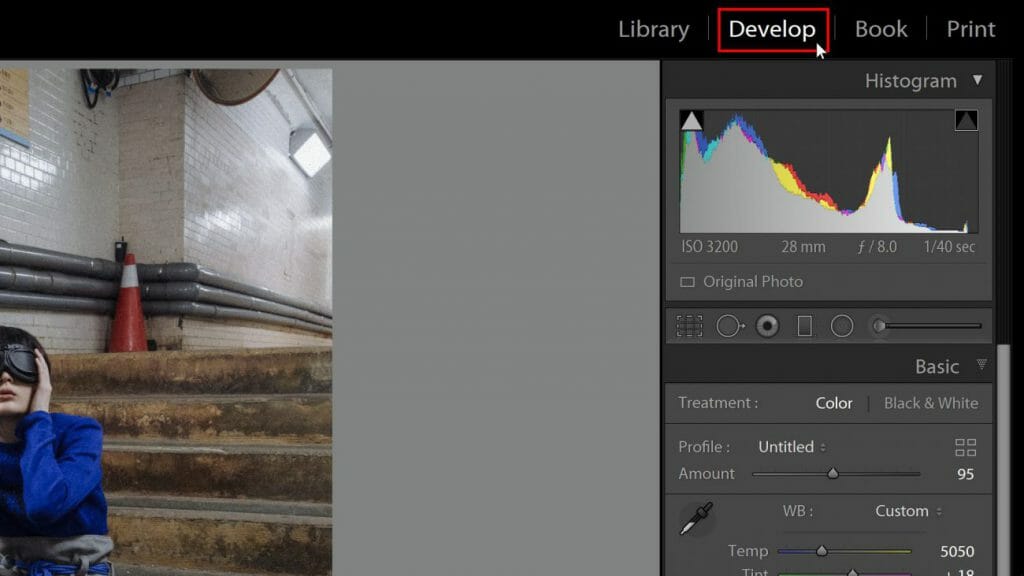
- Open the Develop module in Lightroom Classic
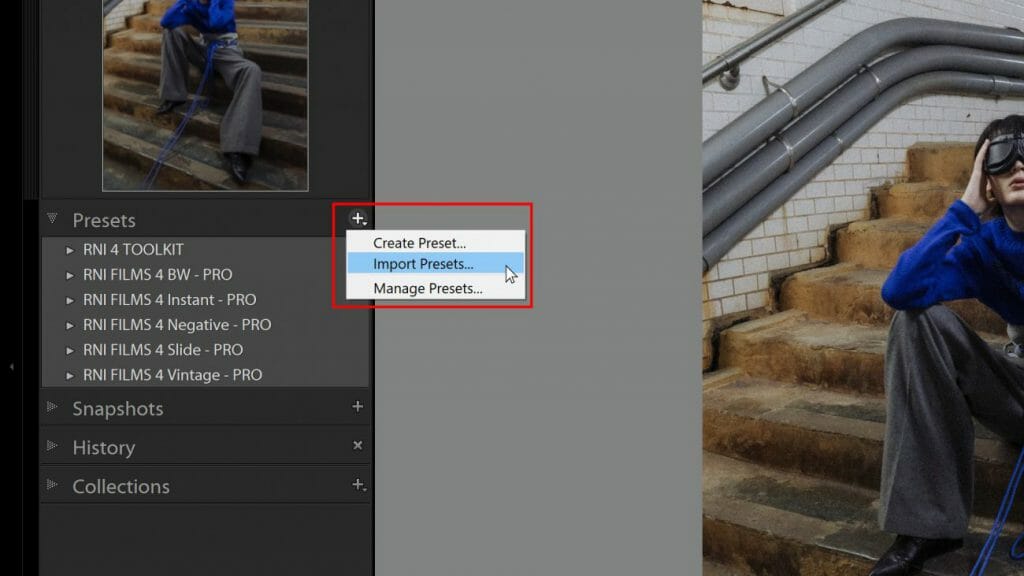
- In the left panel, click on the + button at the top right of the Presets tab;
- Click on Import Presets feature;
- In the file select window, navigate to your presets folder and select your presets;
- Once you’ve chosen your files, click on Import.
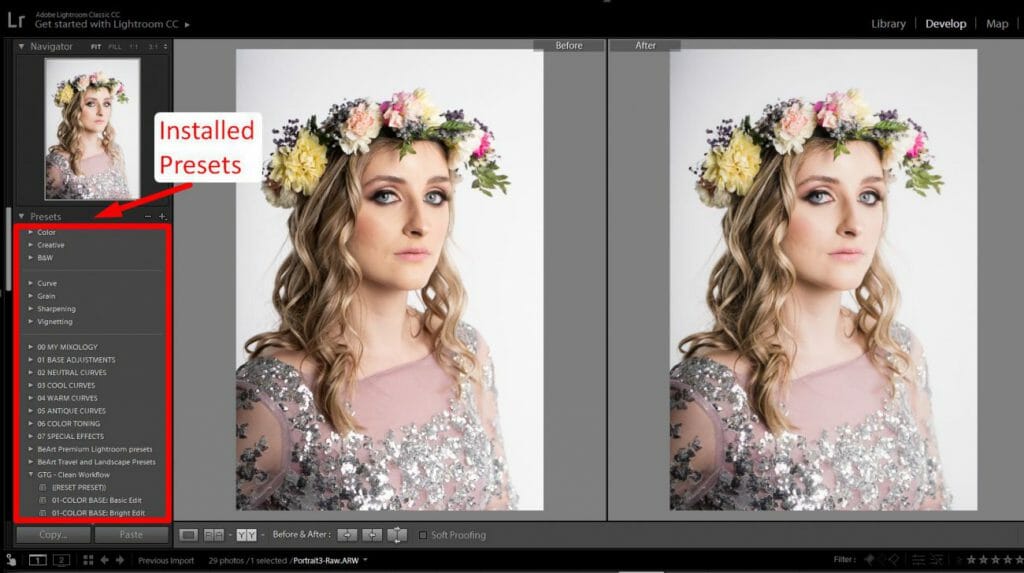
- Your presets will now show up in the Presets tab!
Pro Tip: You can select multiple presets by holding CMD/CTRL on your keyboard while clicking on multiple files. You can also import a .zip archive containing your presets. Lightroom preserves the archive’s folder structure when importing presets.
How to Install Lightroom Presets in Lightroom Classic Manually
You can manually install Lightroom presets by copying your preset files to the Lightroom’s Presets Folder.
Here are the steps to access the Presets Folder from Lightroom (Classic, 4, 5, 6, CC 2017)
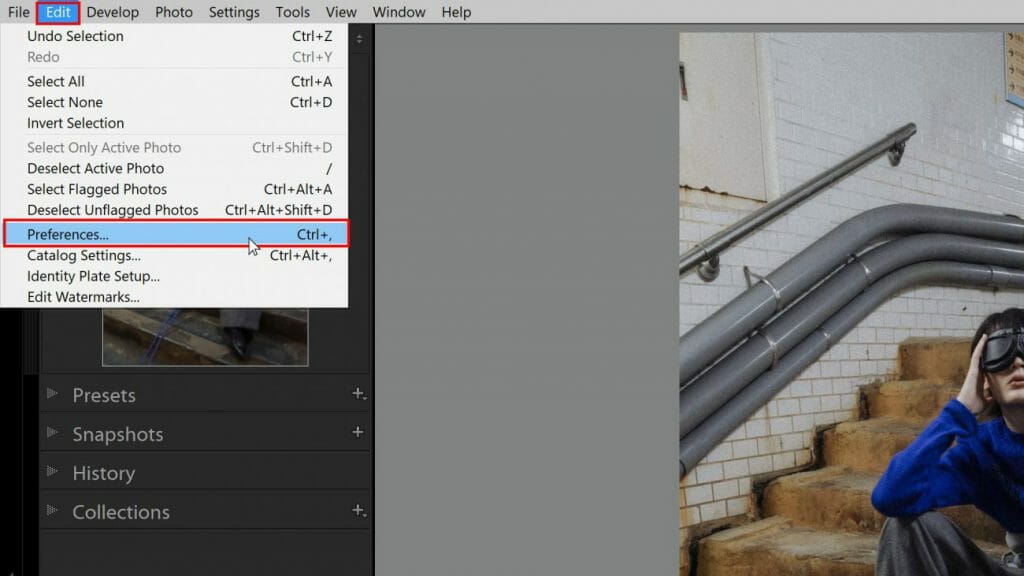
- From the top menu bar, click Edit (Win) or Lightroom (for Mac users)
- Then select Preferences (or hit Cmd/CTRL and , on your keyboard);
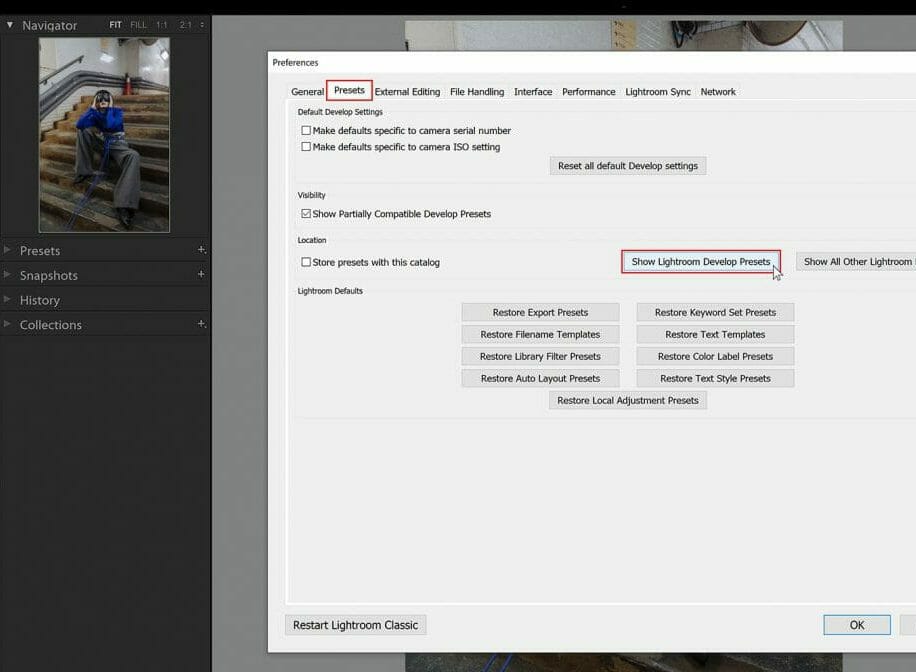
- In the Preferences window, go to the Presets tab;
- Under Location, click on ‘Show Lightroom Develop Presets‘ button.
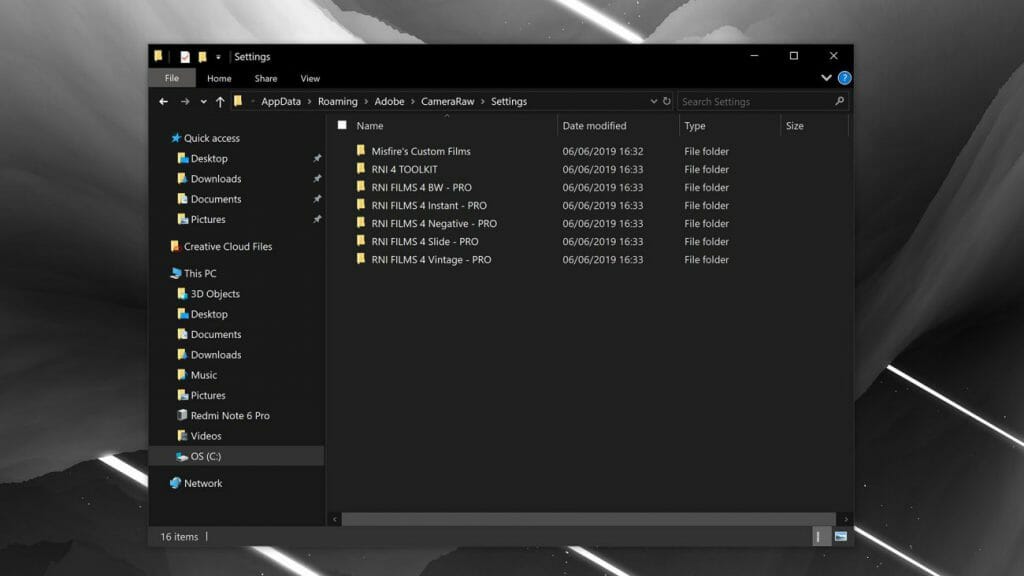
- Once the Preset Folder opens, Copy and Paste your presets in the folder.
- Then, restart Lightroom Classic.
Note: In Lightroom 4, 5, 6, or older CC version, the button is named ‘Show Lightroom Presets Folder‘
Again, arranging presets inside folders will neatly organize them inside the software too!
How To Install Lightroom Presets in Lightroom Mobile
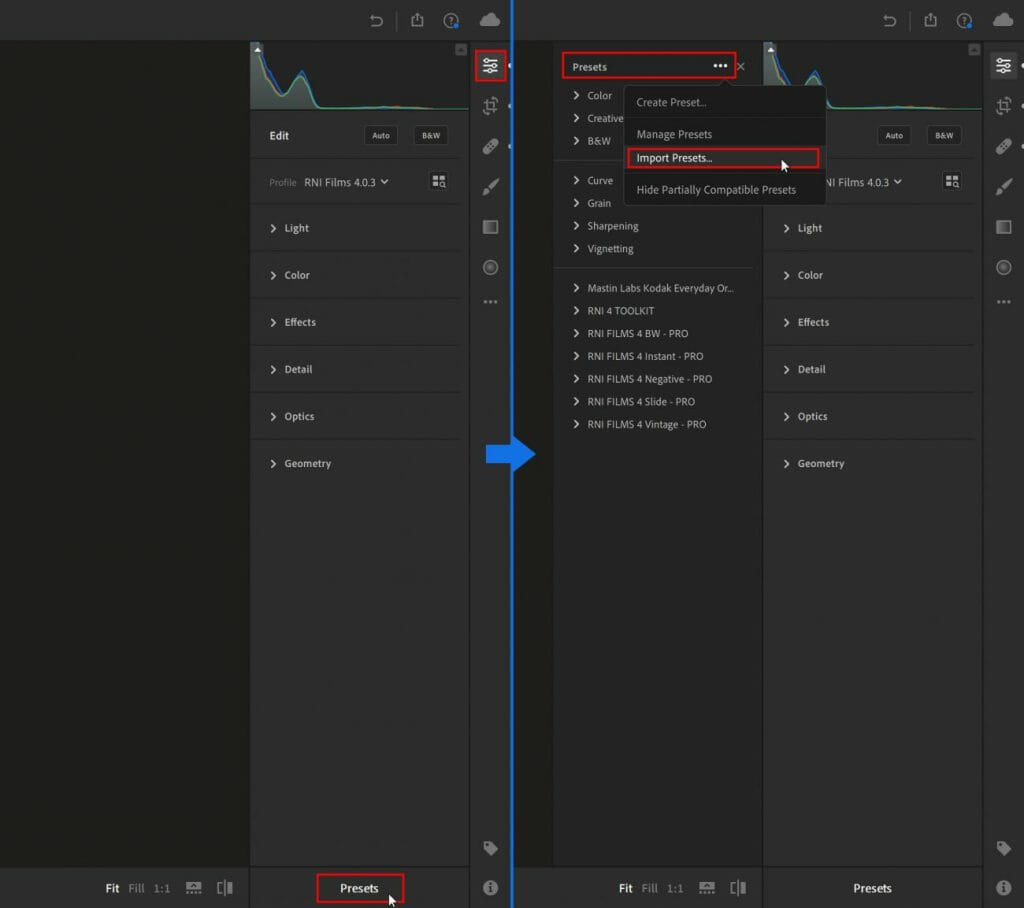
- In the Edit Panel (keyboard shortcut: E)
- Then click on the Presets button to open the Presets tab;
- Click on the three dots near the top of the tab;
- In the curtain menu, click on Import Presets…
- Navigate to your presets’ location and import them into Lightroom mobile.
Note: If you already had Presets in Lightroom Classic, and then install Lightroom mobile, the program will import Presets and Profiles automatically after the first startup – handy! If you need to install new assets at a later date, you’ll have to do it yourself using the above steps.
XMP vs. LRTemplate Presets
Presets come in two different file formats–.xmp and .lrtemplate.
- XMP Presets: these presets are shared by all versions of Lightroom, making the install process very easy.
- lrtemplate Presets: these are older format presets, but still compatible. They will be converted to .xmp format automatically when imported via Lightroom or Lightroom Classic. They are not supported by Adobe Camera Raw (ACR) – but will show up once imported and converted via Lightroom Classic.
A Note About Lightroom Versions
Due to the rebranding that Adobe has gone through to promote their Cloud-based services, what was once referred to as Lightroom CC and Lightroom CC Mobile, are now both officially named Lightroom. Just Lightroom.
Lightroom is entirely cloud-based, with the desktop and mobile versions acting as slightly different interfaces (optimized for touch screens)
So, for those who still rely on local storage (always with an off-site backup!!), they have renamed the old-fashioned Lightroom into Lightroom Classic CC.

Conclusion
I really hope this comes as a great solution for those looking to get up to speed on how to install Lightroom presets – I know I personally spent way too much time digging around to find all the info I needed when I was first starting out.
Now you won’t have to!
Related Article: Free Lightroom Presets
