Then-and-now pictures are more than a fun to look at to see how
an area has changed, they’re also a great way to connect to our history. Here’s how you can make your own.
Choose Your
Area and Image
You need to give some thought to the pictures you want to represent.
If the area is indistinguishable from what it used to be, then it might be an
interesting discussion point, but fall a little flat in a picture that focuses
on direct comparison.
Try to choose a place that still has some obvious
architectural or geographical features if you can. Look for original buildings
and other ‘anchors’ like fountains or the shape of the street.
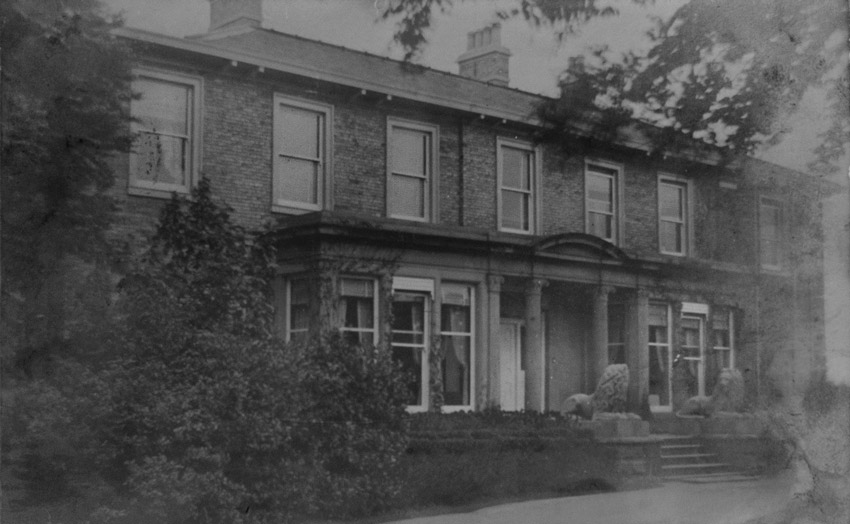
This is the archive image I’ve chosen. It’s a building near to where I grew up that’s changed uses many times—it’s been a manor house, an infectious disease centre and most recently, a free school. The great thing about this building is that many of the original features still exist, even though the building has been extended.
Although this image wasn’t dated in the local archive, it’s certainly pre-1920s. I can work that out from the existing history, how it was in use and what features were still there at the time (like the lions!).
How to Make Your Original
Image, Digital
You can read more about digitising your archive images in
our Archival
Photo Restoration course, but here are a couple of things you should
be thinking about.
The best way to digitise
your image is to use a scanner capable of making high-resolution
copies. Clean your scanner bed before you use it, to make sure you’re not
picking up any bits of dust or marks on the glass.
If you don’t have a scanner, don’t worry, it’s possible to
make a good copy of your image using a digital camera. Try to take your
photograph as ‘straight’ on as you can and be aware of any light reflections,
strange angles or bends in your photo.
How to Take Your
Contemporary Image
You know what you want to photograph, so now the key is to
photograph it in a way that’s going to make the merging of the two as easy as
possible for you.
Take your archive image, or a copy of it, with you. When
you’re lining up your new image, try to match the distance and pay attention to
the landmarks I mentioned earlier, and also things like the slope of a roof and
position of windows: those will all be markers that help you match up your
images later.
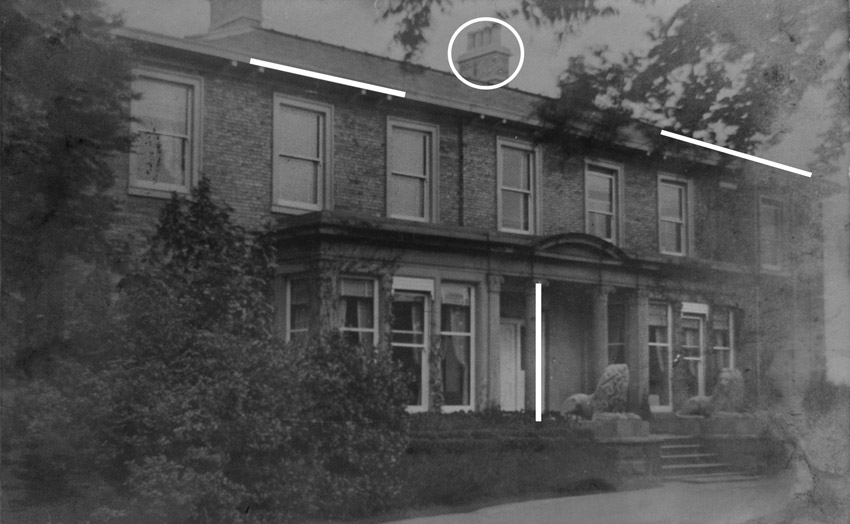
Here, I’ve marked in white a few of the things I looked at when taking my contemporary image. Things like the chimney pot and the pillars still exist, so I’d try to match those up as best I can. I’m also looking at things like the angle of the roof, which should help me judge the distance and perspective.
Try and use a lens that doesn’t distort too much. Avoid
anything too wide, where you might get some distortion and barrelling. You can
correct that to an extent in post-production, but it’s always best to get it as
close as you can in camera, first.
It might be a big ask, but try to match the lighting
conditions if you can. It may be hard to tell on an old photograph, but look
for shadows and where the light is hitting, and try to replicate it by shooting
as close to that time as you can.
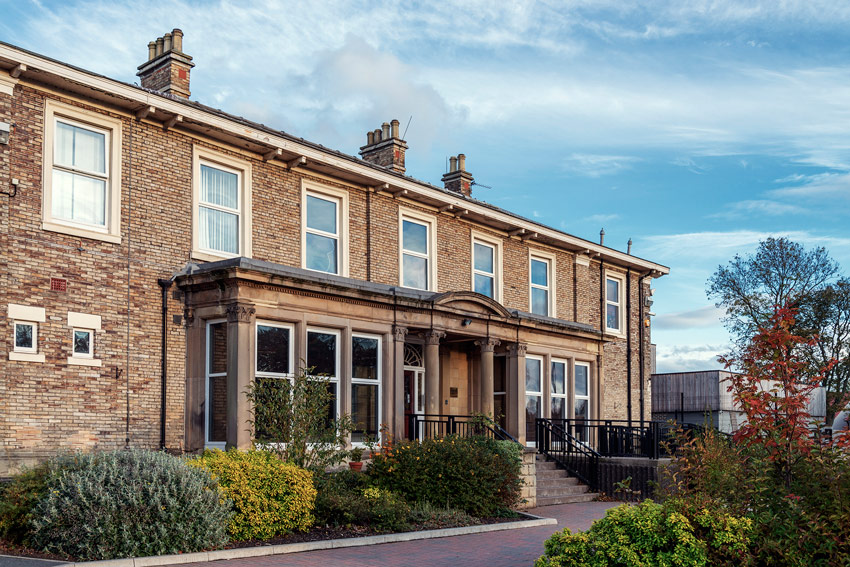
This is my contemporary image. Though some of the features are a little off, it’s not too bad when compared to the original.
How to Merge Your Images in Adobe Photoshop
You won’t want to do too much post-production to your
contemporary image, so just give it some basic colour and contrast corrections
if needed.
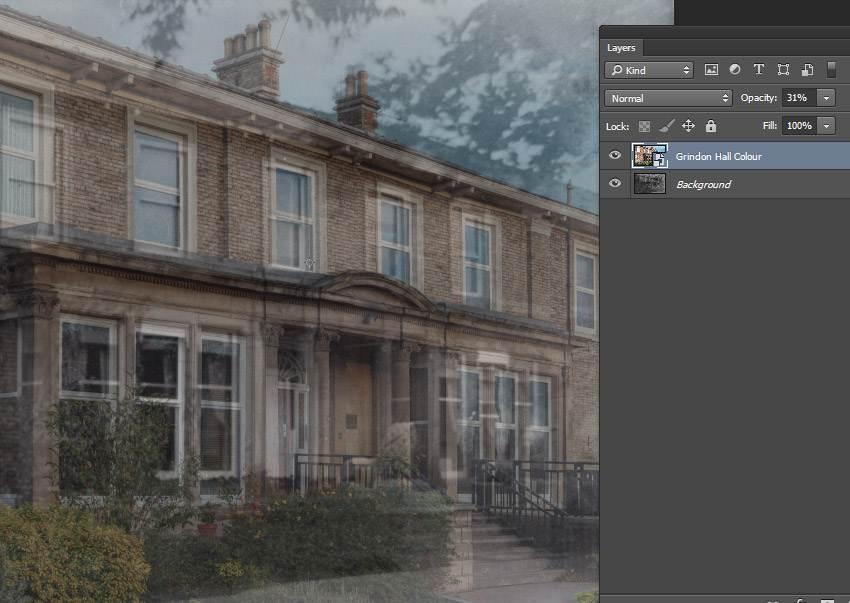
Next, open your archive image as your bottom (or background) layer and pull your contemporary one in so it appears as a smart object. Use the Opacity slider to lower the transparency of your modern image.
Now resize it to roughly match your archive photograph: Select your top image (or Select All on that layer) and then right-click, choosing Transform Selection.
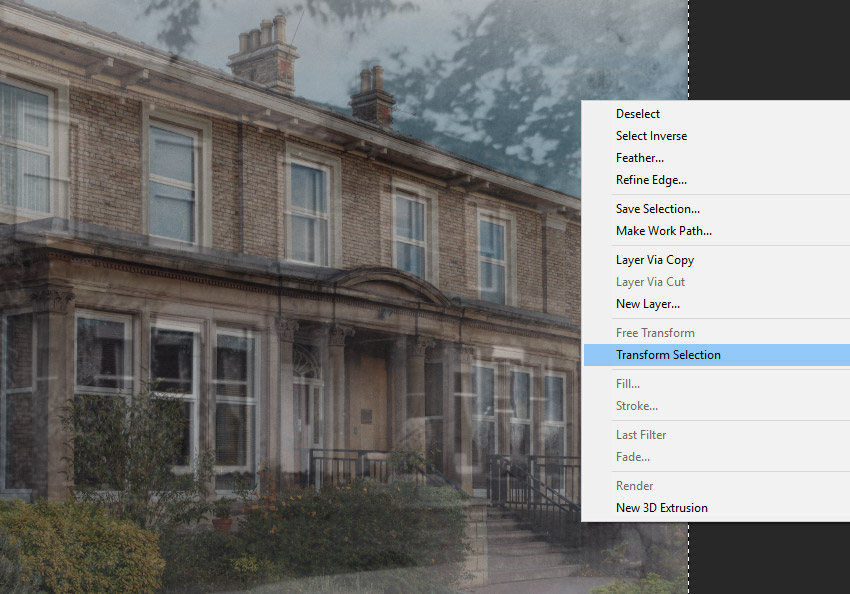
If you right-click again you’ll see you’re presented with some more options:
- Scale—enlarges or reduces
- Rotate—turns based on a fixed point
- Skew—slants vertically or horizontally
- Distort—stretches
- Perspective—applies one-point perspective
- Warp—alters the shape
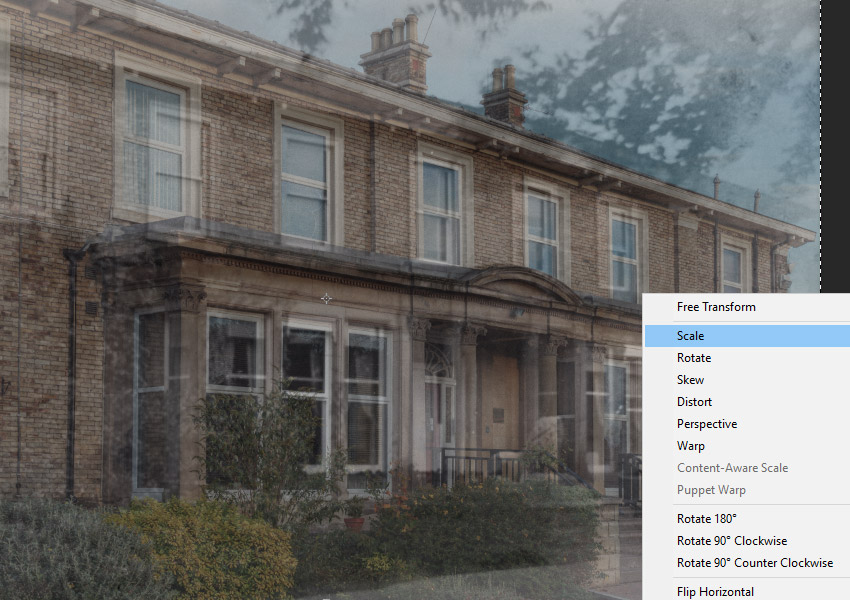
Use these tools to subtly adjust your image until it’s as close to the original as possible. Don’t push it too far or you’ll end up with odd, stretchy looking parts! You’ll probably make most use of Perspective, Skew and Scale.
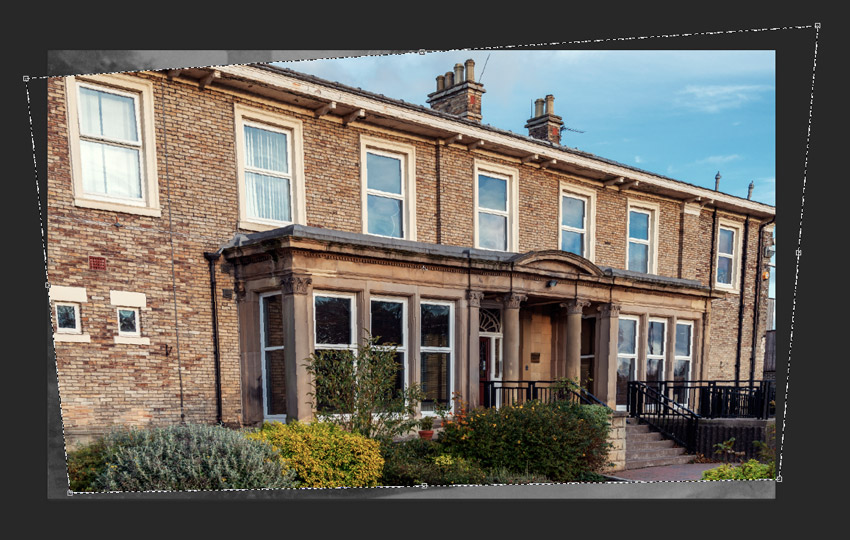
This is how mine looked—it’s quite close but it’s never going to be perfect. You might need to crop your image to get rid of any edges.
Animate Your Images
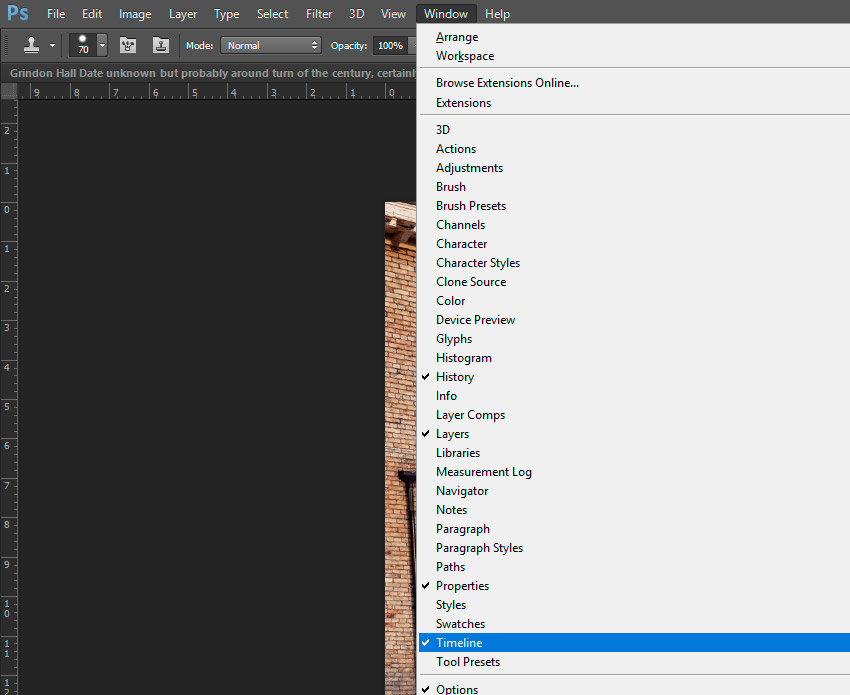
Make sure your Timeline is visible in Photoshop. If it isn’t, go to Window and tick Timeline.
You’ll see a button that says Create Video Timeline. Press that, and you’ll see both layers (your archive and contemporary images) open in the timeline.
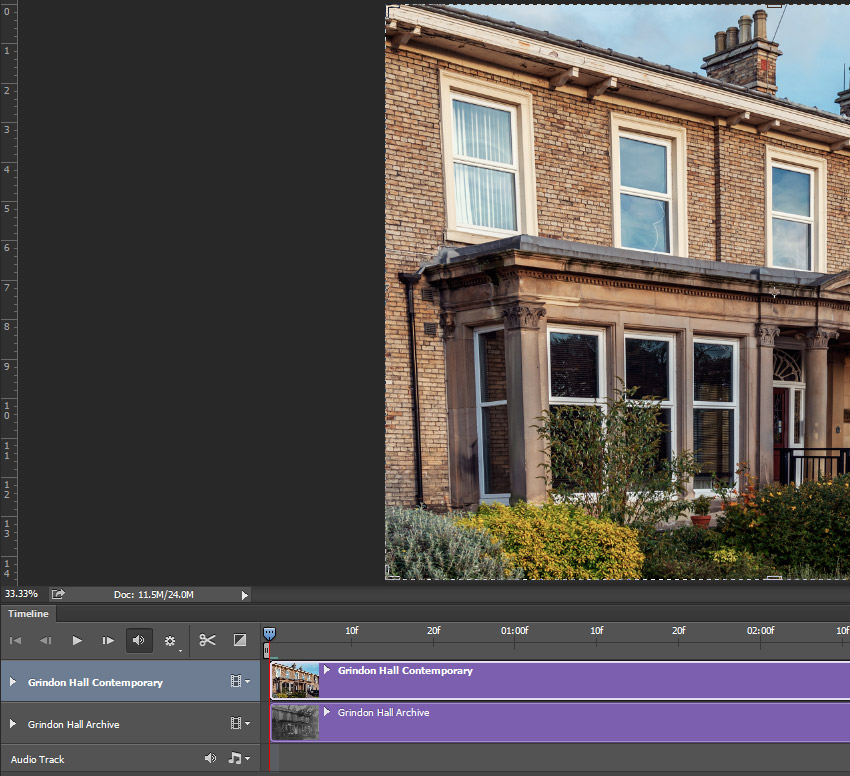
Ideally, you want your contemporary layer to start invisible and then slowly fade in. You’ll need to use the options on the left to add markers to your timeline, and then adjust the opacity in your layers panel.

I’ve circled some parts here to help you to see what you need to adjust. The circled dots on the timeline are where I want my desired effect to start and stop. The opacity is 0% on hitting the first marker and 100% on the second, so it’ll increase gradually.
Save and Export as a Looping GIF
When you’re happy you can go ahead an export as a GIF, or whatever video format works for you.
If you need a little more help with making a GIF in Photoshop, we have a more in depth tutorial you can take a look at.
Password Unzip : Freepreset.net
The file is compressed using Zip or Rar format...please use Winrar to extract this file
If you found the link was error , please comment !!!