Photographing a lightning is a dangerous hobby. Not everyone understands that a lightning storm is highly unpredictable, and a strike could occur any time, anywhere. At the same time, taking a picture of a lightning can be very rewarding, especially if the pattern is unique or the picture is taken at an extraordinary location. The tips below will show you how to photograph a lightning storm and take your pictures to the next level.
1. Safety First!
Above all else, be sure to find a safe location to photograph lighting. It is best to stay inside a building, car, or other object that can protect from a direct strike. If you can see lightning, it is close enough to strike you. I strongly advise against photographing a lightning in an open area, especially if there is water, tall trees, or other structures nearby. Stand at least 50 feet away from water and tall trees, and avoid overly exposed places.
2. What Equipment Should You Use?
If you want a very good picture of a lightning, a DSLR or mirrorless camera with a tripod is almost a must. If you have a point and shoot, make sure that your camera allows you to set manual controls for shutter speed, aperture, and ISO. Also be sure that it has an option for RAW files rather than just JPEG (see RAW vs JPEG).
Another critical piece of equipment is a tripod. Some people get lucky by taking a good picture of a lightning hand-held, but I strongly advise you to use a tripod instead. You’ll need to use long shutter speeds to capture good lightning photos (more on that in a moment), and that can lead to shaky photos if you don’t have a tripod.
In terms of lenses, any lens would work. I prefer zoom lenses rather than primes, since it adds extra flexibility for photographing lightning at different distances. If you want to capture a grand scene with large clouds overhead, a wide angle lens is better than a telephoto. Wide angle lenses also make it easier to photograph lightning, since you don’t need to do as much guesswork. That doesn’t mean telephotos cannot lead to great lightning photos – they absolutely can – but it requires a bit more luck.
There are also a few accessories you might find useful for lightning photography. First, you might want to bring along a cable release or an infrared remote to take photos without touching your camera. Even on a tripod, touching your camera to take a picture can introduce some camera shake. Second, consider bringing along a good flashlight – not just to see in front of you, but also to “paint” light on your foreground to make the scene look more dramatic. Third, take a lens cloth or lens towel with you. Chances are good that it will be raining while you’re taking pictures, and a single raindrop on front of your camera lens can ruin the picture.
Lastly, some specialized products on the market can send a signal to your camera the moment a lightning strike begins, such as the MIOPS camera trigger, taking out a lot of the guesswork. You still need to be a bit lucky with your composition, but at least the camera automatically takes pictures any time a lighting strike occurs. Another benefit is that you can step away from your camera and go to a more sheltered location, while the camera continues taking pictures as if you are right next to it. If you do a lot of lightning photography, it might be worth buying one of these camera triggers to make things easier.
3. Finding Good Locations for Lightning Photography
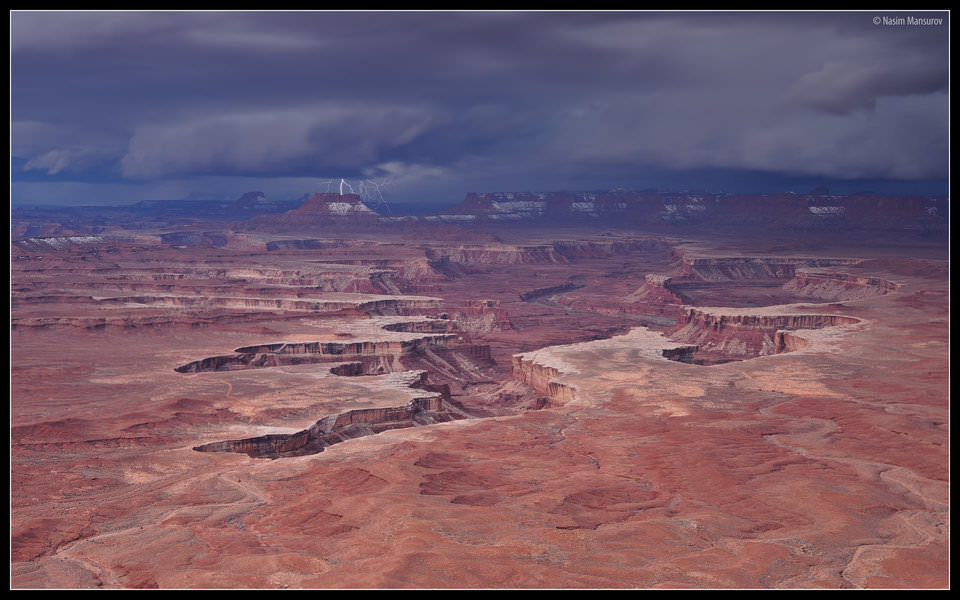
Depending on where you live, it is usually quite easy to find a lightning storm. Storms happen almost everywhere, and, at the right time of year, they may happen as often as every day. That isn’t the tricky part, though; what is difficult is finding a location that works well for lightning photography. After all, you will usually want to have an interesting foreground in your photos, probably not just the view out your window.
To find a good location to photograph lightning, you need to plan ahead of time. You don’t want to wait until you’re in the middle of a storm to search for locations, since it can be both dangerous and a waste of time. Keep some good spots in mind near where you live so you can travel there on a moment’s notice for lightning photography. And if you are on a trip, think of good places to photograph storms in case they start to happen. The goal is to find a location with a good view of a large amount of sky, but also some foreground details that will look interesting under dark light (or even as a silhouette).
Again, make sure to pick a safe spot from which you can take a picture. I suggest protecting your camera against rain drops by putting a piece of cloth or a plastic bag on it, covering both the camera and your lens.

4. Recommended Camera Settings to Photograph Lightning
When you’re on location, put your camera on your tripod and configure the following camera settings:
- Focus: Set your lens to manual focus and then focus to infinity (on the distant horizon). Take a test shot and make sure that your picture looks sharp on the rear LCD. Keep in mind that digital cameras cannot always acquire focus if it is too dark, which is why we recommend focusing manually instead of autofocus.
- ISO: Set your camera ISO to “base” ISO (lowest value). On most cameras, the base ISO is somewhere from ISO 64 to 200. Most Nikon and Canon cameras today are base ISO 100.
- Camera Mode: Set your camera to full manual mode. I would not trust any of the camera’s automatic modes, because periodic lightning strikes will brighten up the area, and your camera might give an incorrect exposure.
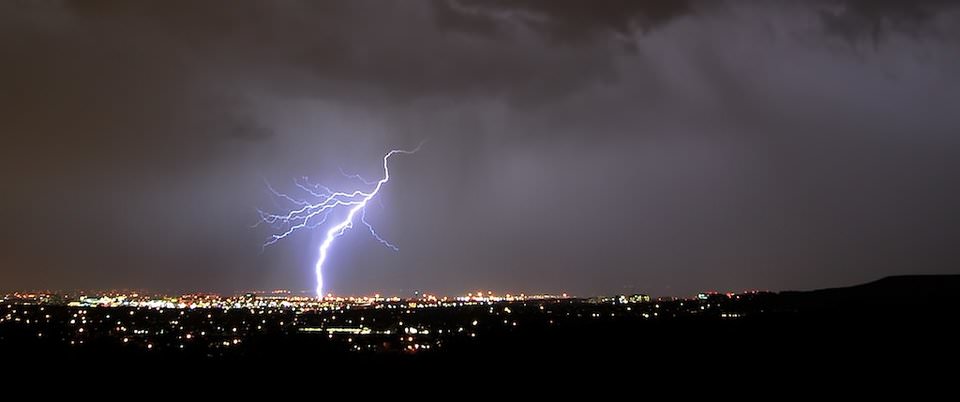
- Shutter Speed: This is an important one. Longer shutter speeds (say, 5-30 seconds) will give you a better chance of capturing lightning – perhaps even more than one lightning bolt – in your image. However, they will also brighten up the foreground, so you might not get that “dramatic silhouette” look. Shorter shutter speeds (say, 1-3 seconds) mean the foreground stays much darker, but it makes it harder to capture a photo with lightning in the first place.
- Aperture: Set your aperture to f/5.6. If your photos are overexposed (with or without lightning), use a darker aperture of f/8, f/11, or f/16 instead. You might also need one of these darker apertures in order to get more depth of field, if part of your scene is close by.
- Double Check: Once you get a bolt of lightning in one of your photos, review the image and make sure it looks right. If the bolt of lightning is too bright, use a smaller aperture of f/11 or so. If the bolt of lightning is too dark, use a larger aperture of f/5.6 or f/4. If the foreground is too dark, use a longer shutter speed of 5-30 seconds. If the foreground is too bright, use a faster shutter speed of 1-3 seconds or even less. This may take some experimentation, but practice makes perfect.
5. Composition Tips
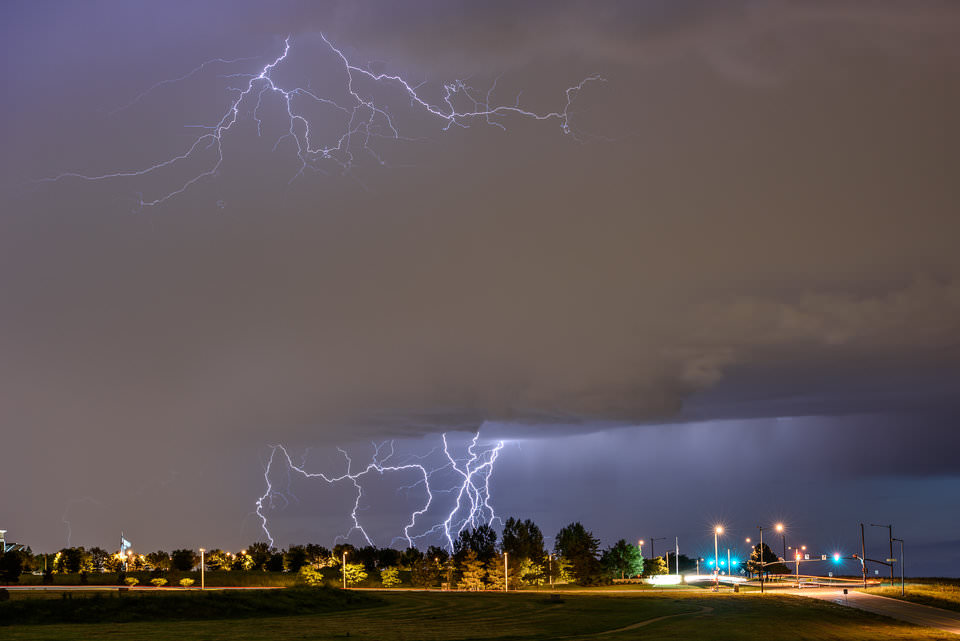
While composing your shot, make sure to cover more sky than your foreground/background. It might not look very good in the viewfinder, but once the lightning strikes, your subject becomes the lightning. During intense lightning storms, the lightning will cover the majority of the picture and that’s exactly what you want. I would say 60-80% of the sky and 20-40% of the ground is probably a safe bet.
You never quite know where lightning will appear in an image, so it is a good idea to compose your photos wider than normal so you can crop the perfect composition later. It is a terrible feeling to capture an amazing photo with the perfect lightning bolt… when the lightning bolt is just barely cropped out of the photo. Give yourself some compositional leeway by shooting with a slightly wider lens and including some extra sky in your photo.
6. Be Patient and Take Many Shots
Lightning photography can require you to take many photos – shot after shot – pointing your lens in the exact same location, just hoping that lightning strikes in the right place. Even with an automatic lightning trigger, this could mean you take dozens of photos in a row during the same storm, with the exact same composition. Sometimes, you may return home empty-handed just because of bad luck! However, a good photo is just around the corner; it is bound to happen eventually. Just be patient and keep taking pictures in sequence. You never know which one will turn out perfectly.
Hopefully this guide gave you a good understanding of how to photograph lightning and stay safe while you take pictures! Good luck, and let us know below if you have any questions.