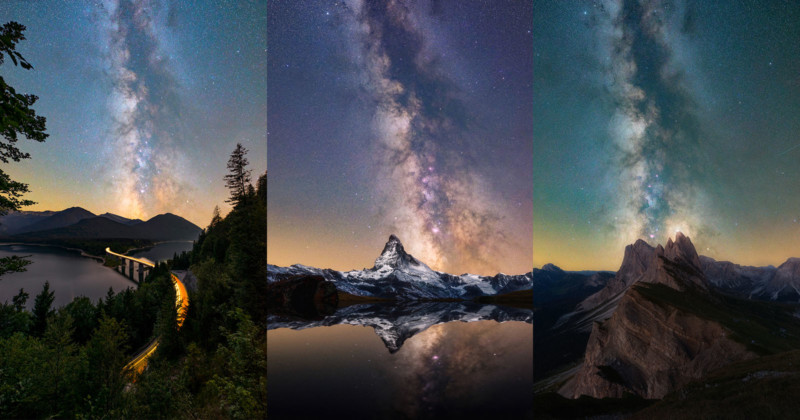

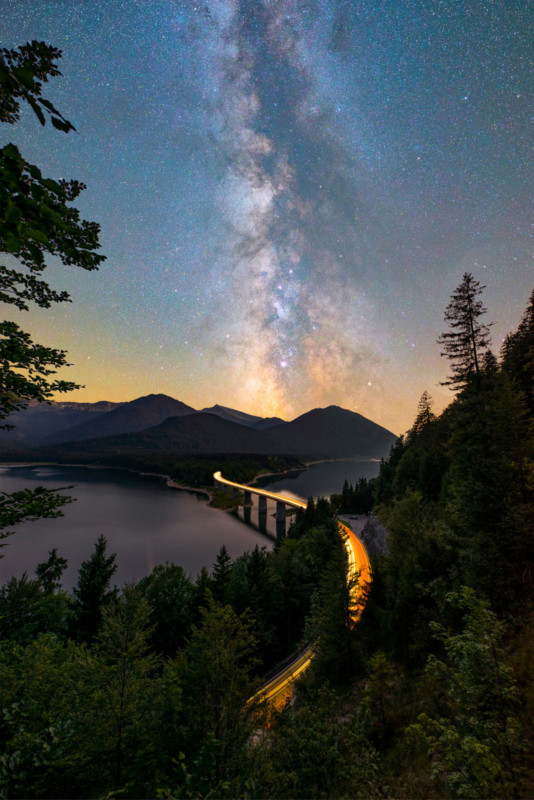
Milky Way photos should first and foremost do one thing: fascinate. When the viewer’s gaze loses itself in the vastness of the motif and he begins to dream, the photographer has achieved his goal.
The Milky Way, our galaxy, is a special highlight for photographers, romantics, and scientists, and it has been for thousands of years. The word ‘galaxy’ itself points to a long history of stargazing. It is derived from the Greek word “gála”, which means milk. The ancient Greeks believed that there was a kind of divine milk flow in the sky.
In 1609, the polymath Galileo Galilei was the first to recognize that the Milky Way consists of countless stars. Astronomers estimate that about 100 to 300 billion stars twinkle in the glowing band in the sky.

In this tutorial, I’ll discuss how you can prepare to photograph the Milky Way.
A Location Without Light Pollution
The term “light pollution” is somewhat misleading because it is not pure light that is polluted, rather it is the light itself that pollutes the darkness of the night. Light pollution is a major obstacle to astrophotography. Thus, a sky without light pollution is the most important prerequisite for observing and impressively capturing the Milky Way.
The lights of a large city can be a big problem in this process. so, if you live in a large city, it will be extremely difficult to successfully expose the night sky and the Milky Way. Therefore, it is best to get out of the city and find a location where it is as dark as possible. To be able to determine the light pollution in your area, the online “Light Pollution Map” will help you.


This shows you in color the areas where light pollution is particularly low or high. Generally, there is little light pollution in large forests, in mountainous regions, or in a very sparsely populated area. Here you can take pictures of the Milky Way without problems. Use this map to find the best place in your region where you have the perfect view of the Milky Way.

Time
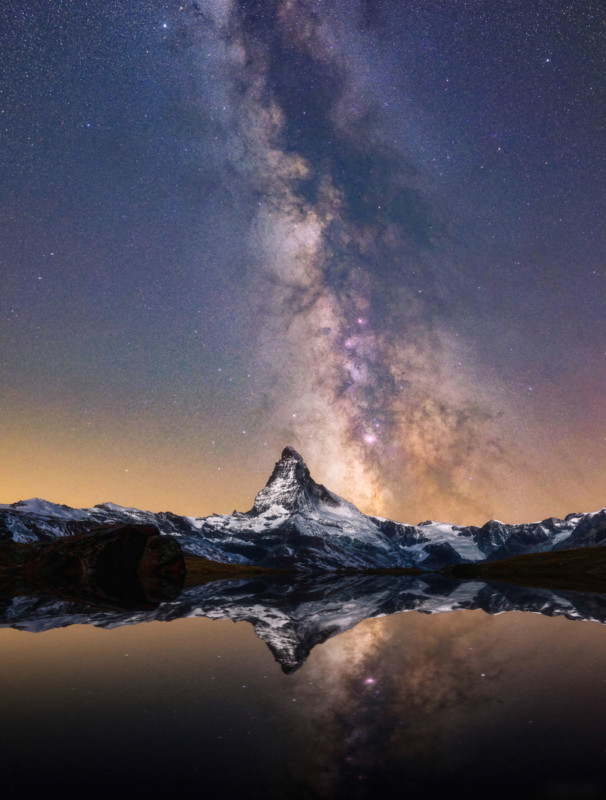
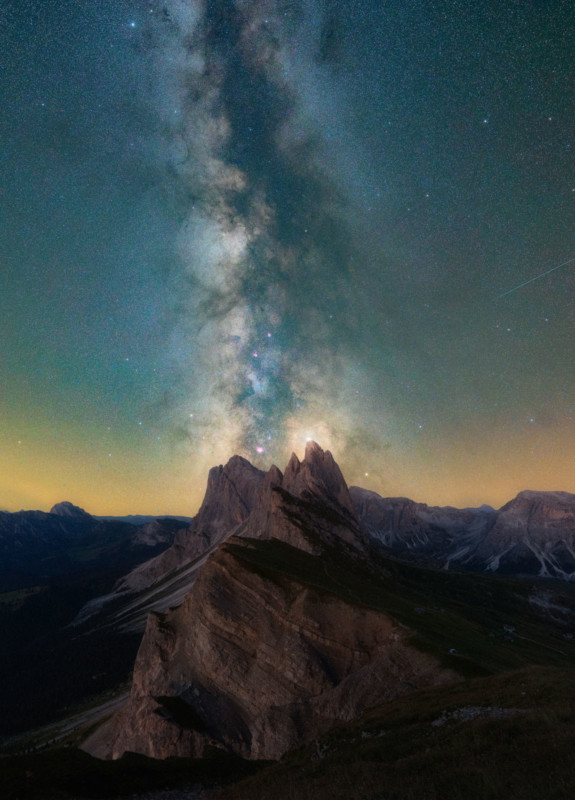
The embossed part of the Milky Way, i.e. the Galactic Core, can be observed between March and September, and this is especially true for the northern celestial sphere. How long it is above the horizon depends on the respective longitude and latitude of the location. The best time to observe the Milky Way is in summer: then it stretches from north to south as usual. Accompanying the Milky Way band, the constellations Perseus, Cassiopeia, Swan, Eagle, and Sagittarius can also be observed during this season.
The Moon
The phase of the moon and its location in the night sky are of central importance. If the moon is close to the Milky Way, it is hardly recognizable because the moon brightens the surroundings too much. Optimal conditions are offered when the moon is not above the horizon or when it’s not a new moon.
Good conditions may also be offered if the moon is behind you when taking the picture, i.e. if it is exactly opposite the Milky Way in the firmament. In this case, you can use the moon to brighten up the surroundings. However, make sure that there is no full moon – that is usually too bright. When the moon stands where and which moon phase prevails at the moment can be found out easily with software/apps such as Stellarium, Planit for Photographers, and PhotoPills.
Weather
In addition to this very specific information, you should of course always keep a close eye on the weather – the best location is of no use to us if it is raining cats and dogs and the cloud cover appears as thick as concrete. As an astrophotographer, you only work when the sky is clear, known in the trade as “CS – Clear Sky”. Again, you get the latest data from the Internet, on Clear Outside and Meteoblue you get very good and reliable data, compactly presented.

Equipment
Camera

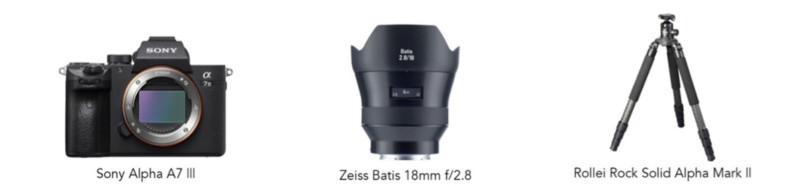
You will be working with high ISO values in this type of photography. Therefore, the camera should have acceptable noise performance. The rule is: the less noise, the more details will be preserved later. Optionally, you can also use an astro-modified camera.
DSLR and DSLM cameras in their normal delivery condition from the factory come with a disadvantage: At the H-alpha spectral line, which is important in astronomy, their sensitivity is very low. From the factory, these cameras are equipped with an infrared cut filter that suppresses the red spectral range. The light from the red hydrogen nebulae does not make it to the sensor because it is filtered out by a filter in the camera to get an efficient color balance in normal everyday photography.
By removing this internal IR cut filter, the sensitivity in the red H-Alpha range is significantly increased and the camera becomes an “astro camera”.
Ultra-Wide-Angle Lens
In order to capture the largest possible area of the night sky on the image sensor, you need a fast wide-angle lens. Due to the earth’s rotation, the stars “wander” across the night sky, and therefore — if you want to avoid star trails — the exposure time of the camera is limited.
A wide-angle lens also allows a comparatively long exposure in addition to a larger section of the Milky Way. The shorter the focal length, the longer you can expose. The same principle also applies to the aperture: The smaller the f-number, the more light can fall on the sensor, and thus you can keep the exposure time shorter.
Tripod
To get the sharpest possible images of stars, a sturdy tripod — which will stand securely even in windy conditions and exposure times of 30 seconds or more — is essential. In addition, we recommend using a remote shutter release to avoid having to touch your camera when releasing the shutter and risking camera shake. However, this is not essential. Every camera has an integrated self-timer function that you can use as an alternative.
Headlamp
Ideally, we should know our way around our equipment for star photography “blind” and be able to make all the important settings even in the dark and with the brightness of the camera screen turned down. For the way to the location or for additional measures on site we need a headlamp, which can also be switched to red light mode if necessary. Red light hardly dazzles our eyes, if we have to switch on a standard flashlight every time, our eyes need up to 20 minutes to get back into “night vision mode”.
Cable, Self-Timer, or Remote Shutter Release
To take a blur-free long exposure of the night sky, you need a cable or remote shutter release. Alternatively — and for me much more practical — you can set the self-timer on the camera to 2 or 10 seconds.
Accessories and Clothing for Star Photography
Do not carry spare batteries in your photo backpack, especially on cold nights, but wear them close to your body to protect them from premature discharge and yourself from disappointment. Also remember to carry extra memory cards, cleaning supplies for your camera and lens, and warm, waterproof clothing.
Apps and Software

To get a better picture or to orient yourself, you can use the Stellarium app, a popular planetarium app. Stellarium is a sky map that shows exactly what can be seen when you look up at the night sky. Identify stars, constellations, planets, comets, satellites (like the ISS), and other deep-sky objects in real-time in the sky in just a few seconds by pointing your phone at the sky. In addition to the extremely popular smartphone app, I also enjoy the desktop and web versions when planning my astrophotography at home.
Also recommended for Milky Way and night sky photography — and one of the best all-around photo planning apps on the market — is the PhotoPills app. The app has a wide range of features that allow you to capture any location on Earth at a specific date in the future and get all the important information, including the times of, for example, sunset and sunrise, moon phases, blue hour and golden hour, visibility of the galactic nucleus of the Milky Way and where it will be located in the sky.
About the author: Delil Geyik is a German astrophotographer whose roots are in Mesopotamia, more precisely in the province of Dersim. He lives in Germany, Stuttgart, and organizes national and international workshops in the field of astrophotography. He also works with a handful of internationally recognized companies. These include Carl Zeiss AG, which specializes in photographic lenses, and the Hungarian company Fornax Mounts, which develops motorized mounts for heavy telescopes and trackers. Delil travels around the globe to capture landscapes under a splendid starry sky with his camera. The photographer, who lives in Germany, has already gained a lot of recognition in the international specialist press. Among others, three of his astrophotography were mentioned by NASA APOD. You can find more of Geyik’s work on his website, Facebook, and Instagram.