In this video tutorial, I will take you through a very simple photo editing workflow for processing your RAW files with Luminar by Skylum (formerly Macphun).
I’ve written a lot about Luminar a lot lately, and I’m really coming to realize that it’s one of, if not THE best photo editing software and alternative to Adobe Lightroom.
If you’ve just started shooting in RAW format, and are a little bit overwhelmed and not sure what to do with them yet – Luminar might be a good place for you to start. There is a free trial available so there’s no risk to give it a go. As I’ve said previously, I didn’t expect to like it as much as I did which is why I recommend it.
NOTE: Please note that I’m using the Mac version and haven’t tested Luminar for Windows so I can’t speak to that. It is newer and does have fewer features than the Mac version but with each update, they get closer to matching.
Getting started photo editing with Luminar and RAW files
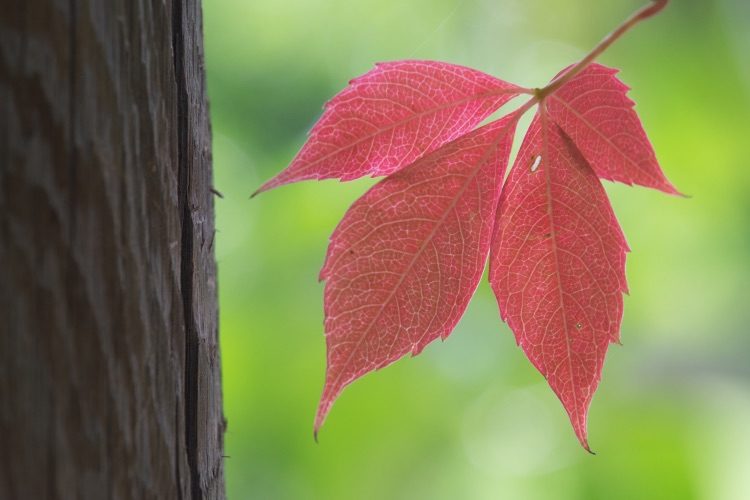
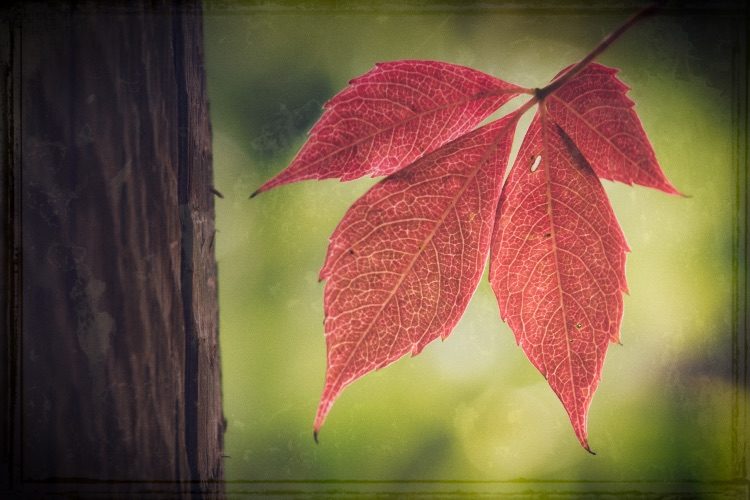
Above is the image I have used for this demonstration. This is how it appears right out of the camera with no processing applied.
Without further ado, here is the tutorial.
If you want to keep it really simple, just watch up to the 17-minute mark of the video and stop there. Continue watching if you want to see how I VERY quickly made three additional looks for this image using some of the built-in presets.
RAW processing tips for Luminar
Here is a short summary of my recommended workflow for processing RAW files in Luminar.
- Open the RAW file for your selected image in Luminar.
- From the Workspace drop-down menu select “Essentials”.
- Work through each of the filters in the order they appear from the top down, starting with RAW Develop. (Note: if you open a JPG that same filter will just be called “Develop”).
- Delete any of the filters you aren’t using or thing you will never use. Same it as a new custom workspace called “My RAW workflow”.
- Save everything you’ve done as a native Luminar (.lmnr) file which will keep all your edits, the history, etc.
- Add a new layer and apply any extra filters or presets there to maintain a non-destructive workflow.
- Use the Before/After slider to see your progress. Use the eyeball icons to turn layers or filters off and on to see what effect they are having on the image.
- Use the Export function to save your finished image (or different versions as I did) in the format and size you require.
- Remember to do one last save of the LMNR file before you close it.
- Share on social media and collect accolades and praise from your friends!
Using Presets
As seen in the video you can quickly change the look of your image and create something stylish and moody.
But take care not to overdo it.
I find that many of the included presets are quite extreme and they tend to over-process the image.
So apply them subtly and don’t be afraid to dial back the strength of a preset, or use the Masking Brush to paint in the effects only over certain areas of your image.
You can pull the main preset slider back, or adjust any of the settings in the filters being applied. You can also change the blend mode (more advanced, I’ll get into that in a future tutorial).
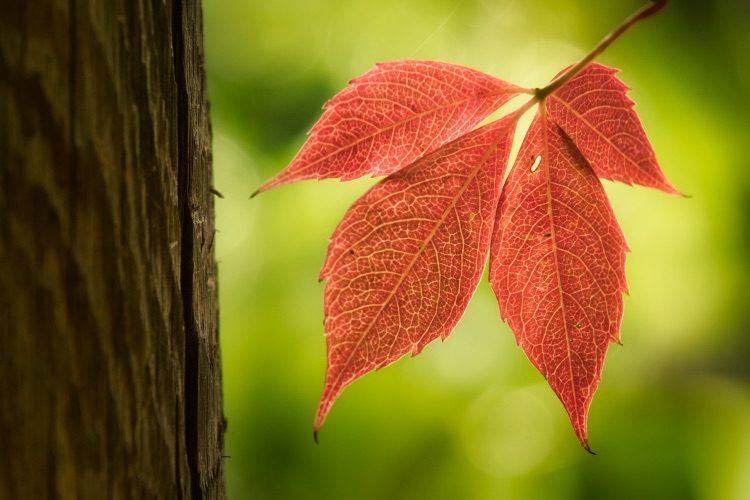
Here are the three looks I got using some of the Luminar presets.
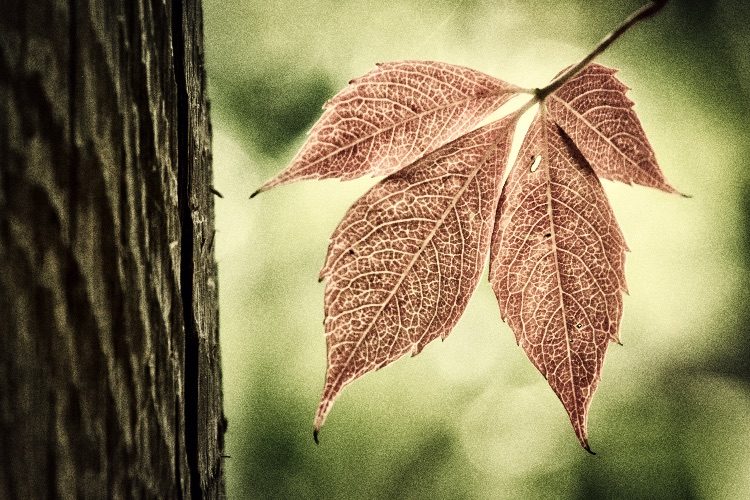
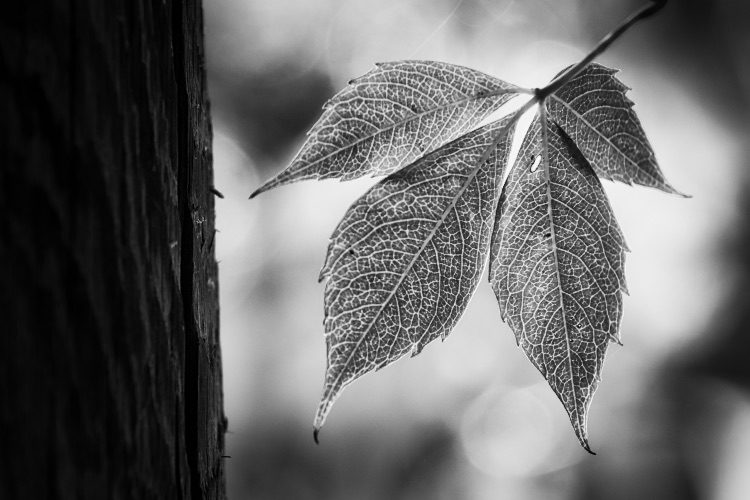
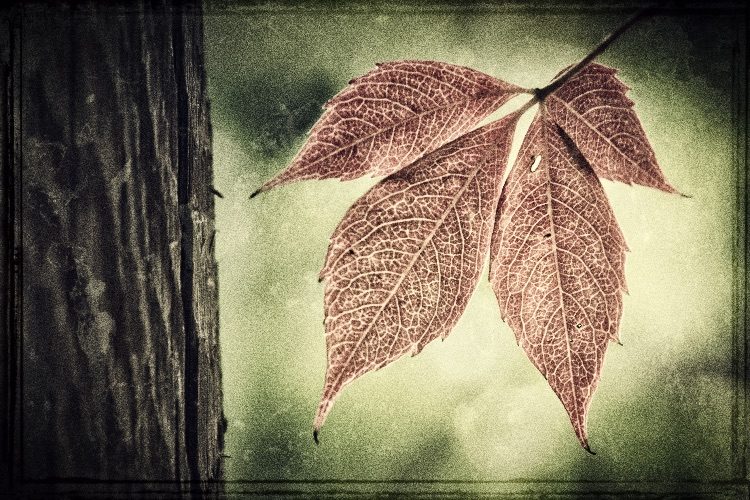
Notice in the last image above I combined two presets. As each was applied to a separate layer I just turned them both on (eyeball icon) and got this look that I quite liked.
So feel free to play around and experiment with things. You can’t do anything wrong and you can’t ruin your image because none of the edits are ever applied directly to your original RAW file. All your work is saved in that LMNR file and you can undo, alter, or redo any of the filters at any time just by opening it up again in Luminar.
Tips for using presets
When using presets in Luminar here are my suggestions:
- Save a few that you like as your favorites (click on the little star in the corner of the preset) so you can find them easily.
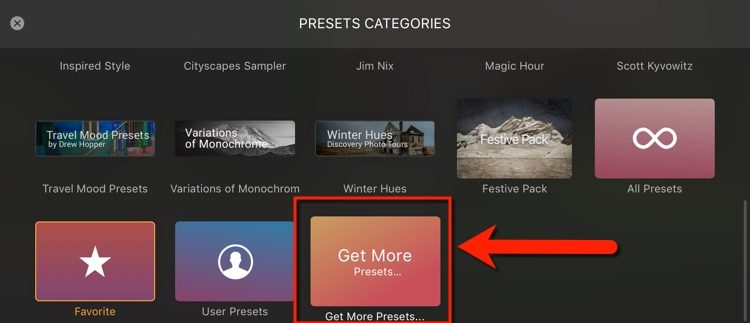
- Download additional preset collections from the Luminar site (see below). There are several free sets available.
- Always use the “+Overlay Preset” button to add a new layer and apply the preset there, not to your original image or layer. That way it’s easier to undo or delete it if you want later.
- Choose a preset and click to apply it to your image. Then play with the Amount slider – pull it all the way up to 100 and down to 0, taking note of what it’s doing to your image.
- Once you find one you like, apply it and then tweak it by using the Amount slider, adjust each of the filters/sliders independently, or selectively paint in the effect using one of the mask options (Brush, Radial Mask, or Gradient Mask).
- Save it as a new preset if you like this look and give it a name such as, if the original preset is called “Vintage” I might rename my version “Vintage – Darlene’s version”.
Your turn
Now it’s your turn.
If you have RAW files sitting on your computer begging to be processed – why not give Luminar a try and see if you like it. Post any questions, thoughts and/or your finished images in the comments area below.
Happy editing!
Cheers,