

Over time, Lightroom may become slow to render thumbnails and scroll through images. Rebuilding all previews may significantly improve performance. It may also significantly reduce the size of your Lightroom catalog. Rebuilding previews also serves as a file integrity check. So what are you waiting for?
Background
Previews in Lightroom are JPEG files that are used for thumbnail viewing. They can also be used for full-size viewing, particularly for offline media. Lightroom makes several (or more) of these previews for each image.
The previews are the largest component of Lightroom catalogs. And while Lightroom tries to manage them cleanly, that’s not always the case. This seems to be particularly true as your catalog goes through multiple upgrades. Sometimes it’s best to throw out the entire preview file and rebuild from scratch.
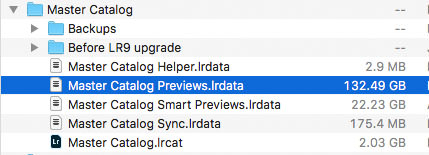
When you rebuild previews, Lightroom will make new files from the original images. In my case, this reduced the size of the previews from ~300GB to 65GB in one catalog, and ~300GB to 125GB in another. (The different results to due to the number of files in the catalogs and preview settings). That’s a lot of new empty space on my drive.
Images scroll much faster now. And during the rebuilding, Lightroom needs to read the original image data to generate the new previews. This serves as a very reliable file integrity check for your whole catalog of images.
Note that it can take Lightroom a long time to build previews if the catalog is large, or if the files are connected to the Lightroom computer by slow connection like older Wi-Fi. It’s best to do this when you don’t have any critical work going on.
The Rebuilding Process
Rebuilding is easy – just throw away the old previews, select all files in the catalog, and tell the Library to make new ones. Then, let the machine chug away. There are some important steps to follow, which I’ve outlined below.
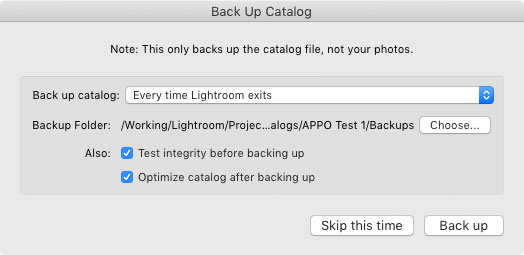
1. Backup the catalog. Whenever you do something like this, it’s always best to make a backup first. Quit Lightroom and backup your catalog.

2. Backup the Previews, if desired. You can also backup the previews before removing them from the catalog. This can take time and a lot of extra space, but if some of your files have become corrupted, the old preview may be the only copy of the image you have.
To do the backup, just drag the previews out of the catalog folder. I chose not to do this step because my previews take up 600GB total, and I have known-good backups of the original files from past validation processes.
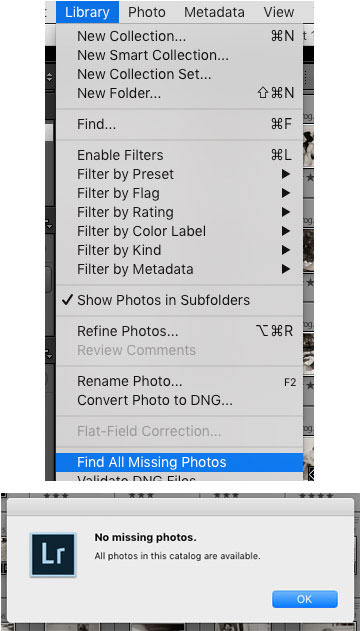
3. Find all missing photos. Before you remove the previews, you’ll want to know if any files can’t be found by the catalog. You’ll want to do this while you still have the previews intact, so you can see what the missing pictures look like. Make sure all drives are connected to your computer or mounted over a network. Go to Library>Find All Missing Photos. You’ll get a notice from Lightroom that all photos are present, or that some are missing.
4. Check Preview Settings. You can find this in Catalog Settings in the Lightroom menu on Mac or the Edit menu on PC. In the File Handling tab, you can set how previews are built. For most people, Auto is a fine setting. For my Works in Progress catalog, I set the quality to Medium. Lightroom looks at the size of the monitor you are using and chooses a size that gives you a full-screen preview.
On my Deep Archive catalog (which has more than 500,000 images) I set this to the smallest size available, and set the quality to low. This saves space, and this catalog is really an index of old work.


5. Close Lightroom and remove the Previews. The previews are contained in the catalog folder. They are named [CatalogName] Previews.lrdata. On Windows this appears as a folder, on Mac it looks like a single file. You can either move it out of the catalog folder if you have enough space on the drive or delete it.
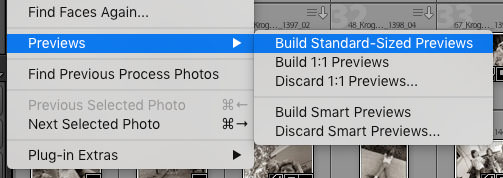
6. Rebuild Previews. Open Lightroom, select images, and go to Library>Previews>Build Standard Size previews. They will start to rebuild.

Tip: If you want this to go as fast as possible, it can be best to run multiple batches at the same time. Select half your files, and start the rebuild, then select the other half and start. This will force Lightroom to use as much of the computer’s processor as possible. It may cut the preview building time significantly.
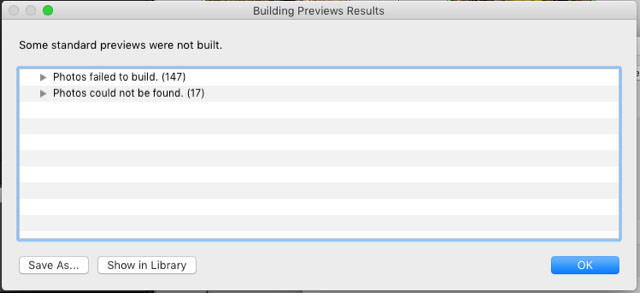
7. Check errors. If Lightroom encounters errors during the process, it will let you know. The typical errors are “Photos that failed to build” or “Photos could not be found.” If you get any errors, you will want to save the error log to your desktop and resolve the problems.
You can try several things to resolve any issues. This would typically include trying to open the file with other software and checking on backup versions of the file to see if they show the same error.
8. Close and backup. Any time you run a big process in Lightroom, it’s always best to close the catalog after completion and let it run through the catalog optimization, integrity check, and backup process.
9. That’s it!. Open Lightroom, and see if it makes a speed. It did for me, as scrolling through the 500,000+ catalog was smooth from top to bottom. You may also want to see how your new Preview size compares with the old.
If you still want to try and get an additional performance boost, check out this very informative article from Adobe on optimizing performance.
About the author: Peter Krogh is a photographer, writer, and software designer. The opinions expressed in this article are solely those of the author. Krogh is the author of six books, including The DAM Book 3.0 and Digitizing Your Photos with Your Camera and Lightroom. He is the new Chief Product Officer at Tandem Vault. More info at www.theDAMbook.com.