A noiseless picture is something that photographers have sought after for ages. A decade ago, it was the limitations with ISO performance of sensors that made high ISO noise a formidable foe. Even with the latest mirrorless cameras where photographers today are able to push the limits of low-light performance, noise reduction via post-processing software still stays as an integral part of the workflow. Photoshop always had multiple built-in options for noise reduction, and there are also plenty of third-party noise-reduction plugins available as well. In this article, I will explain how to handle noise using Smart Objects. For a brief introduction to Smart Objects or if you are new to Photoshop, click here. Once the prerequisites are in place, this approach is a one-click solution for reducing noise.
The Effect of Noise Reduction on Sharpness
Sharpening and noise reduction in post-processing have mostly been reciprocal to each other. That is one of the major setbacks when it comes to using noise reduction software, apart from the fact that noise reduction plugins are either too expensive, or they don’t yield desirable results. When we try to reduce noise, the software ends up softening the overall image. That is primarily because most noise reduction algorithms cannot differentiate between noise and sharp boundaries.
Using smart objects is one of the most effective ways to reduce noise without compromising the sharpness of the image. But there are a few conditions that need to be addressed and like most other approaches, it has its limitations as well. Let me get you through the conditions before we proceed to the actual noise removal.
Requirements and Limitations
First, we need multiple pictures of the same composition. If not exact, at least close to identical frames would be required. The quality of noise reduction gets substantially better as the number of frames increases. Usually six to eight frames will be good enough to produce desirable results with the minimum being at least two. Since we need close to identical frames, this method cannot be used to de-noise images with moving subjects.
Second, try to go wider than you actually need to, as we are going to merge and align multiple images. So obviously there is going to be considerable cropping involved. Let’s take a look at the simple step-by-step procedure.
Step-by-Step Procedure
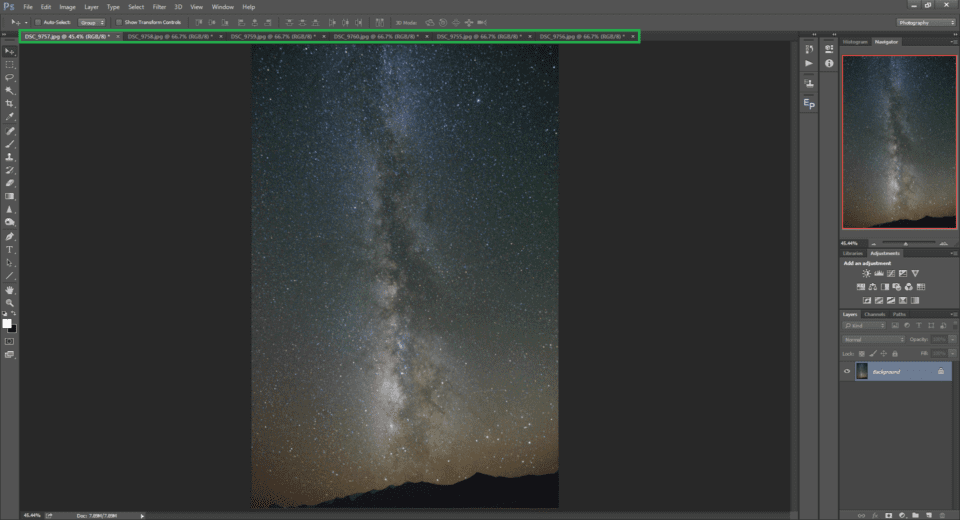
I have selected six frames of the Milky Way that were shot one after the other. First, open all the selected frames as tabs. Selecting all the pictures in the explorer and dragging them into Photoshop does this.
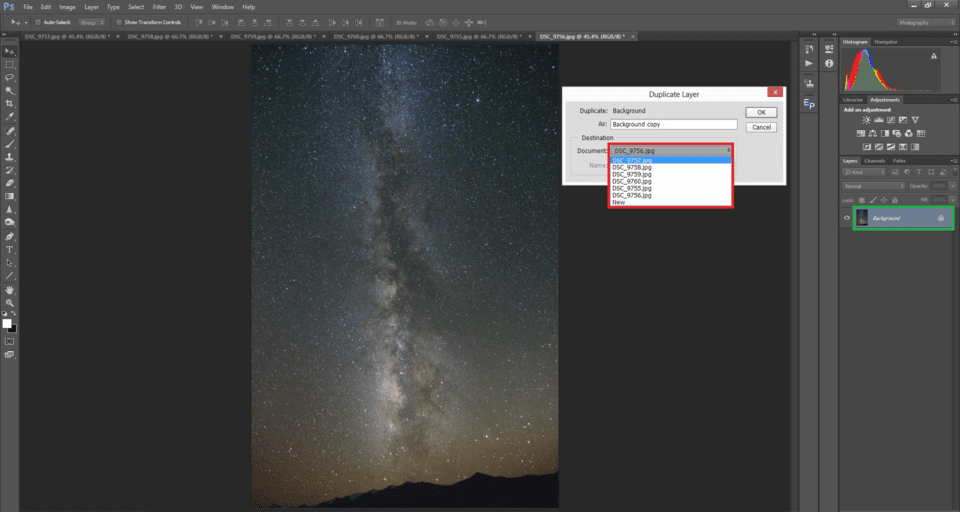
Now let us copy all the frames as layers into a single Photoshop file. Make sure the background layer is selected (marked green) and right click on it. Selecting Duplicate Layer from the pop up menu would bring the duplicate layer menu. In the destination, select the first image in the sequence and click OK.
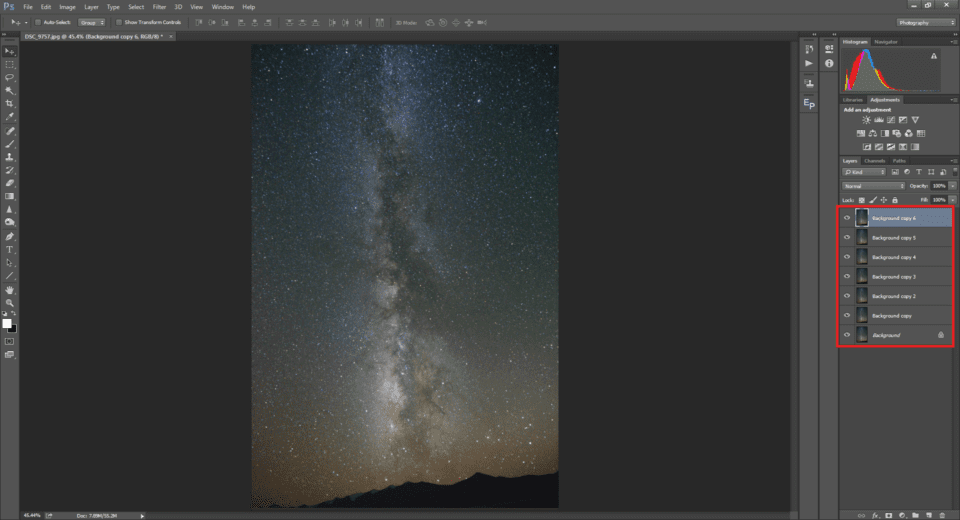
In this example, I have duplicated the rest of the images into DSC_9757 as shown above.
Note: if you use Lightroom Classic, selecting the batch of images, right-clicking on them and clicking “Open as Layers in Photoshop” will automatically bring them into Photoshop as layers.
It’s always better to use a tripod to get close to identical images. Hand-held images would end up having more cropped out areas, which might affect your final composition. As mentioned earlier, this is why you might need to go wider, so that you can get the desired result after cropping.
Aligning Layers
Now that we have all the frames as layers in a single image, let’s align them. We can do so using the Edit->Auto-Align Layers menu. Selecting the Auto Align Layers menu will bring a pop up window in which we need to use the default Auto option in the projection menu.
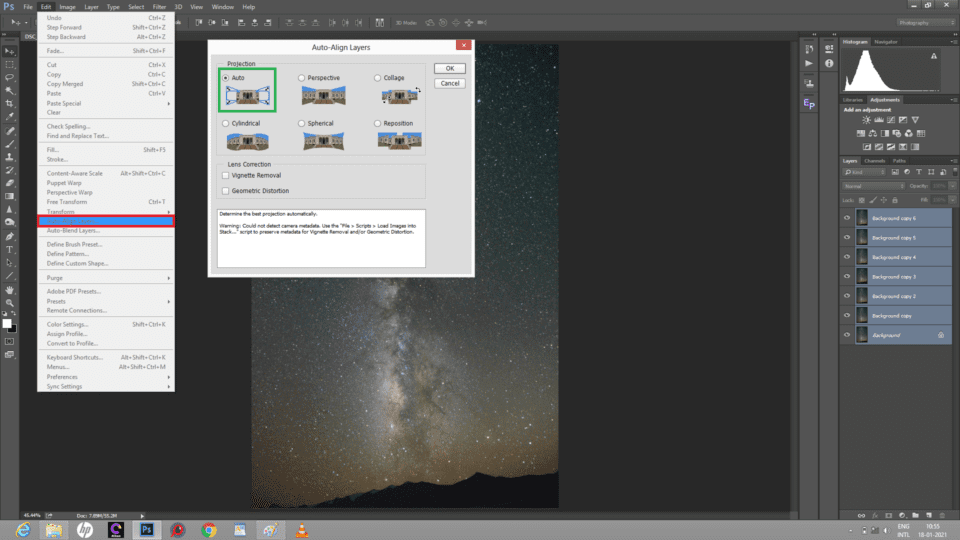
This will align all the six layers and as mentioned earlier, there will be a crop out area.
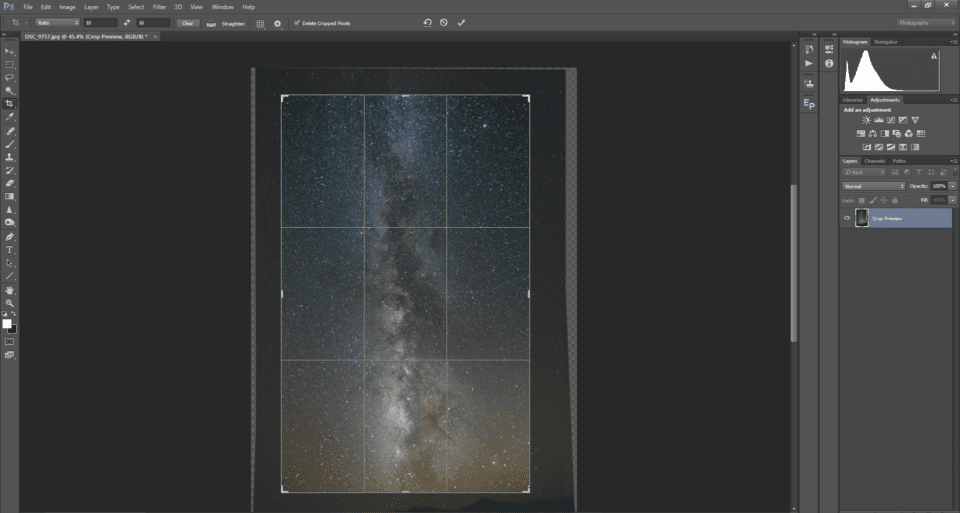
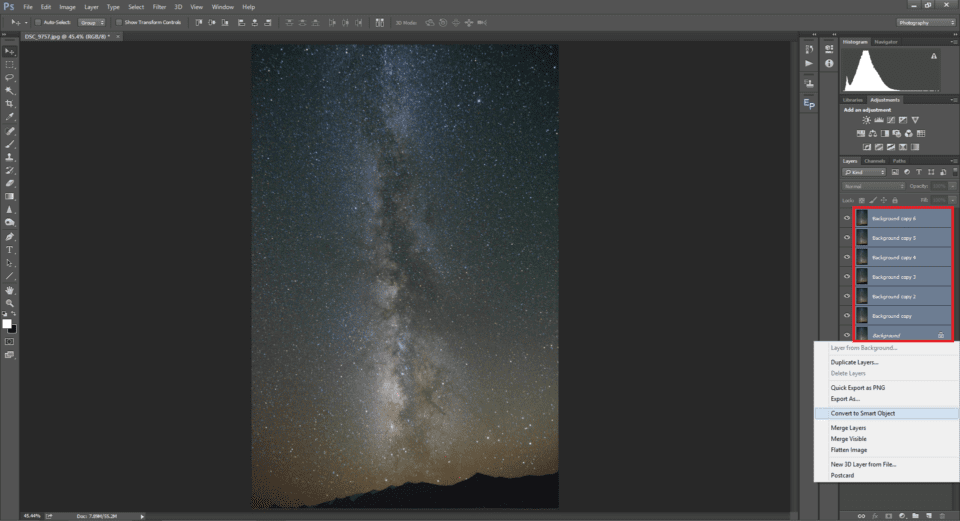
Once we have all the layers aligned perfectly, make sure all the layers are selected. Right click on the layers window and choose Convert to Smart Object from the pop-up menu.
Noise Reduction
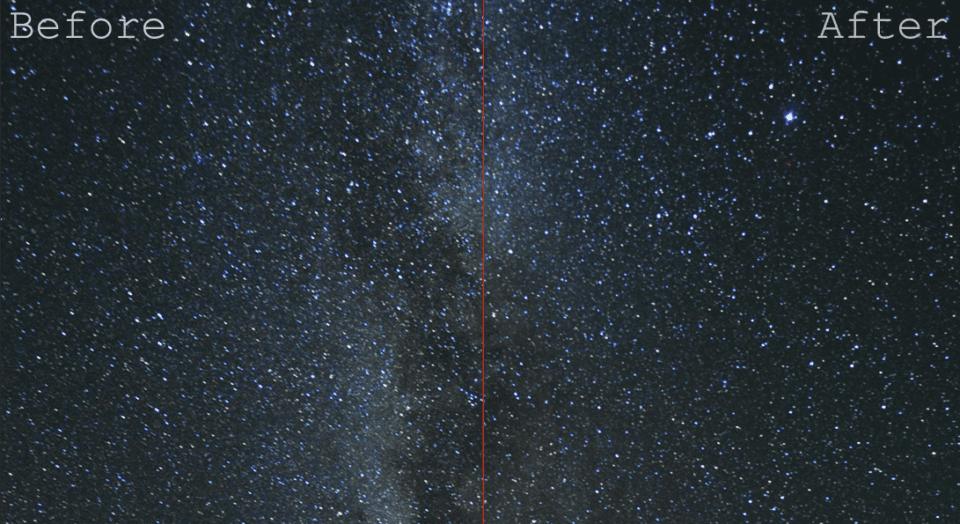
We now have a group of perfectly aligned layers as a smart object. De-noising is just a few clicks away. Go to the Menu Layers -> Smart Objects -> Stack Mode -> Mean. This stack mode will only select the pixels that are common in all the frames, leaving out the rest. Since noise is random and we have perfectly aligned pixels, the odd pixels (noise) will be eliminated, leaving us with a cleaner image without compromising the sharpness of the image.
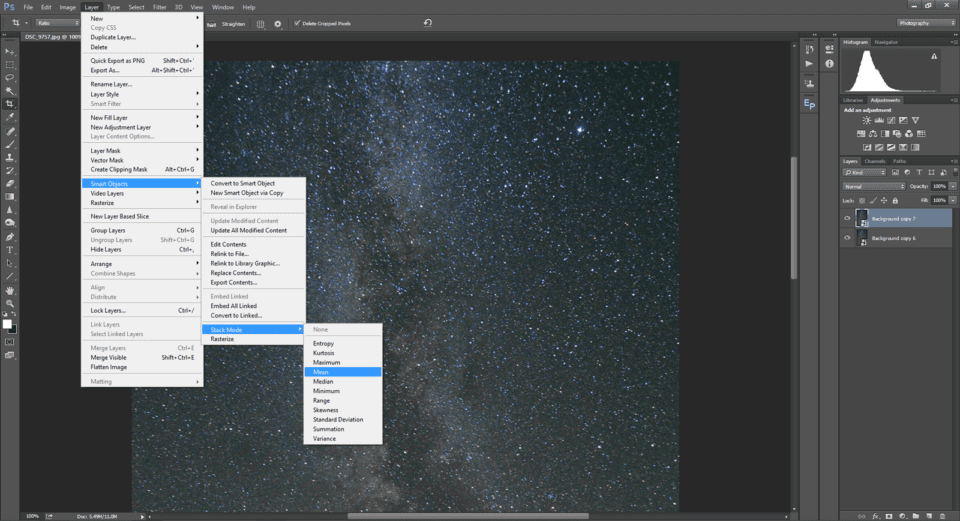
Once done, you can see the noise almost disappearing, leaving a cleaner image without softening the stars. This approach would be best suited for low-light photography, especially if you are using a camera which doesn’t have the best ISO performance. Once mounted on a tripod, this method even suits mobile photography.
Conclusion
In this article, we learned how to reduce noise using smart objects in Photoshop, without using any noise reduction tools or plugins. The above method using image averaging is one of the simplest methods to get rid of noise, especially when using high ISOs.
If you have any questions, please let me know in the comments section below!