Would you love to capture stylish interior photography? Do you wonder how magazines make homes look so appealing? We’ll show you how to take your interior photography to the next level with our handy guide.
Perhaps you’ve dabbled in some real estate photography already, or you love looking at home interior photos on social media? The sight of so many stunning images can be overwhelming
So how can you upgrade your shots and take your skills to the next level? Let’s go step-by-step through the process of capturing magazine-worthy interior photography.
1. Preparation Is Key to a Successful Interior Photography Shoot
There is plenty to prepare before you take a single photo. You’ll need to:
- Check, charge, and pack the right equipment;
- Pick the best time of day to shoot; and
- Style the space.
2. Choose the Right Time of Day for Your Shoot
If you have the freedom to choose the time of day to shoot, apps like SunSeeker can help you plan the perfect light.
Unlike most other forms of photography, midday tends to be ideal because the light is strong and indirect (the sun is overhead). It helps avoid any bright sun streaks coming through the windows, providing an even, indirect glow of light.
3. Style and Declutter
Your ability to style a space will depend on how much freedom you have in the home you are photographing.
Even if you don’t have the liberty to move items around, or style a space with different décor, there are still things you can do to make sure space looks its best.
If you can’t move anything, take 5 minutes to go around the room and adjust the existing items: straighten and fluff pillows, stack magazines, move cords so they’re less visible, and group similar items on countertops so more flat space is visible.
If you can move items around, do everything mentioned above, but also consider moving some things out of the room entirely. Stacks of papers should be hidden or removed from the room. As much clutter as possible should be cleared, and don’t be afraid to move furniture or small items to accommodate for specific angles as you move throughout the room.
4. Choose the Style of Shot That Suits Each Room
While each space is different and will have unique needs, there are several types of shots which are guaranteed to deliver magazine-worthy images.
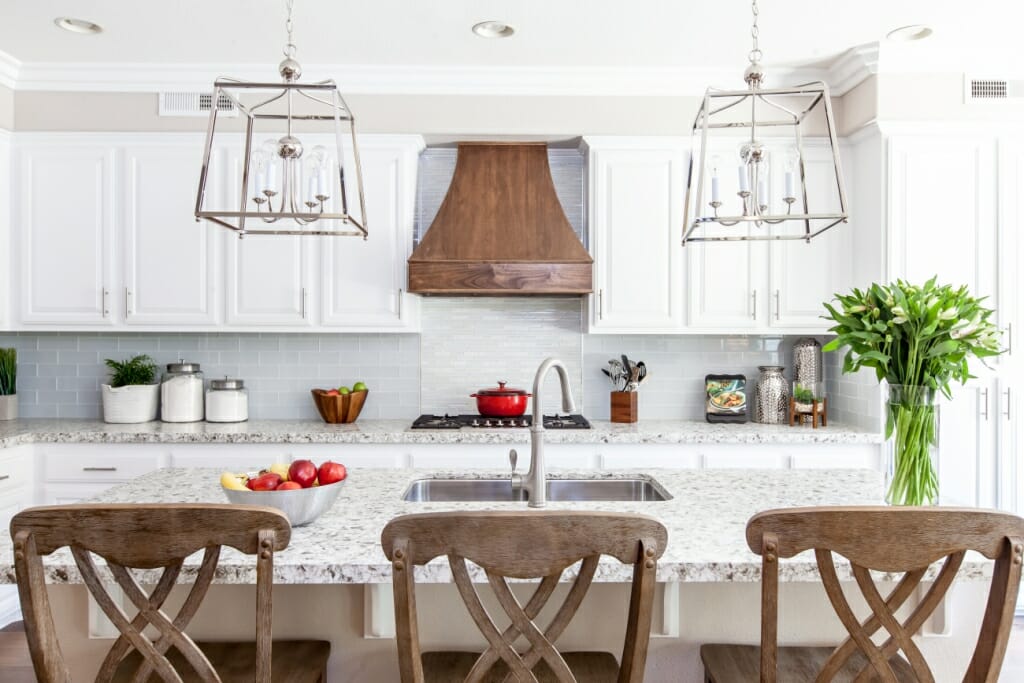
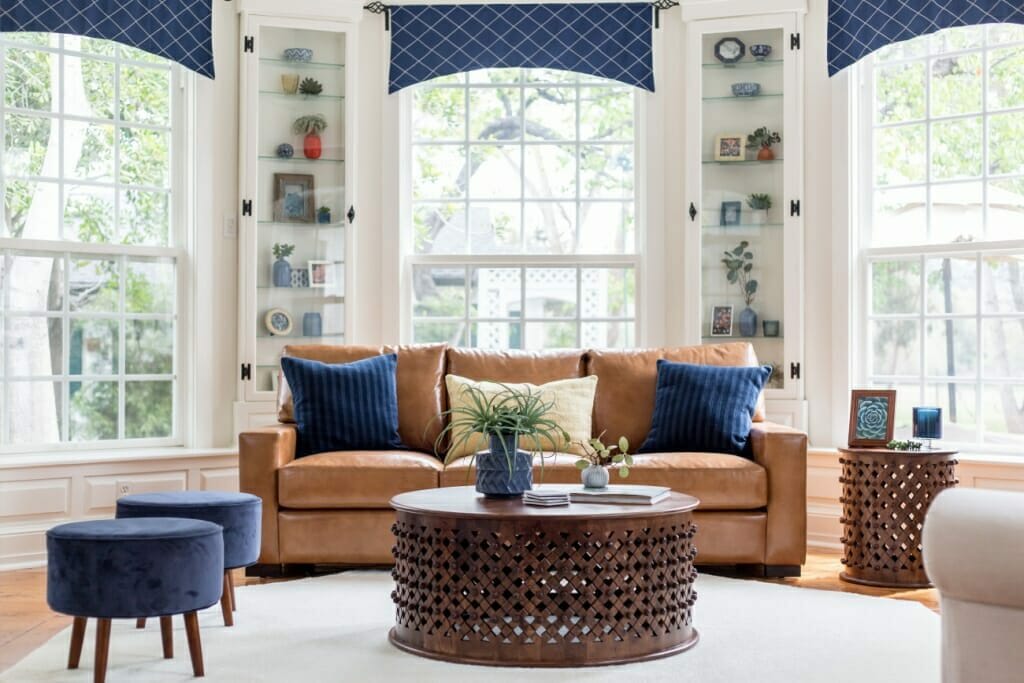
- Wide shots at an angle. This is typically the widest shot taken in the room. Focus on walls that have interesting features, such as windows or artwork. These shots will most likely require bracketing to obtain High Dynamic Range (HDR) imaging.
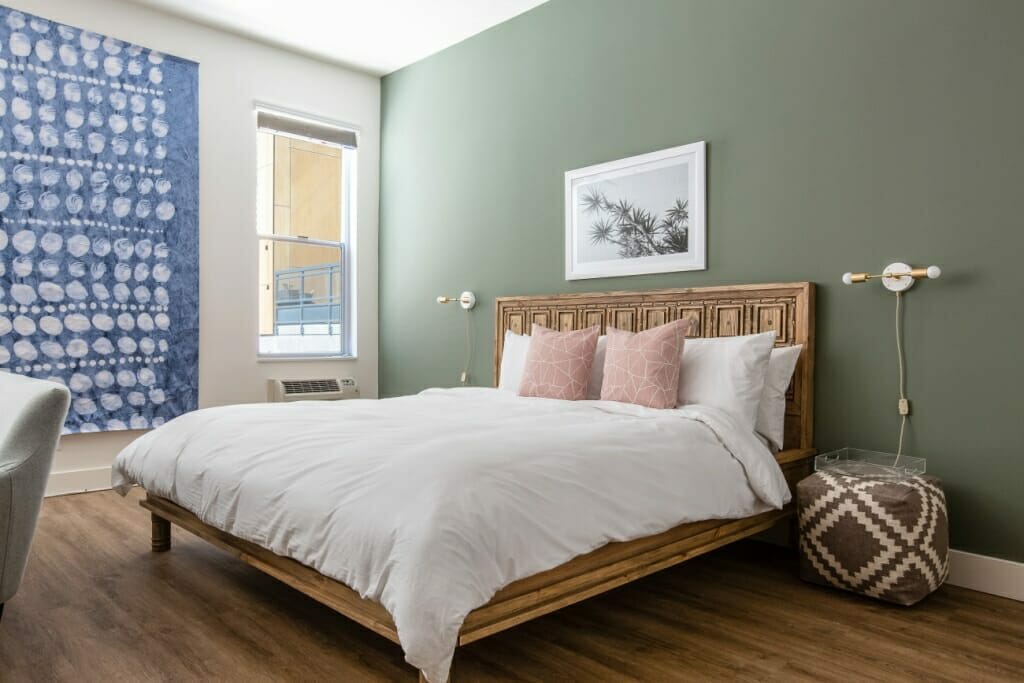
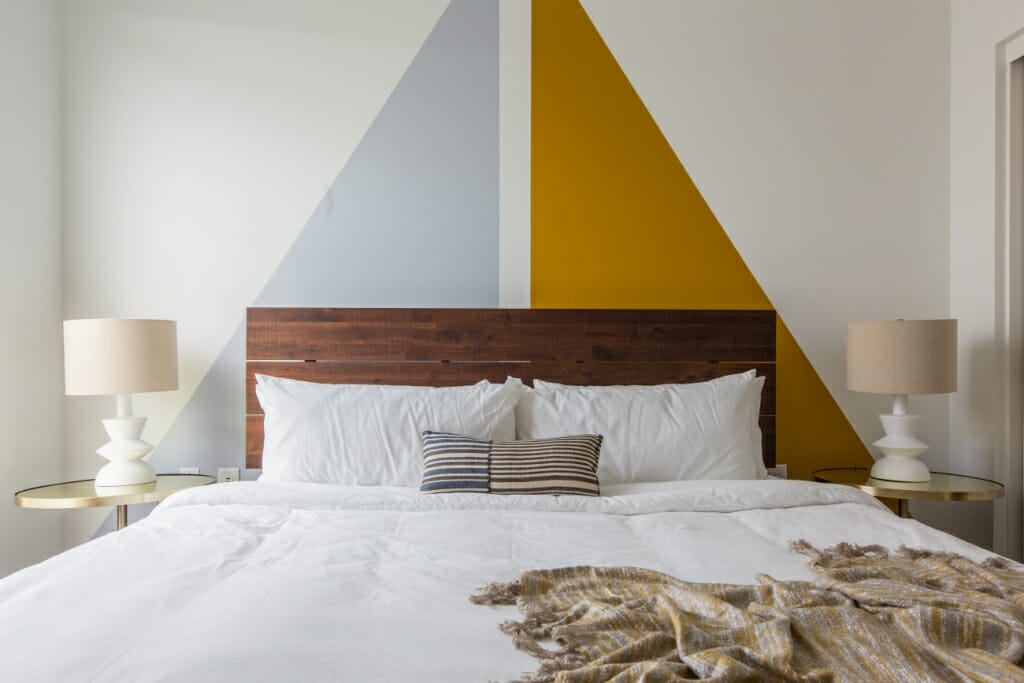
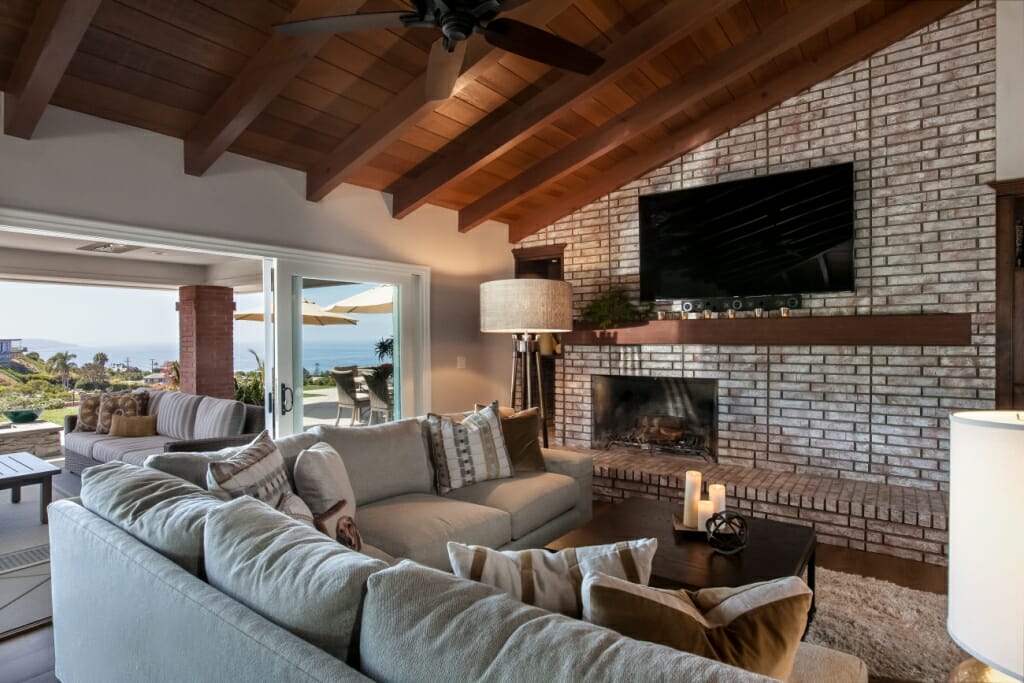
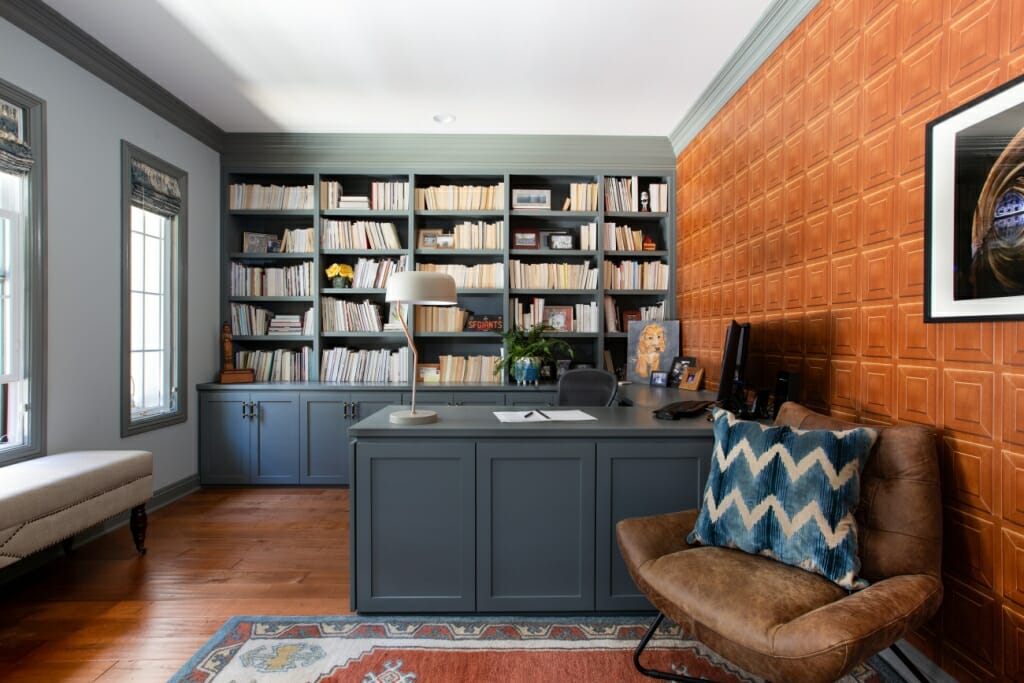
- One-point perspectives (straight-on). These are very popular on social media and often incorporate feature walls with elements like a fireplace, a built-in wall unit, or décor around a large window.
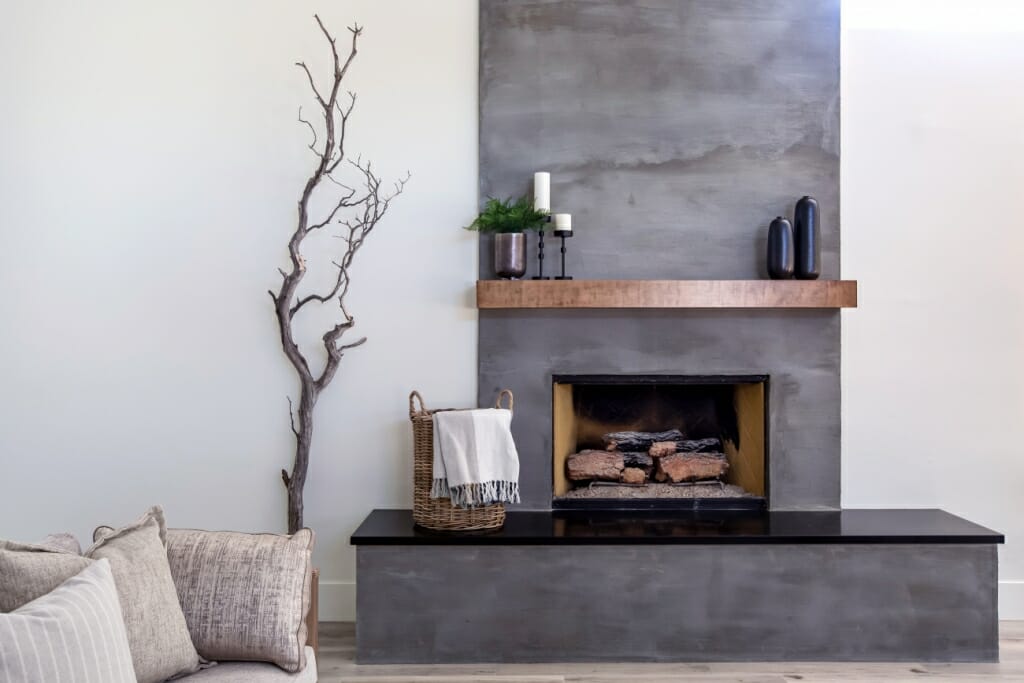
- Vignettes. Vignettes are tighter than wide or one-point perspective shots. They tend to show small moments in a room, typically a cluster of furnishings with small décor pieces. The vignettes tend to be the photos that tell the story of a space, create a mood, and show off the styling.
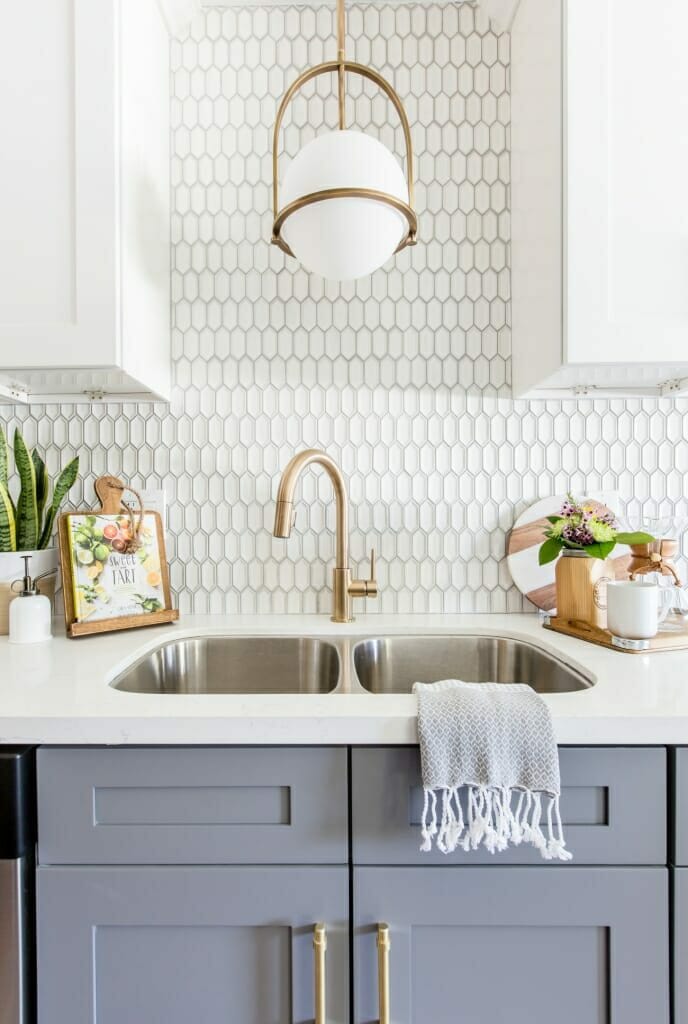
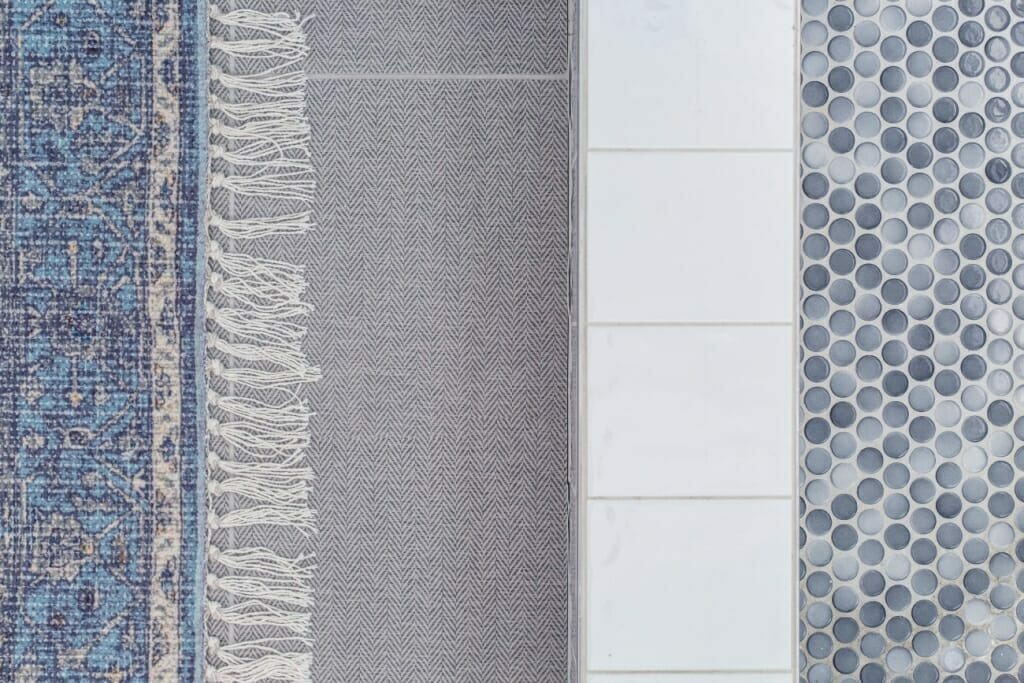
- Detail shots. These are even tighter than vignettes, and often show things like material, texture, or small decorative items in far more detail. If you’re shooting for a contractor or if there is intricate construction work, details are ideal for highlighting quality finishes on things like tile work or millwork.
- Transition shots. I use the term transitions for photos that show how multiple spaces connect. Showing the next room through a doorway, or opening a slider door to show a patio, can help immerse the viewer in a space. These are also photos which create a flow from one space to another.

- Outdoor Shots. Outdoor spaces are simply rooms without walls, so they should be treated as such. Don’t forget to style outdoor spaces accordingly and show them in transition photos, so the connection to the outdoors is clear.

5. Pick the Right Camera Height and Angle
Camera height will vary slightly, but generally speaking, you’ll want the camera to be about 5′ off the floor.
If you have a taller than standard counter height, or lower than usual furnishings, you’ll want to adjust the camera height so items don’t seem distorted.
The use of a tripod is crucial to shooting interiors, especially for wide shots, or any that will require bracketing in post-production.
When adjusting the tripod, make sure your camera is level. Look through the viewfinder to check your verticals are truly vertical, and in the case of one-point perspective shots, make sure your horizons are straight.
The simple act of straightening your verticals is probably the fastest way to upgrade your interior photos.
6. Bracketing Is Key to Even Exposures
Bracketing is when you take several shots of the same photo, each with varying exposures.
The idea is that you take one or more dark shots to expose for the bright areas (often this is the view out the window), one shot for ambient room exposure, and one or two shots for the darker areas.
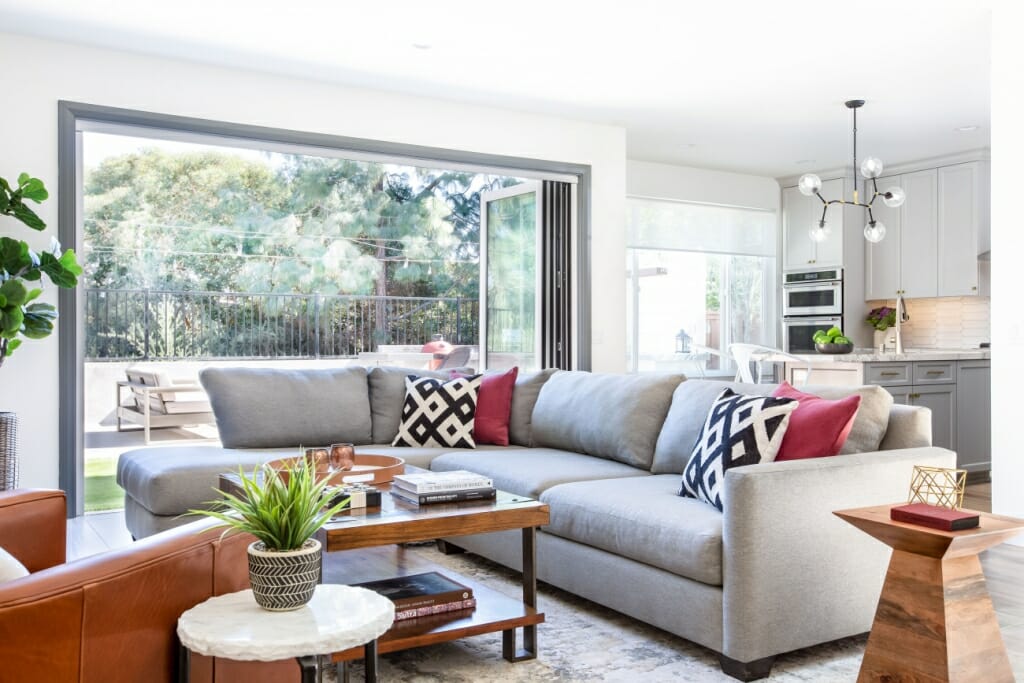
The bracketed shots are then blended into one image in Photoshop layers, to give a more even exposure. This technique mimics the way our eyes naturally balance out varying brightness in a scene, and feels more natural.
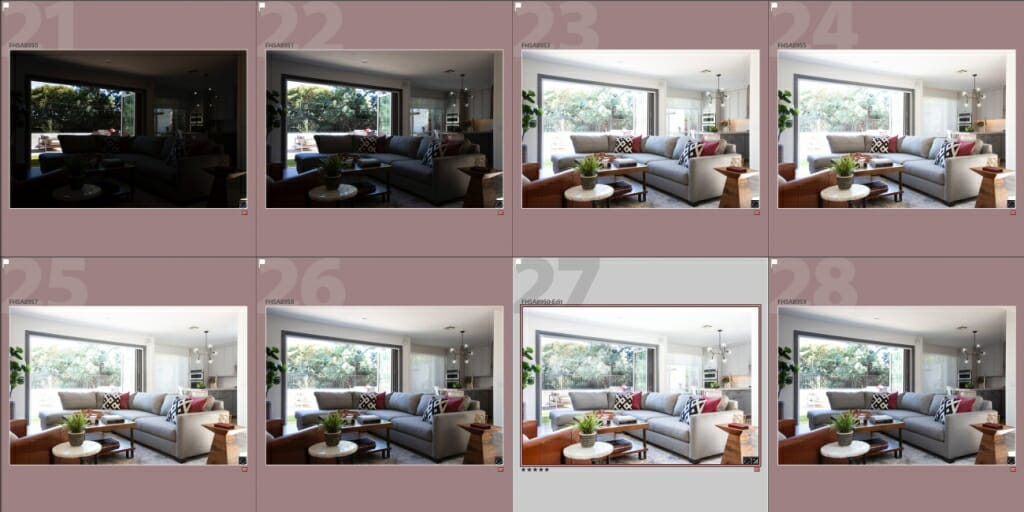
We’ll talk a bit more about HDR editing later, but make sure you take multiple shots of underexposed or overexposed areas, so you can compensate in post production.
7. Use an Off-Camera Flash for Better Lighting
Handheld flash units are a great way to keep costs down compared to strobe flashes.
Mount it on a tripod and use a remote trigger to aim the flash towards a wall or ceiling. This will bounce the light into the area you want to illuminate. Bouncing it, rather than aiming the flash directly, will diffuse the light and cause fewer shadows.
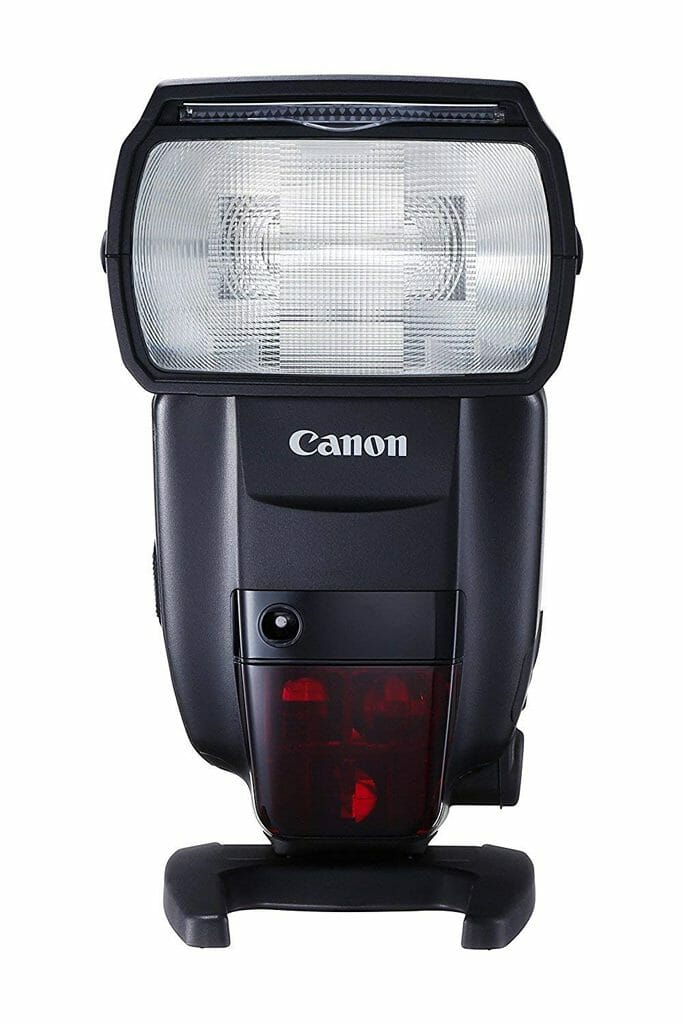
The idea is to add soft light to fill in or highlight areas, while maintaining a natural look. Since you’ll be bracketing exposures, taking extras shot of specific areas lit up by a flash will help add dimension and interest to the final photo.
8. Choose the Best Focal Length for the Shot
It may be tempting to enter a room and shoot at the widest focal length possible–but please resist!
Typically, you want to be in the 20-24mm range for wide shots: the 24mm tilt-shift lens offers a great focal length for these type of shots.
If you need to get more of the room in the frame, try stepping further back or just outside of the room to get the angle you need. Shooting too wide from inside the room will only add distortion. A tighter frame will also give your photos a high-end look.
9. How to Edit Your Interior Images
The main goal of editing interiors should always be for a natural look, not one that feels fake or stitched together.
Our eyes naturally balance out bright and dark so we see a range of light all at once. Our cameras, however, don’t work in the same way. We can, however, create that balanced look for photos through HDR.
Be wary though, HDR editing is often taken to extremes. Finding the balance that feels right for you and your photography style will take time, so be patient.
HDR Editing Workflow for Interior Photography
HDR processing can feel a bit overwhelming at first, but practice makes perfect. Follow our step-by-step guide below:
- Import all your bracketed photos into Lightroom, then select the images you want to merge;
- Once several bracketed shots have been selected, right-click (or Command + click on a Mac) for the pop-up menu. Select ‘Edit in’, then select ‘Open as Layers in Photoshop’;
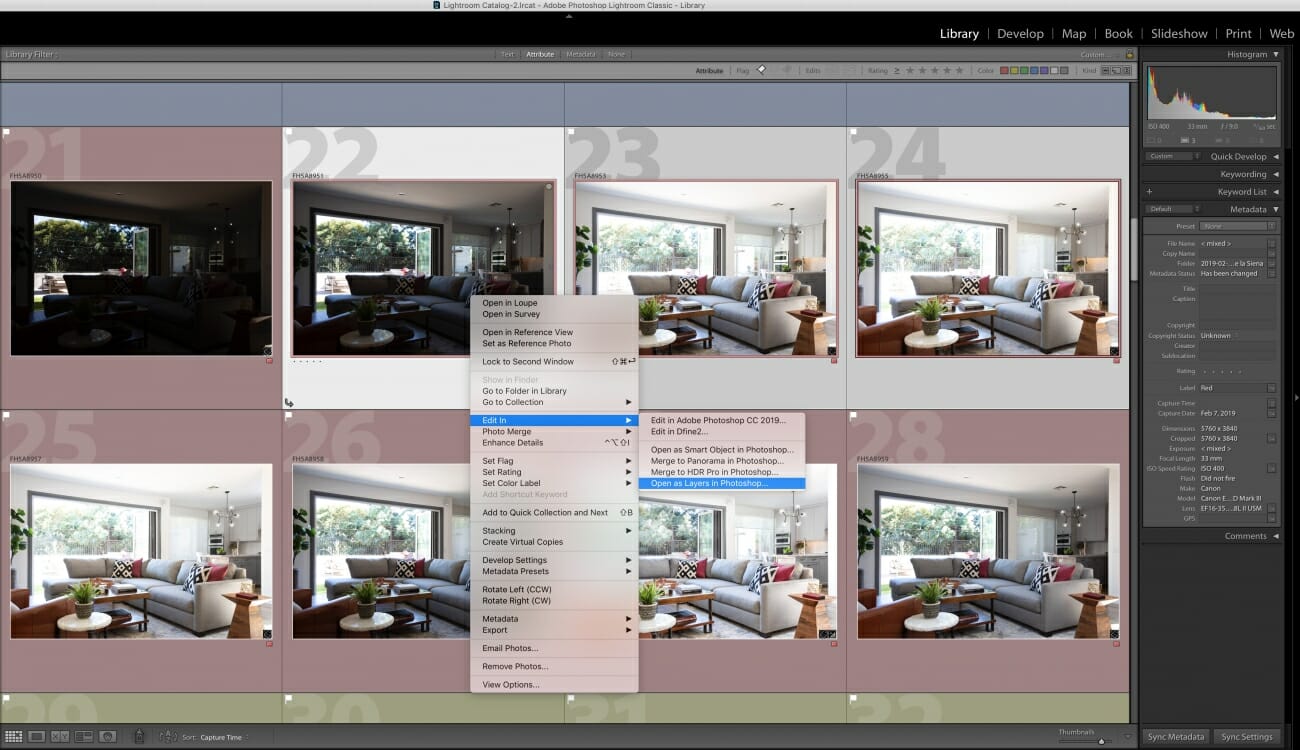
- Photoshop will automatically open and your selected photos will as be shown as layers. Use mask layers to blend shots together, using wide, very soft brushes so that effects are subtle;
- Once blending is complete, save the Photoshop file and close it;
- Return to Lightroom, where the new file has been automatically added. Add the finishing touches in Lightroom; and
- Export from Lightroom in JPEG format for your client.
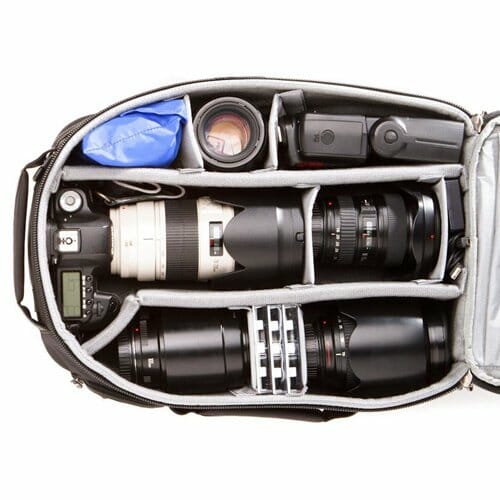
10. Use the Right Gear for Your Interior Shoot
It should go without saying, but the day or night before a shoot you should organize and check all your gear. Make sure you prepare and pack the following:
- Spare batteries, memory cards and even an extra camera body in case of technical emergencies;
- Give yourself time to fully charge all your batteries–don’t forget to pack your chargers in case you need to charge batteries on location;
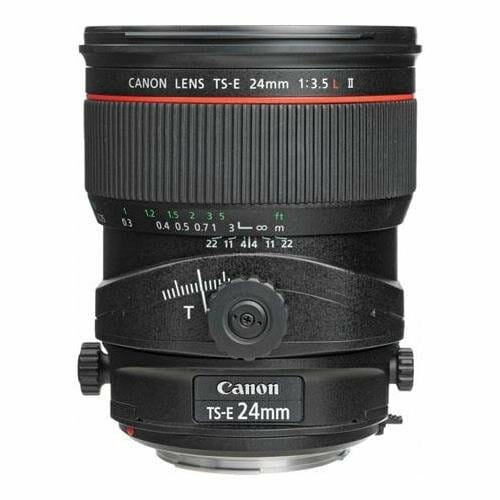
- Pack a wide-angle lens, such as the Canon 16-35mm f2.8 (or equivalent). You could also use the Canon tilt-shift TS-E 24mm f3.5L II lens, often used in tilt-shift photography. Be sure to avoid ultra-wide lenses though, as you’ll be shooting at tighter lengths than you would for real estate photography;
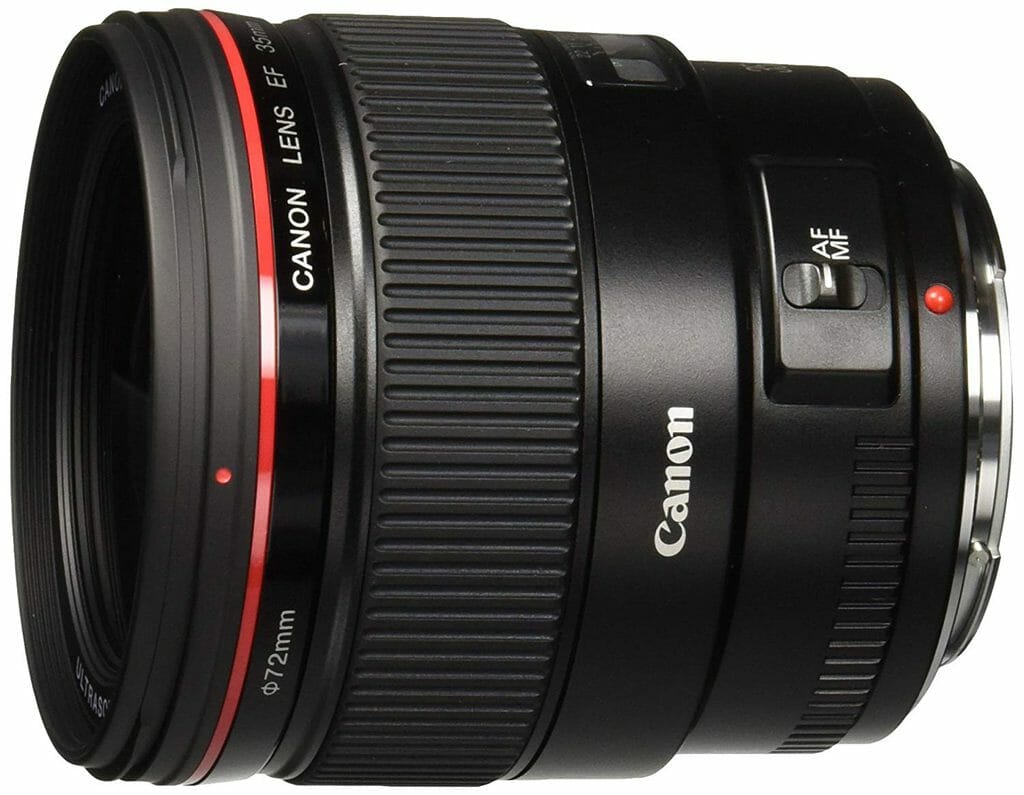
- Pack a 35mm or 50mm prime lens for detail shots. I love the 50mm lens, but this one will come down to personal preference. Often, though, you don’t have the space to use anything longer than a 50mm; and
- Pack a flash unit or strobe, in case you need extra light in low light conditions.
Time to Get Out and Shoot
Now it’s over to you–it’s time to get out and practice. Hopefully, our tips have shown you that magazine-worthy interior photography is not so unattainable.
Walk through these steps at your next shoot and get one step closer to super stylish interior images.
Now that you’ve learned these tips for stunning photos, you’re a better photographer.
Guaranteed.
But the fact is, the journey doesn’t stop there. There are more tips, tricks, and secrets–all of which will help you take gorgeous photos.
And if you want to learn all of these secrets, I recommend you sign up for the PhotoBlog newsletter. We send our subscribers all sorts of great stuff–including the tips, tricks, and secrets, straight from the experts. All to help you capture world-class photographs.
Did I mention that it’s all totally FREE?
(Oh, and we’ll send you a natural lighting cheat sheet–designed to help you use light in ways you’ve never considered.)
So to start taking stunning photos, enter your email: