In previous articles, you’ve learned about basic flash functions, and what all the settings and tools on the flash are used for. Now it’s time to learn about how to use bounce flash to take better photos.
If you missed the other two articles you can find them here:
Bounce flash – what is it and why use it?
Bounce flash is exactly what it sounds like. Instead of pointing the flash directly at the subject, you aim it in a different direction and bounce it off of another surface.
The reason you want to do this is to make the light source larger. Quality of light is directly related to the size of the light source, and a speedlight (or flash) is very small relative to the size of the subject’s face.
It will produce hard lighting with harsh shadows and a lot of contrast. Aimed directly at the subject it also makes your image look flat and dimensionless. We’ll look at some example images in a bit.
So if you want softer (less contrast, more flattering) light you need to make the light source larger. You can do that by using fancy modifiers like umbrellas and softboxes (I’ll cover those in a future article).
Or you can use the bounce flash technique which is much simpler and you don’t have to buy anything else (bonus!).
The bottom line is that learning how to bounce your flash will help you take better photos. So let’s get into how to do it!
What you need to do bounce flash
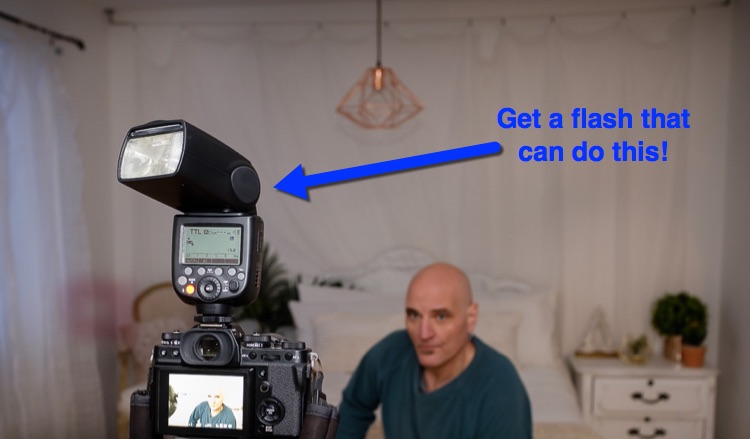
There is only one thing that you need in order to do bounce flash – a speedlight that has tilt and rotate capabilities. That’s it, it’s that simple.
If you don’t already have a speedlight (another term for flash, Canon calls them Speedlites) you don’t have to spend a fortune to get one. The big brand name ones that are made by the camera manufactures can cost hundreds of dollars. Luckily, there are other less expensive alternatives that work great!
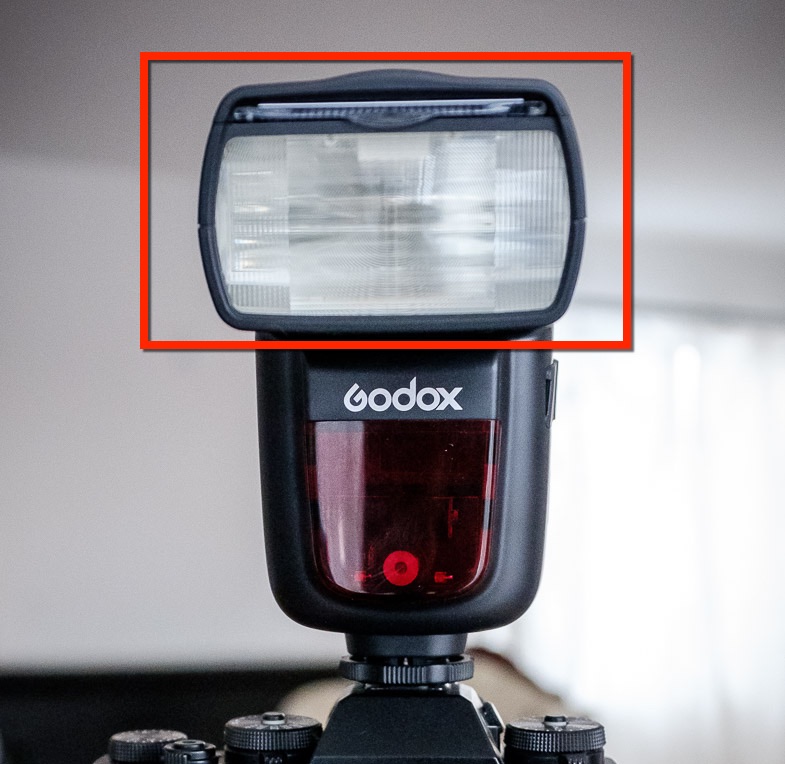
Godox and Yongnuo are two third-party brands that are quite good. I have two Godox flashes myself (see the photo above) and I love them. They cost me less than $100 each.
The Godox TT350 is about $85 and the Godox TT600 is only $65 so you can even get a couple of flashes for less than $200. For comparison sake, a Canon or Nikon flash will run you over $400-500 just for one!
As a handy reference, I put a few into a shopping list on Amazon for you if you need to buy a flash. CLICK HERE to shop for a flash.
Basics of Bounce Flash
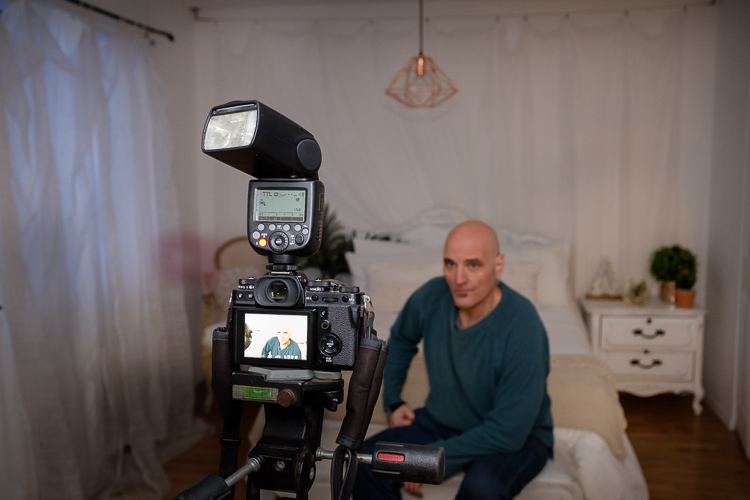
The best way for me to explain bounce flash to you is to show you the flash and how it’s set up, and the resulting image from each option.
For the images below I used the following settings:
- Manual Shooting Mode (on the camera)
- ISO 800
- Aperture f/5.0
- Shutter speed 1/15th of a second
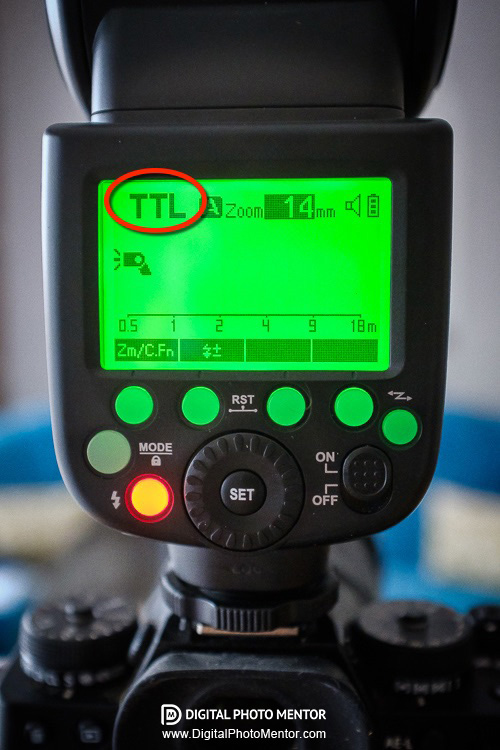
- Flash was in TTL mode with FEC (flash exposure compensation) set to zero
I used the slightly higher ISO and slow shutter speed to capture just a bit of the light in the room as well so the images weren’t totally flashed looking.
Let’s look at the examples below.
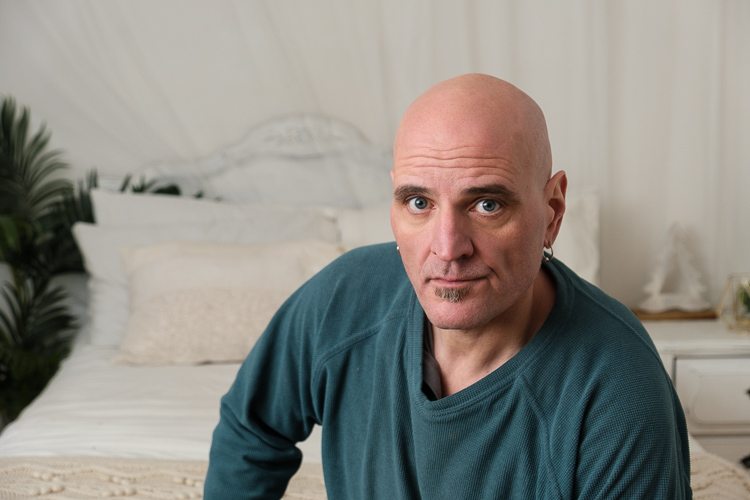
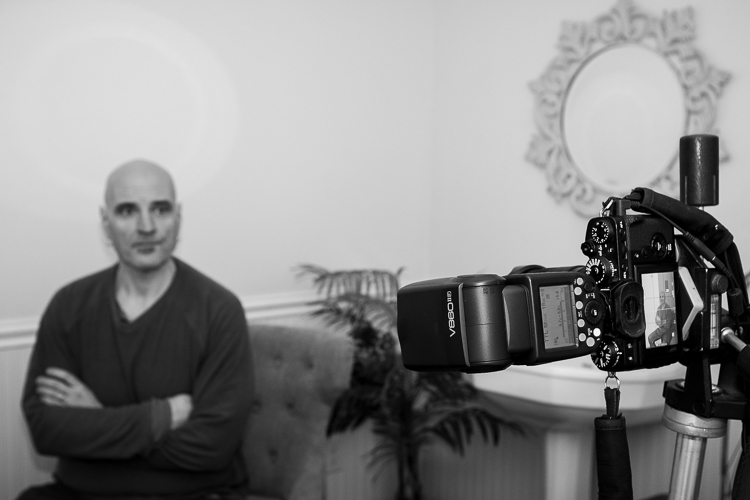
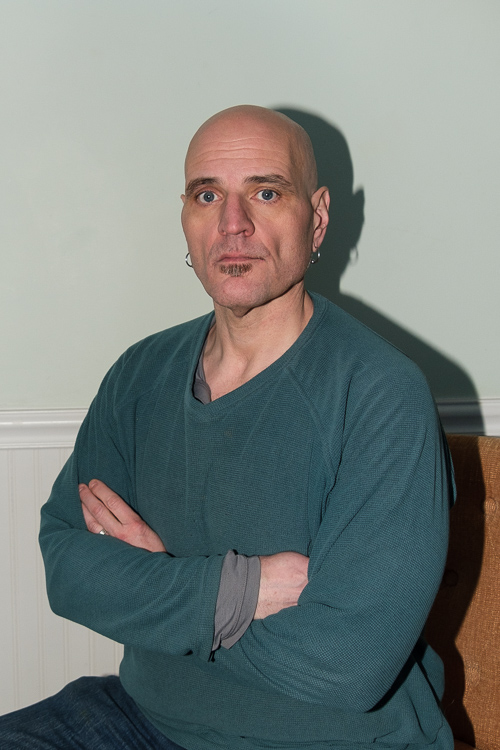
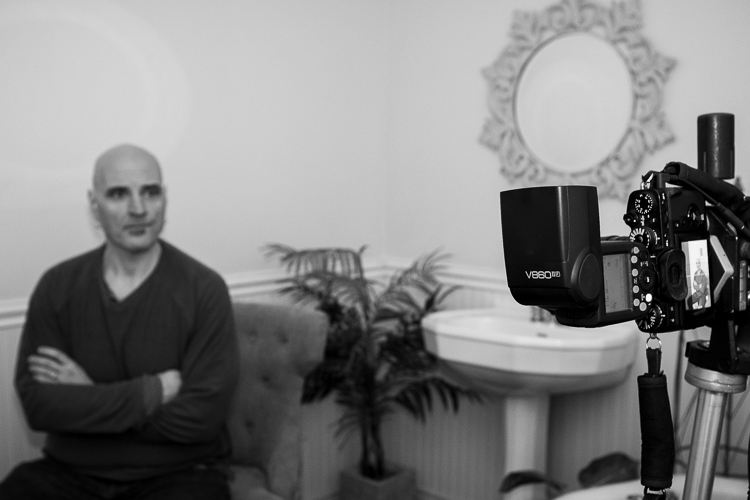
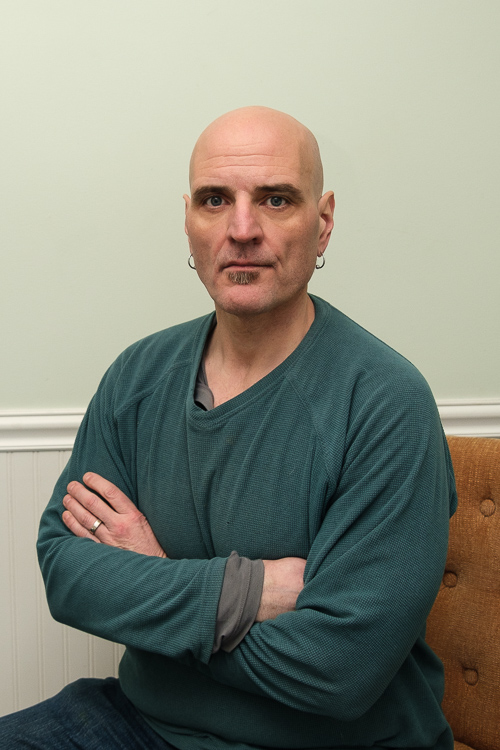
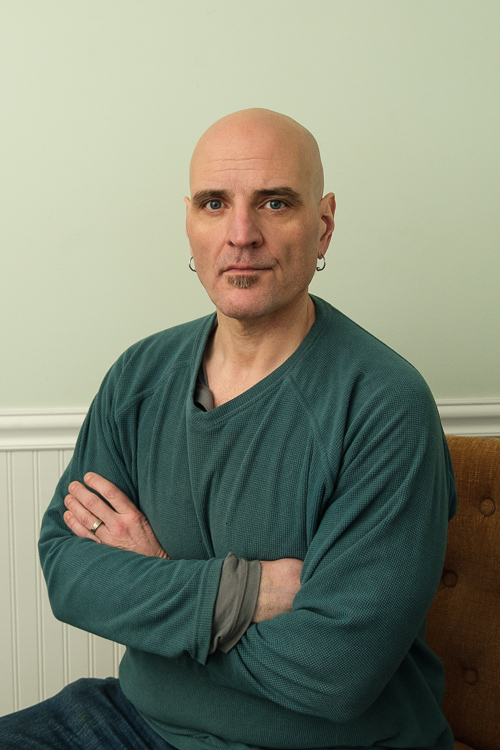
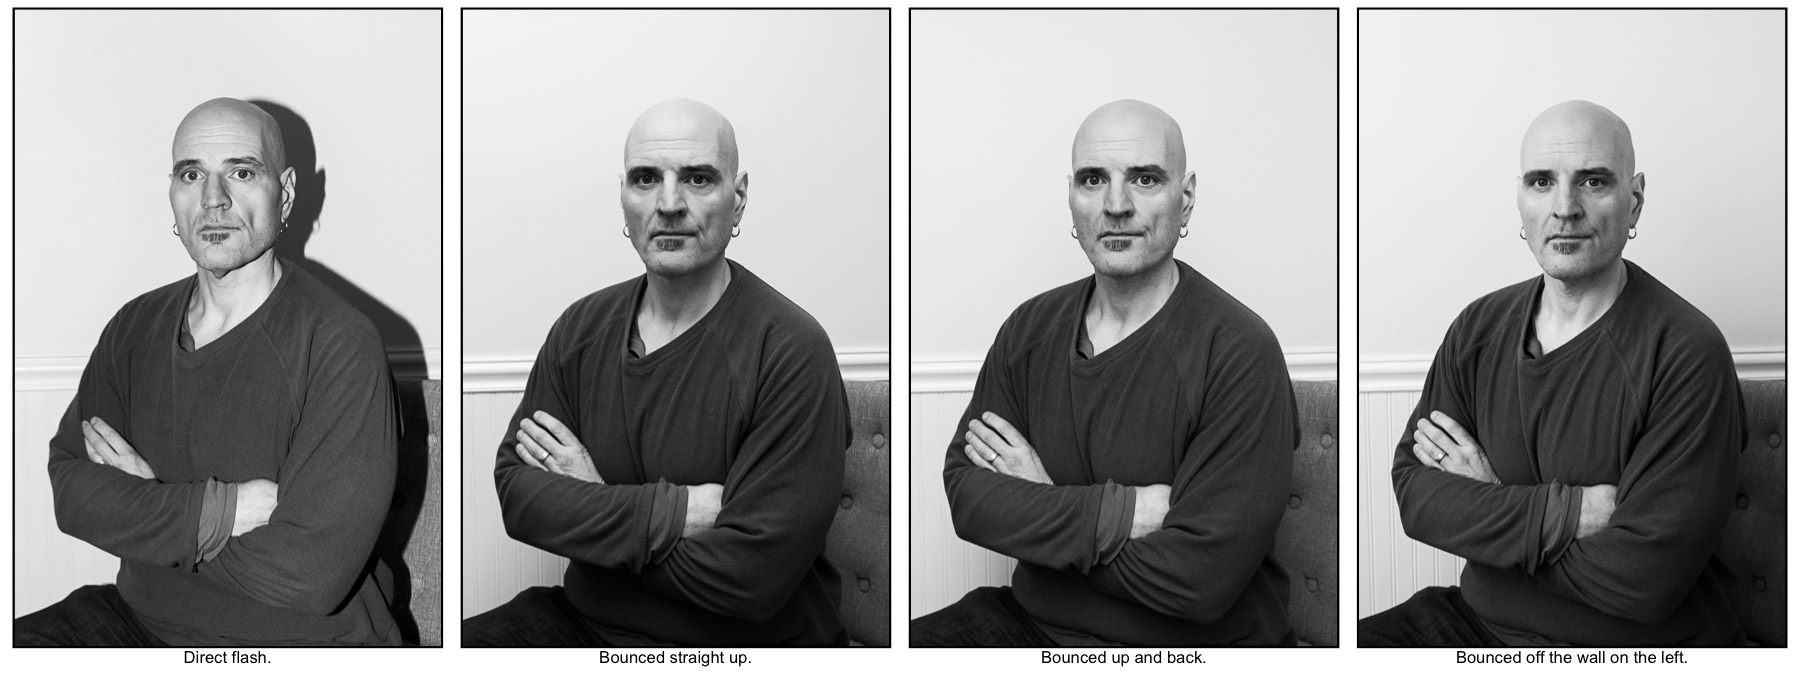
Direct Flash
First, here is a shot that was taken with the flash aimed directly at the subject (my husband Rob). Take a close look at the lighting, what do you notice?
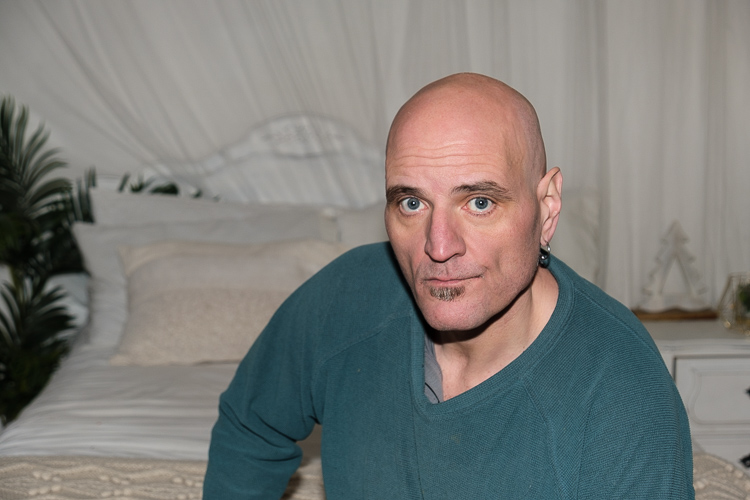
What I want you to notice here are a couple of things in particular:
- The big shadow under his chin. That is from the flash being slightly higher than the camera, it produces a shadow underneath the chin like this.
- The flat lighting on his face. Both cheeks are lit equally. That makes the image lack depth and makes his face look 2-dimensional (flat).
The other thing that can sometimes occur when using direct flash is red-eye. But using any of the bounce flash techniques outlined below will help you avoid that for good.
Flash Bounced off the Ceiling Above
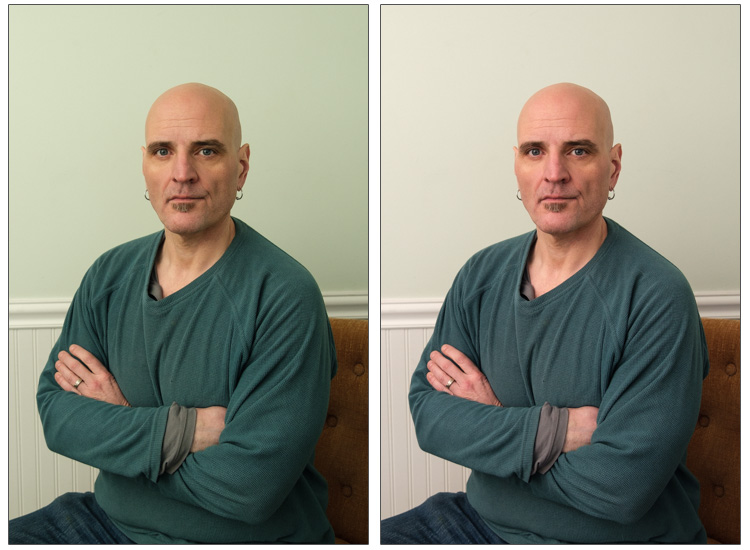
Next up, the following image was taken with the flash aimed directly up, bouncing the light off the ceiling directly above the camera. Take a close look at the lighting, what do you notice this time?
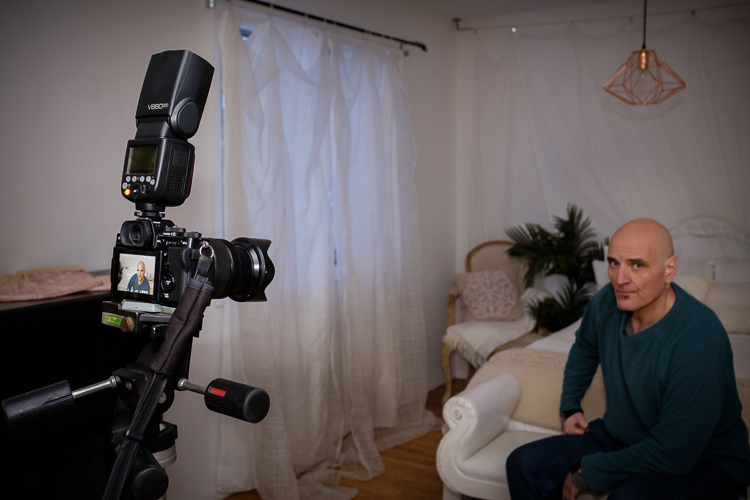
Can you see the difference in the resulting image below right away? It’s better than the first shot because the light isn’t as harsh (hard) now.

This is because the light source is no longer the actual flash head itself, it is the part of the wall that is being lit and bouncing light back. That is a much larger light source (the wall compared to the flash head) so therefore the light is softer.
The shadows are deeper under his chin, and under his eyes, but they are not as crisp. The shadows don’t have the same hard edge, meaning the transition from light to dark isn’t as rapid.
This is called “edge transfer” and you want the light to fall off into shadow more gradually. That is a sign of softer lighting. That is what you want for most subjects.
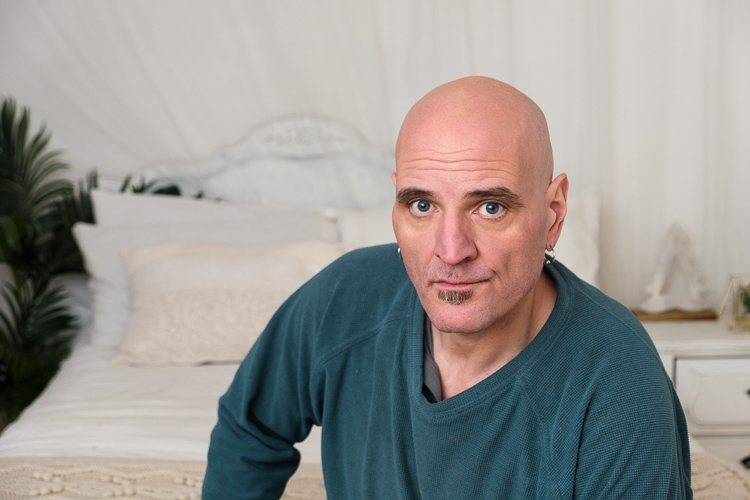
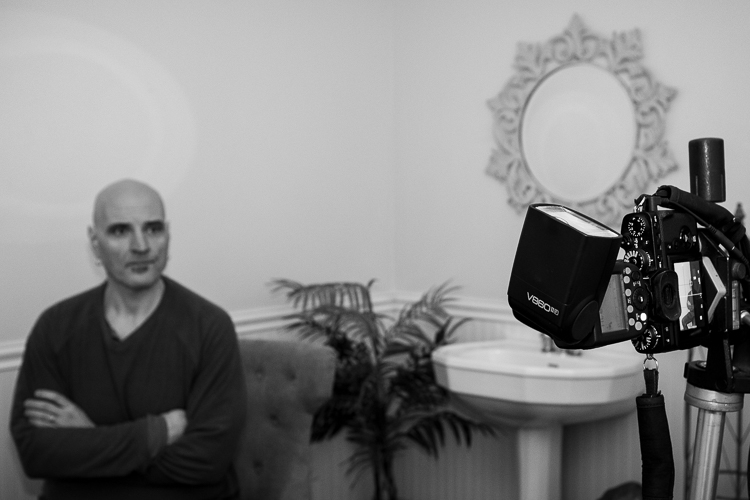
Flash Bounced up and Behind the Camera
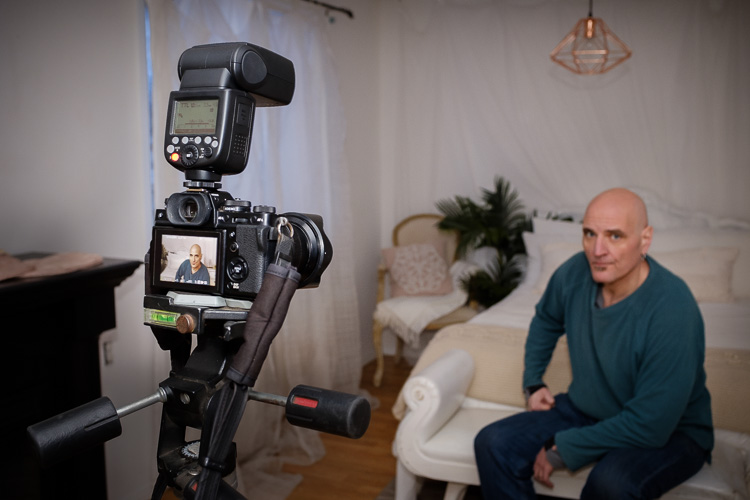
Next, we’re going to see what happens when the flash is aimed up, but slightly behind the camera. This is my favorite trick to use when there are no other options.
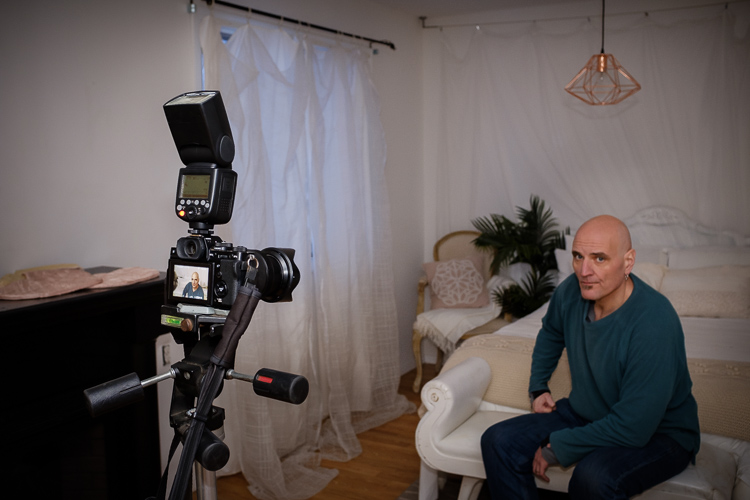

There is a subtle difference between the image above and the previous setup, but it’s an important one. Look closely at his eyes.
In the one with the flash aimed straight up his eyes are dark, there is no light hitting them at all. In the one above with the flash aimed up and back. now there are catchlights (the light in the eyes). That is a good thing!
Be really aware of this, especially for people with really deep-set eyes. That is why I prefer this method over just bouncing straight up, and it’s a simple fix.
Flash Bounced to the Side
The next option is to bounce the flash to one side or the other. This is a great choice if there is a white or neutral colored wall available for bouncing the flash.
Just be aware that if whatever you’re bouncing the flash off has any color tint, it will cast that color onto your subject as well.
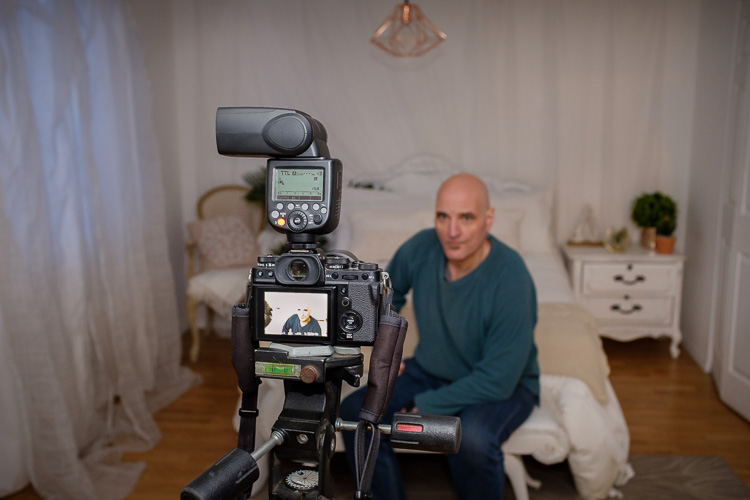
Notice how the side-lighting in the image above adds shape and dimension to his face. You want shadows, just good ones in the right direction. The lighting pattern looks like a complex studio setup with big lights and multiple flashes.
But it is just the light from that one flash, on-camera, simpled rotated and aimed to the left. That is not too hard, right? You can do this!
NOTE: If there are no white or neutral walls available to bounce, you can get a large white collapsible reflector to take with you anywhere. You don’t even need walls then, just someone or a stand to hold it. Super portable and affordable.
Bouncing Other Directions
Now that you have the idea you can literally aim your flash anywhere to bounce it. The idea is to make the light source bigger, thus taking your small flash and making the most of it.
In this next example, I bounced the flash up and back behind the camera into a corner of the room.
Here I want you to notice how even the lighting is on his face. Look at his left and right cheek here, compared to the image with the flash aimed to the side above.
Neither is right or wrong, I just want you to see what each option does so you can make educated choices.
If you want more dramatic lighting like for a man, use the side lighting. If you want more even light for say kids photos, then bounce into a corner of the room. It’s about choosing the most appropriate or “best” option for the situation and your subject.
Shooting Vertically with Bounce Flash
Let’s take a look at what happens when you turn the camera to shoot vertically (portrait orientation).
Notice in the setup image above, not only is the camera rotated but so it the flash. In fact, it’s not beside the camera not on top anymore. Let’s see what kind of image this makes.
I purposely positioned him close to the wall here because this is a common issue that many beginners face. A huge ugly shadow on the wall, ever get one of those?
So instead of learning how to Photoshop it out (one of my least favorite sayings), let’s take what you have just learned about bounce flash and apply it here.
Bounced straight up
I rotated the flash once again to point straight up at the ceiling, which in this case was white.
Once again, the eyes are dark. So let’s keep going.
Bounced up and back
This is why you want a flash that can rotate and tilt in all different directions. Take note of how it’s oriented in the setup above.

Better, now he has light in his eyes again. Always check the eyes for light, that’s your goal!
Bounced to the side
Okay, this is where it gets tricky in this room. Do you remember what I said about bouncing off of colored walls? Notice anything here?
So what do you expect will happen when I bounce off those walls?
He’s going to be green, and you know what they say right? It’s not easy being green!
Well, that’s not so great. But in this case, because I was shooting RAW format files, it was fairly easy to correct using Lightroom.
Just take note if you’re in a room with colored walls. The stronger or brighter the color of the walls, the harder it will be to correct in processing – even with a raw file. I tried with purple walls once, was a nightmare and I had to convert the images to black and white to save them.
So take note, in a situation like that I’d suggest just using the bounce up and back technique instead (assuming the ceiling is white or neutral). Let’s compare the four images in black and white, it will help you see just the light and not the green walls.
Conclusion
As a final comparison to bring it all together for you, I did one last test using a couple of small diffusers I have. One came with my Godox V860ii speedlight kit, and the other I bought long ago.
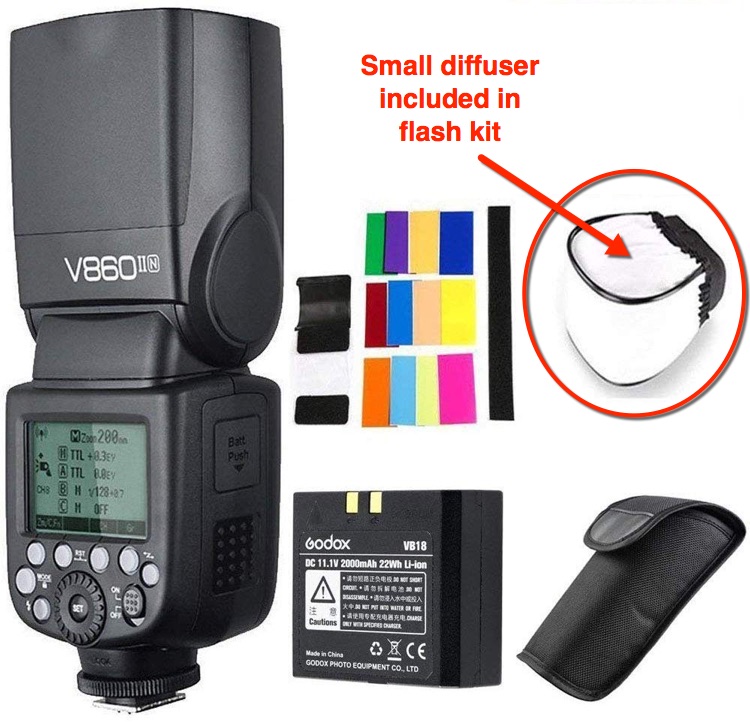
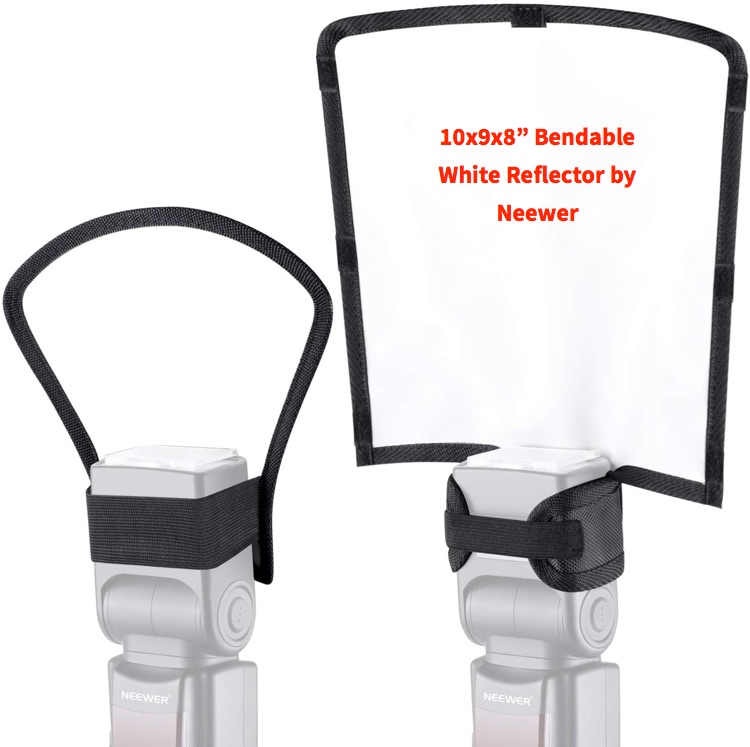
They don’t make the one I have anymore but it’s the same idea. It’s just a little white reflector that you attach onto the speedlight to bounce light forward. You can even use an elastic band and a piece of white cardboard, that will give you the same results.
NOTE: I covered using the little white card (bottom left image above) that comes built-in with most flashes in this article: How to Use Your Flash – What all the Buttons and Settings Mean.
But let’s see how those tools stack ut against the bounce flash results.
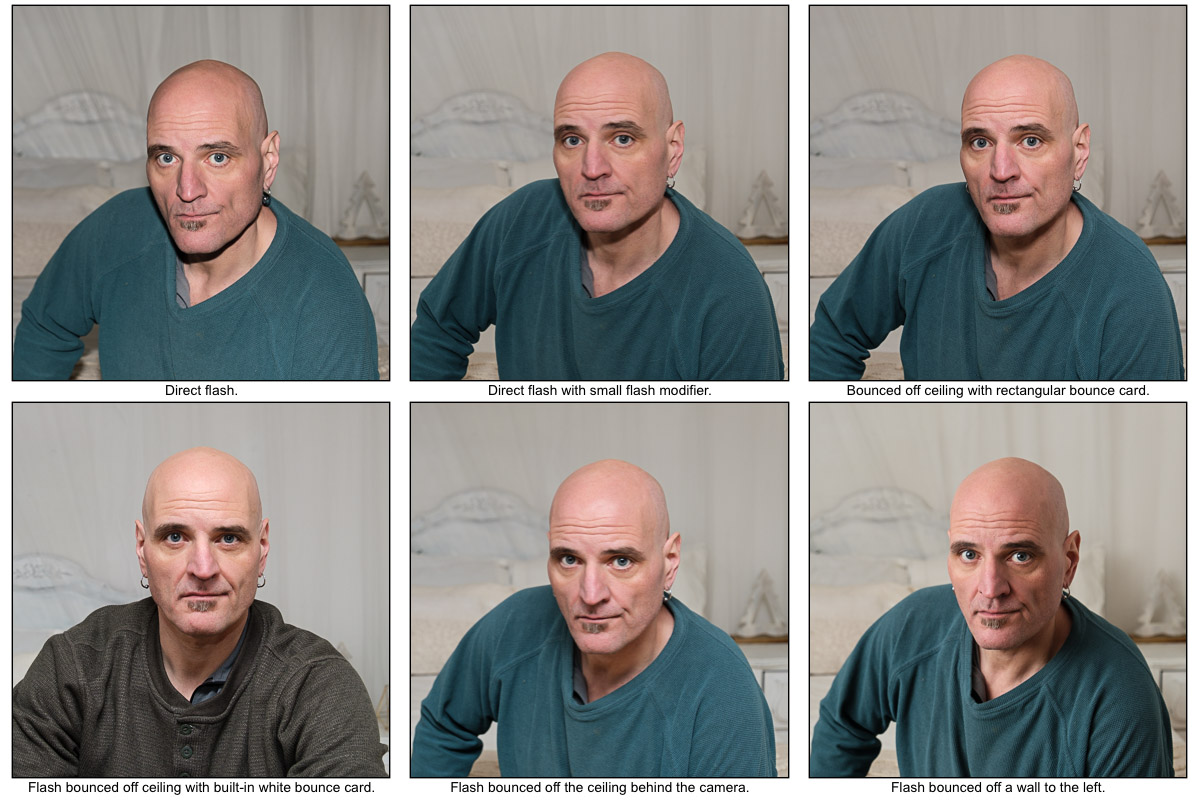
Can you see a progression of good > better > best in the images above?
The images on the top row are using direct flash or a relatively small reflector still and that shows in the big shadows under the chin and flat lighting on the face.
Do you agree that the three images on the bottom row above are better than the ones above? But it wasn’t any harder to create those, in fact, it was easier. I had a heck of a time getting the little diffusers to stay on the flash and took more time mucking around with them than it did to simply rotate the flash.
I hope that you’re starting to feel like you can master flash photography after this and the previous articles. Keep practicing and you’ll get the hang of it and start making images you’re proud to share.
Cheers,