In this flash photography tutorial, I’m going to provide some practical tips on how to use a flash for total beginners. Even if you’ve never taken your flash out of the box, you can do this because I will show you how to use it in the simplest way possible.
Now is the time to learn because a flash will come in handy at Christmas parties and holiday gatherings. You got this! I promise it’s not as hard or as scary as it may seem.
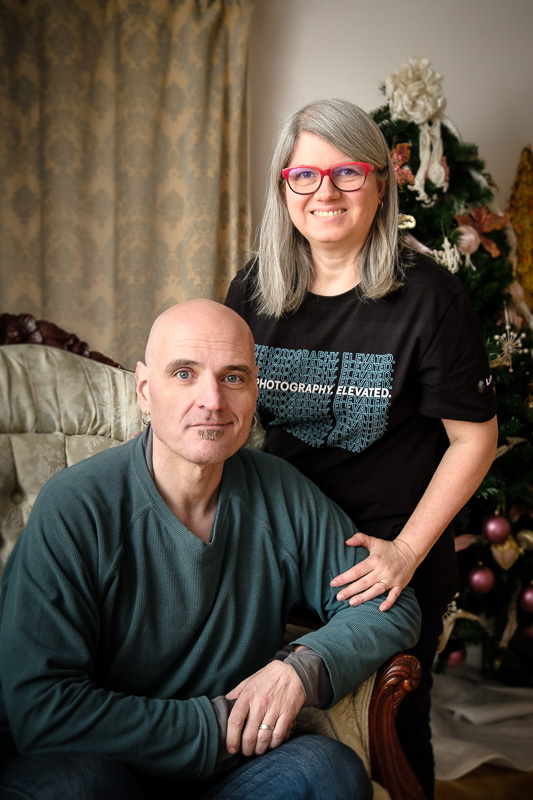
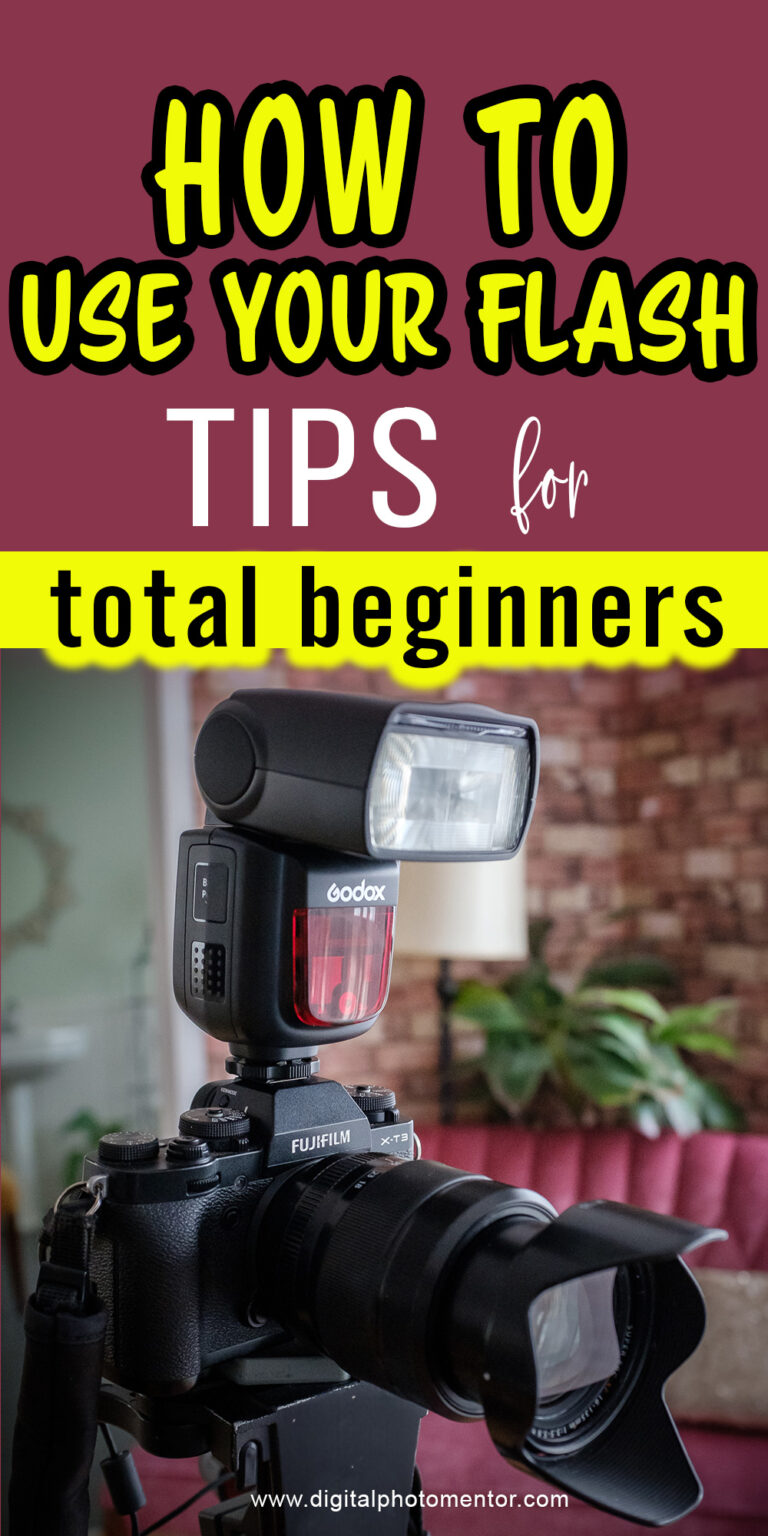
I have used a slightly more advanced technique in the image above, called bounce flash. I’ll cover that in a future article but it’s really not that hard either. You literally just turn the flash head to face a side wall and bounce the light off that.
Buying your first flash
If you haven’t purchased your first flash or speedlight yet there are a few things to consider. These are the most important features to look for:
- Make sure the flash is compatible with your camera brand and model. Most third-party flash manufacturers make units for all kinds of cameras from Sony, Pentax, Canon, Nikon, Fuji, and Olympus. So just check that specs to make sure you get the right one. Branded flashes will most likely be safe (i.e. a Nikon flash on a Nikon camera) but double-check to be safe.
- Buy a flash that has a rotating and tilting head. You will need that in order to do bounce flash which will cover in the future.
- The guide number. This just represents the power output of the flash. The higher the number, the more powerful the flash. So if you want a flash for general purpose use don’t get the smallest one, but you likely don’t need the biggest either. The ones I have range from GN (Guide Number) 36-60.

You do not have to spend hundreds of dollars on a flash either. If you opt for a brand name one to match your camera (i.e. Canon, Nikon, etc.) you’ll pay a lot more than if you go for a third-party one.
Companies like Godox, Nissin, and Yongnuo make some great speedlights for every camera brand and model. I personally have two Godox ones and a remote trigger (used to fire them off the camera) and I spent about $250 total for them both!
Here is a quick idea list for flashes and accessories. I recommend checking out the Godox Mini TT350 TTL if you want something small and light (it runs about $85 USD). Or if you want a more powerful model look at the Godox V860II TTL (retails for around $179 USD).
Note: For comparison purposes, similar flashes in the Canon line-up will run you about $199 and $499 respectively for very similar products. So there is a big difference in price, but NOT in quality.
Using the flash on the camera
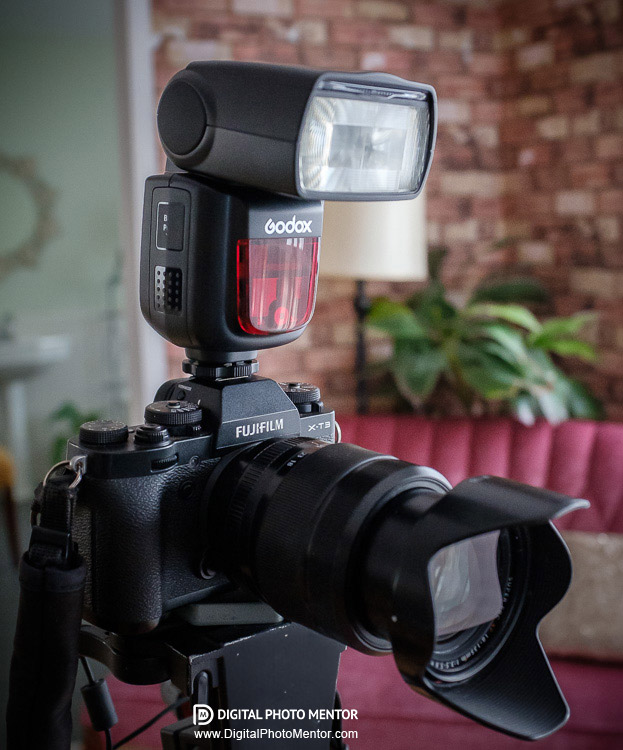
The simplest way to use your flash is to attach it to the hot shoe on top of your camera. So for the purpose of keeping things simple, that’s all I recommend doing for now.
NOTE: A flash may also be called a speedlight, so you may see these terms used interchangeably. Speedlite is a Canon trademarked term to refer to Canon speedlights, just to confuse you!
Once you get the hang of using flash you can expand your knowledge and horizons and start using off-camera flash.
But don’t complicate things and confuse yourself right from the get-go.
Just keep it simple. Master this step first, then you can go to the next level.
I will be doing a series of articles on using flash over the next few months that will take you from here (using our speedlight for the first time) to flash mastery.
So just follow along and you’ll eventually get there. Don’t try to build Rome in a day.
Attaching the flash to the camera
To mount the flash to the camera, use the hot shoe on top of the camera body. Make sure the flash is not in the lock mode and slide it into the hot shoe.
Never force it or you can risk damaging the contacts. If it’s not doing on easily, double-check to ensure the flash’s locking mechanism is set to unlock.
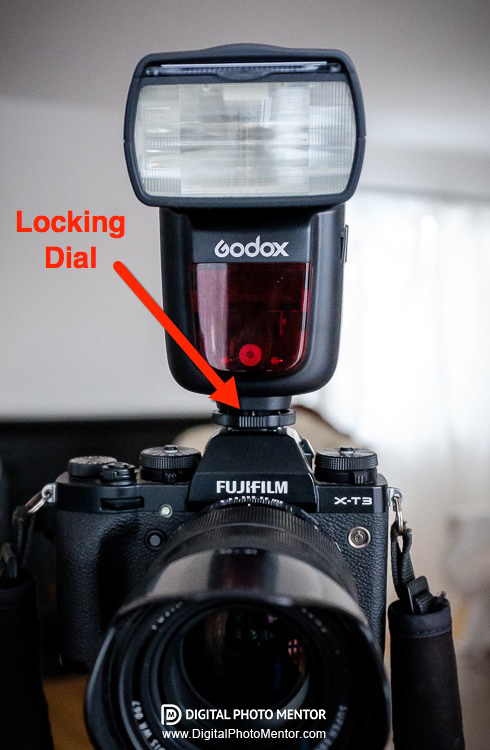
Make sure the flash is pushed all the way on, as far forward as it can go. Then turn the locking dial to secure it. Failure to do so could result in the flash falling off and getting damaged.
Flash Modes
Before you mount your flash to your camera, let’s back up and go through some of the settings on the flash. There are many options and it can be overwhelming to know which ones to use.
I’m going to give you the simplest ones, so use them for now until you graduate to the next level.
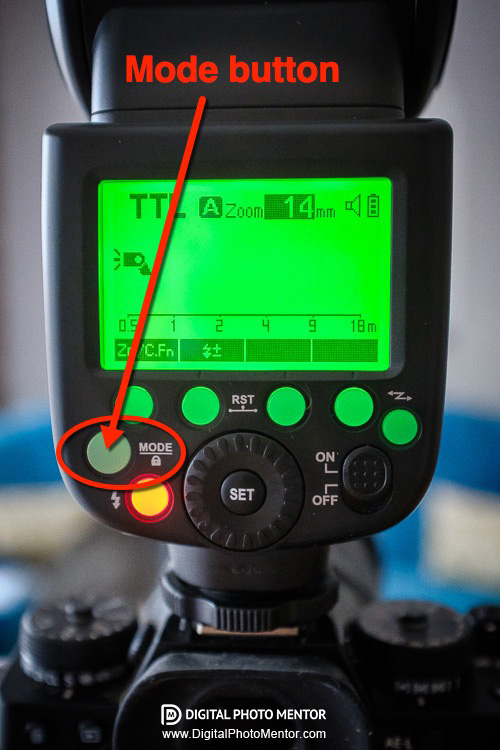
First of all, there are three different flash modes on most speedlights. You set the mode usually by pressing the mode button on your flash. It may look something like this. If you aren’t sure where to find it, check the user manual for your speedlight.
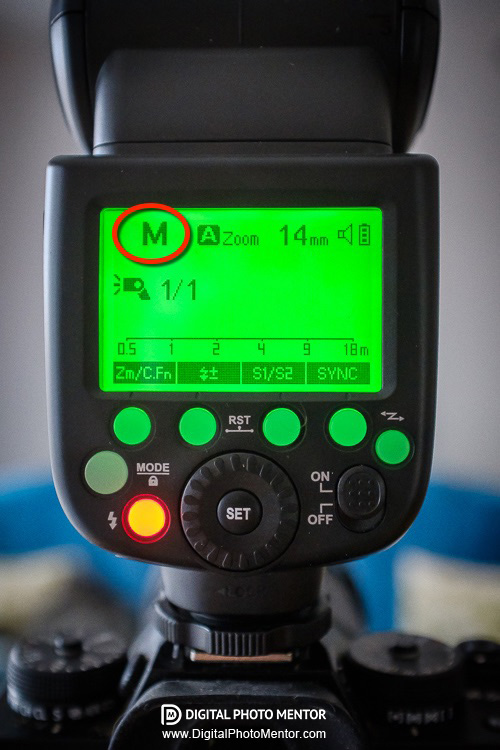
Manual Flash Mode
This setting has the most control but it also means you need to measure the light and adjust it as needed.
So that means this is NOT a beginner setting.
If you attempt to use Manual mode on your flash and get inconsistent or unpredictable results, just avoid it until you gain a bit more knowledge around using flash. It’s not easy, and even some pros get it wrong. So don’t feel bad about it.
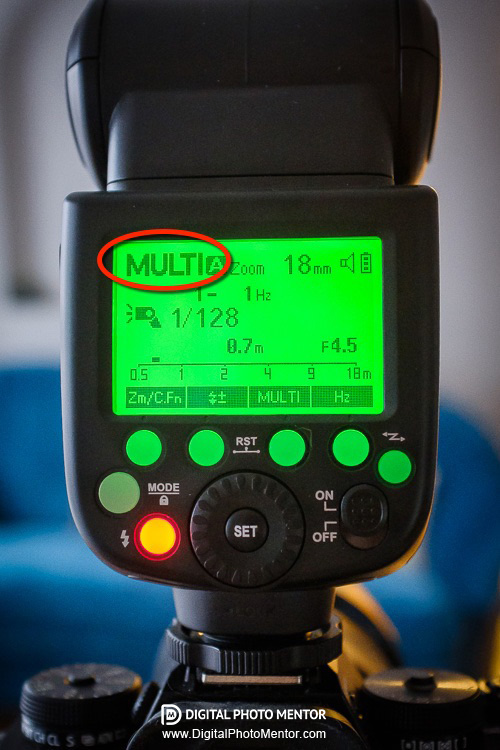
Multi Flash Mode
This one is also more advanced. Multi Flash Mode is used to create an image where the flash fires multiple times during one camera exposure to create the look of movement.
For now, let’s ignore this one too. You may in fact never use it. I have never had an occasion to do so.
TTL Flash Mode
The meaning of TTL is “Through The Lens”.
What happens in this mode is the flash fires a small pre-flash you don’t even see. Then the camera assesses the subject distance and the amount of light needed to illuminate it and fires the flash at the right power level to produce a good exposure.
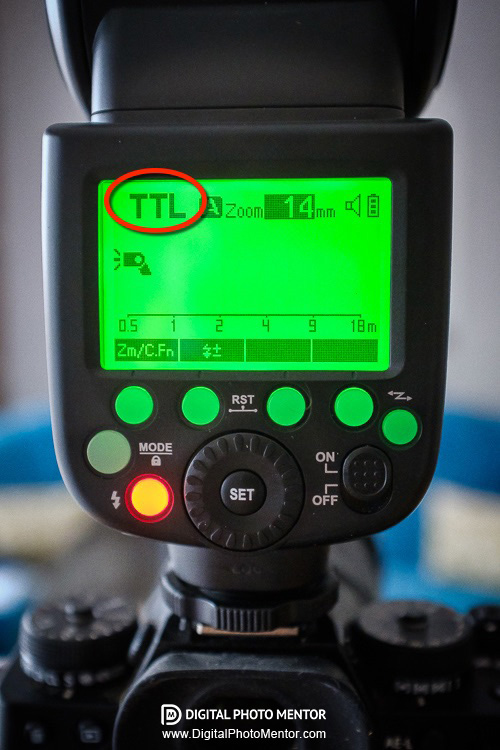
This is the mode you want to use, at least for now!
In fact, when your flash it on your camera this is the mode I’d recommend using most of the time anyway. It does a great job and if you choose your camera settings wisely (don’t worry I’ll help you with that too) then they make a great pair, working symbiotically together.
Flash Exposure
Now that you have the flash mode set, and the flash is mounted on the camera, let’s talk about one other setting you need to know about. That is the Flash Exposure Compensation or FEC for short.
Most flashes allow you to increase or decrease the amount of flash exposure applied to your scene. Mine goes from -3 to +3 in 1/3 stop increments. Yours may be similar or have a wider or smaller range.
For the most part, you’ll want to leave it set to zero. You’ll know it’s at zero when you don’t see any other number, like this.
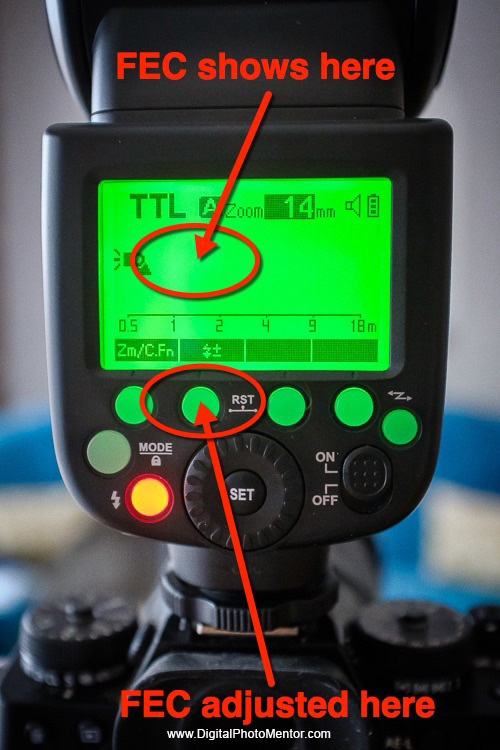
The Flash Exposure Compensation is adjusted by pressing a button (mine is indicated above) and turning the dial on the back of the flash.
Notice the symbol above the button. It has a little lightning bolt symbol and a +/-. Look for something like that on your flash.
NOTE: If you have the same brand camera and flash you may be able to set the FEC from your camera menu as well. So check there if something funny seems to be happening.
Using Flash Exposure Compensation
When you dial the Flash Exposure Compensation to the minus side, the flash will provide less light by that amount as compared to the main overall exposure. Let’s look at how it works with some examples.
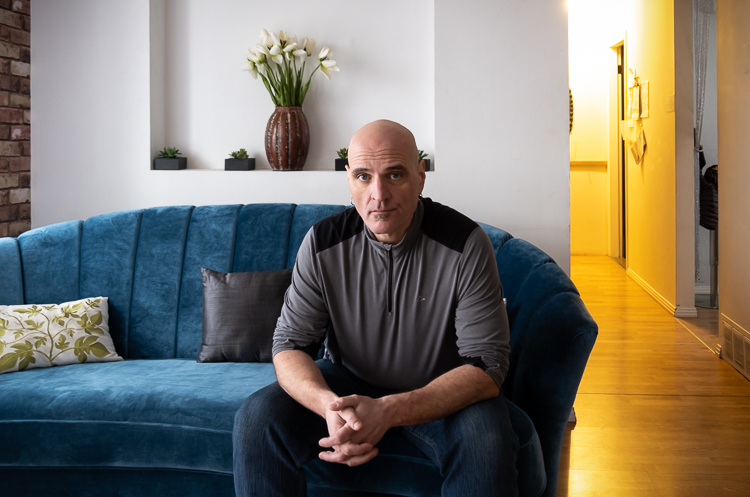
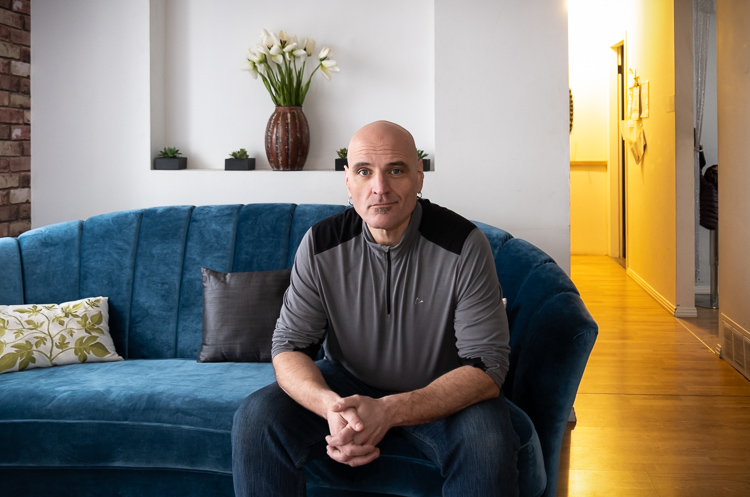
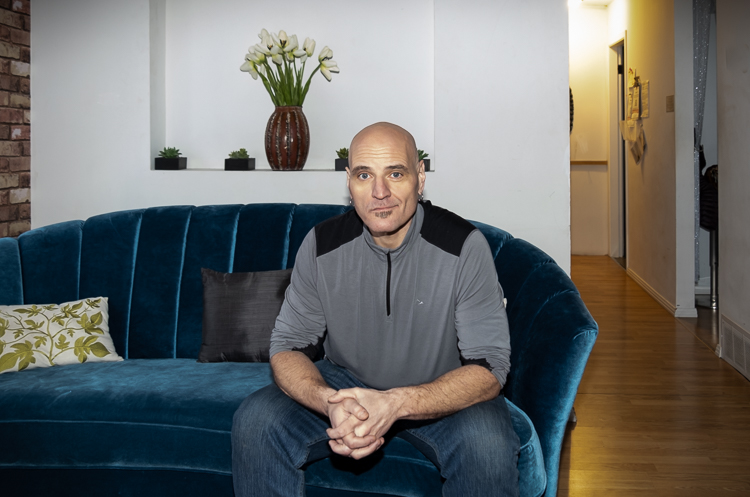
This first image is my base exposure, taken without any flash. I left the light on in the hallway on purpose to show ambient versus flash exposure and how they work together.
There is a large window to camera left adding light to my subject, aka Rob, aka my husband. He graciously agreed to be my model for this demonstration.
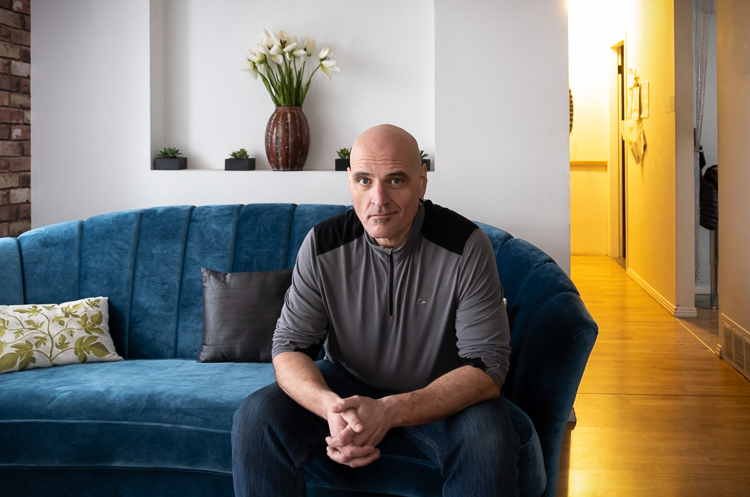
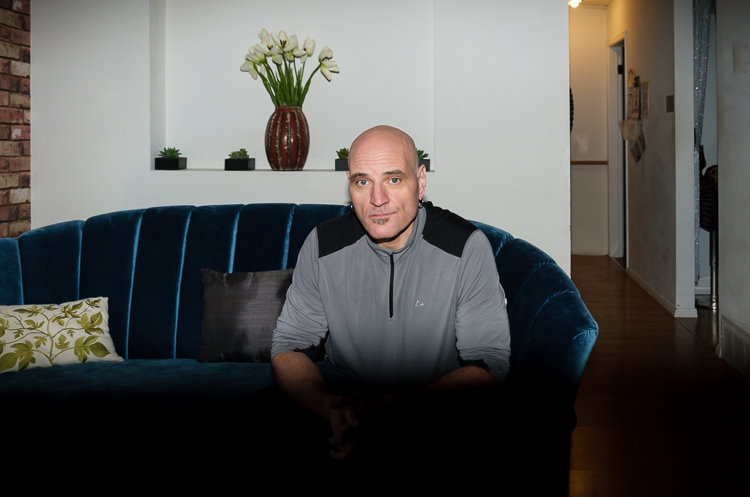
Next, I’ll add in the flash. It is in TTL mode, set to 0 FEC. So what should happen is the camera will fire the flash to provide a good exposure on the subject.
Note: I used Manual Mode on the camera so the settings did not change from one to the next. But you can use Program mode, or Aperture Priority, or Shutter Priority too.
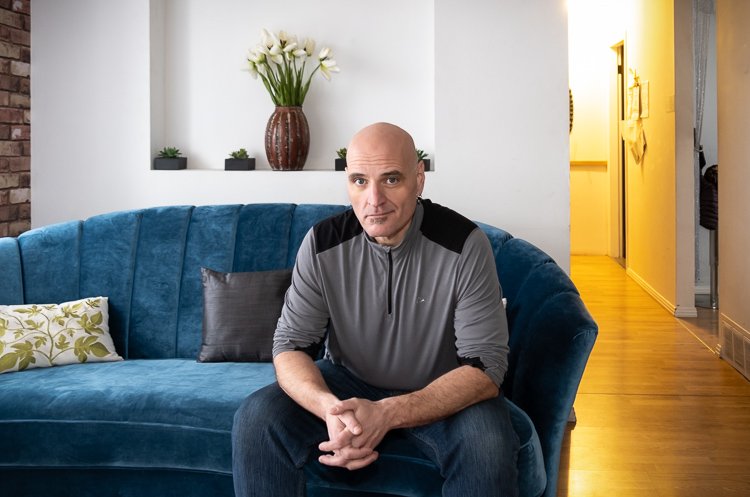
Notice how well balanced the flash and light in the room are in the image above. It’s lightened the shadows nicely without him look “over-flashed”.
If you didn’t know flash was used here, could you even tell? No, probably not. THAT is the goal of a well-done flash photo. You want it to blend the light in and have it appear natural.
Negative Flash Exposure Compensation
Now let’s see what happens when I dial in negative FEC.
As the FEC is lowered, the flash power is decreased by one stop each time. So it becomes less powerful and has less effect on the image. See how that works in the three images below.
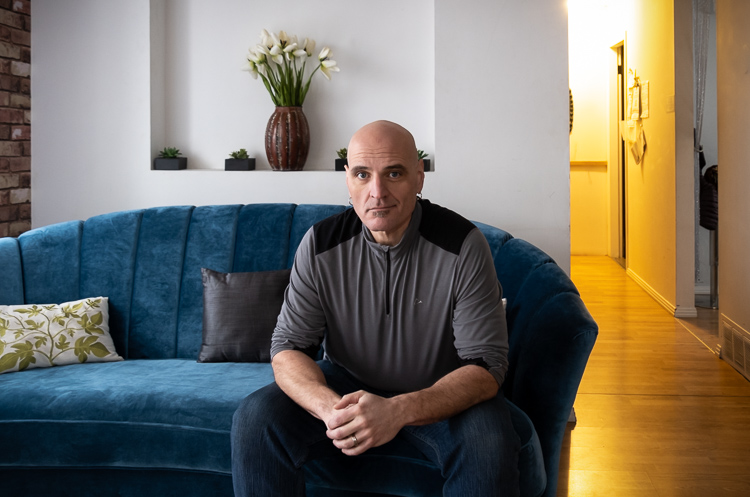
What did you notice about the three images above? Can you see the difference?
HINT: If you want a natural-looking fill flash outdoors or in situations where there is plenty of light you just want to fill in the shadows – set the FEC to -1. That will do a nice job in most situations as a fill flash for you.
Positive Flash Exposure Compensation
Next, I will dial in positive FEC.
As the FEC is raised, the flash power is increased by one stop each time. So it becomes more powerful and has more effect on the overall exposure and the image.
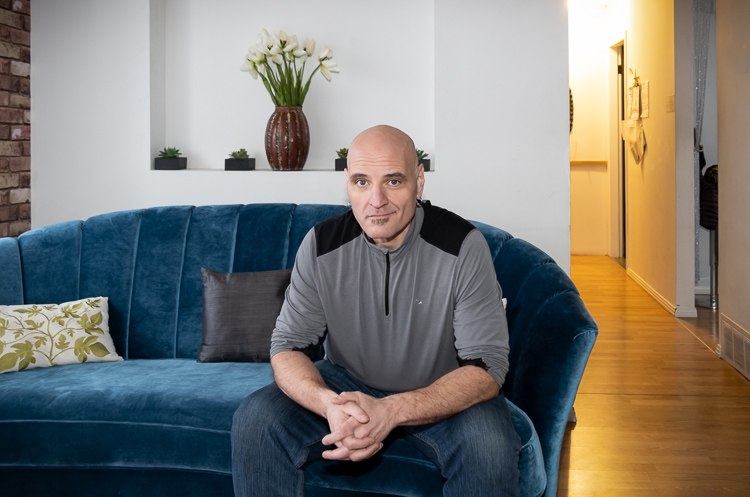


What did you notice this time? The difference is obvious, right?
I did not adjust the exposure on the camera because I wanted the exposure in the room as a constant. As the FEC was increased and the flash fired with more power, it started to overexpose the entire image.
Could I fix this exposure? Yes. I could adjust the main exposure to be less overall, or correct it in processing. But I personally wouldn’t want to do that.
Notice how much darker the hallway is now. Look at the harsh shadows now under his chin and from his hands. There is no nice side lighting from the window anymore. That is all caused by the flash setting.
It is not at all natural looking anymore – this is what over flashed looks like.
Avoid making images that look like this by keeping your Flash Exposure Compensation set to 0 or -1. I almost never use FEC +1 or higher and I honestly cannot think of a scenario when I’d use it.
Camera Settings for Flash
I will address this topic in more depth in another article but I want to give you some basic starting points and things to watch out for here to get you started.
First of all, I do NOT recommend shooting in Manual mode when using TTL flash. Let the camera and flash do the work for you. It will be a lot easier and cause a lot less frustration that way.
You have a few options for the camera shooting mode and I’d recommend each in different situations.
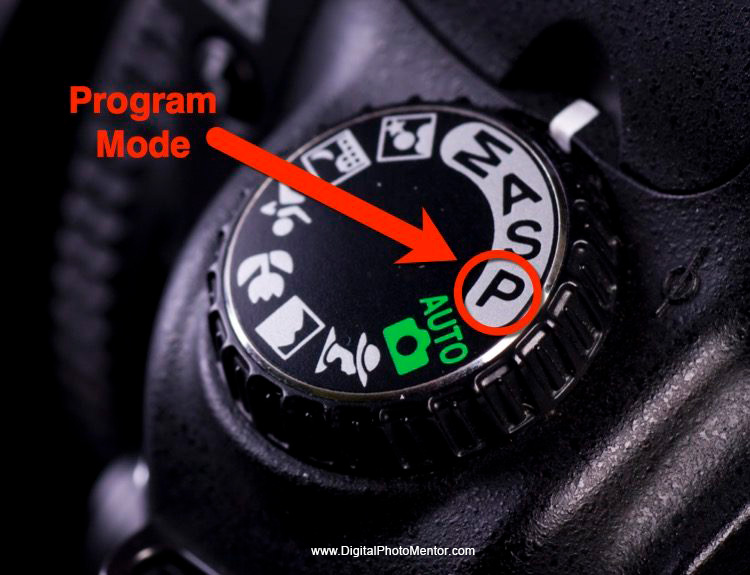
Program Mode
If you are just starting with photography and are still unsure about exposure and which settings to use, just use Program Mode. There is no shame in this and it will usually result in pretty good images.
Aperture Priority Mode
This is the mode I use most often for many situations when I’m shooting handheld (no tripod). But when using flash indoors it can cause some issues.
For example: If you choose a small aperture like f/8 or f/11.
The flash will then have to fire at a much higher power than if you use a larger aperture like f/2.8 or f/4. That can run the battery down quickly or even cause the flash to overheat.
It will likely also cause the background to go really dark and the shutter speed to get really slow (even down to 1/2 of a second or slower if the light is really low) which results in ghostly subjects or blur in your images.
So use this mode cautiously. Make sure to open your aperture as wide as it goes. Use a lens with a wide aperture like a 50mm f/1.8, that will help as well.
Shutter Priority Mode
This is the mode I recommend if you want to venture out of Program. But again be aware of some issues that can arise with the wrong settings.
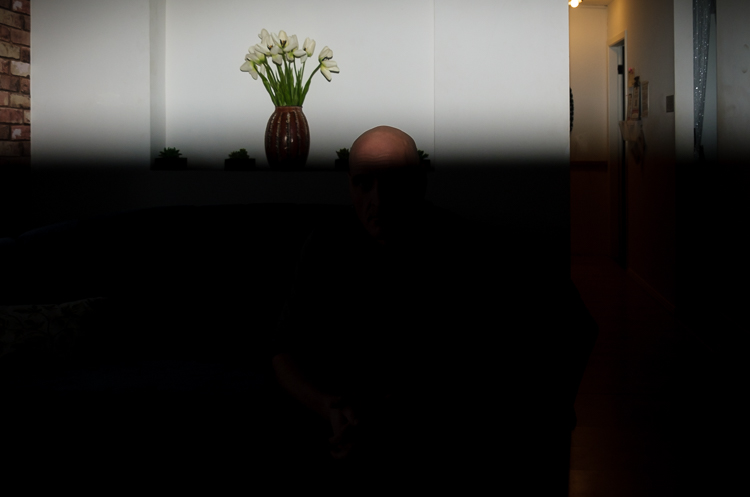
Have you ever gotten a photo that looks like this, with a big black band across part of your image?
That is caused by the shutter speed going beyond your camera’s Flash Sync Speed. Most cameras sync at 1/200th or 1/250th, this was shot at 1/500th. So what does that mean?
Simply put, when you use a shutter speed faster than the camera’s sync speed – the shutter has already started closing before the flash goes off. That’s what causes the black band, you’re actually seeing the shutter closing.
The image above is even worse at 1/1000th of a second. There is a fix for this in situations where you need a really fast shutter speed. But we’ll talk about that another time.
So all you need to know for now is to keep your shutter speed under your camera’s sync speed. If you aren’t sure what that is, go with 1/200th and you’ll be pretty safe. That information should be in the user manual for your camera or google “flash sync speed MY CAMERA MODEL” and replace the bold text with your actual camera brand and model.
Also, keep in mind that if you use a slower shutter speed like 1/30th even you can still freeze any motion from your subject. The flash does that for you, it freezes that instant in time.
So in a dark or room with low light try shooting with these settings:
- Shutter Priority
- Flash set on TTL and FEC set to Zero
- Shutter set to 1/30th.
- Set the ISO to Auto (set the maximum to 3200 or 6400) or to at last 800.
Then just fire away, the camera will do all the work for you.
If you get too much motion or blurry images – adjust the shutter speed to 1/60th or 1/100th.
If the background is really dark increase the ISO.
Your turn to practice
That should give you a good head start on using your flash, even if you’re brand new to all this. So get it out of the box, put it in your camera and go take some good photos at your next holiday event.
Cheers,