Introduction
Stunning views come from far-flung trips, high climbs, and hard to reach places, so as striking photographs.
Twenty years ago, capturing an aerial image may sound like a military thing. But now, any professional or freelance photographer can capture aerial photos using a drone camera. For years, we witnessed how rampant the use of aerial photography is, and somehow it became mandatory for big events.
A drone is a remote-controlled camera and, by far, is one of the greatest innovations in photography. Luckily, drone cameras are now affordable, but not everyone knows how it works, its features, and the way around operating it.
In this post, you’ll find everything you need to know about drone photography. These include tips on how to set it up, pre-processing, post edits, plus some ideas on how to capture vivid photos and videos.
What is Drone Photography?
Before I give you some useful tips and ideas, it would be nice to know the basic terms and definitions used in the drone photography world.
- Drone Photography definition: Drone photography includes capturing still images and video using a drone.
- Other terms of a drone: As mentioned earlier, a drone is remotely controlled. A drone is also called an unnamed aerial vehicle (UAV) or unmanned aircraft system (UAS), or quadrotor helicopter, or quadcopter.
- Line of Sight: The term used where the pilot can see the drone during the flight.
- First-person view (FPV): The pilot’s view where they can see where the drone is flying or where it hovers.
The Two Most Common Types of Drones
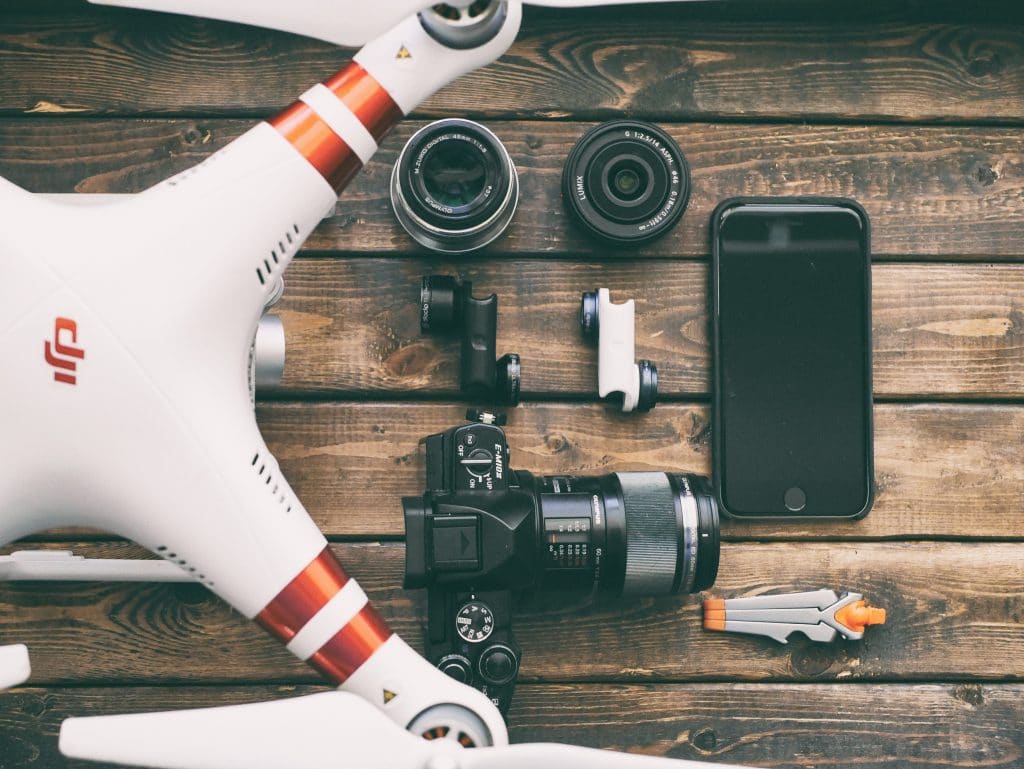
Built-In Drone Camera
Built-in drone cameras are usually bought in a package, where the rotor and camera are bought as a package. Often, built-in drone cameras are larger but do not expect their cameras may have a high resolution.
There are units where the camera and rotor are detachable, and some don’t.
On-Board Drone Camera
An on-board drone camera has the rotor and camera sold separately. These are smaller drones where you can attach your camera (like a GoPro). In this case, it would be easier for you to manage it since you’re already familiar with the camera you used.
How to Choose a Drone for Your Needs and Skills
Now that you have an idea of the two most common types of drones, the next thing to consider is how well you can fly a drone.
The market has been saturated, a lot of drone camera brands are available, but how do you choose? Though you may find affordable choices, it is still considered an investment of your hard-earned money.
So it’s only fair to broaden your choices before making any purchase. That’s why I suggest that you study the features of drone cameras first before getting one for yourself or if you needed an update.
There are many tricks you can do with a drone, but it would be better to pick a drone that matches your current skill and your best interest.
- Beginners: I would usually advise novice photographers to go for the light, cheaper and sturdy ones. It may not have more advanced features and add-ons as the expensive ones, but it is easier to fly and can help beginners to practice more.
- Indoors: If the purpose of acquiring a drone is for indoor activities (like for school and office functions), you can pick a drone for indoor use only. Before buying a drone, check if there are limitations and if a drone is limited to fly indoors only.
- Night Mode: If you’re into aerial shots of the sky during the night, look for drone cameras that have a bird’s eye view, can fly great heights, and are programmed to shoot during the night. This is especially helpful for those in star photography.
- Advanced: For professional photographers, videographers, or cinematographers must get a larger drone, have sophisticated aerial photography, additional necessary features, and a state-of-the-art camera.
Instruction Manuals
No matter what type of drone camera you have, it will always be a struggle to operate it, especially for the first-timers. The learning curve of operating a drone camera is vast, but it all starts with learning the basic steps to hone your skills.
Before learning the basic steps to operate this device, it’s better to get oriented on the basic parts of a drone.
Parts of a Drone
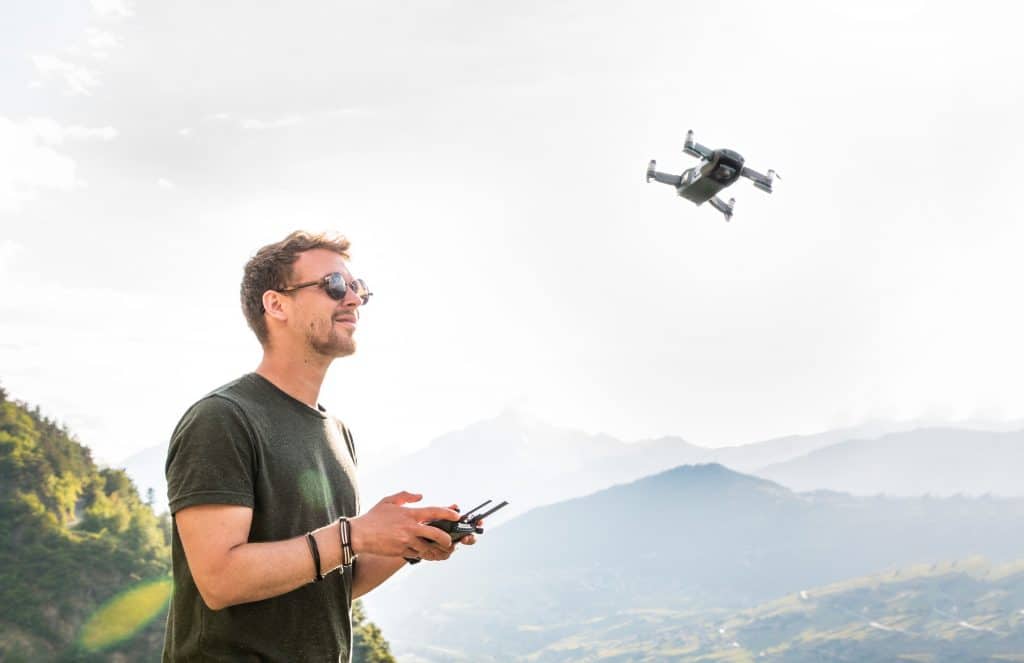
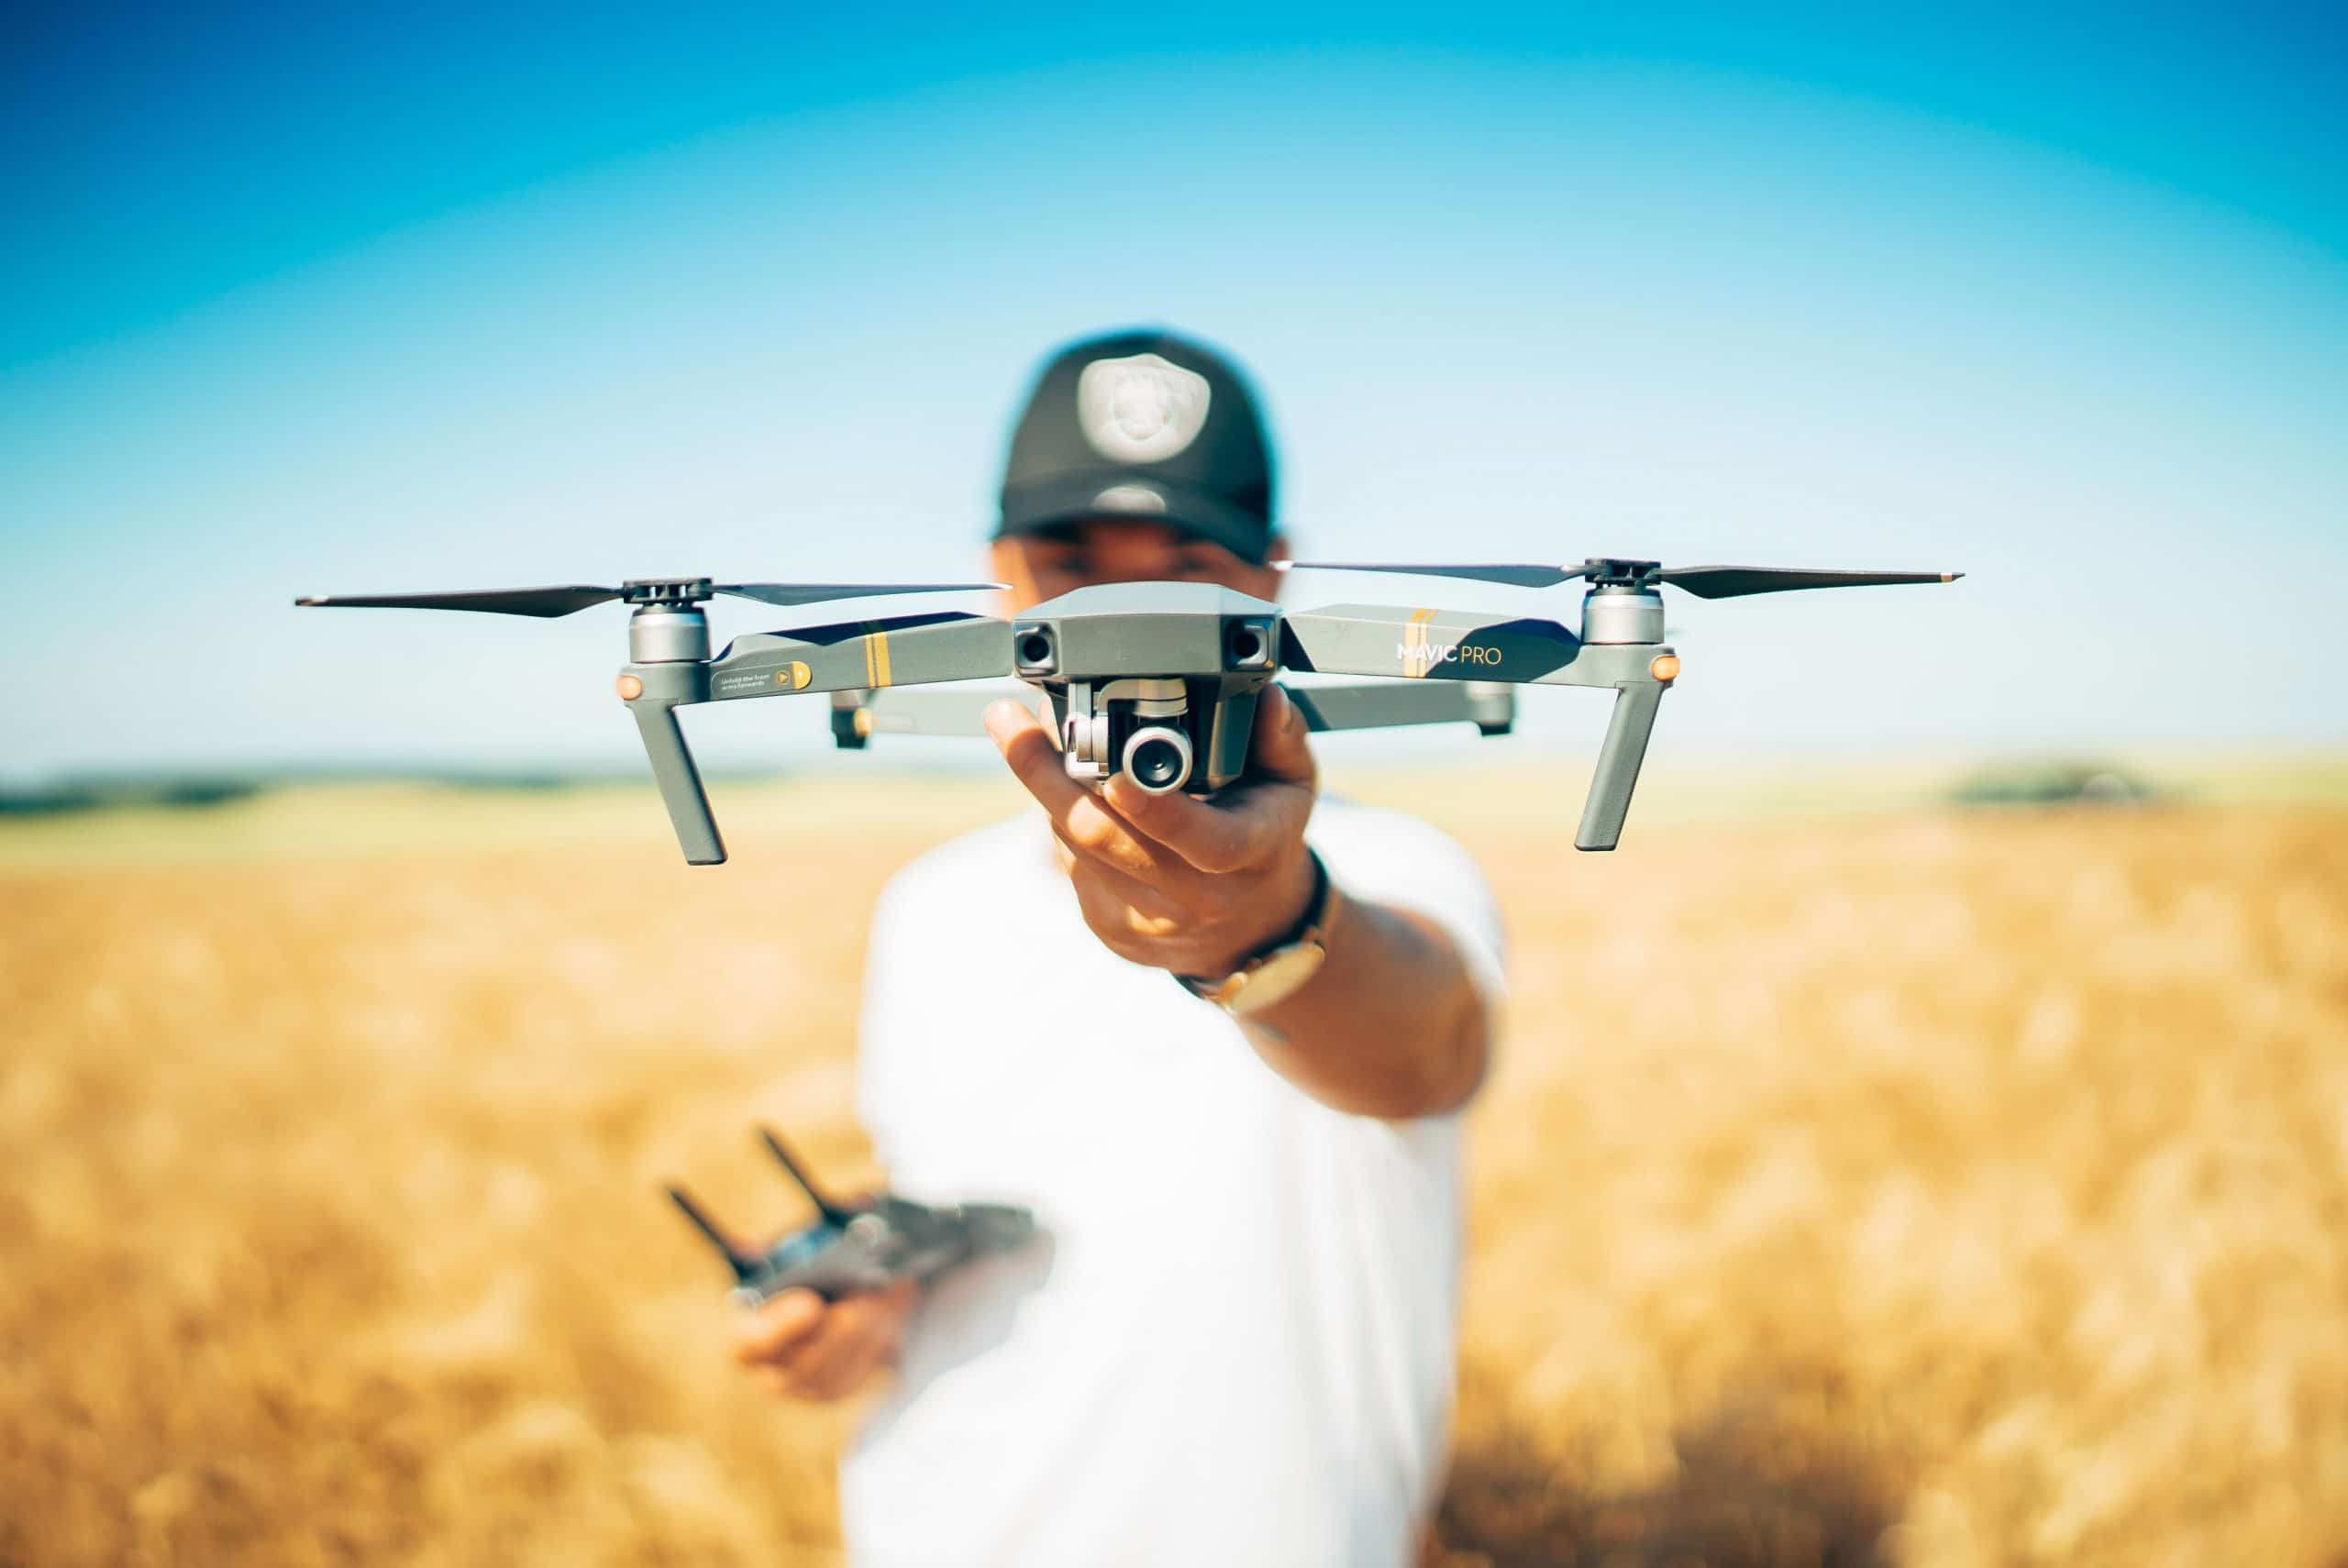
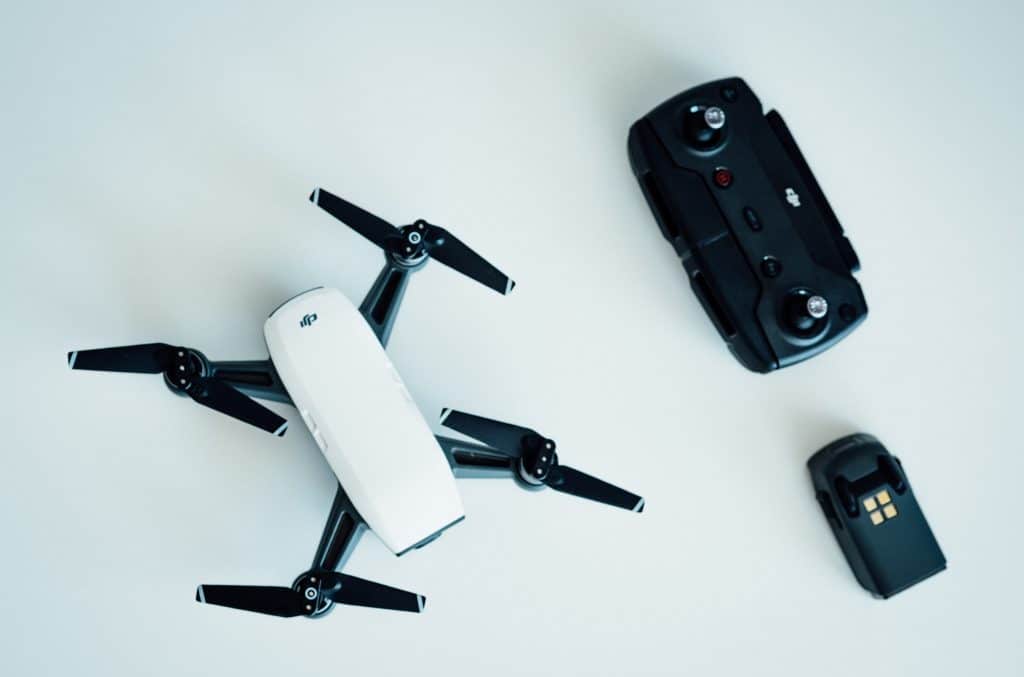
- Remote Control: This is a hand-held device, also known as a transmitter, and is used to maneuver and adjust the settings. It somehow resembles what a gaming joystick looks like. Some more advanced drones can now be remotely controlled using a mobile device.
- Propellers: The propellers are like a fan that spins to keep the drone afloat in the air. Using the remote control, you can manually adjust the intensity and movements of a drone.
- Camera: As I mentioned earlier, drones either come with a built-in or detachable camera. You can use motion cameras like a GoPro to attach in your rotor.
- Gimbal: It is the part of the drone that is considered as the support system. It allows the object to remain horizontally stable regardless of the motion.
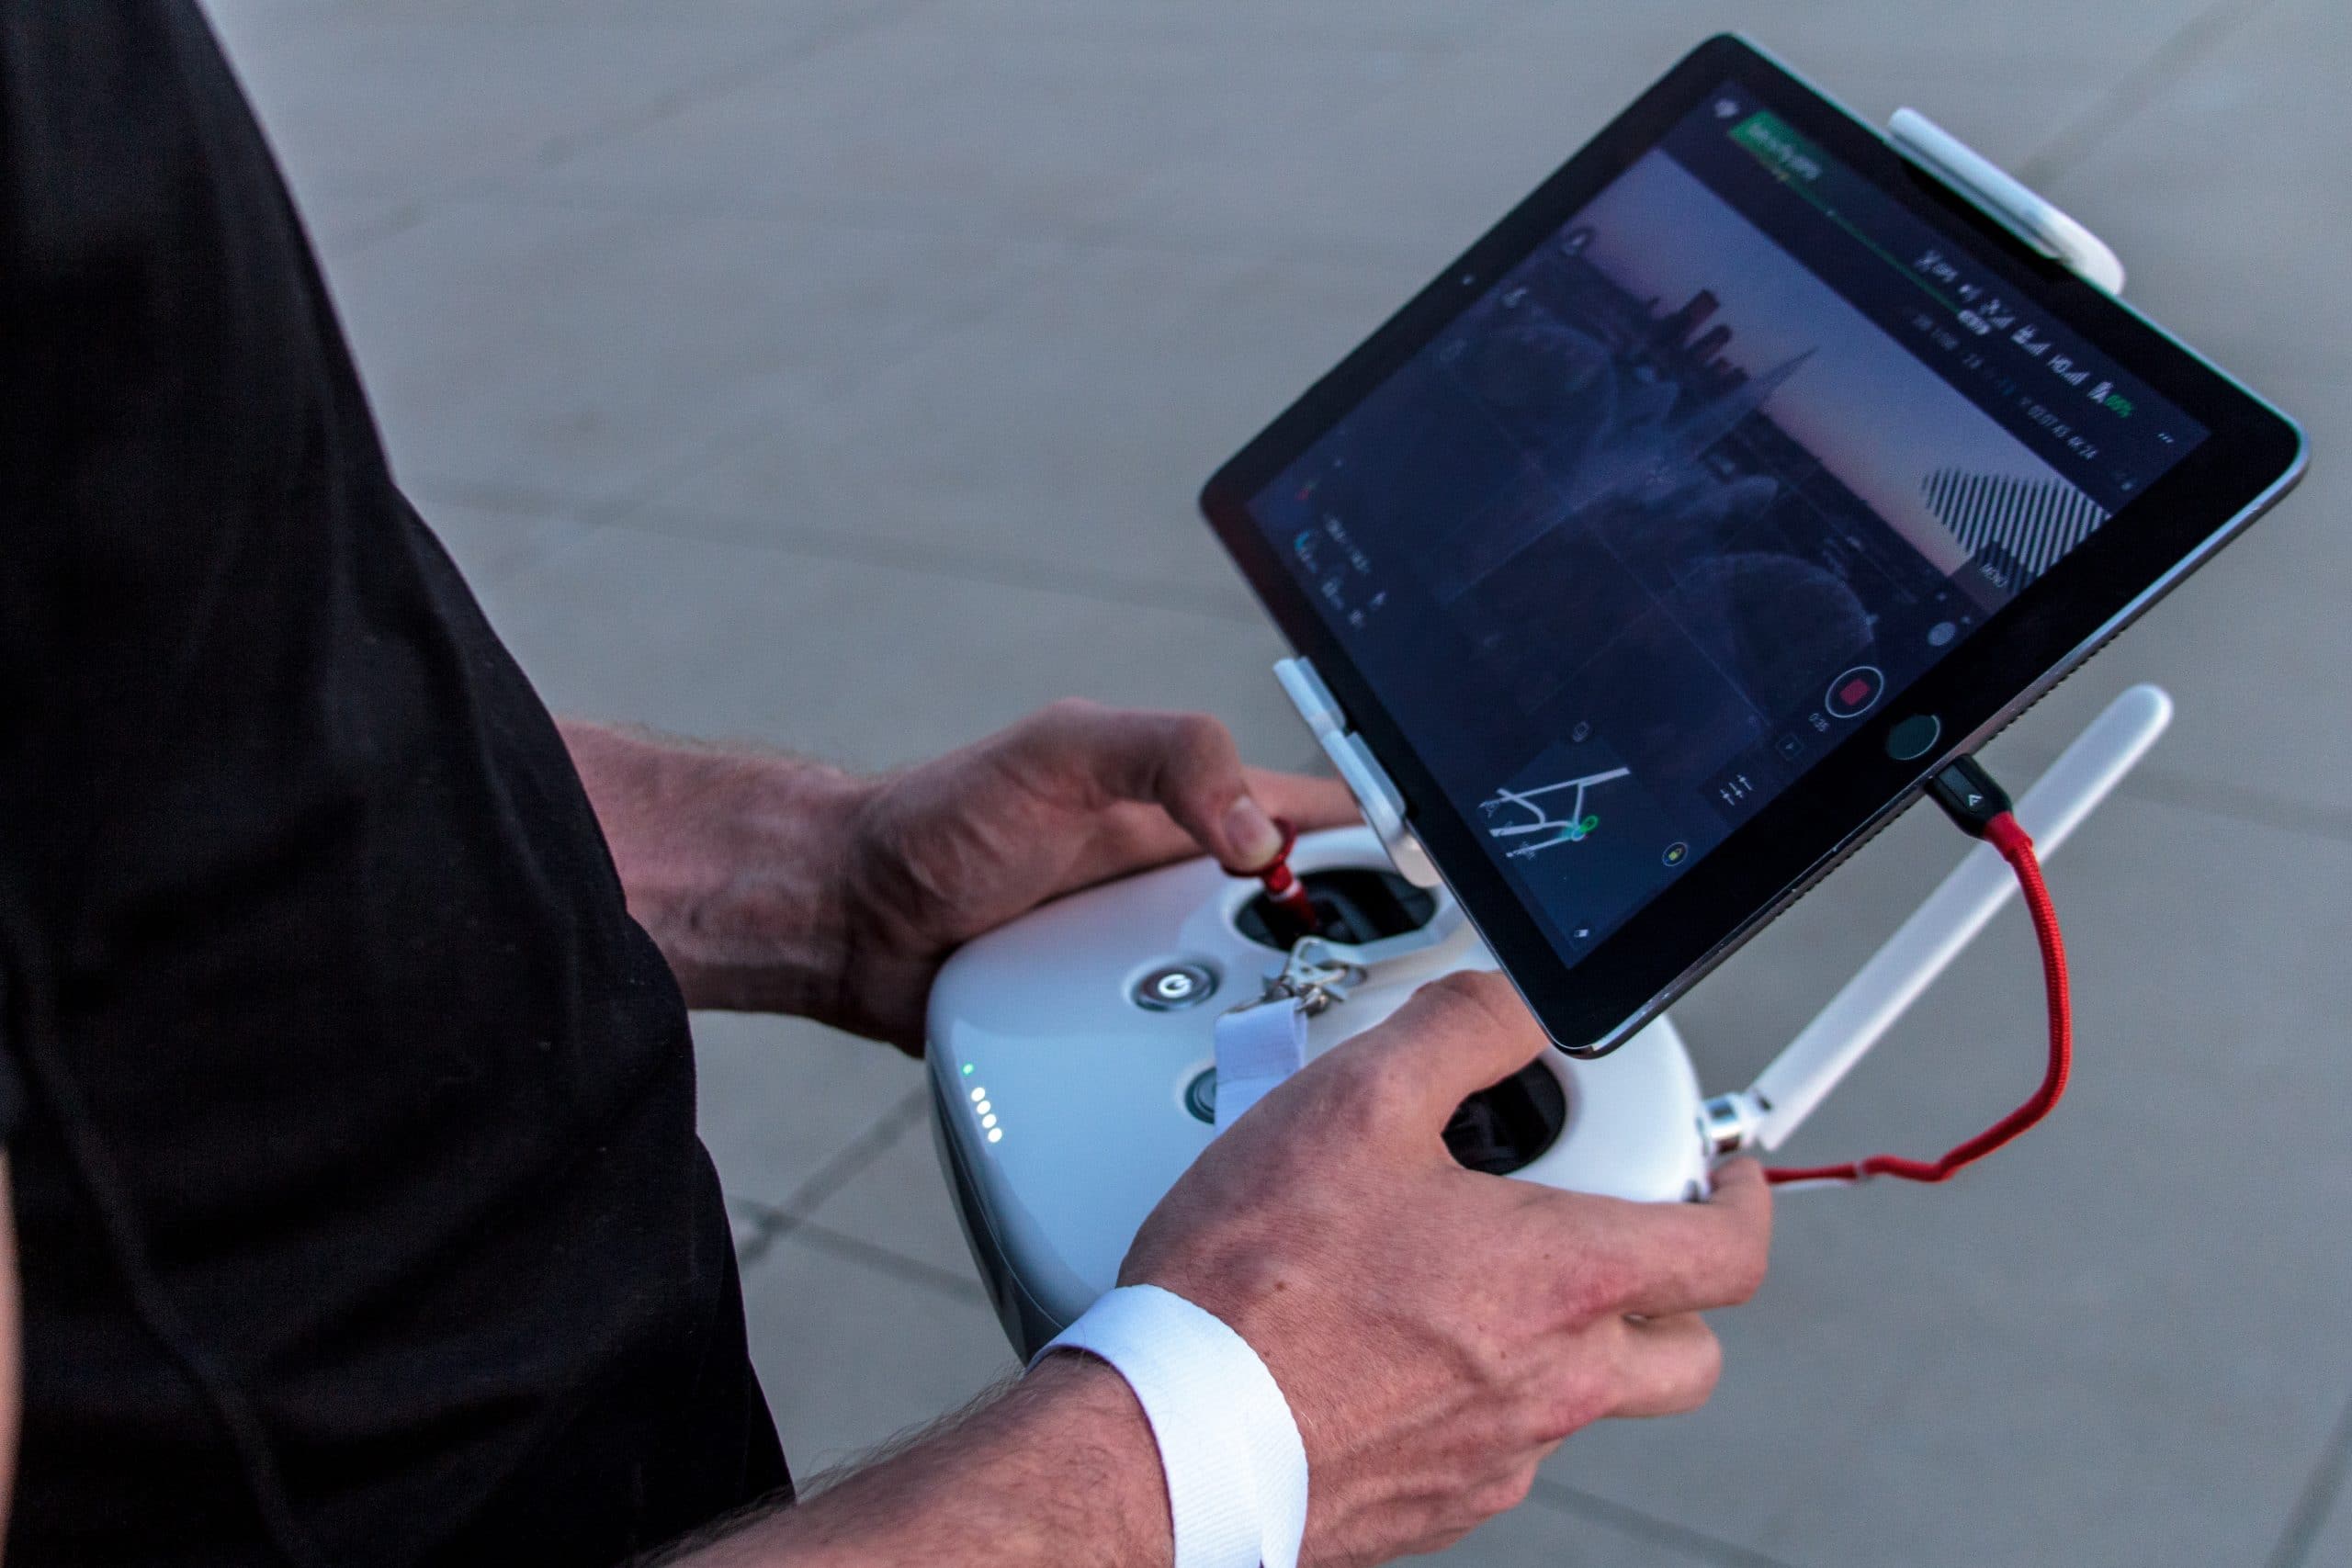
Basic Functions of a Drone Controller
To maximize the use of your drone and ensure it’s safety at all times, it makes sense to master at least the basic functions of a drone controller.
When you buy a new drone camera, it comes with a remote controller. But with smartphone technology nowadays, you can use your mobile phone as remote control via an app.
So let us prepare your first flight and stay safe by learning some of the basic techniques and flying maneuvers.
- Left Stick: The left stick of the controller maneuvers the throttle (also known as altitude), and the yaw (also called the rotation).
- Yaw (Left Stick X-Axis): When pushing the left stick in the right to left directions, the drone will rotate clockwise or counterclockwise. This will help position the drone face another direction without the need to leave its current spot.
- Throttle (Left Stick Y-Axis): This is when the left stick is pushed up and down to change the altitude of the drone. It will control how high or low the drone will fly in the air.
- Right Stick: The right stick controls two maneuvers – the pitch (forward and backward) and the roll (movements from side to side).
- Roll (Right Stick X-Axis): Pushing the stick from left to right will make the drone “roll.” This is used to avoid any obstruction along the line of view without changing the Y-axis altitude of the drone.
- Pitch (Right Stick Y-Axis): The up and down of the right stick of the controller enables the drone to forward and backward.
All these combinations of the right and left stick must be practiced. This may sound like operating a toy car, but the pressure is on, and it gets harder when you have an expensive gadget flying in the air.
It’s always suggested to practice flying in lower altitudes first. Also, make sure that the batteries of your controller are adequately charged.
Features of a Drone
Before buying or upgrading to a new drone, checking out its specs is something you have to do. In this way, you’ll know if that product best suits your interests and skills.
At the same time, you’ll be aware of any limitations or benefits it has to offer. It’s like buying a new mobile phone, and you just don’t buy it because it looks aesthetically pleasing. You have to check its features, any restrictions, and figure out why it’s the best pick for you.
Each drone brand offers different features, but upon research, here are the standard features almost all drones have.
Smartphone Compatibility
We live in a fortunate generation wherein almost every smart product can be linked with another smart device.
In this case, a smartphone can serve as a controller to provide flight control or may serve as an FPV screen for a live video streaming.
You can connect your smart device to your drone through Wi-Fi.
Smart Feed
Since you can use your mobile phone as an FPV screen, the smart feed feature allows you to have a live feed.
This is a great feature to increase your chances of capturing a great shot. Without the smart feed feature, you’ll be wasting half of your time capturing bad shots because you can’t see the scenery.
This is also helpful when avoiding any obstacle that may block the route of your drone. This is also a safety precaution to avoid hitting along the way and eventually falling.
Smart Mode
Most drones also have a smart mode feature. This is helpful especially for newbies to ensure great shots and safety of the device during the flight.
When in smart mode, you can fly the drone using your synced mobile device. Smart modes of most drones activate the Obstacle Avoidance feature for safety precaution during the flight.
It has an auto-pilot mode that is useful for flights to capture the best shots while the drone flies on its own.
Tracking
One thing I noticed with travel vlogs, is that the starting scene consists of the vlogger running away from the camera, then the camera chases the vlogger.
I always notice a smoothly transitioned straight shot of the camera chasing the vlogger without so much controller maneuver. Then I knew about the tracking option or the “follow-me” option.
The tracking option is enabled when your drone is connected to your smartphone. The drone locates the GPS of your phone; that’s why it can detect and follow you.
Geofencing
Another feature of drones is called Geofencing. Consider it as an imaginary fence that restricts the aerial fly zone of a drone.
In this way, drone photographers won’t experience their drone reaching out of their site. The perimeter of this imaginary fence will depend on the unit of the drone.
Laws for Flying Drones
Local Regulations of Drone Usage
Drones are not only used for photography purposes. As early as the 1900s, it was initially used by the military as part of their weapons.
Up to this day, the military uses this as part of their tactics. No wonder why over the years, regulations were implemented on its usage.
Even freelance photographers and hobbyists must comply with local drone regulations. As part of knowing how the drone cameras work and its features, you must be aware of the local rules too.
Ignorance of the law excuses no one that includes you. So check in with your local government for the drone regulations, requirements, or any needed registration.
Rules for Flying Drones
Every state and country has different laws when it comes to drone usage. But below, I have a list of the common regulations of most states in the US.
- If you’re a foreigner and have plans to travel the US with your drone camera (either for business or leisure purposes), you can register your device online before flying in.
- For airline flights, the drone camera must be on your carry-on luggage, and never check-in.
- Most states allow drone photographers to fly within the visual line of sight.
- The drone’s weight must not exceed 55 pounds.
- Do not fly your drone near any aircraft.
- You cannot fly the drone above 400 feet.
- The speed must be under 100mph.
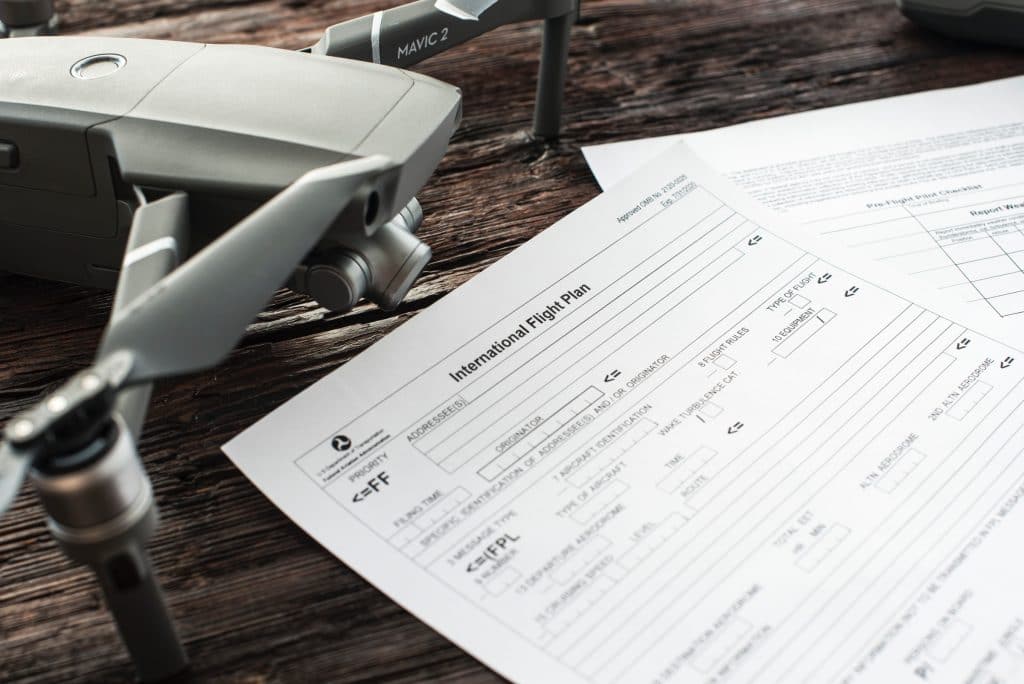
Pre-flight checklist
What is a drone pre-flight checklist?
It is a required guideline for drone flyers (photographers and hobbyists included) to promote safe and legal operations of drone cameras. This is not just a checklist; you can skip over and not take it seriously as the US law requires drone pilots to conduct drone pre-flight checks at all times.
It’s not just a list of things to do to help you ensure to capture the scenic views, but the top priority is the safety of the user, the device, and the people and property around.
It includes the physical checking of the drone and the camera, fulfillment of required documents, and more. This checklist is helpful not to forget anything and reduce the risk of any physical damage towards the property, injury to people, and device malfunction.
This pre-flight checklist can be summarized in three general rules to remember at all times:
- Orient yourself and comply with city, state, and country laws before flying your drone camera.
- Practice fly in a non-populated area
- Put the drone in the beginner mode.
To explain further, here is a guide you should follow to understand the dos and don’ts.
Before the Shoot
At home, plan and prepare the shots in mind you want to take. It will help if you are familiar with the location, or have visited before. If not, you can do your research online and find some inspiration for the shots you want to take.
In this way, you can save some time and effort in thinking about the composition of your photo.
Weather Check
If you have plans to capture aerial shots outdoors, you may want to check the weather first. Check local weather updates on the news or online to get an idea of rain and strong winds.
Take note, do not push with your shoot as scheduled if there are any weather disturbances forecasted within the day. It’s not worth taking the risk, and you’ll end up wasting your time packing and unpacking your things when it rains.
Even if your camera is waterproof, your rotor and its propeller are not. Rain and strong winds can damage the electronics of your device, and it’s dangerous. Remember that if it is not windy on the ground, it can be different 400 feet up in the air.
Strong winds are an opposing force to your drone that will require more battery usage. You may end up having the wrong estimate of your drone’s battery life and can end up stopping mid-air.
Time
Planning and choosing the time is important for photora[hic purposes and, at the same time, for the safety of the device.
It sure is nice to have sunset and sunrise shots, and I’m sure you can get a good shot or two. But it’s not all about just capturing perfect shots, and it’s about safety too.
Some drones rely on guidance systems when landing and avoiding any collision (the Obstacle Avoidance feature). The guidance systems may not work properly in low light and might result in a catastrophe.
If you fly to take shots using your drone camera at night, I suggest that you must have a more advanced skill. Beginners shouldn’t fly the drone at night, because advanced manual skills are required, not the beginner’s mode.
Location
When choosing the location, there are four things you might want to consider the scenery, safety, obstacles, and legal limits.
- Local Regulations: As mentioned earlier, every city, state, and country has different laws when it comes to drone photography, and we must respect that.
- Safety: Once you have confirmed and complied with all legal responsibilities of your chosen location, ensure your safety too. For example, you have chosen a remote part of the forest, and you plan to camp there overnight. It is best to check out any safety issues (e.g., wild animal habitation or dangerous chemical exposure). It all goes back to doing your research and checking in with the local government of any safety issue of your chosen location.
- Scenery: Of course, the most important factor when choosing a location is the scenery. You won’t even consider this location if it weren’t for the great shots you can take. Plan on the good angles and possible picturesque shots within the location you chose. Be as creative as you can, and maximize the time and effort of being there in your location.
- Obstacles: It’s good that you conduct your research beforehand of the good shots you want to take. But if you’ve never been in that location, there may be unseen obstacles you might want to check. So before take off, check if any obstacles may cause any inconvenience during the flight (e.g., tall trees, power lines, telecom towers).
Planning Your Flight-Path
Since Google Maps is available, it’s easy to plan out the flight path from Point A to Point B. Luckily; there are drones and their designated mobile apps that show the map on the FPV screen while flying the drone.
This will help you save time and ensure that your drone is within your view at all times. Make sure to take note of the distance from one point to the next to make sure that you have enough battery power to cover all destinations.
Keep Your Drone Updated
Another checklist must-have is to keep your drone’s system updated at all times. There are drone manufacturers that release updates for their equipment’s firmware. So make sure to check for updates for both device apps and firmware before the scheduled photoshoot.
This could benefit you in the process and make the workload more manageable. Some of the updates include bug fixes and newly added safety features.
Memory Card
Check the storage space of your memory card before leaving your house. If you don’t have an extra memory card, back up the existing files and delete them on your memory card for extra storage space.
Better yet, format your memory card. You don’t want to run out of memory card space mid-air. It will be a waste of both time and effort to change the memory card in the middle of your flight.
Check Your Batteries
As important as checking your memory card storage, it’s important to check the batteries of your drone before leaving the house. If possible, always have fully charged backup batteries and the charger too.
If you use your smartphone as your FPV screen, make sure that your smartphone has enough juice too. Just to make sure, bring your phone’s charger and extra power bank.
Visual Inspection of the Device
Before leaving your house, make sure to check over the whole device. Check if screws are tight, check any sign of wear and tear of the propellers, and check if the buttons and stick of your controller. Check if there are any cracks or signs of deterioration in the camera.
Other photographers always miss checking this – the moist inside the camera lens. This is caused by temperature and humidity, which you can control. You may not control it, but you sure can prevent it.
The most common solution in removing the moisture on the camera lens is using silica gel or better yet store your camera in a place where moisture cannot sip in.
Check the Gimbal Cover and Clamp
If you opt to place a gimbal cover over the camera, then you might as well check it too. This looks like a helmet bubble with the purpose to protect your camera lens from being damaged. There’s a clamp that secures the lock in place to avoid it from moving around while on air.
Make sure to check the gimbal cover and clamp if it calibrates correctly. Also, clean it using a
microfiber cloth, and make sure to clamp everything in place after cleaning it.
Calibrate the Compass
After you turn on the controller and drone, don’t forget to calibrate the compass. This is a critical step every time you fly the drone.
How to calibrate the compass depends on the brand of the drone. For almost all drones, this is an important safety and navigation feature. But the most common way to calibrate the drone’s compass can be summarized in these easy steps;
- Launch the app on your phone
- Check the settings and look for the compass
- There should be an option on how to calibrate the compass
- The app will give you instructions to maneuver the drone as part of the compass calibration process.
- Follow and complete the instructions indicated in the app (e.g., complete each rotation correctly).
- Make sure there are no magnets and metal objects at least five feet near the drone, as this may affect the calibration of the compass.
- Once the app prompts that the drone is calibrated, it is now safe to fly it.
Do not be complacent about calibrating the compass even though you just used your drone the other day.
The magnetic fields may vary from one location to another. That’s why it’s important to make it a habit to calibrate the compass before every flight.
Check the GPS Settings
When checking on the GPS of the drone, remember these three points;
- Check the satellite strength at your desired location.
- Set the GPS location of the drone and wait for it to sync in.
- Set location points like the Return To Home settings.
- Before taking off, make sure that the drone has a strong GPS signal.
Check the communication status
Once the antenna of the drone’s controller is up, check if it has proper communication with the drone. Do not use it until you see that the signal is good. When the signal is bad at five feet, it won’t get any better any 100 feet.
Flight Mode
Depending on the purpose of what you’d like to shoot or your skill level, it’s better to make up your mind of the flight mode you want to choose before take off.
Here are some common flight modes of drones (the flight mode offered by a drone will depend on the brand):
- Manual Mode
- Altitude Hold
- GPS Position Hold
- Auto-Pilot Mode
- Normal Orientation Mode
- Free Orientation MOde
- Return-To-Home Settings
Double Check the Wind Speed
I mentioned earlier to always check in with the local weather forecast and the wind speed before pursuing the aerial shoot. But it doesn’t end there, and you have to re-check the wind before flying your drone.
You can look for signs of strong winds by looking at the movements of trees and clouds. Use your right judgment to see if the winds are too strong in the higher altitudes. You can also check online the wind speed in your area.
Test Drive
So if you’ve done all the pre-flight requirements, you can now take it out for a spin and test drive. These are just quick and simple steps to follow before going on full blast flying.
- First, start the propellers and slowly hover it above the ground.
- Listen to any usual sound produced by the propeller. If they’re noisier than usual, land the device and check any loose thread.
- If the propellers sound food and you’re confident that they function correctly, let it hover above the ground for a few seconds.
- Check if the controls function the way they’re supposed to (the Yaw, Throttle, Roll, and Pitch).
- Once it’s stable and it functions as expected, you can now fly the drone at a much higher altitude.
- Practice is the key to mastering the art of drone photography. You don’t expect to be a master of the craft overnight. Be patient and practice as much as you can.
Monitor Any Change in the Conditions
It’s a good habit to practice the pre-flight checklist, but this does not guarantee your safety all through the flight. There are external factors that could change in a snap that you can’t control.
That is why it is strongly advised to monitor any changes during the flight. You must monitor any changes in the weather, wind speed, obstructions, and battery life.
If possible, tag along a friend to help you monitor these changes as it will be impossible for you to check weather forecasts with your hands on the controller.
If the device prompts any malfunctions, do not risk it, and just land the drone.
Drone Photography Techniques
Nowadays, drones can be used in many ways. So here are some tips you can use depending on the purpose, event, or the type of output you want to have.
Review the Basic Rules
Drone photography and traditional photography typically have the same fundamentals used. It is strongly advised to learn basic photography rules like the rule of thirds, golden ratio, and leading lines.
Wedding Photography
Event photographers now use drones to document the whole wedding. Most especially for the videography of the aerial view of the ceremony, the location, the reception, and other unique ideas, the photographer can think of.
When shooting for a wedding, a drone photography technique that can be used is to keep it simple for still photos, and go slow and stable for a video scene.
Real Estate Photography
Even realtors use drone photography to sell a property, especially big estates (with pools and spacious backyard). A good drone photography secret when taking pictures of the property is to make use of the natural light.
The right lighting is an excellent technique used for almost all kinds of photography. The output of your photo will depend on the sunlight at the time of the day. It can even create striking patterns and long shadows, which is helpful in real estate photography.
Dynamic Tension
Dynamic tension is a photography technique used to show movement and energy in the image. You can look for multiple diagonal lines that go in different directions or body language that contrasts.
Be creative and look for opposing symmetry and patterns, coupled with scenes of colors, shapes, and repetition.
Landscape Photography
In landscape photography, there are many techniques you can use to take a majestic photo. It will depend on the location and what you can see in the view. So here are some tips you can use in landscape photography:
- Include the foreground and background on the image focus
- Use Wide-Angle Lens
- Use photography filters (during the shoot or post-edits)
- Capture motions and movements
- Make use of body water for a mirror effect
- When including a person on the picture, remember the rule of thirds
- Know the recommended settings and equipment for the landscape scenery you would like to photograph.
Post Process of Photos
Drone Photography Editing Tips
Even in drone photography, post-editing your photos will help bring more life into it. Just like controlling your drone, post-editing also needs a lot of practice. It is a whole new skill that you can’t master overnight too.
You can use various editing software like Photoshop and Lightroom. Just like picking the brand of drone that best suits your skill and interest, it is suggested to choose a photo software that suits your needs too.
Learning this whole new skill may be time consuming and meticulous, but it’s part of being a photographer, and you can’t just get away with it.
Vivid Shots
Whether you use Photoshop or Lightroom, you can utilize the HSL option to give a contrast between the clouds and the sky to make it appear more vivid. You can do this by darkening the sky a bit and making sure not to touch the edges of the clouds.
Stylize Photos
You can stylize the photos by adjusting the brightness, contrast, and saturation settings. Then adjust the curve layer and finish up with soft light blending mode.
You can also add two solid-color layers and set it to the blending mode to overlay and adjust the opacity. The adjustment of all these (to increase or decrease) depends on the content of the photo. That’s why you must also have the eye to see what a good photo looks like.
Essential Add-ons
Like other cameras, drones also have accessories you can use for better output and convenience. Here are some of the essential add-ons you might want to consider:
- Extra Set of Batteries
- Propeller Guards
- Extra Propellers
- Extra SD Cards
- Drone Landing Pad
- LED Lights
- Lanyard for the controller
- FPV Goggles
- Alternative Controllers
- GPS Trackers
Have Fun
With the confidence and peace of mind that you did all the guidelines to keep your drone safe, you’ll be able to enjoy and appreciate the whole process.
If you’re a hobbyist and love photography, the most important thing to remember is to have fun. Remember to practice all the skills that you need to excel in drone photography.
Enjoy the whole process and enjoy the outcome of the drone shots you took. After all, we’re here to become the better version of yourself. Don’t forget to have fun!