If you have a hard time getting the color right in highly saturated images, then keep reading, as this Photoshop tutorial is for you. You’ll learn about the basic tools that already exist in Photoshop to modify saturation and tone, and how you can use those tools by applying saturation masks to always get the colors you want.
Color Issues
Like many photographers, you may struggle with finding simple ways to reliably control color in your images.
It’s so easy to overdo the saturation and not know where to stop, and it seems hard to figure out how to tame overly saturated colors.
The few tools that are available in Photoshop seem really broad, and it can be difficult to use them to modify and process highly saturated photos in a controlled way.
But there is a simple workflow that you can use to help you stop over-saturating your photos and get the color you want. One that lets you target your color adjustments to only the parts of the photo that need it.
The mainstay of this process is a selection method called saturation masks which is done inside Photoshop. Using this technique you can select areas of both high and low color saturation independently and precisely target any saturation and tone adjustments you wish to make.

Example images of using saturation masks
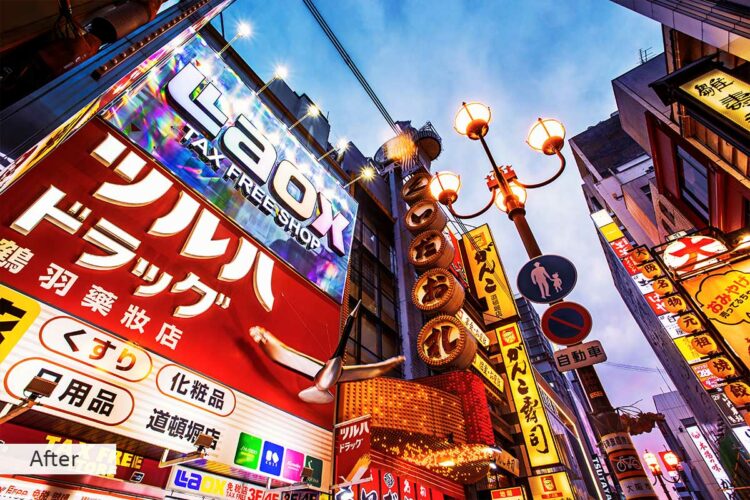
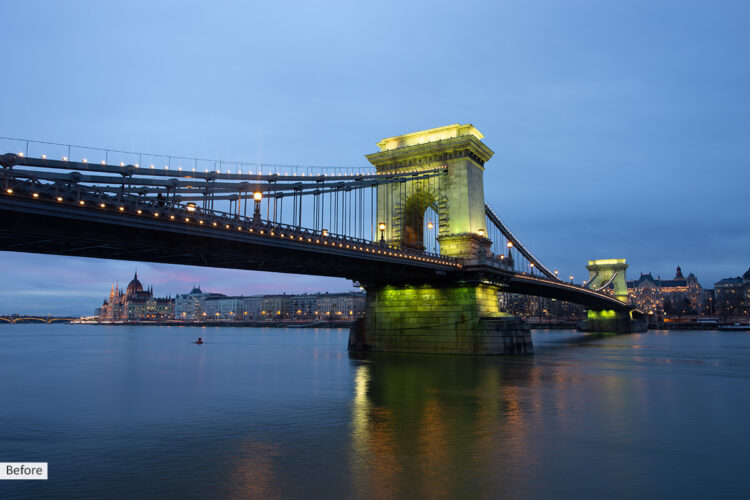
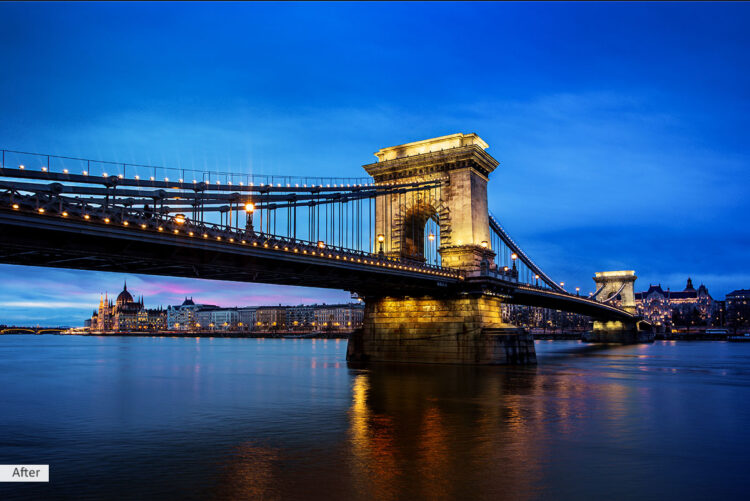
To give you an idea of what kind of results you can expect, here are a couple of example photos from the original to the finished photo after processing with saturation masks.


Basic Color Control Tools in Photoshop
If you want to control the color and tone of your images in Photoshop, there are a handful of tools and Adjustment Layers that you can use, with which you may already be familiar.
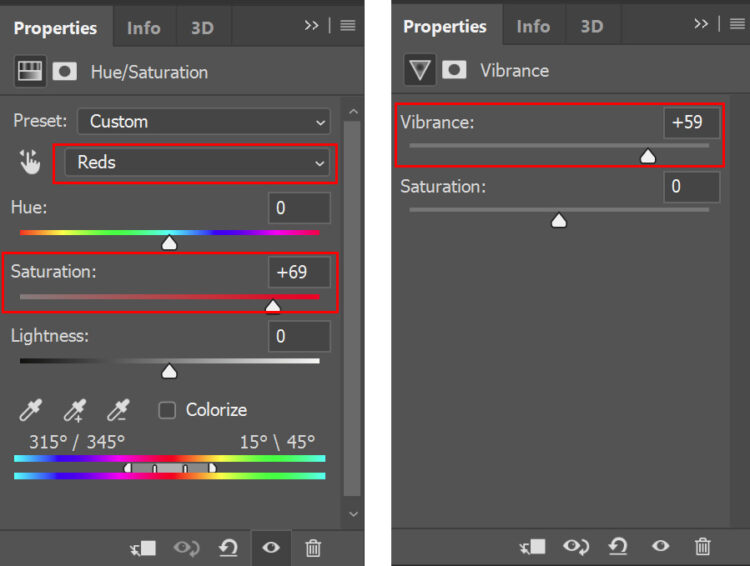
But there are only two Adjustment Layers that are specifically aimed at setting the color saturation of a photo.
- Hue/Saturation (outlined in blue below)
- Vibrance (outlined in red below)
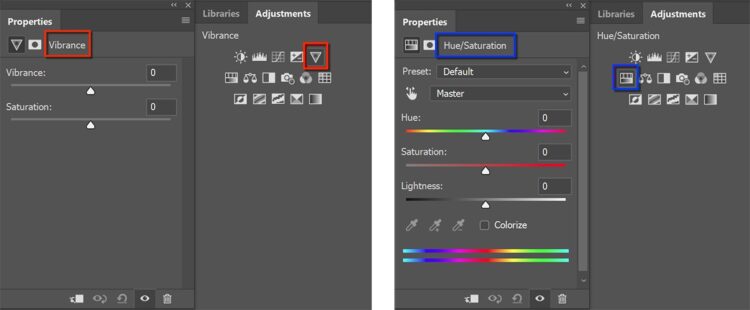
These edits work as basic global adjustments (meaning they apply to the entire image). They boost all colors in the case of Vibrance or only work on specific color channels (like Red, Yellow, Green, etc.) in the case of Hue/Saturation.
They are both very useful tools to help you to control saturation, but not on their own. I’m sure you’ve used them before and found that even small changes to the saturation sliders create large, non-targeted and often undesired effects across your photo.
For example, look at the photo of the Dotonbori district in Osaka, Japan below. If I apply both vibrancy, through a Vibrance layer, and increase the red saturation through a Hue/Saturation layer you can see a strong increase in the overall color saturation.
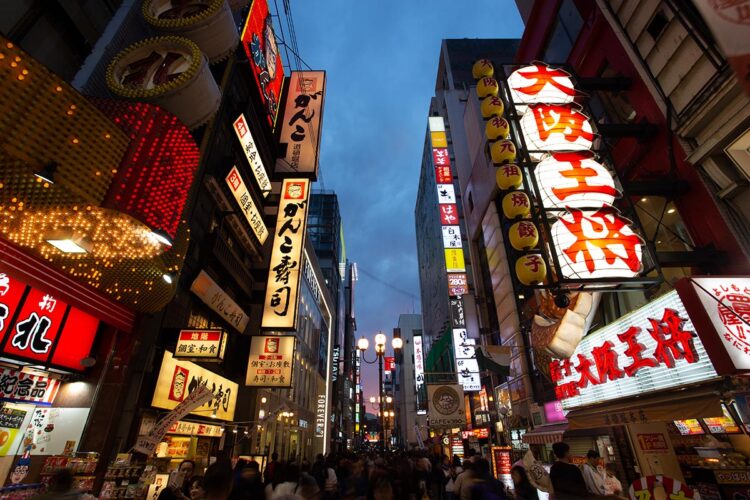

But the image still seems flat and lacks subtlety. The lack of targeting of the effect means that it is overdone.
So, you need a way of applying this effect to only the parts of the photo that need it. This is where Saturation Masks come in handy.
How to Use Saturation Masks to Get Perfect colors
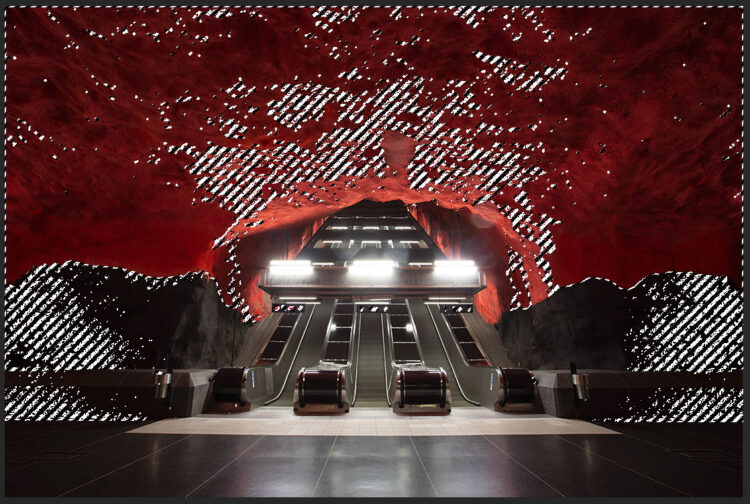
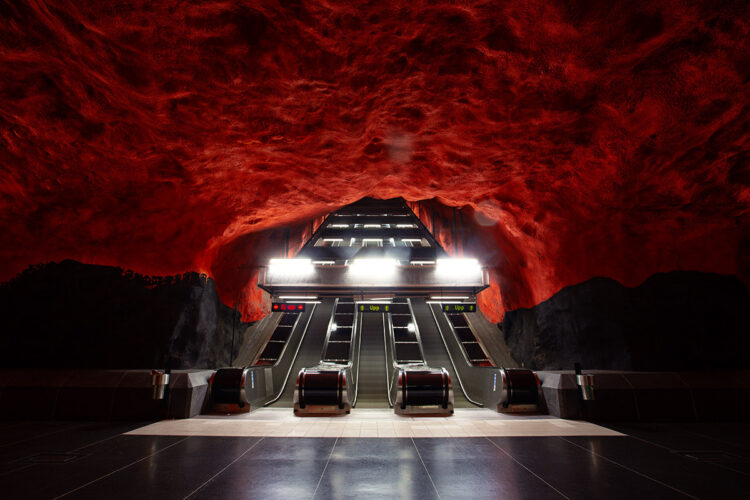
If you want to do this with me and follow along with the complete workflow, download the original photo here.
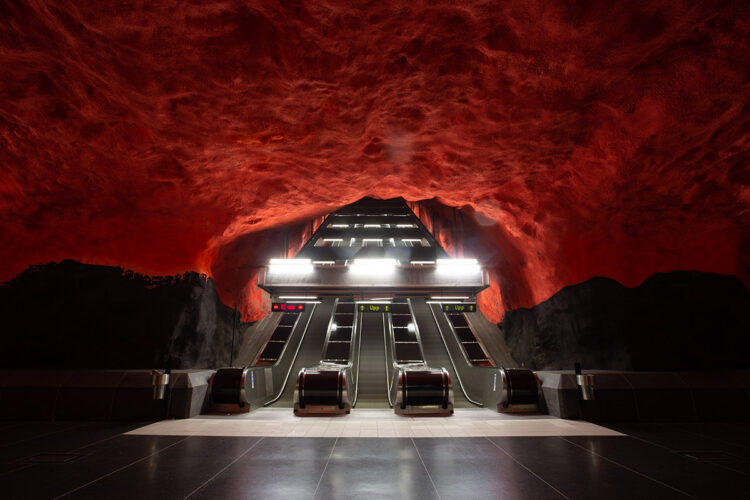
From first glance, it’s obviously a really high contrast photo. The red is highly saturated and the escalators and floor are very low in their color saturation.
You can see that the highly saturated red extends across the photo from the brightest part in the center to the darkest parts at the edge. So while other selection methods like luminosity masks are excellent for blending exposures, they fail for color control purposes when the highest and lowest saturated parts of your photo do not neatly fall in line with the brightest and darkest parts of the image respectively.
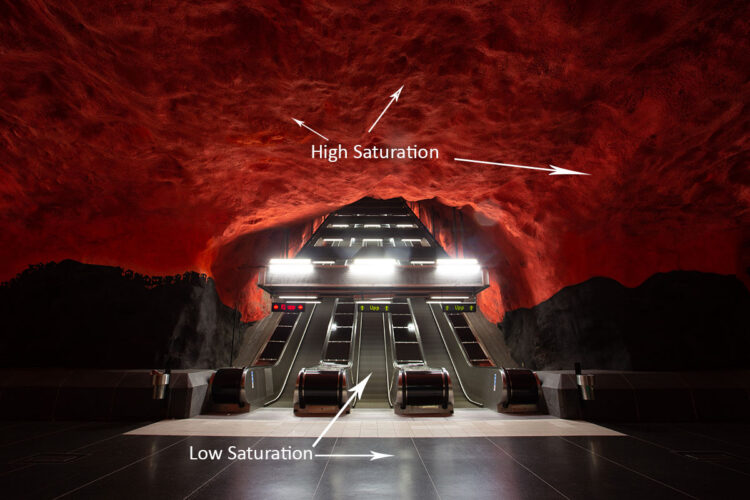
So this is when you can use saturation masks to separate out these areas so that you can then target the Hue/Saturation or Vibrance adjustment layers to affect only those specific parts of your photo.
This means that the Hue/Saturation and Vibrance no longer act as global adjustments, but will only work on either the most saturated parts of your photo, or the least saturated parts. If you want to follow along with this tutorial, you should have some prior knowledge of masking in Photoshop.
Step 1. Create Saturation Masks
Saturation masks are not something natively available in Photoshop, you must create them yourself.
Depending on how confident you are with Photoshop, it may be a little overwhelming, but it is nonetheless easy to create these.
If you are a little less confident or want to skip ahead, I have produced a free pack of Photoshop Actions that you can download from here, that will create these masks for you in one easy click.
Alternatively, you can watch this short video to learn how to make them for yourself in just a few minutes.
Step 2. View Your Saturation Masks
Next, go to the Channels tab in Photoshop where you will see your newly created saturation masks.
The high saturation masks contain the more saturated parts of your photo, getting increasingly refined as the number next to the mask increases. The same is true of the low saturation masks, although they contain the least saturated pixels in your photo.
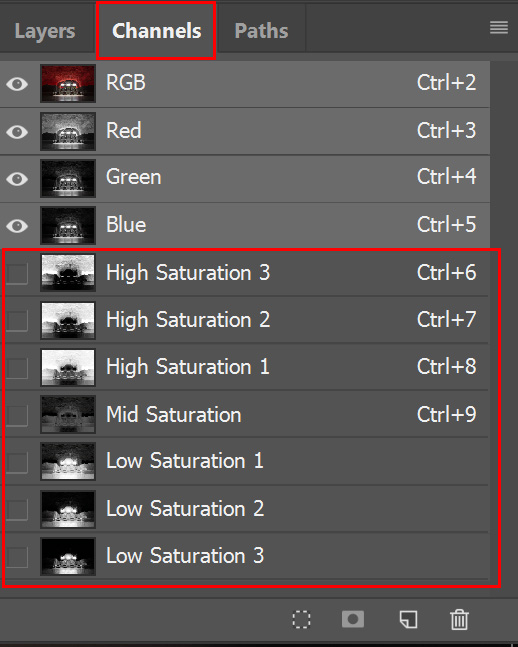
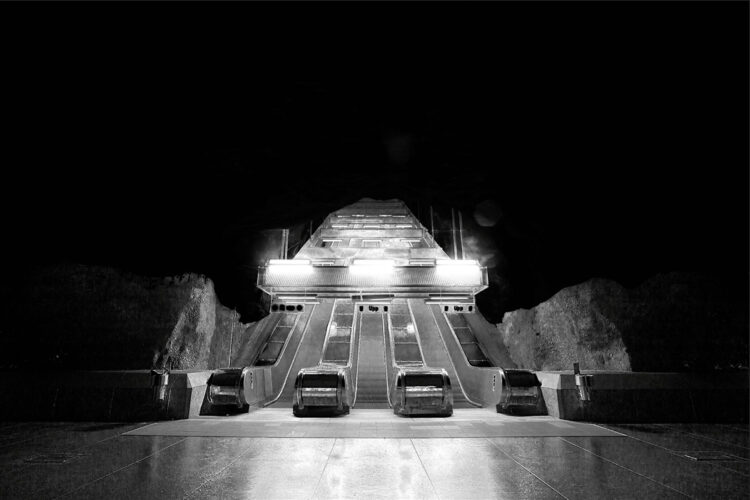
You can view each mask by holding down the ALT key as you click on each channel. As an example, here is the High Saturation 3 mask, and the Low Saturation 3 mask.
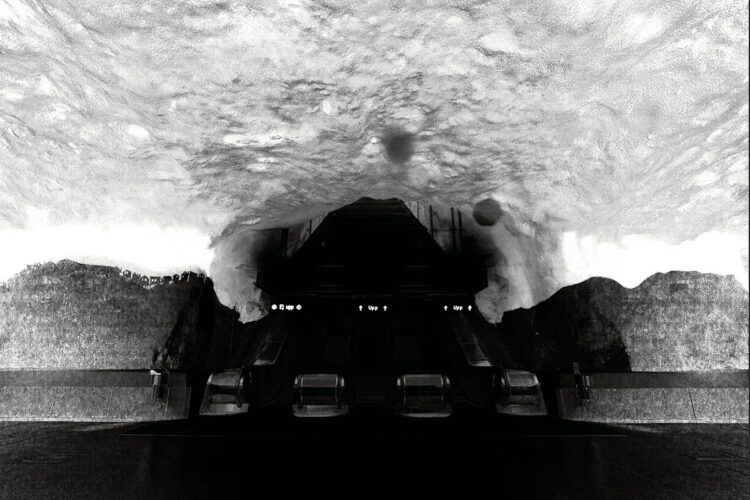
The white areas of the masks are the parts of your photo that will be selected. It is those areas that your Hue/Saturation and Vibrance adjustment layers will be affecting.
The dark areas are not selected by the masks, and will not be affected by your adjustment layers. The various tones of grey in the masks are the areas of medium color saturation. Those areas will be partially affected by the adjustment layers.
You can see that the High Saturation mask has selected nearly the entire ceiling and almost none of the escalators and floor. The Low Saturation mask is its exact opposite.
This hopefully follows exactly what you saw with your own eyes. That the most highly saturated colors were in the ceiling, with the least saturated colors in the escalators and floor.
So, using these saturation masks as layer masks, you can target the Hue/Saturation and Vibrance adjustment layers to only the highest or lowest saturated parts of your photo.
Step 3. Applying a Saturation Mask to a Hue/Saturation Adjustment Layer
The easiest way to create a targeted adjustment layer is to Ctrl+Click (Cmd+Click on Mac) on one of the saturation mask thumbnails. First, try Ctrl+Clicking on the High Saturation 3 thumbnail, as below shown below.
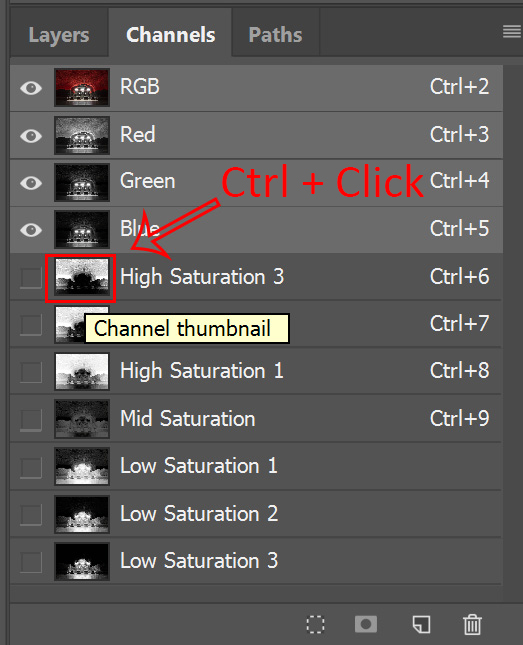
This loads the mask as a selection on your photo. It will look like this:
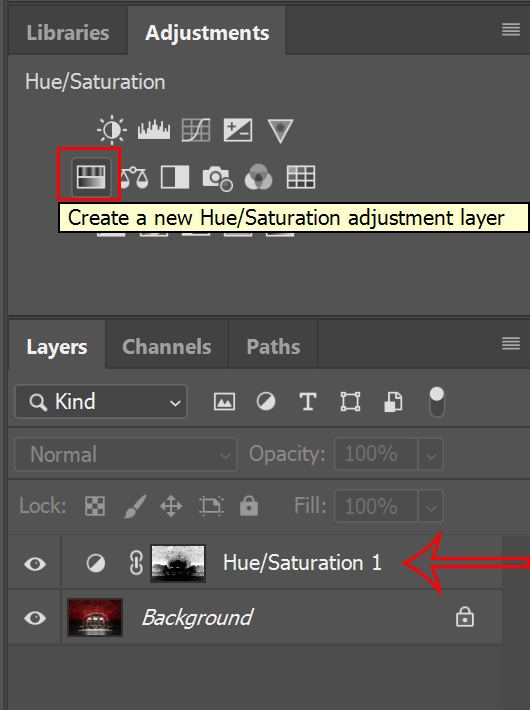
Then, simply click the Hue/Saturation icon to add that adjustment layer. The selection will automatically be applied as a layer mask.
To demonstrate the power of this technique, try adding a large amount of saturation, while also lowering the lightness, in the master channel of the Hue/Saturation layer.
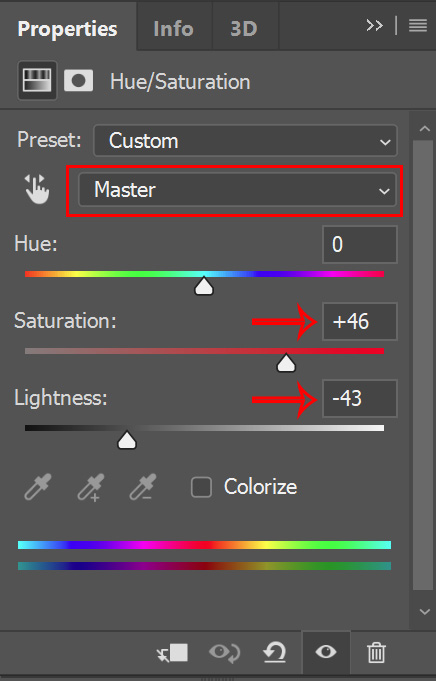
You will notice that contrast is pulled into the ceiling without the red becoming noticeably more saturated, with the escalators and floor not being affected at all.
Then try disabling the mask on the Hue/Saturation layer to see what effect your changes would have without using the saturation mask.


You can see that disabling the saturation mask causes the lighter reds to become heavily oversaturated, a lot of the contrast disappears from the ceiling, and the bright lights and reflection in the floor become muddy due to the reduced lightness.
Avoiding problems like these is exactly why saturation masks are such a useful tool.
Step 4. Adding More Adjustment Layers
Using saturation masks like this is the essential workflow for controlling highly saturated photos. But you don’t just have to use them with simple color control adjustment layers like Hue/Saturation or Vibrance.
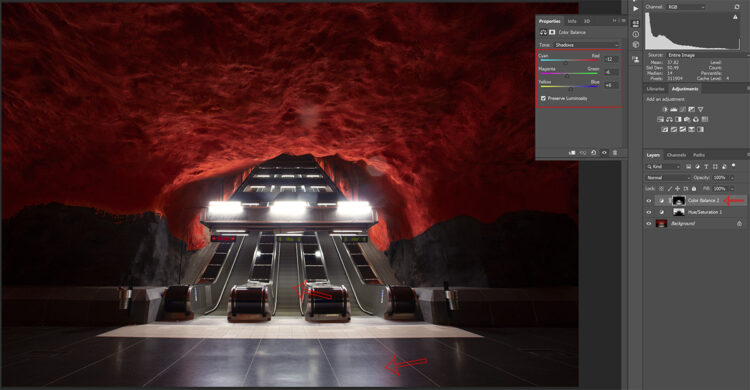
I would recommend that you repeat Step 3 above, but this time add a Color Balance adjustment layer, using the Low Saturation 3 mask. This means that the adjustment layer will only be applied to the least saturated colors in your photo.
You tend to find strong color casts in low saturated areas, as there are no dominating colors to drown them out. Therefore, you can use a low saturation mask plus a Color Balance adjustment layer to remove any color cast and recreate neutral colors, in this case removing the green/yellow color cast.
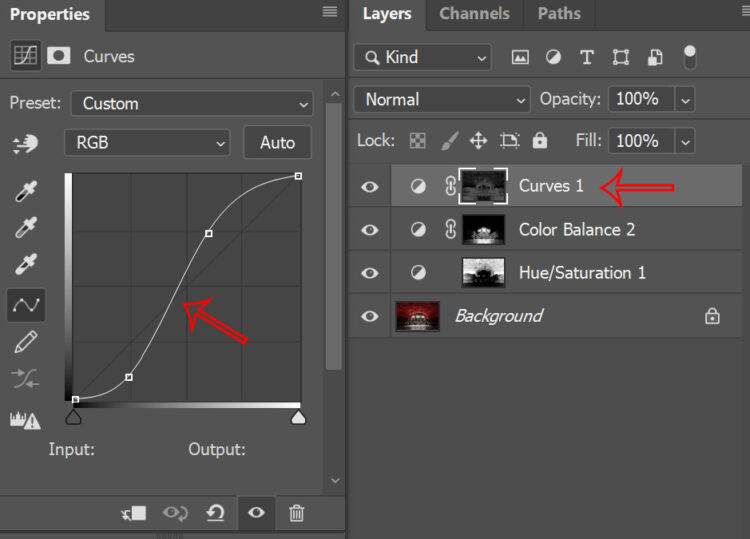
Finally, you might want to add a Curves adjustment layer if you feel that your photo is lacking in overall contrast. Use the Mid Saturation mask again following the process in Step 3.
You can add a strong S-shape to this Curves layer, which will apply gentle contrast throughout your photo because it is being constrained by the saturation mask.
Final Result
If you follow this process using saturation masks to add more adjustment layers, you can quickly process highly saturated photos in minutes. I continued to add various Curves and Color Balance layers to create the final photo below.
Notice that the most saturated parts of the red in the before photo are no more saturated in the after photo, However, you can see color and tone adjustments throughout the rest of the image.
If you want to see a quick workflow of how to use saturation masks to process an otherwise flat photo, take a look at the video below.
With the use of saturation masks, it is possible to carefully control tone and color in a way that is replicable and does not rely on luck. But, this is just the start of what you can do when it comes to color control.