Everyone’s favorite part of photography is camera equipment. I’m kidding, of course — although that is the impression you’ll get from certain photographers. But no one can deny that some gear is necessary in order to take pictures. At the very least, you need a camera and lens, but there are also important considerations like software and other accessories. This article dives into the most necessary and important camera equipment you need for photography, including some of our top recommendations.
1) Camera
A good camera is like an extension of your arm. It should be effortless to use, making it as easy as possible to capture the photo you have in mind. So, what camera should you get?
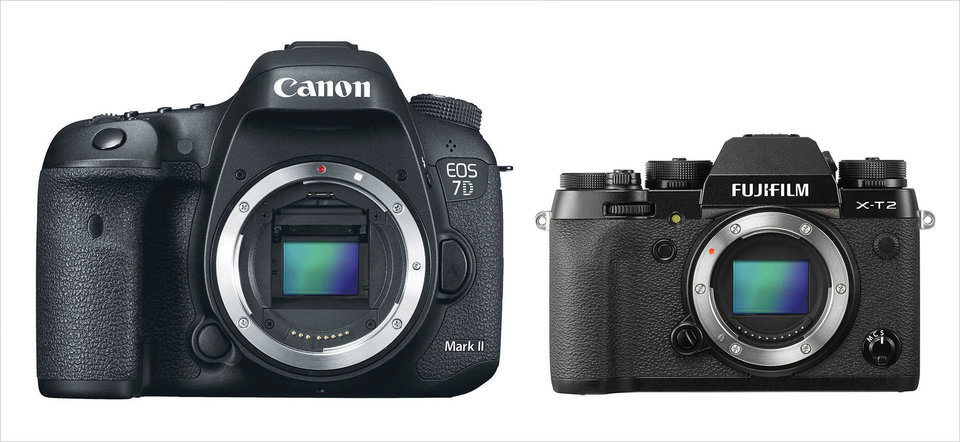
The best place to begin for many photographers is with an entry-level DSLR or mirrorless camera. The difference between these two types of camera is that DSLRs have an internal mirror, which reflects light directly from the lens into an optical viewfinder, so that you can see exactly what the lens sees. Mirrorless cameras don’t have this feature, which allows them to be smaller and lighter. The market price of a brand new entry-level DSLR or mirrorless cameras tends to be in the range of $300 to $700, not including any lenses or accessories.
Some popular entry-level DSLRs include the Canon Rebel series, the Nikon D3400, and the Nikon D5600. Don’t be fooled by the term “entry-level.” These are excellent cameras that we highly recommend for beginning and advanced photographers alike. On the mirrorless side of things, you have even more options to choose from, including popular cameras from Canon, Nikon, Sony, Fuji, Olympus, and Panasonic.
If these cameras are beyond your budget, you can get major discounts by purchasing a slightly older model from the same lineup — for example, an older Canon Rebel, or the Nikon D3200 or D5200. You can also buy used. On the flip side, for a higher price, you can find more advanced and specialty equipment. Either way, all of these are highly capable cameras. Do some research, pick one, and don’t agonize over the decision, because every option on the market today is quite good. (But if you need a place to start, check out our camera reviews.)
Lastly, there’s nothing wrong with using the camera you already have, even if it’s a smartphone camera or a point-and-shoot. You can capture excellent photos with any equipment, so long as you know its limits. There’s always time to upgrade in the future, and it isn’t worth rushing a purchase right now if you haven’t found the right one.
You can read more about DLSRs versus mirrorless cameras as well as DSLRs versus point-and-shoot cameras if you’re still trying to make your decision.
2) Lens
Along with a camera, the single most crucial piece of equipment for photography is a lens. In some ways, lenses are even more important than the camera itself, because the lens is what actually focuses the light to reach your camera sensor.
Certain cameras (including all the DSLRs and mirrorless cameras discussed above) allow you to switch out your lenses. They’re called “interchangeable lens cameras.” You can swap a portrait lens for a huge, expensive sports lens, using the same camera. This is a major benefit, making your system far more flexible for different types of photography.
What lens should you get? Some photographers use kit lenses which come bundled with many cameras. Other photographers buy their cameras and lenses separately. Either way, you definitely need to purchase a lens in the end, one way or another. There are two (and maybe three) that we recommend for starters. From most important to least, you should get:
- A kit lens that zooms, such as a 14-42mm, 16-50mm, 18-50mm, 18-55mm, or 18-105mm lens. These are inexpensive lenses that offer a lot of versatility, which gives you a good idea of what specialty lenses to buy in the future. They’re also higher in quality than they sometimes get credit for.
- A prime lens that doesn’t zoom, such as a 25mm f/1.8, a 35mm f/1.8, or a 50mm f/1.8 lens, which are especially good for portraits and people photos with a “shallow focus” effect (blurry background — see our article on aperture).
- A telephoto zoom lens, such as a 55-200mm. This type of lens lets you photograph distant objects like wildlife or sports, although not all photographers will need that capability at first.
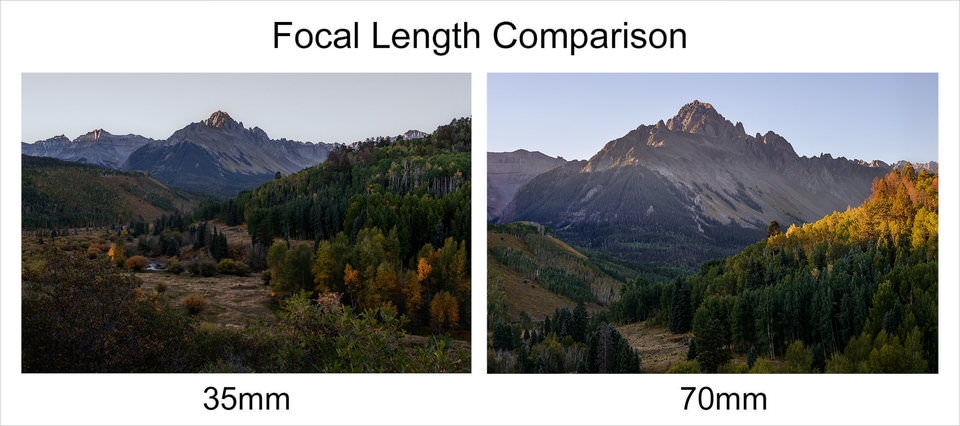
Every lens has a millimeter number, such as 50mm. This is called your focal length. It simply refers to how far “zoomed-in” a lens is — how narrow of an angle it captures. Lenses with a higher number (anything 85 or more) are considered telephoto lenses, which are like telescopes, magnifying things in the distance. Lenses with a lower number (anything 28 or less) are considered wide-angle lenses that show a much more sweeping view. And anything in between, like a 50mm lens, is a normal lens. Keep in mind that the exact numbers are not as important as what they represent. Some people would say that a 35mm lens is a “wide normal” lens, for example. Take a look at the image below, or at our more extensive focal length comparison:

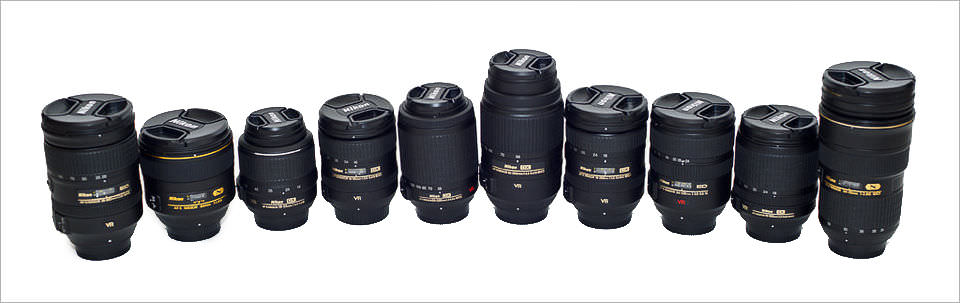
There is also the important distinction between zoom lenses and prime lenses:
- Zoom lenses cover multiple focal lengths. You can zoom them in and out.
- Prime lenses can’t zoom at all — they’re fixed at a single focal length.
Zooming is a great feature, but prime lenses are also excellent choices. They usually have several benefits, including weight, price, sharpness, low light performance, and “shallow focus” improvements (again, covered in our article on aperture). At Photography Life, we tend to prefer prime lenses rather than zoom lenses in many situations. You can read more at Prime vs Zoom Lenses.
Example:
An example of a zoom lens is the Nikon 24-120mm f/4 lens. An example of a prime lens is the Nikon 50mm f/1.8 lens. It’s easy to tell that a zoom is a zoom, since it has a range of millimeter numbers in its name. That represents the widest angle and the most magnified telephoto a single lens can offer. For example, the Nikon 24-120mm f/4 lens is a 5x zoom.
All photographers have different lens needs and requirements. There is no one-size-fits-all option, and that’s why manufacturers have hundreds of lenses on the market. Still, the basic kit described above should be a good place to start. Or, if you’re trying to decide on the right lens, you might consider checking out our lens reviews. You should also learn the things to do after buying a new lens.
3) Camera Bag
Unlike cameras or lenses, camera bags are easy. Picking a good one is mostly common sense — if a bag is comfortable, and it fits your equipment well, go for it. Still, you should choose a good one from the start. The ideal bag depends upon the type of photography you like to do:
- Landscape photographers will primarily want a camera or hiking backpack, since they end up traveling long distances and carrying a lot of equipment.
- Street and vacation photographers are likely to want a shoulder bag, since it’s quick to access, and it works well for smaller overall camera kits.
- Wedding photographers differ, but most will want a camera backpack or rolling suitcase to bring a lot of equipment to the wedding. Also, they may want a shoulder bag for moving around while taking pictures.
- Studio photographers might not even need a bag, if they never leave the studio, although some will purchase rolling suitcases to carry their equipment via car or airplane.
There are thousands of options for camera bags out there. Although you could buy bags online, we strongly recommend going out in person and testing this yourself, since you never quite know how a bag fits until you wear it. Comfort is very subjective. If you need to buy online, pick a store with a good return policy, such as Amazon, Adorama, B&H, or REI.
Along the same lines, don’t forget a good camera strap. If you end up carrying your camera around for long stretches of time, the original strap that comes with your camera probably won’t be very comfortable. You can buy large, padded straps at any camera store, and they’re also easy to find online. One very comfortable strap that we recommend is the Op/Tech Pro Strap, or you can check out all the straps that B&H sells.
4) Memory Card
The next item is a memory card. Memory cards store photos and let you transfer them from your camera to your computer. They’re an essential piece of equipment for any photographer. Some cameras even include a memory card when they ship.
The first reason to get a good memory card is storage. You’ll want a card that can hold plenty of photos — ideally well over 1000 photos from your camera, if not more. Get a memory card that is at least 16 gigabytes, and ideally 32 GB, 64 GB, and so on. This is especially important for wildlife, sports, and travel photography, where you’ll be taking a lot of photos. At Photography Life, we stick with 64 GB cards or larger.
The other important consideration is speed. Fast memory cards come with several benefits, and one of the biggest is that they minimize the time your camera spends “buffering” (locking up to process a burst of photos you just captured). This saves time in the field, and it lets you take longer bursts more easily. Getting a fast card is especially important for wildlife and sports photographers, and for video usage.
Memory cards are cheap compared to almost all other camera equipment, and, in today’s world, there’s really no reason to get a bad one. One card we strongly recommend is the SanDisk 32 GB Extreme Pro SDXC UHS-I Memory Card, due to its fast speed and reliability, for $22 (and a 64 GB version also exists for $38). You can read much more about why we recommend this card, and others like it, in our detailed article on everything you need to know about memory cards.
5) Tripod
Tripods are incredibly valuable for many photographers, although their importance depends upon the subjects you photograph. Personally, as someone who mainly focuses on landscape photography, my tripod is like an extension of my camera. I almost always use it. But other people — portrait photographers, wedding photographers, or street photographers — may not use a tripod as often.
What tripod should you buy? The truth is that all tripods have compromises. A $50 tripod from Best Buy might be lightweight and inexpensive, but it won’t be very stable in the wind. A $600 carbon fiber Gitzo tripod might be extremely stable, but it’s a $600 tripod. Also, if you want a lightweight tripod, you’ll need to compromise even more in terms of price or stability. This diagram sums it up:
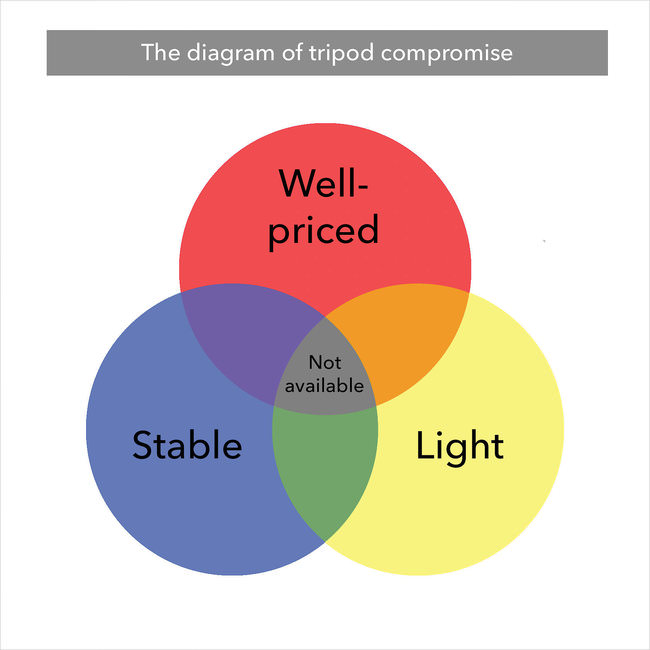
My recommendation for most beginning photographers is to buy something in the $75 to $150 range, at least at first, and to avoid buying one that’s made of plastic. A moderately lightweight aluminum tripod is a good option at this price. The most popular brand at this price range is Manfrotto.
If you later decide that you need a better tripod, go straight to a high-end carbon fiber option. Don’t buy a tripod in the middle, because it won’t be enough of an improvement, and you’ll end up buying the more expensive one anyway in the end. We speak from experience — If you upgrade your tripod incrementally, you’ll lose a lot of money along the way. The two top tripod brands are Gitzo and RRS, although they are very expensive.
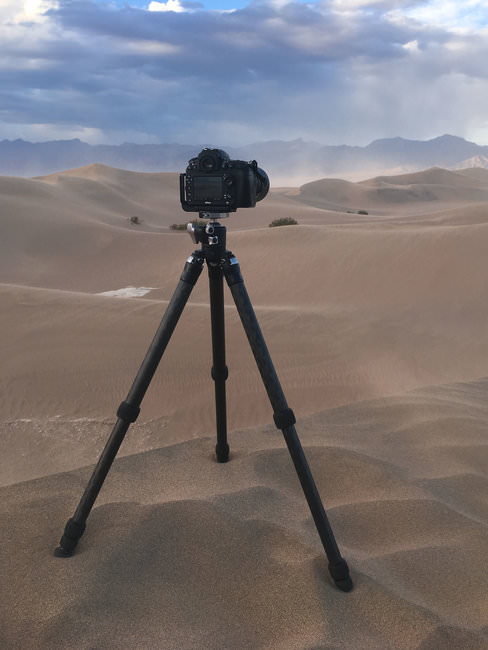
Also, you need a tripod head. Your tripod might come with one, or you may need to buy it separately (in the $50 to $100 range). Tripod heads are important; they’re how you actually move your camera around to take photos. If your tripod doesn’t come with a head, our recommendation is to buy a ballhead rather than a pan-tilt head, since it will be smaller and just as stable. (Pan-tilt heads are good for video, but usually are not necessary for still photography.) In the image above, there is a ballhead on the tripod.
Popular brands at this price include Manfrotto, Oben, Vanguard, Slik, Benro, Mefoto, and Sirui. That’s just scratching the surface, too — this is a very crowded market. The differences from one company to another are not very large, especially in terms of price-to-performance ratio. Find something with the right weight, folded length, and maximum height, and make sure the reviews seem favorable. After that, you should be good.
If you’re thinking about buying a tripod, your should know what to look for.
6) Filters
Filters go directly in front of your lens (or, more rarely, behind your lens), which alters the light your camera captures. They’re an important part of photography, although you might not need as many filters as you would think. There are four main types of filters that are relevant in digital photography. However, you might only need one or two of them, or none at all:
- Clear filters are transparent filters that protect your lens. Good clear filters are more expensive, but bad clear filters might harm your photo quality significantly. Personally, I only use a clear filter in the most extreme conditions, but other photographers use them all the time. Clear filters are also known as UV or Haze filters.
- Polarizing filters are crucial for many photographers. These filters darken the blue sky, and they decrease certain reflections in an image. If you photograph plants or water, polarizing filters are very useful, and highly recommended. (Read more about polarizers here)
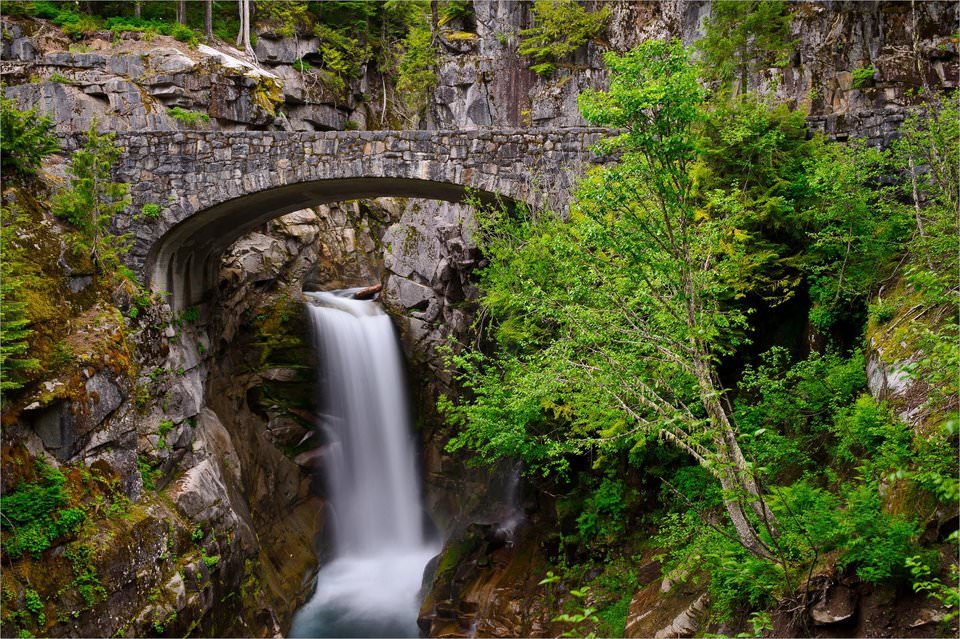
- Neutral density filters reduce the overall amount of light that reaches your camera sensor — they’re essentially just darkened pieces of glass. You should use them if you want extra motion blur in your photos, such as smoothing out waterfalls, or if you’re trying to do flash photography in bright conditions.
- Neutral density graduated filters transition smoothly in a gradient from dark to clear. This is useful if you need to darken a portion of your photo selectively (like the sky), while leaving the rest of the photo unaffected.
At Photography Life, we recommend waiting to invest in filters until you’re willing to get a higher-end option. That’s simply because a bad filter will harm the image quality of every photo you take.
The most important filter is a polarizer, at least for most photographers. It has a huge effect on your photos that is impossible to duplicate in post-processing. Still, you may also want other filters, depending upon your work.
As for brands, some of the most popular are Hoya, Tiffen, and B+W. There are other specialty brands, too, as well as plenty of cheap $5 plastic options available. Some photographers have preferences — often quite strong — between the main brands, but the basic fact is that you get what you pay for. For example, the best filter from Tiffen will be better than the worst filter from Hoya, and vice versa. Of the three, B+W is generally considered the highest-end brand.
You should read more about filter types if you are planning to purchase one or more.
7) Flash
For many types of photography, a flash is absolutely essential. It matters if you want to take pictures of people in dark environments, or if you want to shape and mold the light that shines on your subject. It’s also a good way to brighten dark shadows, even during the day.
Many cameras have pop-up flashes already, and you also can buy separate, stronger flashes at an additional cost. Some photographers (such as landscape or architectural photographers) may not want a flash at all. Others (like portrait photographers) could find them to be essential.
If you’re interested in advanced flash photography, consider getting a flash that can work without being attached to your camera. Otherwise, all you need to start might just be a flash that tilts up and down, or even the pop-up flash already built into your camera. Also check out all of our flash photography tutorials.
8) Extra Batteries
Any time you buy a camera, it will ship with a battery and charger. Still, that may not be enough. Personally, I have six batteries and three chargers, since I go on long hikes in cold weather, where batteries die quickly. Other photographers have even more. It’s never worth it to lose a good photo because your battery is dead, no matter the reason. So, get at least one backup battery — and more if you find that two isn’t enough.
Some people ask us about buying third-party batteries to get a discount, and our answer is simple: It depends upon which one you buy. There are so many third-party options that it is impossible to generalize. When in doubt, the original manufacturer’s battery is more likely to perform at the highest standards, but plenty of photographers purchase off-brand batteries without any issues with battery life or malfunctions. This is a case where it is important to read the reviews.
9) Post-Processing Software
To edit your photos, you need some sort of post-processing software. Most photographers will end up editing their photos, often significantly. However, the free software that comes with your camera or computer might not have enough features. So, what software should you get? There is no perfect answer answer varies significantly from person to person.
Many photographers ask about Adobe Photoshop first. However, although it’s a robust editing program, it’s aimed at graphic designers and digital artists just as much as photographers (if not more). For conceptual photography and strongly retouched advertisements/commercial work, Photoshop is a must-have. But, for many photographers, it’s overkill.
The actual software you should get is a bit of an open question. One possibility is to continue down the Adobe route and get Lightroom, which is a dedicated editing program specifically for photographers. Lightroom is $10/month from Adobe, and that price also includes Photoshop, which is a solid deal for a professional package. However, many photographers try to avoid subscription models like this, especially when it is the only option available from a company like Adobe. We’ve written about the issues with this arrangement several times before.
If not Lightroom, what’s left? Beyond Adobe, the playing field gets a bit messy. If you’re looking for a Photoshop alternative, there is an excellent and inexpensive piece of software called Affinity Photo — but no single option is ideal to replace Lightroom for your “everyday edit” needs. In no particular order, here are some of the most popular choices:
- ON1 Photo RAW
- Alien Skin Exposure
- Capture One
- ACDSee Ultimate
- DxO PhotoLab
- Photo Ninja
- RawTherapee
- Corel AfterShot Pro
All of these are well-respected, professional products, and you can’t go wrong. The important thing is to stick with the piece of software you pick whenever possible, since you’ll be able to learn it in-depth over time. That way, you’re familiar with how to make your photo match your intended appearance.
10) Monitor and Calibration Equipment
It’s important that the colors you see on your computer monitor actually mirror the colors you captured with your camera, at least at a broad level. Otherwise, the edits you make to a photo will be fundamentally flawed.
The problem is that most monitors have major color issues out of the box, or they aren’t good monitors in the first place. It’s important that you purchase a monitor that is an “IPS” panel (In-Plane Switching), and get at least an 8-bit monitor (and ideally a 10-bit or greater wide-gamut monitor). This way, your monitor can display the greatest range of color and give you the best color reproduction. Monitors can be expensive. One of the more reasonable options we recommend is the Dell U2415, for $220. However, you should read our guide to buying a good monitor for photography before purchasing anything, so that you have a better idea of what specs to look for.
After that, you still need to calibrate your monitor. This is where an external piece of hardware measures the monitor’s colors and provides a more accurate profile. The two most popular companies for calibration products are Datacolor and ColorMunki, starting around $100-$120. This may not be the most obvious piece of camera equipment, but it’s an important one for many photographers. You can also read more about calibrating a monitor if this is a topic that interests you.
11) Other Accessories
Along with all of this necessary camera equipment, there are some additional important accessories to consider along the way.
First, to maintain your camera, lenses, filters, and other gear, you’ll want a cleaning kit. This includes microfiber cloths and cleaning spray for your lenses, as well as a way to clean your camera sensor if it gets dirty. There are plenty of options out there, including wet-cleaning solutions and dry-cleaning products like sensor brushes. We also sell our own Sensor Gel Stick at Photography Life for this purpose.
Along with a cleaning kit, you may also want various other accessories like remote shutter releases, GPS attachments, motion triggers, printers, and so on. The market for photography accessories is huge. Our recommendation is to hold off on buying some of this more specialized gear until you have a good idea what genre of photography you’re interested in pursuing. For example, you wouldn’t want to buy a set of high-quality studio lights, only to realize that you prefer landscape photography rather than portraits.
Don’t get bogged down by accessories at first. Start with the core kit of your camera and lens, and see what direction your photography goes after that. Only buy additional accessories as needed.

12) Warning: Don’t Buy that Bundle
We’ll wrap up this camera equipment guide with a quick warning: Don’t buy all-in-one photography bundles when you purchase your camera, as tempting as they may be.
On most photography retail websites — Amazon, B&H, Adorama, and so on — you can find kits that include many of the items we’ve discussed so far. These bundles might include a camera, lenses, a shoulder bag, filters, cleaning equipment, a tripod, memory cards, and extra batteries, among other possible accessories. For the “convenience,” these bundles often cost $100+ more than the base kit. The problem? The added accessories are nearly always cheap, bottom-barrel junk.
We’ve seen many photographers throw away money on these bundles, only to repurchase almost all the items later from a higher-quality manufacturer. As tempting as kits like this may seem, they are simply a bad investment for learning photographers. Some bundles out there are good, but a far greater number simply are not worth the price.
13) Conclusion
Picking the right camera kit isn’t as easy as just buying a good camera. You also need to think about tripods, filters, post-processing software, batteries, memory cards, accessories, and more. The good news is that you don’t need to spend a fortune to get there. Start with an entry-level DSLR or mirrorless camera, as well as a couple lenses, and expand from there as needed.
Camera equipment matters, but, no matter what gear you have, it won’t be the driving force behind taking good photos. Instead, the most important thing is understanding how to take photos — both the technical and the creative side of things. That’s what we cover in the next chapters of Photography Basics.