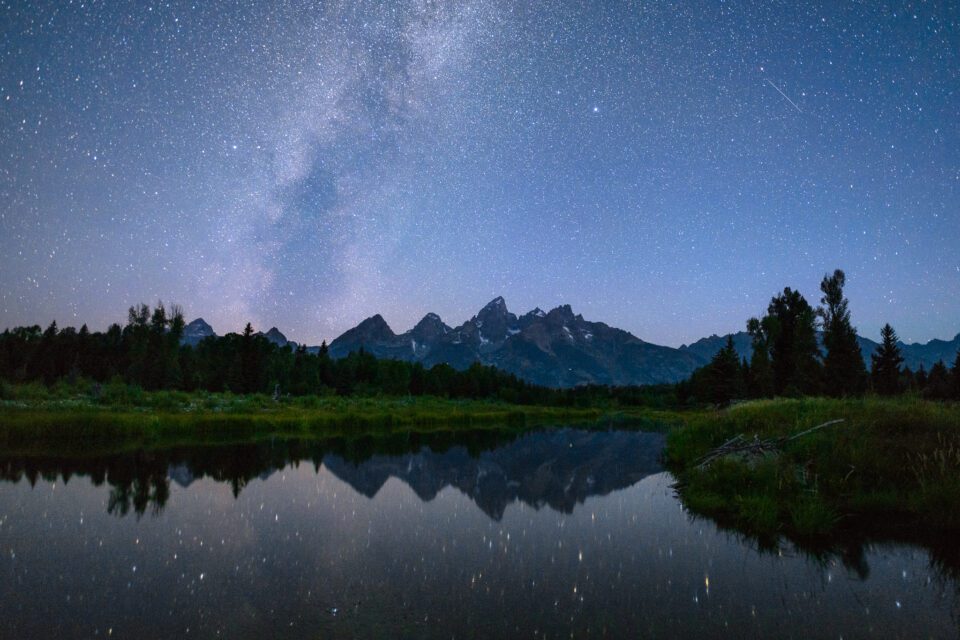
Simply seeing the Milky Way is already an awe-inspiring experience, and photographing it is one of my favorite things in the world. Although I’ve already written several articles about photographing the stars, today I wanted to specifically cover the gear needed to get great night sky photos.
This article is a continuation of my recent article on the best equipment for landscape photography. As such, I’ll be using the same rating scale to judge the usefulness of each type of astrophotography gear:
- 1/4: Rarely worth getting
- 2/4: Can be useful
- 3/4: Very useful
- 4/4: Must buy!
However, this time I couldn’t think of any “rarely worth getting” equipment that is popular among astrophotographers, so there is nothing rated “1/4” in this article! Almost every common accessory for Milky Way photography can be useful under some circumstances, even if I don’t tend to use it for my own photography.
Without further ado, here’s my analysis of the necessary gear for capturing great photos of the Milky Way at night.
Tripod (4/4)
It should go without saying that you need a tripod for Milky Way photography. I’m sure there are some people out there who take handheld Milky Way shots just to say they can, but they’re losing a massive amount of image quality that way.
One time, I didn’t bring a tripod along because I was traveling with some friends and didn’t expect to do much photography. Our view of the Milky Way ended up being amazing. I tried to take some shots by putting my camera on the ground, pointing toward the sky with a self-timer. I ended up with bad compositions, bad focus, and blur from the camera slipping in the grass. My friends took better Milky Way photos with their phones. It was humiliating. Bring a tripod!
Full-Frame Camera (3/4)
The usual advice for Milky Way photography is to get a camera with the best possible high ISO noise performance. And while that’s true, two techniques I’ll cover in a moment (star trackers and image averaging) mean that it’s not a necessity. You can theoretically take top-quality Milky Way photos with even a point-and-shoot so long as it has manual mode and shoots raw.
But boy does a good camera make things easier. Full frame is the way to go if you can. They also tend to have better lens options for shooting the Milky Way than aps-c cameras.
Wide-Angle Lens with f/2.8 or Greater Maximum Aperture (3/4)
Wide lenses allow you to use longer shutter speeds without blurring the stars. And large apertures allow you to capture more light – critical considering that a lack of light is the biggest barrier to high-quality Milky Way shots.
However, as with using lower-quality cameras, you can also use slower lenses or telephotos for Milky Way photography these days without actually sacrificing image quality. You just need to be using a tracking head or image averaging.
But wide-angle lenses with a large maximum aperture are still the ones to beat. That’s particularly true if you want to do some special case photography like capturing details in the Northern Lights, which can’t readily be improved with star tracking or image averaging.
Headlamp with Red Light Mode (4/4)
One of the most important pieces of gear you can bring along for Milky Way photography is a headlamp. With a headlamp, you free your hands to set your camera and adjust composition. Most headlamps also have a low-light mode, unlike a lot of flashlights.
Try to get one with a red light mode because it doesn’t strain your night vision as much as white light. Just remember to turn off the headlamp before taking your photos, or you’ll end up with a red foreground!
Bright Flashlight (3/4)
Even though I generally navigate with a headlamp at night, it’s always helpful to bring along a bright flashlight as well. One of the easiest ways to focus on the night sky is to shine a flashlight at something in the distance and focus on that instead, approximating infinity focus.
This is the one I use because it’s small, light, and has variable brightness. If you already have a good one, just use that.
Light Painting Gear (2/4)
I’m not much of a light painter in my Milky Way photos. Some people love it and consider it a necessity. The best light painting gear varies from flashes to lightsticks to even drones with lights attached, depending on what you’re trying to accomplish.
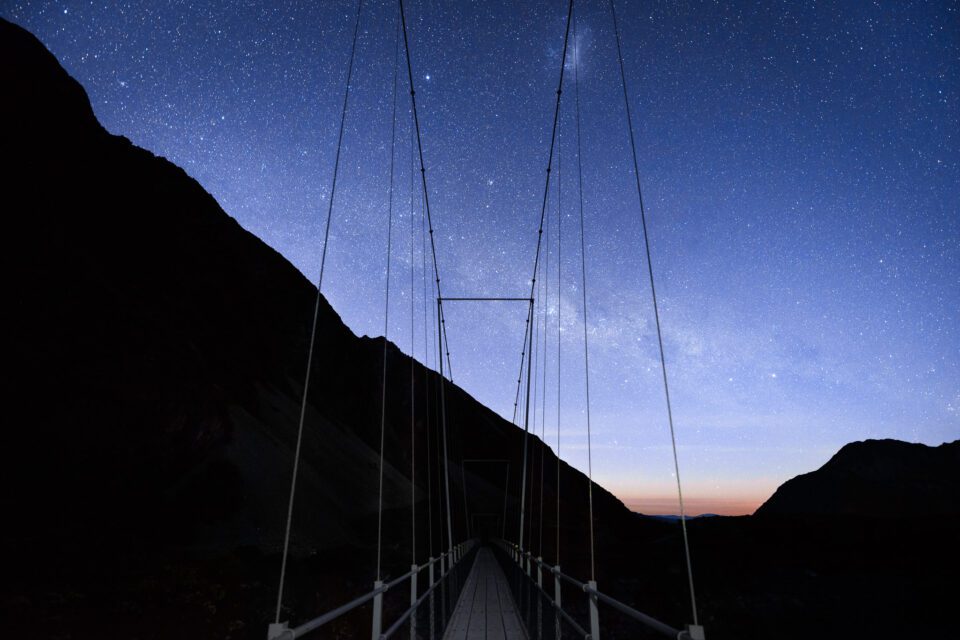
In the rare case where I’ve wanted some light painting, as in the bridge photo below, I’ve used my flashlight or headlamp to provide slight foreground illumination.
Focus Aid Filter (2/4)
Generally, lens filters aren’t closely associated with Milky Way photography, but there are a couple types that photographers occasionally use. One of those is a focusing aid filter. It works by adding streaks to the stars in your photo – streaks which are misaligned when the star is out of focus and aligned when it’s in focus. The idea is that you’d attach the filter, focus, and then detach the filter.
There’s nothing wrong with them (they do work well) but I find them no faster or easier than the other focusing methods I tend to use at night. Feel free to get one if the other methods cause you to strain your eyes, though.
Light Pollution Filter (2/4)
The other somewhat common filter for Milky Way photography is a light pollution filter, designed to filter out some of the yellow colors of light that are common near cities and towns. While light pollution filters may seem like a good idea, they often cause enough color shifts in the foreground (and blurry corners on the cheaper filters) that I tend not to recommend them. The situation where they’re the most helpful is for deep-sky astrophotography in polluted areas, where you’re using a star tracking head (see below) to maximize image quality.
Star Tracking Head (3/4)
One of my favorite accessories for capturing high-quality photos of the night sky is a star tracking head. To use it, you just point the head at the North Star – or equivalent area in the Southern Hemisphere – and it follows the rotation of the stars all night (technically the rotation of the Earth, but we all know what I mean). You can attach an ordinary tripod head and compose your photo however you want. Wherever you point, star trails will be eliminated.
However, the downside is that “earth trails” – i.e., a blurred foreground – is inevitable when you use a star tracker. Some photographers choose to take a second, non-tracked photo of the foreground to merge the two together in Photoshop. Other photographers use star tracking heads for deep-sky astrophotography anyway and don’t have a foreground to worry about in the first place.
Whatever you choose, star tracking heads can give you absurd levels of image quality at night. I took the photo below with a fourteen minute exposure (plus a separate shot for the foreground). You can see in the crop afterwards just how much detail is in those stars.
![]()
Tripod Leveling Base (2/4)
If you want to take panoramas at night in order to capture the whole Milky Way, a useful tool is a tripod leveling base. Leveling bases go directly underneath the tripod head, and they have a few degrees of motion in each direction to allow your tripod head to be completely level even if the tripod legs aren’t. This way, you can rotate the tripod head to take multi-image panoramas without introducing a major tilt to your shots.
There are certainly more advanced setups if you want to do complex nighttime panoramas (our friend Aaron Priest is known for that) but a leveling base is a good starting point if you’re after basic panoramas.
Remote Shutter Release (3/4)
It’s common in Milky Way photography to be shooting with unusual settings that are much easier with a remote shutter release. Whether you’re trying to capture star trails with an hour-long exposure, a timelapse movie, a sequence of images to blend later, or anything else unusual, a remote release of some kind can be very useful. Although most cameras have built-in intervalometers, a separate remote will usually have much more functionality.
Battery Management System (3/4)
If you’re shooting a timelapse or sequence of images at night, you should make sure you have enough batteries to last. Cold nights sap away battery life faster than you may be used to, and the same is true of constantly recording images one after another.
Plenty of cameras these days have an option for continuous power over USB, which means you can use a high-capacity external battery pack to keep your camera charged all night. If yours doesn’t, you may want to look into a standard battery grip that can at least double the capacity on most cameras.
The easiest option, if you’re not shooting a timelapse and don’t mind interrupting your camera for a minute, is just to bring a bunch of extra batteries and swap them out when they reach one bar.
Warmth (4/4)
It’s easy to get cold while you’re taking Milky Way photos, especially if you’re just standing around next to your tripod in the dead of night.
With no sunlight to keep you warm, even a seemingly reasonable night around 15 Celsius / 60 Fahrenheit can start to feel surprisingly cold. Bring more jackets than you think you’d need, plus handwarmers, a hat, gloves, and so on – even if it seems like overkill. Make things cozier by bringing a camping chair, blanket, and a portable speaker to enjoy the evening as your camera clicks away.
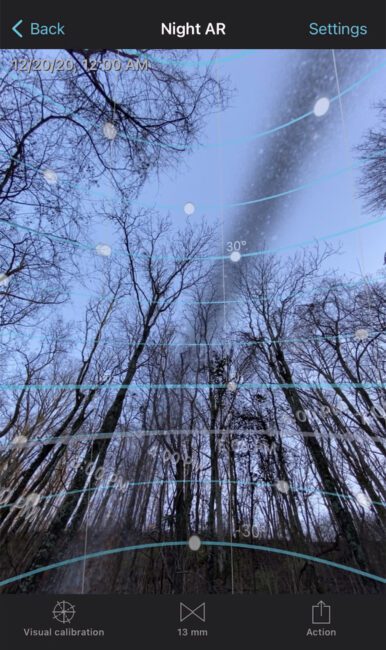
Milky Way Tracking App (3/4)
The Milky Way is generally found to the South, even if you’re in the Southern Hemisphere (though it’s much more overhead to you if that’s the case). It starts the night in the Southeast and moves toward the Southwest.
Still, it changes quite a bit based on the time of year and where you are on the globe. Rather than simply planning to look South, a better idea is to have an app that can track the Milky Way and show you where it’s going to be at any time and date in the future.
There are plenty such apps out there. I have no affiliation with them, but I like one called PhotoPills that has an augmented reality view of the Milky Way superimposed on the landscape in front of you, with whatever time/date you select. I’m sure there are others that do something similar, but either way, I recommend a Milky Way tracking app to make your life a bit easier.
Other Apps (3/4)
There are so many other potentially useful apps for Milky Way photography that it can be hard to keep track. You’ll want a good weather app that shows cloud cover details; I use a free one called Astrospheric. For deep-sky astrophotography, there are plenty of apps which show where to find particular details in the sky. I can’t say I’m very impressed with any of the ones I’ve tried, but I use two called Star Chart and Star Walk 2 that are passably good. And then I’d recommend PhotoPills a second time because of its information about the moon and meteor showers, plus specific features for calculating star trails. It’s a $10 app, though, while the others are free.
Sequator or Starry Landscape Stacker (3/4)
As much as I like using a star tracker to capture maximum image quality at night, there’s a method I like even more – image averaging. With the proper software, you can load multiple photos of the Milky Way to be averaged together, a process which drastically reduces noise and improves image quality.
The two best options are Sequator (Windows) and Starry Landscape Stacker (Mac), which align the stars before averaging your photos. They keep the foreground and all other stationary objects in the photo untouched. It’s similar in image quality to using a star tracker, at least for most uses.
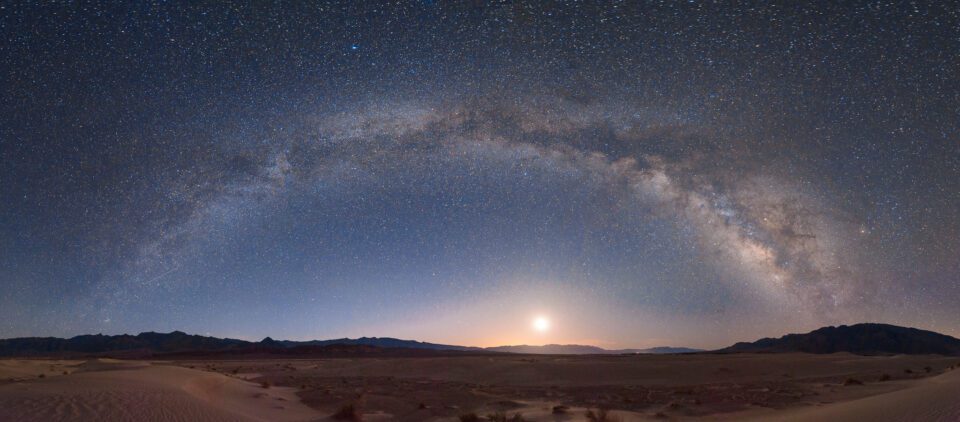
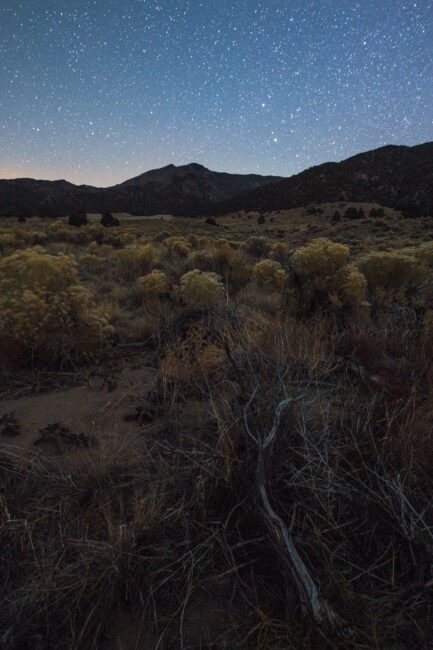
This sort of software is why I’m comfortable using an f/4 lens (the Nikon Z 14-30mm f/4) as my primary Milky Way photography lens these days. It’s also allowed me to get dramatic improvements to my depth of field at night, as you can see in the photo below, where I was able to use f/8 and take 33 photos to average:
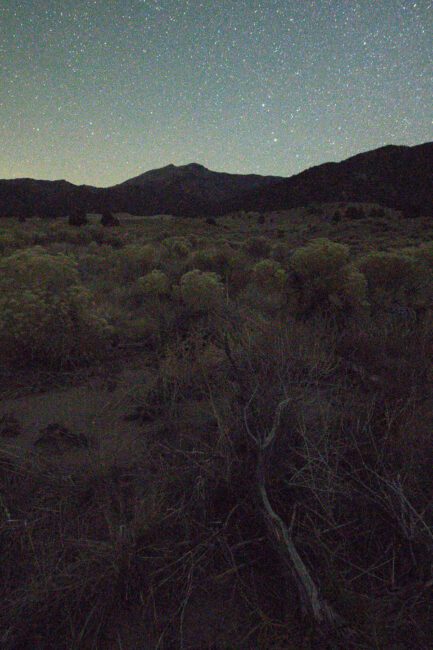
A single photo with the same depth of field looks like this, completely unusable:
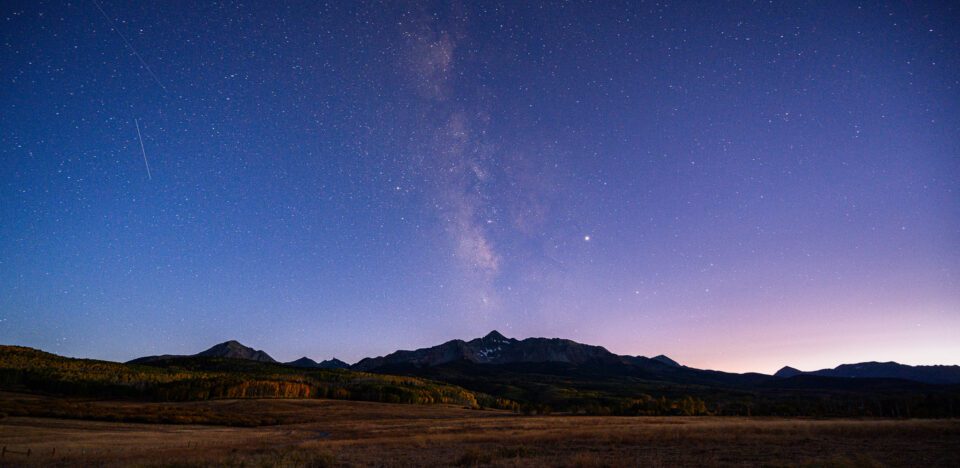
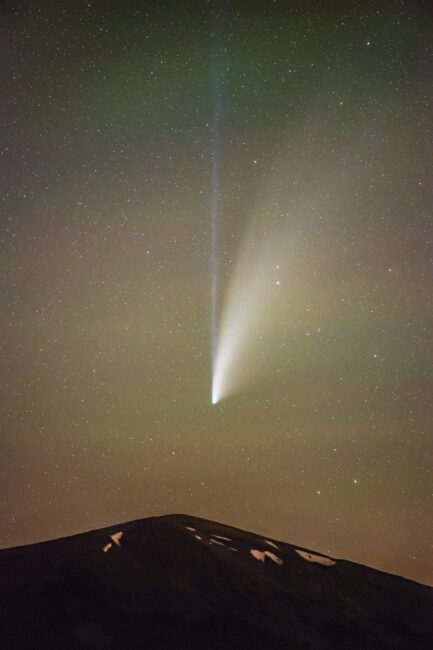
You can also use image averaging to take telephoto images very easily, either to enlarge the core of the Milky Way or to show off other astronomical phenomena, like the comet Neowise that showed up last year:
For what it’s worth, you can also take image averaged photos of deep-sky objects (or even use a combination of image averaging and a star tracker) to get very high levels of image quality. If you don’t have a foreground in your photo, the best software options are DeepSkyStacker (Windows) and Lynkeos (Mac), both of which are free. Again, I have no affiliation with any of these, and there may be others out there that are similarly good – just sharing what I’ve used.
Topaz Denoise or Similar (3/4)
The last step of Milky Way photography is the post-processing phase. There’s a lot of noise in most Milky Way photos, so a good noise reduction product is very helpful. I generally just use Lightroom’s noise reduction, but not because it’s better than other software out there. It’s not; it’s just convenient. To get top quality, I recommend downloading Topaz Denoise or some similar artificial intelligence noise reduction software.
Conclusion
I hope this article helped you figure out what gear you need for Milky Way photography! If there’s anything I overlooked, let me know in the comments below. This is what I use for my own Milky Way photos, but there are so many advanced directions you can go if you’re interested in this genre – everything up to dedicated telescopes for deep-sky astrophotography, or even specialized cameras for photographing other planets in the Solar System. The sky is, quite literally, the limit.