Taking pictures of people can be challenging for an amateur photographer. Everyone enjoys seeing good portrait photos, whether of family, friends, or just an interesting face. And, as photographers, we also enjoy being able to make an image quickly, which is why we hate when something goes wrong with the photo or with our camera settings. With that in mind, here are some technical tips to help you improve the quality of your portrait photography and use the best possible camera settings along the way.
Pick Camera Settings so Your Subject’s Eyes Are Sharp
We have five (or so) senses, but the one we use most is our sight. This means that the eyes on a photograph have to be sharp, no matter how many people are in it. Here are some tips to make sure that your subject’s eyes are sharp.
To start, I like to use single point autofocus. “Guessing camera” modes aren’t my favourite because they do not necessarily lock focus on the eyes. You want to use a single point and focus on the nearest eye. Lock the focus, and recompose slightly if needed to get a pleasing composition before shooting.
After taking some shots, check the sharpness of the eyes. You can’t check sharpness by the default image on the LCD screen. Start there, but use the zoom function to check the eyes. Shoot again if they aren’t sharp. You need to play with your focusing, and perhaps read the manual to understand how to use your camera. The deeper problem might lie with your camera settings, which may not be optimal for portrait photography. Below, I will cover some of those settings to improve the portraits you take.
Shutter Speed for Portrait Photography
There are an almost infinite number of guides out there on the minimum safe handheld shutter speed. But only a small number of these guides understand you’re photographing a living person who is likely to be moving.
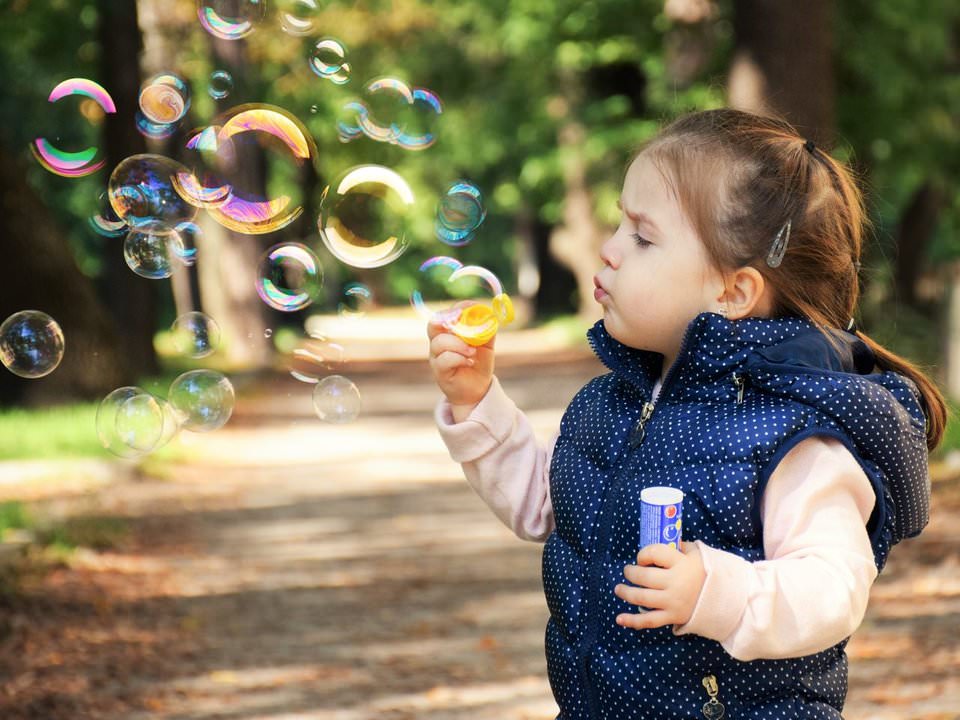
Using a 50mm prime is not a good reason to have a shutter speed of 1/60 of a second. Most likely, you will need to raise the shutter speed to counteract some of your subject’s movement. Don’t hesitate to try different techniques. Especially if the eyes are not sharp in your portrait photo, use a faster shutter speed (assuming that you’ve already adjusted the focus properly). You will need a fast shutter speed when photographing a child, for example, because they are constantly moving at a higher rate than adults. This is one of the challenges at my photography company, NPM, where we mainly photograph children. Faster shutter speeds help in counteracting their endless movement.
Don’t rely on the technical features of a camera such as optical image stabilization to counteract this. Stabilization can help a lot with reducing shake from your hands, but it does nothing to prevent blur in your subject. This is not to say you should turn off image stabilization, but that this feature alone is not enough to guarantee sharp portrait photos.
A Tip for Shooting Outdoor Portraits

To get the best possible portrait photos outdoors, you often will want a very shallow depth of field with a blurred background (as opposed to studio portrait photography, where that is less of a concern). How do you capture a thin depth of field, also known as a shallow focus effect?
The simple answer is that you should use a wide aperture. If you are just getting into photography and don’t know where to start, you might consider setting your camera to portrait mode on the mode dial, which will do this for you. (Specifically, it uses a wider aperture and a faster shutter speed, giving you less probability of blurry photos and a higher likelihood of a soft, dreamy background with beautiful bokeh.)
Advanced photographers should do the same thing by turning to aperture priority or manual mode and setting their lens’s widest aperture, or something close. The result, once again, is to capture a shallow depth of field and make the background less distracting. This tip might seem simple, but if you are not doing it already, take a shot at it. You may find that it drastically improves the aesthetic appeal of your images, as it focuses the attention of viewers onto the primary subject. Although, like all things in photography, it is a technique you should use deliberately, and there are always counterexamples as well.
Choosing the Right Focal Length

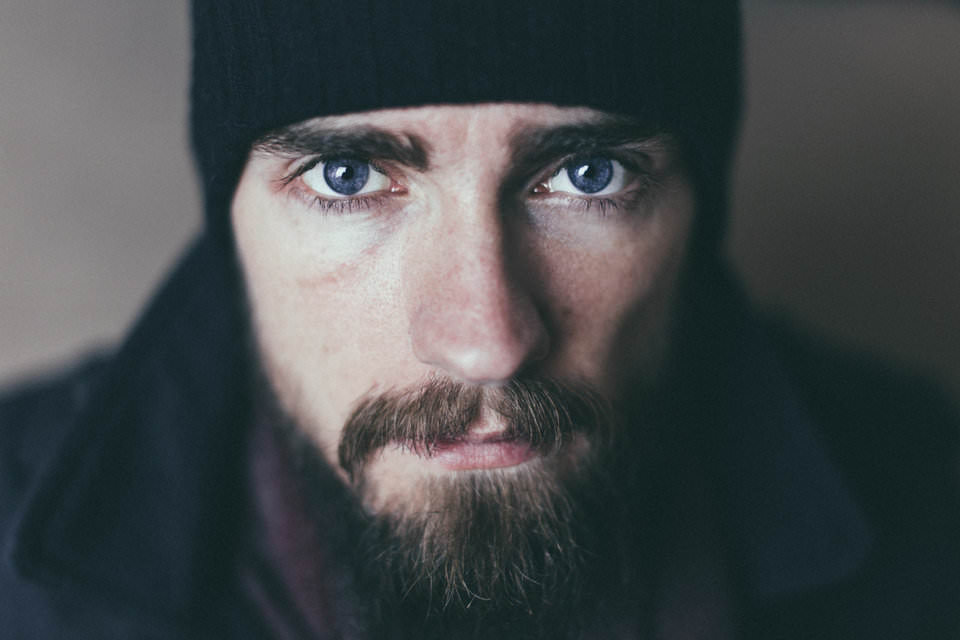
In my opinion, a 50mm lens is not ideal for close portraits. When you’re close enough for a half body or headshot, perspective exaggeration makes the nose look bigger and affects the depth of your subject. A 50mm lens is great for group shots and full-length portraits, but I do not find it a good choice for a portrait of a single person. (It is not that a 50mm lens never works – consider the first photo in this article – but simply that it is not my favorite if your goal is a flattering close-up.)
Your telephoto zoom lens, on the other hand, is a smart choice. Start out with 100mm and work up to longer focal lengths. You’ll get some perspective compression as you stand farther and farther back, which is often flattering to faces. It also increases the space between you and a subject, which puts non-professional models at ease; there’s no lens shoved right up to their face. Keep in mind that many telephoto zooms are built to be sold at low prices, which is both good and bad. On one hand, these lenses are relatively affordable, but it is also true that they may not have the same maximum aperture as an equivalent prime.
To blur the background, you need to use the longest possible focal length, be as close to the subject as possible, and have the lens set to the widest aperture. It is entirely possible to photograph a great headshot of a child with a basic 55-200mm lens at 200mm and f/5.6. Double check the eyes to ensure they are sharp, and – should you be unable to get a fast enough shutter speed to freeze motion blur – try raising the ISO. There is a good chance your camera is better at noise control than you think.
Group Photography Camera Settings

It can be challenging to photograph a group. Where should you focus, and how should you frame your photo? For creative purposes, it can help to pose the group yourself, so you avoid having them line themselves up side-by-side however they choose. Also, people generally leave some space between themselves, so get them to squeeze together. Make sure the people in the back push their heads between the people in front (not just stand up taller). This reduces the need for a smaller aperture and gives you some more depth of field flexibility, since all your subjects will be a similar distance from your plane of focus.
And now it is time to use the 50mm lens; this is what it was made for. Unless you have had enough practice to fully understand your system’s depth of field, a good place to start is to focus on the closest eye of the nearest person in the group and start out with an aperture of f/8. Be sure to choose the right shutter speed, which may require you to raise the ISO if the default shutter speed causes some unwanted blur.
Take a shot and review it to assess the overall sharpness, using the zoom function in your image review. If your depth of field is not ideal, make any necessary adjustments to the aperture, and reshoot the photo. It might take a few tests shots, but you’ll soon have the right camera settings, and you can start the real job: getting everyone to look like they are happy to be in the photo!
Hopefully, the tips in this article will help you pick the best camera settings for portrait photography, getting everything from shutter speed to focusing technique as good as possible. It requires some effort to take great pictures of people, but the photos and memories you capture will make it all worthwhile.
Thank you to reader Sarah Milton for this wonderful article and beautiful portrait photos! Please visit her website Newborn Photography Melbourne if you would like to see more of her work or book a family photography session.