Have you ever wondered how photographers immortalize stars or galaxies in their astrophotography? Look no further. We will show you how to capture stunning shots of the Milky Way.
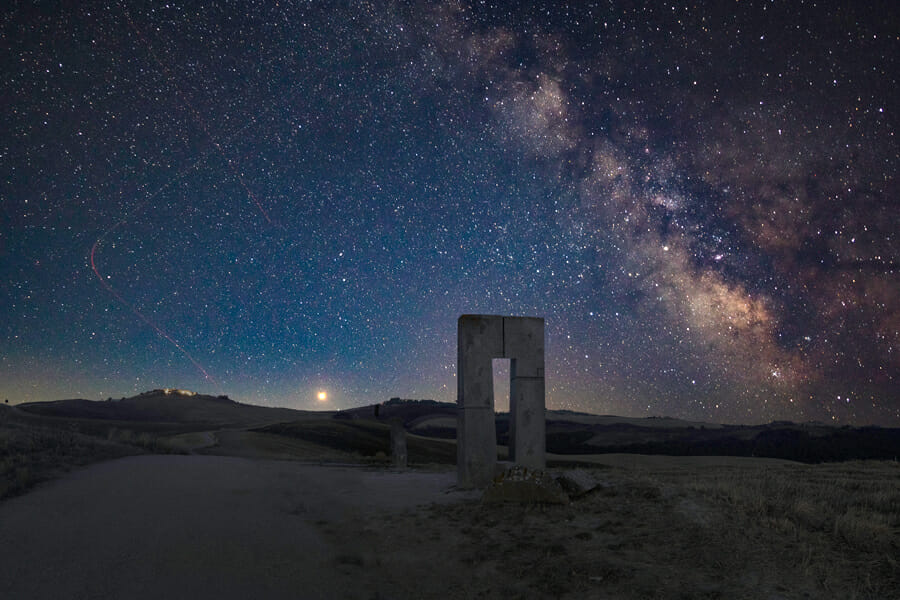
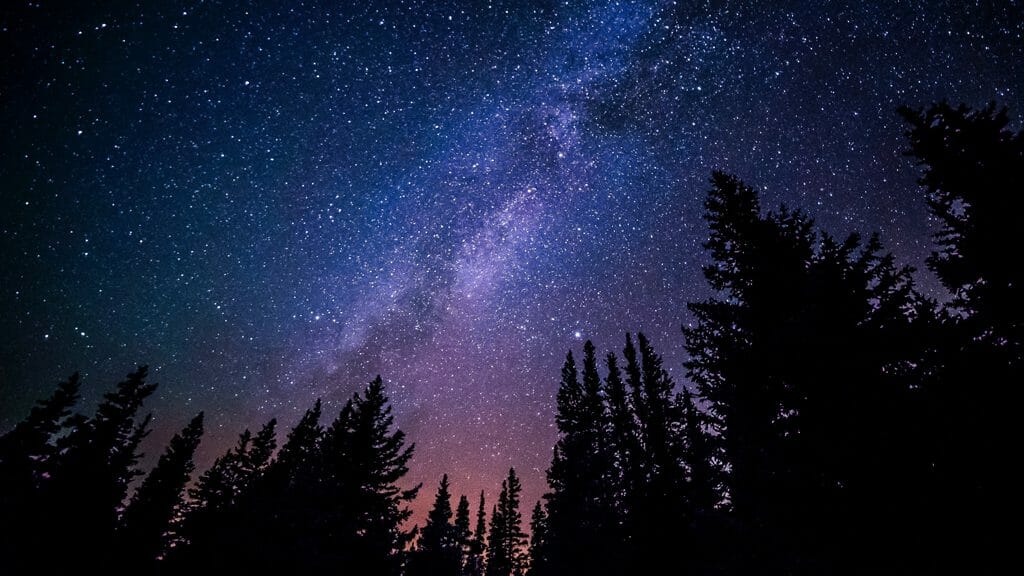
Night sky photography is often associated with cityscapes or starry landscapes, in which the Milky Way dominates the sky.
Photographing the night sky is challenging but rewarding, especially if you are curious about the cosmos. In this article, I will introduce you to the basics of Milky Way and night sky photography.
The Magic of the Milky Way
What makes photographers lose their sleep and venture outside at night with their cameras?
I think that is because we, as humans, view the stars with awe. Most people in the ‘civilized’ world don’t usually have a view of the Milky Way thanks to light pollution.
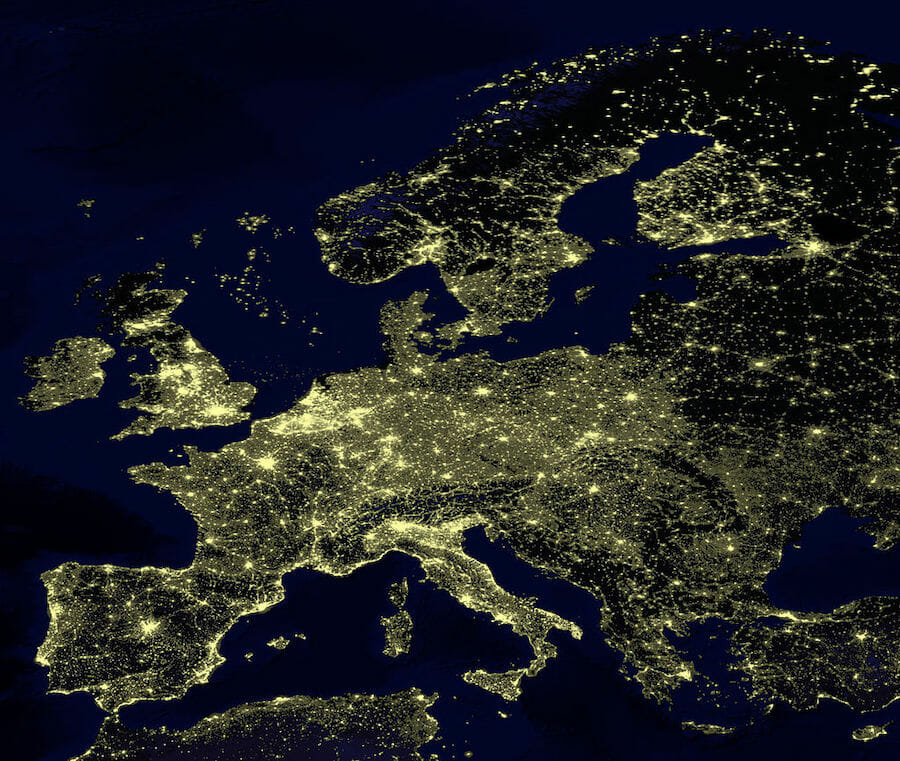
When a massive power outage struck southern California in the 1990s, Los Angeles residents reportedly called 911 to express alarm about strange clouds hovering overhead. They were looking at the Milky Way for the first time.
If anything, astrophotography has the merit to bring back the magic of the night sky, showing you a sight that you will probably never get to see otherwise.
What Is Astrophotography?
So, what is astrophotography? Loosely speaking, any image of celestial bodies falls under the term ‘astrophotography’.
These images usually include:
- The Moon or the Sun;
- The planets;
- A starry sky; or
- Deep-sky objects such as nebulae, star clusters, and galaxies, including our own, the Milky Way.
While all those targets are pertinent to astrophotography, each one of them requires specific photographic equipment, as well as specific imaging and editing techniques.
We will detail those techniques and gears in dedicated articles; but for now, let’s focus on starry landscapes and Milky Way photography.
Successful Starry Landscape Tips

Before getting technical, let’s look at a list of things you should consider before you venture out under the stars:
- Plan ahead: Check the Moon’s phase and weather reports;
- Location and composition: Know where to find the stars and where the best composition will be;
- Use the proper gear: Using a fast, short focal lens and a tripod is the best place to start;
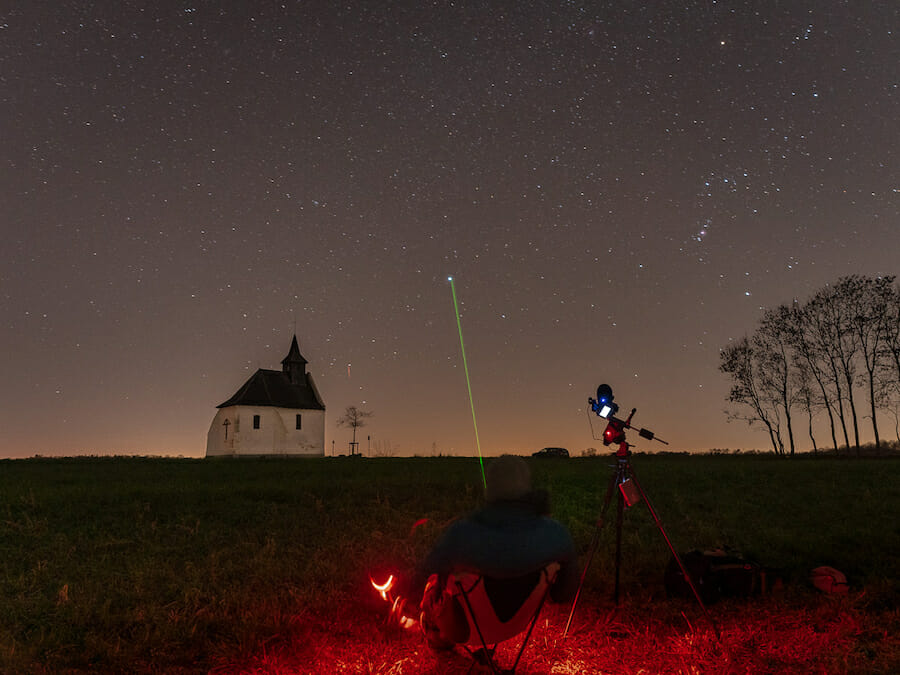
- Pack appropriately: Nights can be cold, even in summer, so wear layers; it’s better to wear too much than too little. Pack snacks, water, and a frontal lamp (with a red light to save your night vision).
- Pack a binocular: A 7×50 or 8×40 binocular will keep you busy while you’re exploring the starry sky.
Check the Weather
If you want to photograph the Milky Way, you need to find the darkest possible sky you can get.
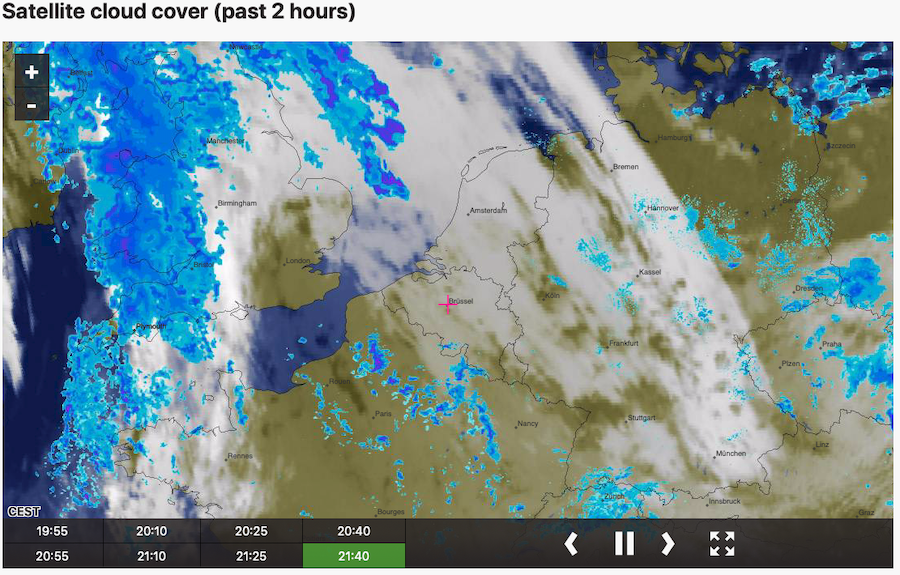
Checking the weather before you leave home is a good way to avoid surprises. You may also want to check satellite images to assess the risk of clouds rolling in later in the night.
Weather forecasts also provide the phase of the Moon and its rising/setting times.
You can download apps to check the weather, available on both iOS and Android smartphones. A couple of great free ones are:
- Meteoblu (iOS, Android): A free app. It shows radar maps and hourly weather forecasts for up to one week; and
- Clear Outside (iOS, Android): Another free app. This shows sky quality and visible conditions, Moon phase with actual Moon illumination, Sun and Moon rise and set times, plus International Space Station visibility.
Check the Milky Way Visibility
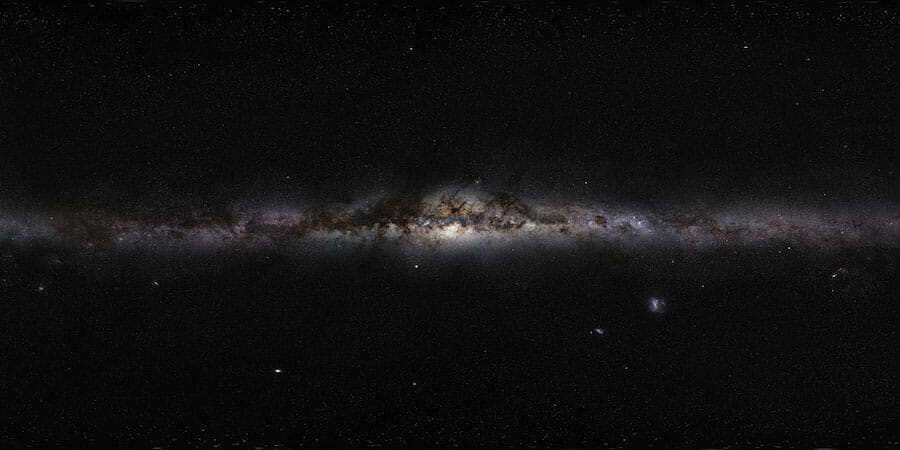
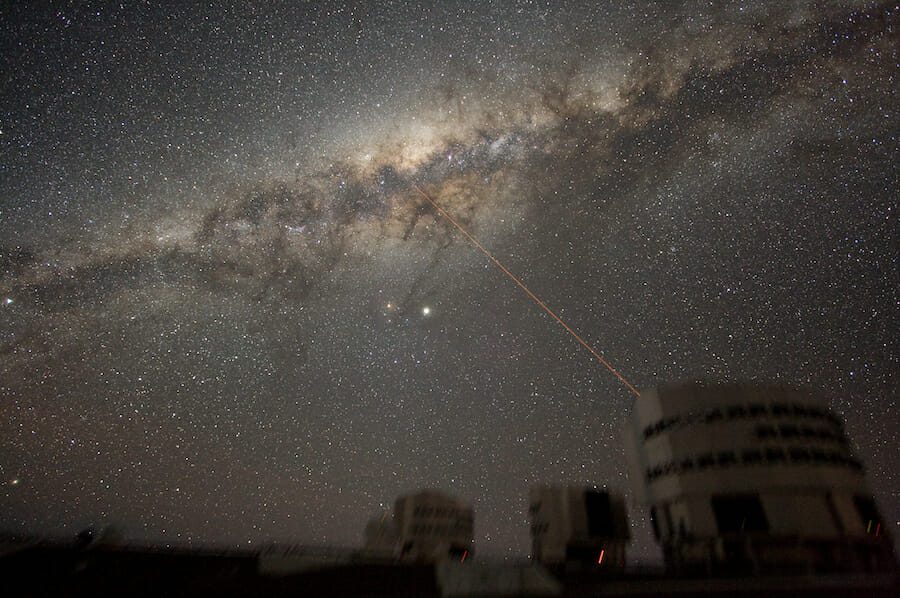
The Milky Way is our own galaxy and we are inside it.
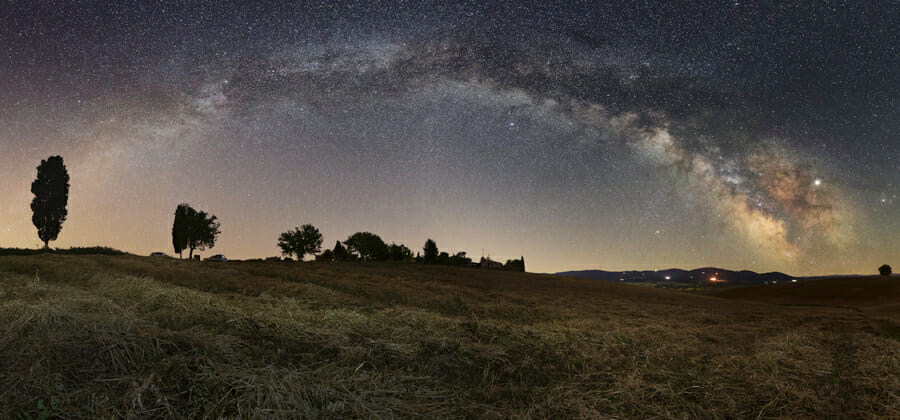
It is visible as a relatively bright band crossing the sky. Its brightness is because most of the visible stars are located in the galactic plane.
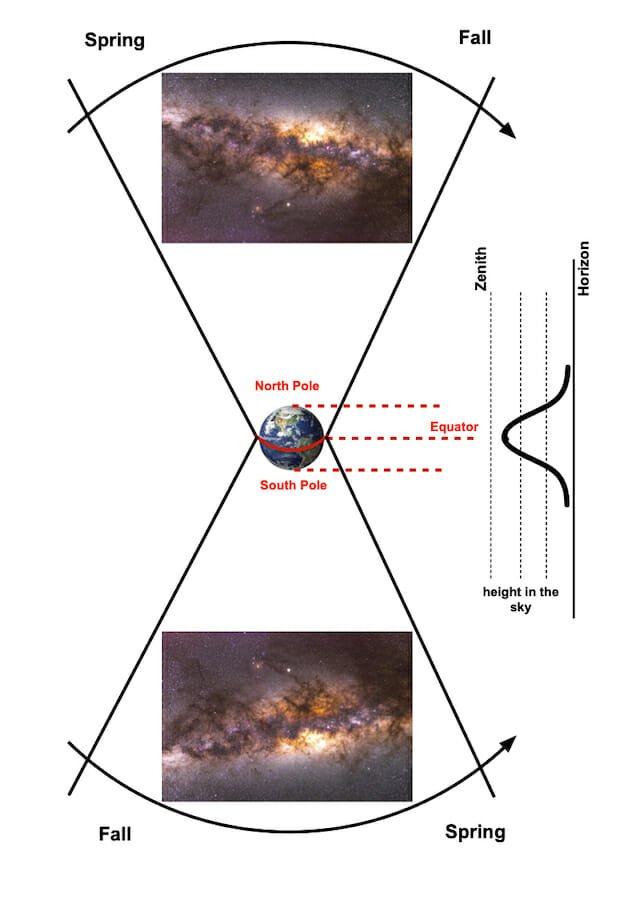
The Milky Way is visible all year, but its core rises and sets seasonally. The galactic core is also the most colorful and detailed part of the Milky Way.
In the Northern Hemisphere, the Milky Way’s Core is best visible in spring to late summer, particularly at lower latitudes.
In the Southern Hemisphere, the best period to photograph the core of the Milky Way would be in autumn and winter.
The closer you are to the equator, the higher the Milky Way’s core will be in the sky; making it less affected by light pollution.
Choose the Right Location
Your choice of location will have a direct effect on the type of image you wish to capture.
If you want to capture only the Milky Way, what you have in the foreground is irrelevant. In this case, all you need is a dark location with a view of the galaxy.
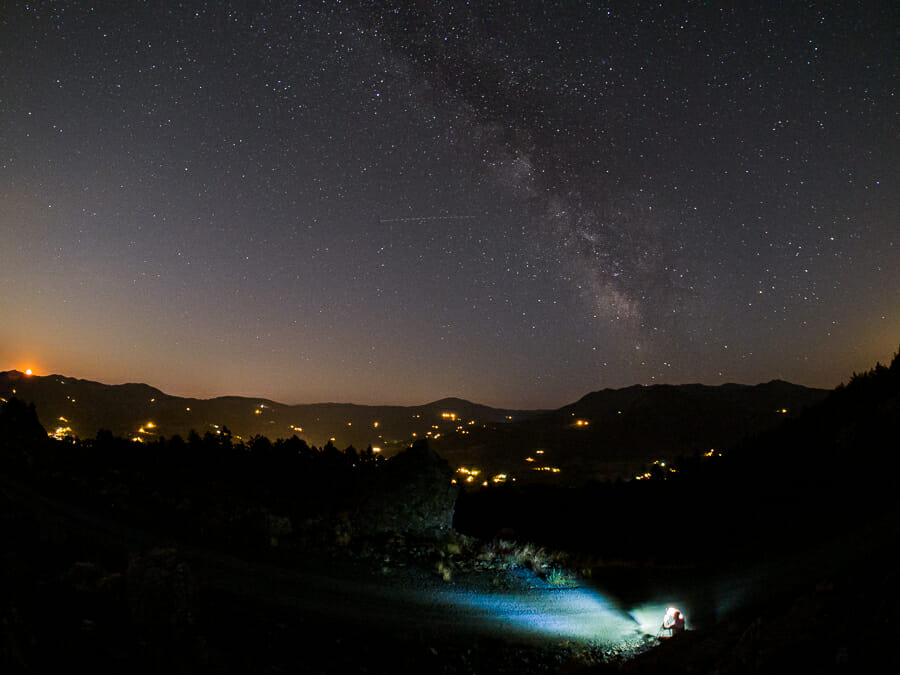
On the other hand, if you want to photograph a starry landscape with objects in the foreground, things get a bit more complicated.
First of all, a great sky can’t make the photo: the foreground is as important as the stars above it.
The best way to take a starry landscape, whether you are after a milky way shot, a star trail or simply stars, is to use the same criteria you would use to photograph landscapes in daylight.
Consider the following:
- The landscape must be interesting;
- The foreground must provide a point of interest to hold the viewer’s attention; and
- Pay attention to your landscape composition: use the rule of thirds etc: you still need to balance the amount of sky and land in your nocturnal landscapes.
In addition to those rules, you should ensure the following:
- The landscape is visible and not solid black;
- The sky is sufficiently dark; and
- Your point of view should be towards the target you want to photograph in the sky.
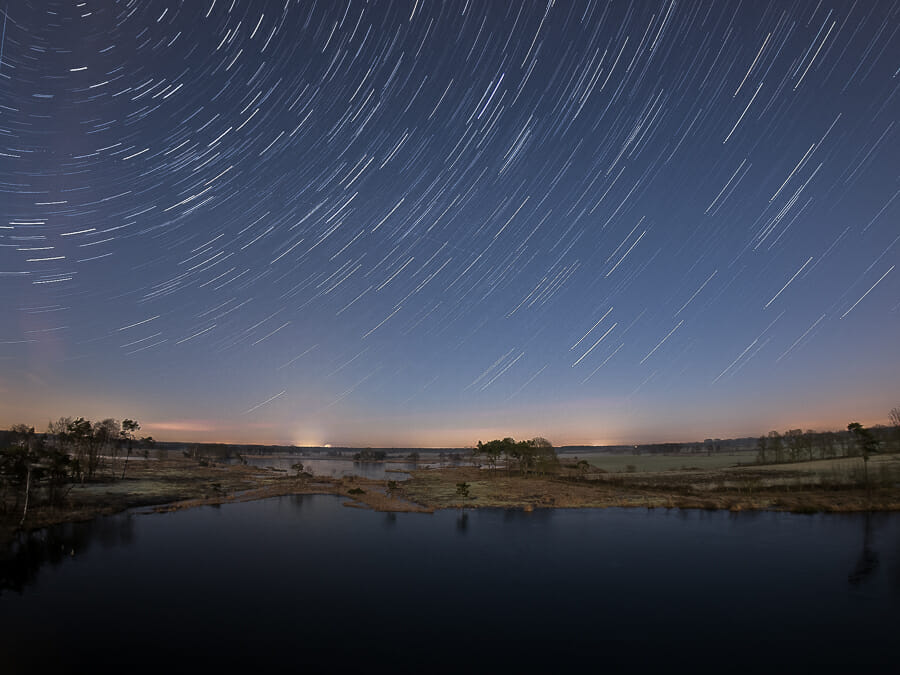
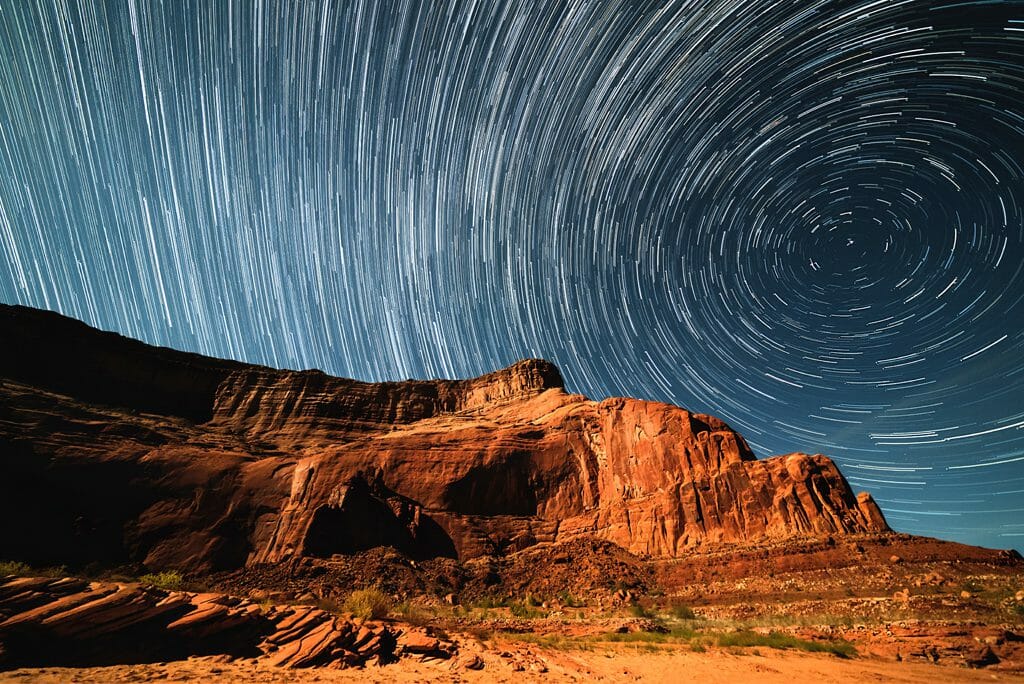
A great location that you can photograph looking at North, for example, is not a good candidate for photographing the Milky Way’s core but could be great for star trails.
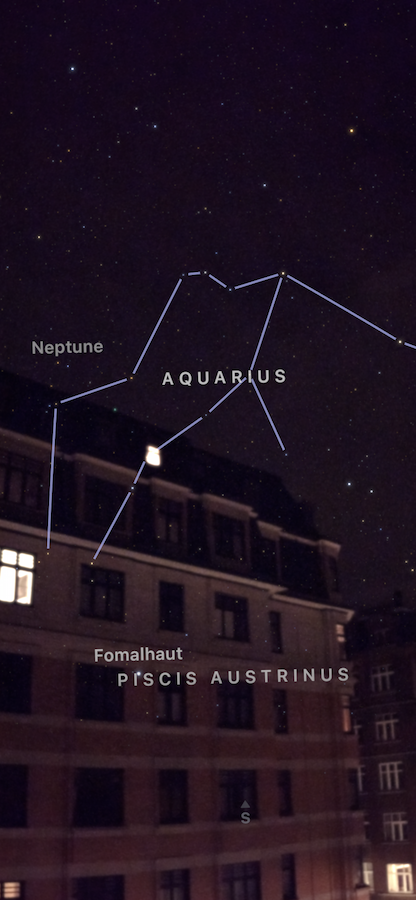
If you have the opportunity to scout out your location beforehand, smartphone apps such as Sky Guide and Photo Pills can help you plan ahead.
Using your phone GPS and sensors, together with augmented reality, these apps show you exactly what can be seen in the night sky from your chosen location. This will help you to pick the right spot.
Find a Very Dark Sky
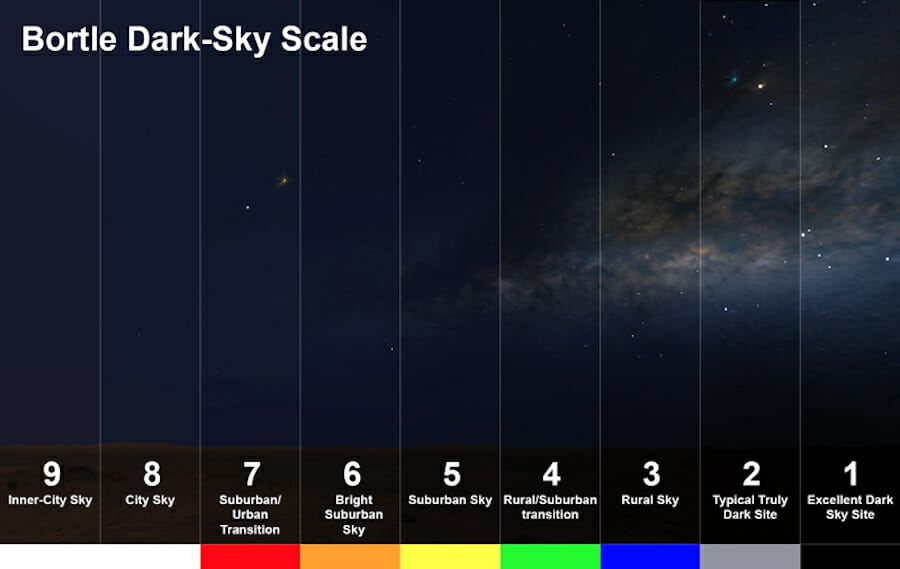
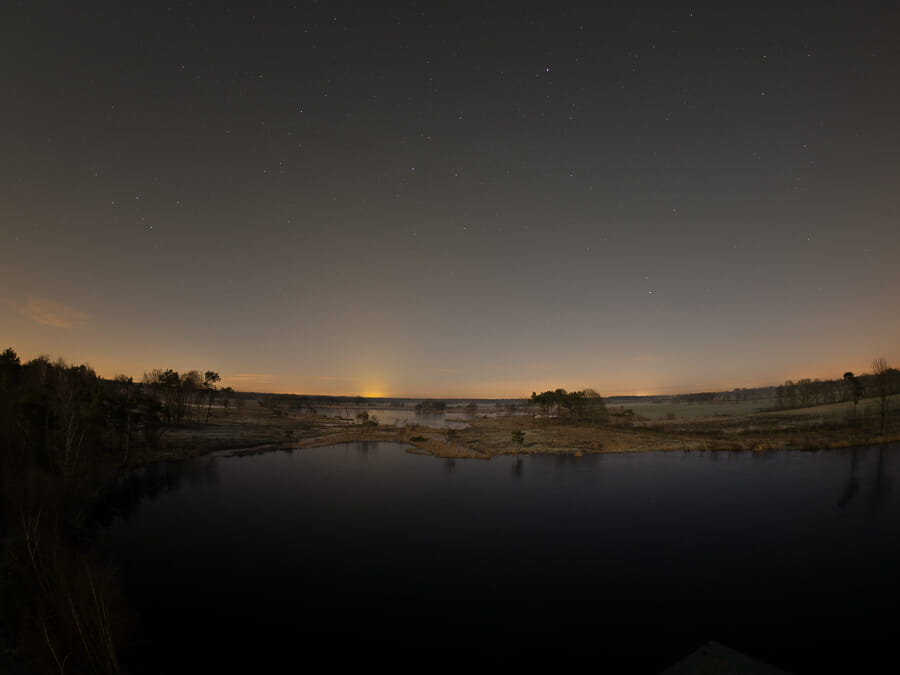
Finally, before leaving your home, check a light pollution map to see if your chosen location will be dark enough.
Ideally, to photograph the Milky Way’s Core over a landscape, you want to photograph under a sky that has a Bortle scale of 4 (or lower). With brighter skies, light pollution will overcome the faint Milky Way and its colors.
If you want to photograph a wide scene, it’s best to head out around a New Moon or with the Moon low in the sky.
The Moon is so bright at this time that it will naturally light the landscape. The sky will be brighter too, but if the Moon is sufficiently low, small, and not close to the Milky Way, you will be fine.
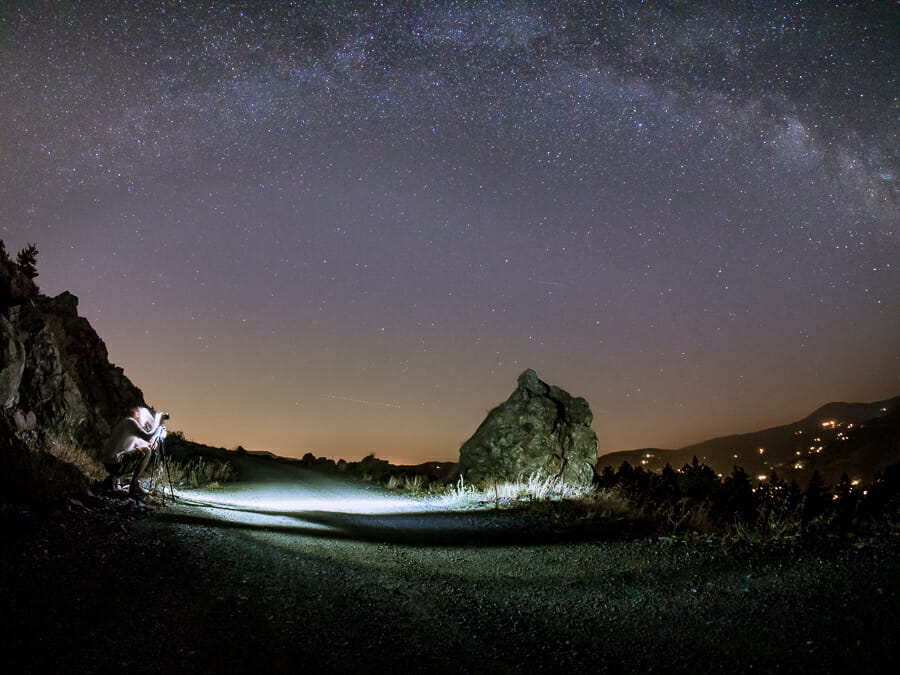
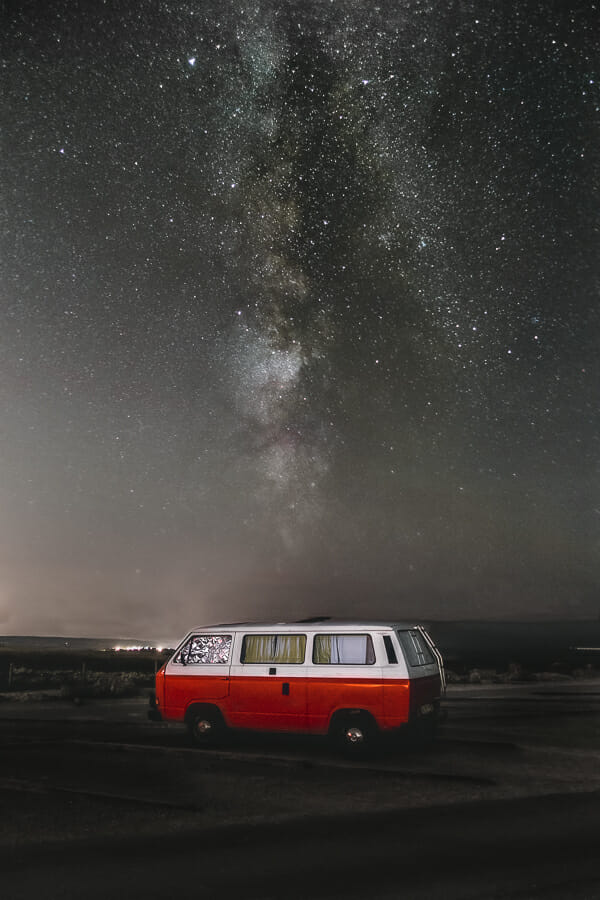
If you prefer to focus on an element of interest in the landscape, such as a vehicle, house, tree or yourself, you could also do some light painting to light the foreground.
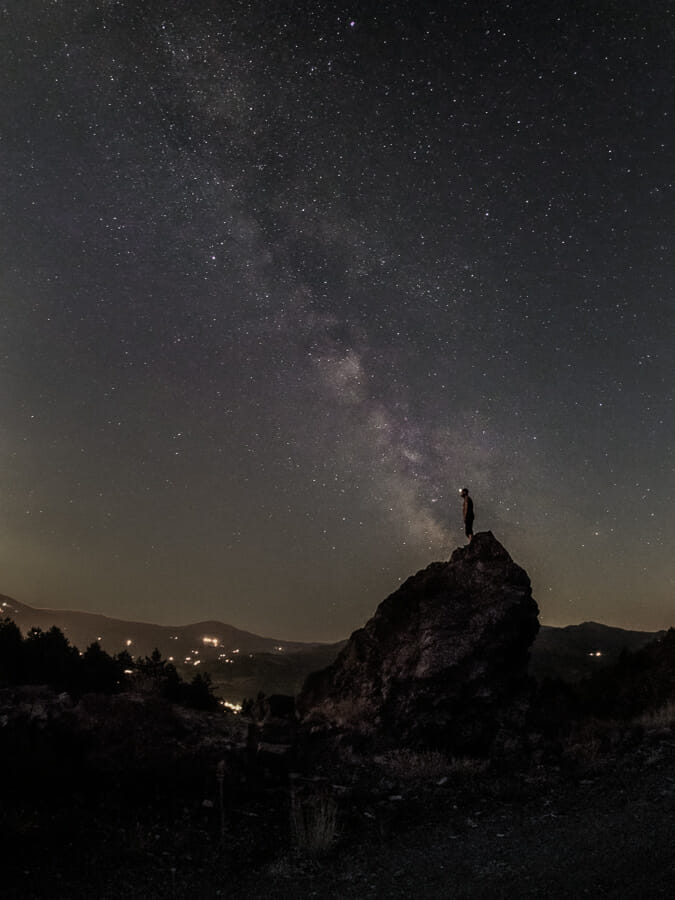
If you cannot make the foreground visible, consider having something, even yourself, in silhouette against the sky.
The Best Camera Settings for Milky Way Photography
Once you are under the stars, it is time to work through an action list of settings. You’ll need to consider the following:
- Use the 500 rule: To calculate how long you can expose before star movement will become noticeable on your images;
- Shoot for image stacking;
- Camera Settings: Shoot in RAW, with daylight white balance, and set the camera in Manual mode and carefully manually focus on the stars;
- Image blending: Consider taking one (or more) photos of the sky and foreground, then choose the best settings for each. You can blend the 2 exposures later in your final image. This will ensure both the sky and foreground are in focus and properly exposed; and
- ISO: Use higher ISO, such as 3200 or more. But remember: the higher the ISO, the more noise will appear in your image. Plus you risk ‘burning’ out the stars to pure white
So let’s take a look at how to set up your shots for the best results.
How to Avoid Star Trails
If you are not interested in creating star trails, you should aim to set your camera to freeze the star movement.
This can be done efficiently by using a tracking device, or, if you are on a tripod, by keeping your shutter speed short.
However, the short shutter speed will be variable and will depend on factors such as the focal length and sensor size.
What Is the 500 Rule in Astrophotography?
The 500 Rule gives you a decent starting point for setting your shutter speed.
This empirical rule states that the longest exposure time (ET) you can use in seconds before stars elongate noticeably. The sum is ET= 500/(CP * FL).
CP is the crop factor for your camera sensor and FL is the focal length in mm of your lens. For example, let’s say you are using a Canon EOS 60D (crop factor of 1.6) with a 50mm lens.
Your longest exposure should be less than 500/(1.6 * 50), i.e. about 6 seconds. If you have a 10mm wide-angle lens, then the longest exposure can be as long as 31 seconds.
Take a test shot and check your stars. You may find they are still too elongated: in this case, use the more conservative 400 rule; ET = 400/(CP * FL).
Another more precise but complicated rule is the NPF Rule, which also takes into account your camera’s resolution.
Fortunately, apps such as PhotoPills (iOS, Android), have exposure calculators if you want to include ‘spot’ stars in your shots.

ISO and Aperture
Once you know how long to expose for spot stars, you need to maximize the amount of light you record in this time.
For this, it is useful to have fast lenses with large maximum aperture or f-stop number, such as f2.
But increasing the ISO will not change your sensor’s sensitivity to light; it will digitally amplify both the signal and the digital noise. Too high an ISO will introduce too much noise and reduce the usable dynamic range of the sensor.
If you track, try using something like ISO 800-1600. If you do not track the movement of the stars, you can test ISO 3200 or more.
How to Focus on the Milky Way
Focusing on stars is tricky, as they are small and faint.
Most of the time, relying on autofocus is a recipe for disaster. The best way to focus on the Milky Way is to switch to manual focus and use your camera’s live view.
Simply magnify a bright star and look at how its size changes during focusing.
The better the focus, the smaller the star will look. Furthermore, faint stars may become visible when your focus is good.
Milky Way Photography Equipment
Choosing the right equipment for astrophotography is essential. But it’s not just camera equipment you need to think about.
In addition to the right camera, lens, and tripod, you’ll need to consider purchasing a star tracker, a light pollution reduction filter, a remote shutter, and an intervalometer.
So let’s take a look at the right equipment to shoot marvelous Milky Way images.
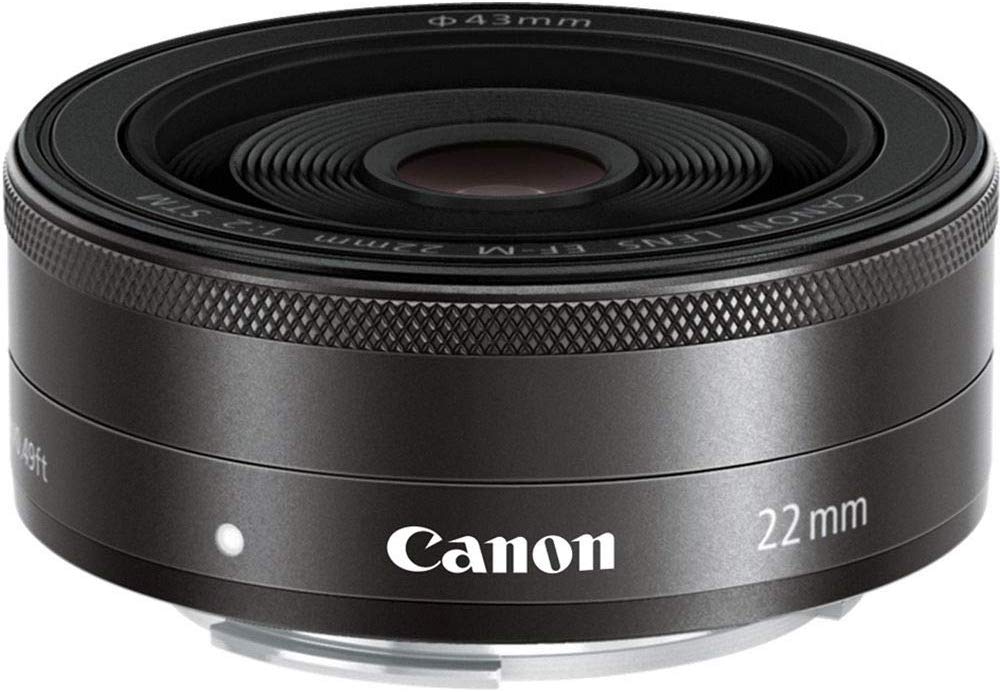
Choose the Right Astrophotography Lens
In general, you’ll want to use a fast lens with a large maximum aperture.
Ideally, you also want your lenses to exhibit low chromatic aberration, coma, vignette and be reasonably sharp when used wide open.
A lens that is usable at f2.8 or f3.5 is a good one to start practicing astrophotography.
The focal length is also important; this not only determines the field of view but it directly affects how long you can expose.
This is because as the stars move across the sky, you must expose for long enough to capture a good amount of light, but not so long that your stars elongate noticeably.

If you track the stars, you can use longer telephoto lenses to really hone in on your target.
On a fixed tripod (no tracking), a fast 50mm lens is the longest lens you can get away with (on a cropped sensor camera) to avoid star trails.
All major camera and lens manufacturers have a 50mm that is cheap and fast, suitable to get ‘close-ups’ of the night sky.
The most common type of lenses used in starry landscape photography, however, are wide-angle lenses.
This is because the field of view is large enough to capture plenty of the landscape and the sky together. Also, thanks to the short focal length, star elongation is less noticeable and exposure time can be pushed longer than with a 50mm lens.
Suitable wide-angle lenses can be found among all camera brands. If you are on a budget, a classic 18-55mm kit lens can be used at 18mm.
But what if you want an even larger field of view? In this case, consider fisheye lenses.
However, you cannot usually attach filters, as the front element of the lens bulges out. But a fisheye lens will allow you to capture the full arch of the Milky Way.
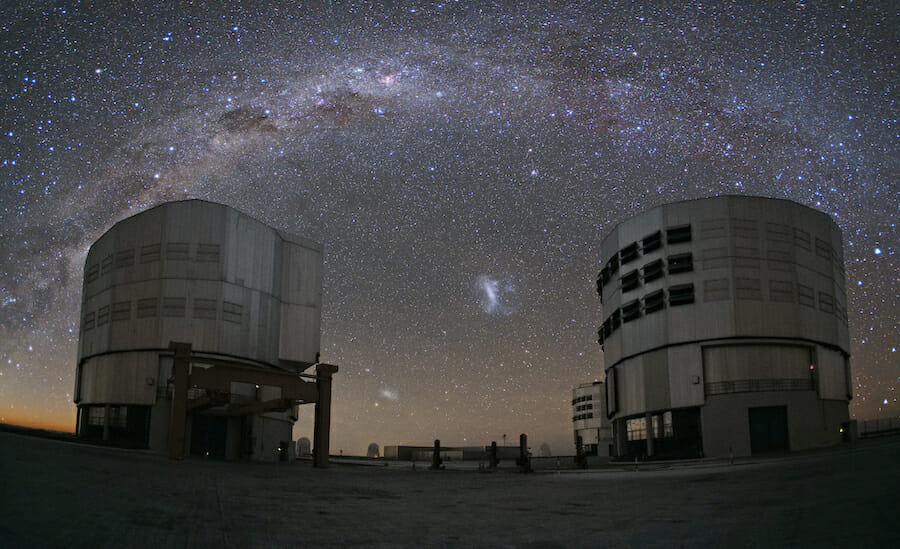
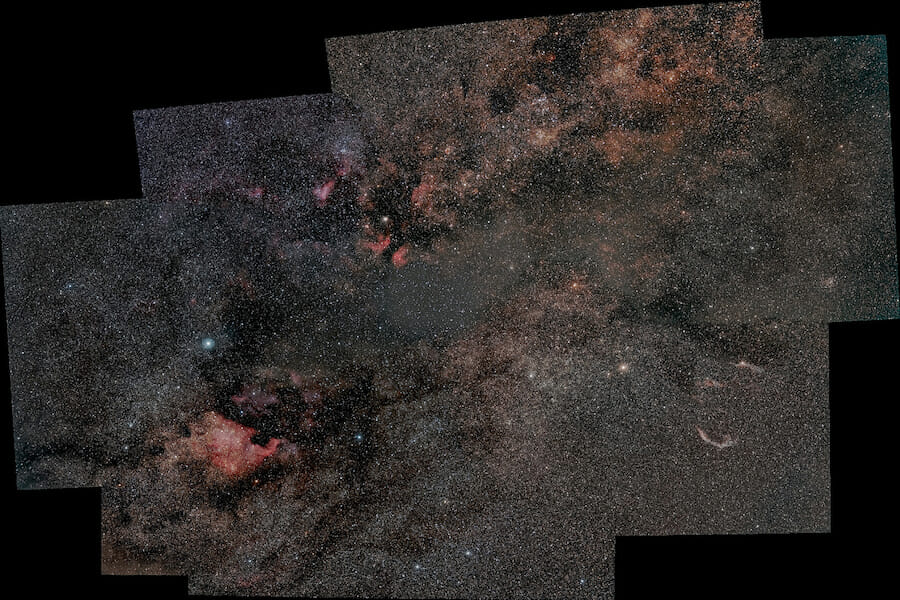
If you have a longer lens, you can create a panorama stitching to capture the Milky Way arching over the landscape.
You’ll need a fast lens that exhibits negligible chromatic aberration and coma, otherwise, stars will look a slightly odd shape, and you will get color fringing. Both effects can be reduced by stepping down (i.e. by increasing the f-stop number) your lens.
A list of great astrophotography lenses include:
But there are many other great lenses are available from Sigma, Tamron, and Sony. Have a look at this impressive list of Best Lenses For Astrophotography from Lonely Speck.
A Tripod Is Essential Equipment
You need a tripod to support your camera when you are photographing the night sky.
You will be shooting long exposures so there is no way around it.
Choose Your Camera Carefully
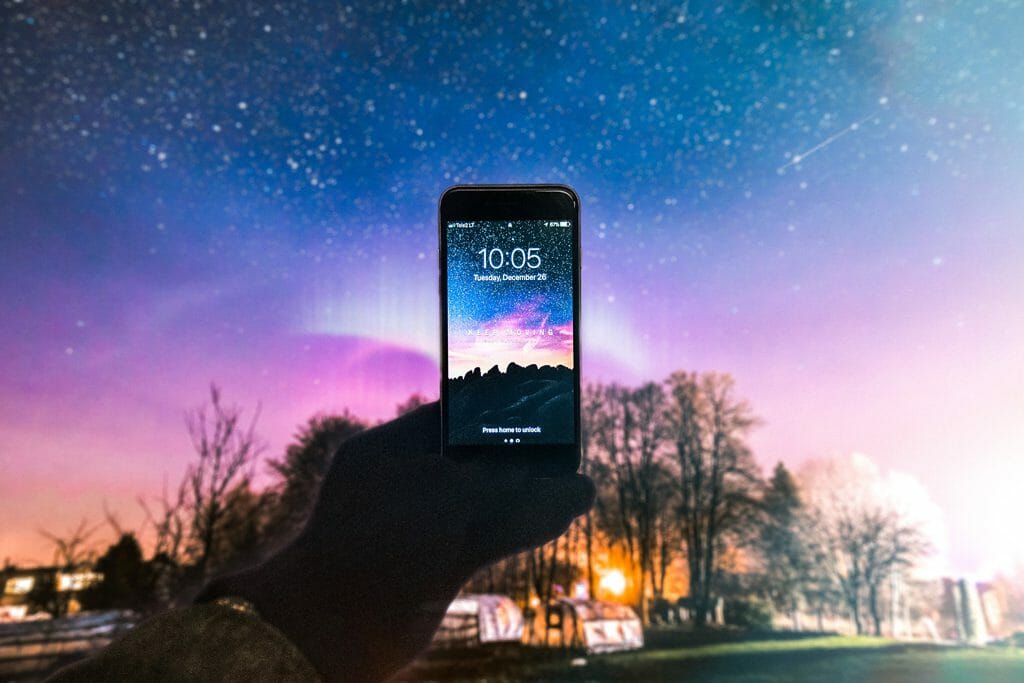
There is an old saying in photography: the best camera is the one you have with you.
With proper technique and a good sky, you can photograph the Milky Way with a decent compact camera or even a smartphone.
For the most part, though, astrophotography is not a ‘casual’ photographic genre.
Compact cameras and camera phones are not used much; DSLRs or mirrorless cameras are usually the equipment of choice. These cameras have larger sensors which, in turn, have larger pixels, which take longer to saturate.
They’ll retain the natural colors of the stars, rather than clip them to pure white. Plus larger digital sensors tend to produce less noise if you’re using high ISOs.
Related Article: Best mirrorless cameras for beginners
The size of the camera sensor also affects the field of view (FoV). For a given focal length, smaller the sensor, narrower the field of view: a 12mm lens on a micro four-thirds camera gives an FoV equivalent to that of a 24mm lens on a full-frame camera.
Therefore, it may be difficult to go as wide as a full-frame camera with a smaller sensor. On the other hand, if you want to close in on the sky, a cropped sensor camera can help.
You should consider the following when choosing your camera:
- The noise level at high ISO;
- Does it have live view to help you manually focus on the stars; and
- A long battery life.
Other than that, the quality of the lens is far more important in the beginning than the size of your camera’s sensor.
Seek out a Star Tracker
A good camera and tripod will get you far, however, the use of a star tracker will really boost your astrophotography.
A star tracker is a device you mount on your tripod that allows you to follow stars across the sky.
After aligning the tracker with Earth’s celestial pole, your camera rotates in sync with the sky. This allows you to capture minute-long exposures without worrying about elongated stars.
A great option for wide-angle astrophotography is the Omegon Minitrack LX2/LX3. These are mechanical trackers that come complete with accessories.
The Sky-Watcher Star Adventurer and iOptron SkyGuider Pro trackers have more to offer. Although expensive, they can support heavier equipment while still remaining portable. More importantly, they have better tracking accuracy.

And finally, you have large, equatorial mounts, such as the SkyWatcher S30200 AZ-EQ5 GoTo Mount. These mounts are more oriented to deep-sky astrophotography than simpler starry landscapes.
Trackers can, however, also be used for starry landscapes: you need to take a series of photos (for image stacking) of the sky while tracking. When you’re done with the sky, stop tracking the stars and get one (or more) shots of the foreground. Those images are later composited in editing to create a superior image.
Buy a Light Pollution Reduction Filter
When photographing the Milky Way, you ideally want to do so from the darkest place possible.
This is because the detail and color of the Milky Way are very faint. Light pollution is a real problem, as it creates uneven luminosity and color gradients across images.
To help combat any light pollution, use a Light Pollution Reduction (LPR) filter. The most efficient ones are made for telescopes and can’t be found in diameters larger than 2 inches (or M48).
Didymium filters, instead, are available both as square filters, like the NiSi 100x100mm NiSi Natural Night Filter, or as screw-on round ones like the HOYA Red Intensifier filters.
These filters have rare earth elements added to the glass: their job is to adsorb some yellow and orange light.
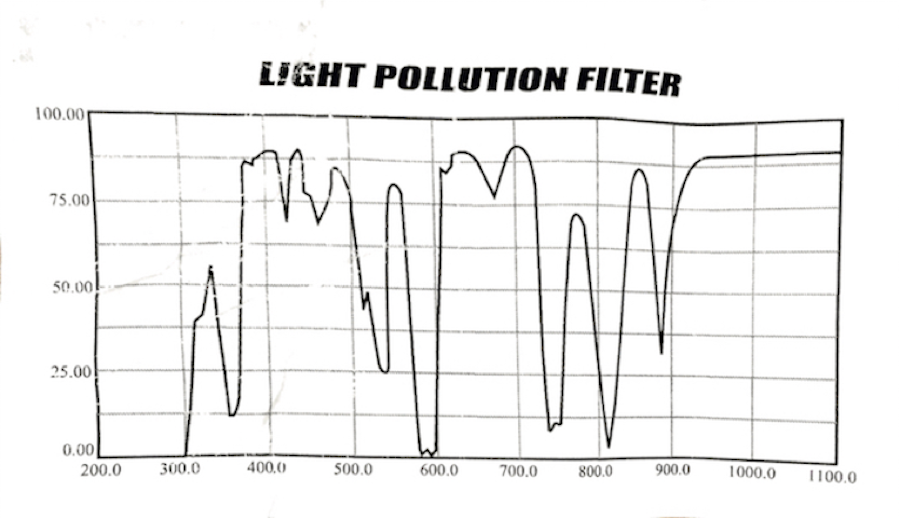
The filtered out orange street light is the major component of light pollution (vapor mercury and sodium light).
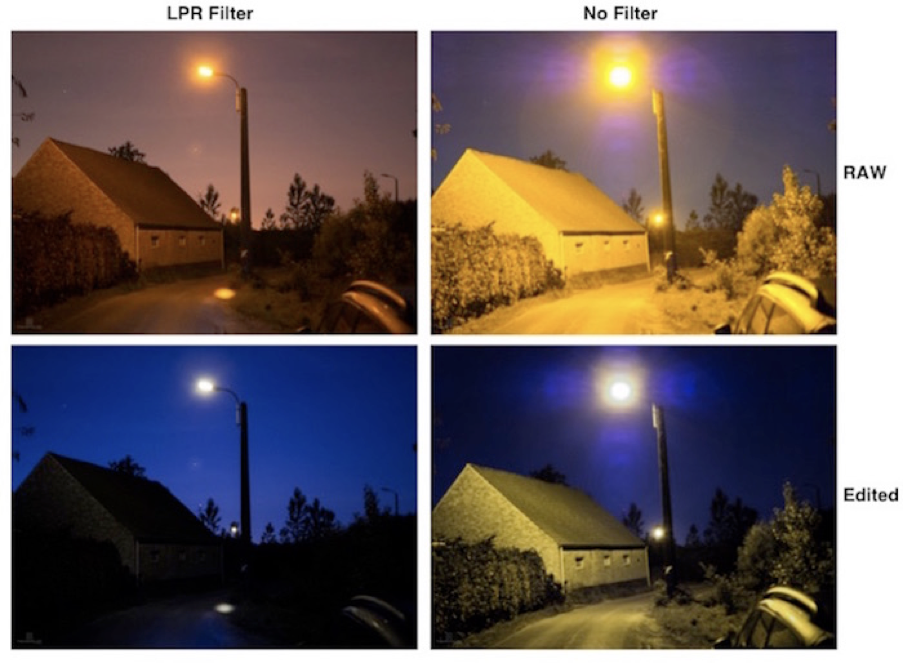
But light pollution from LED lights is not affected by these filters, so their efficiency is not universal; it depends on the kind of light pollution you have in your area.
Use a Remote Shutter
Remote shutters are a must in astrophotography; you want to avoid any camera shake.
Therefore the ability to take a photo without touching the camera is a great way to ensure shake-free shots.
Furthermore, many remote shutters have a built-in intervalometer. This allows you to specify:
- The exposure length;
- The number of photos you want to take;
- The interval between the photos; and
- The initial delay.
The use of such remote will make shooting the stars far more enjoyable. We’ll explore intervalometers a bit more in the next section.
Invest in an Intervalometer
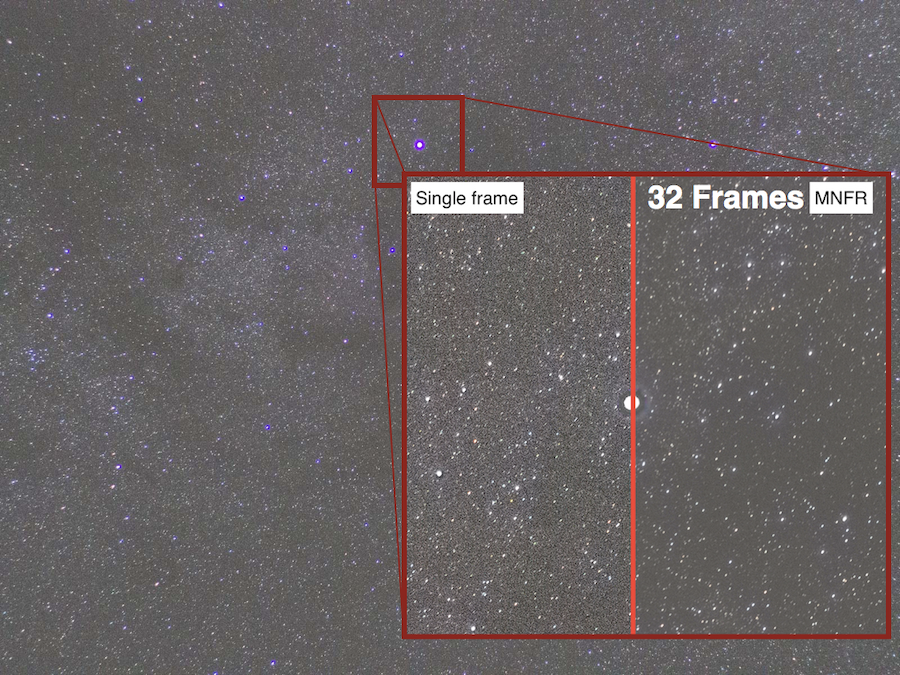
An intervalometer allows you to automatically snap a sequence of photos. You can snap up to 60 photographs without the need to touch the camera.
Taking many photos of the sky allows us to improve the details and reduce the noise by image stacking in post-production; a standard procedure in astrophotography.
Some cameras offer a built-in intervalometer, usually allowing the user to record up to 999, 60-minute exposures. If you think 60 minutes limits you, or your camera has no built-in intervalometer, you can buy an external one.
How to Edit Milky Way Images
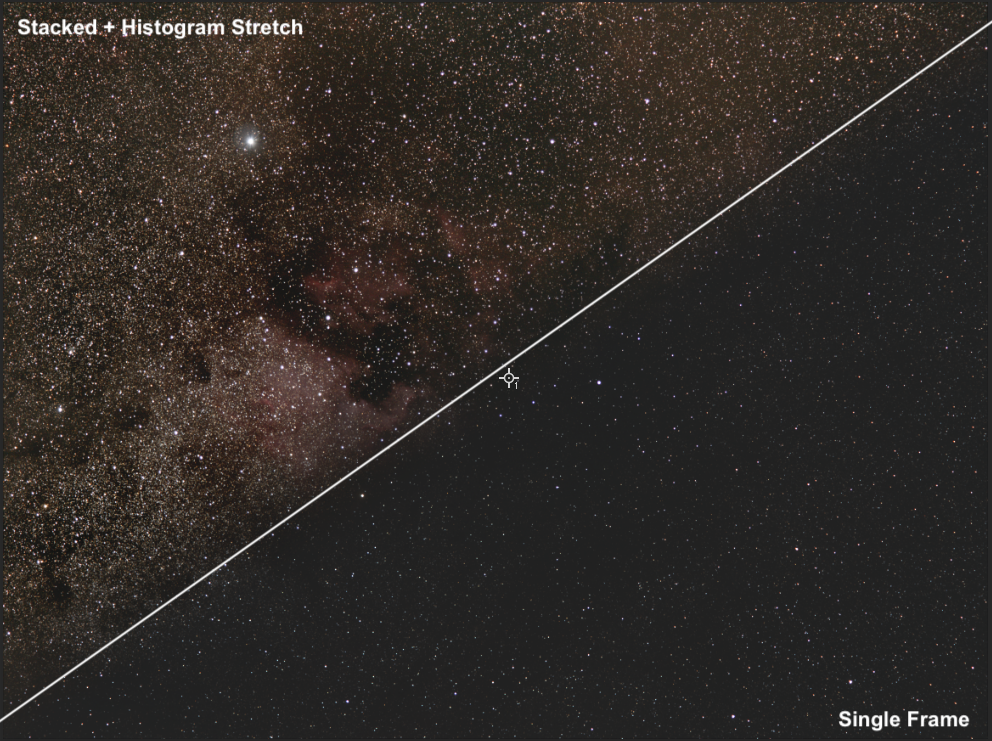
There is no such thing as getting astrophotography right in-camera; editing is essential.
Image stacking is a must. You have to take many shots and combine them in post-production.
Editing in astrophotography has little to do with the aesthetic of the photo but focuses on squeezing as much data out of your RAW files as possible.
If you have photographed the Milky Way with no landscape, you can combine all your images using Deep Sky Stacker (DSS), or Sequator.
This is free, easy-to-use software for Windows. DSS, in particular, is used worldwide to edit deep-sky astrophotography.
For starry landscapes, I prefer to pre-edit the RAW files in Lightroom. Here I use global and local editing tools to even up the white balance in the sky, reduce chromatic aberration, gradients and vignetting.
I would then export all the images as tiffs and let Sequator align and stack the images.
If you have a Mac, you can use Starry Landscape Stacker for stacking starry landscapes or Starry Sky Stacker, which are Mac alternatives to DSS or Sequator. However, these incur a cost.
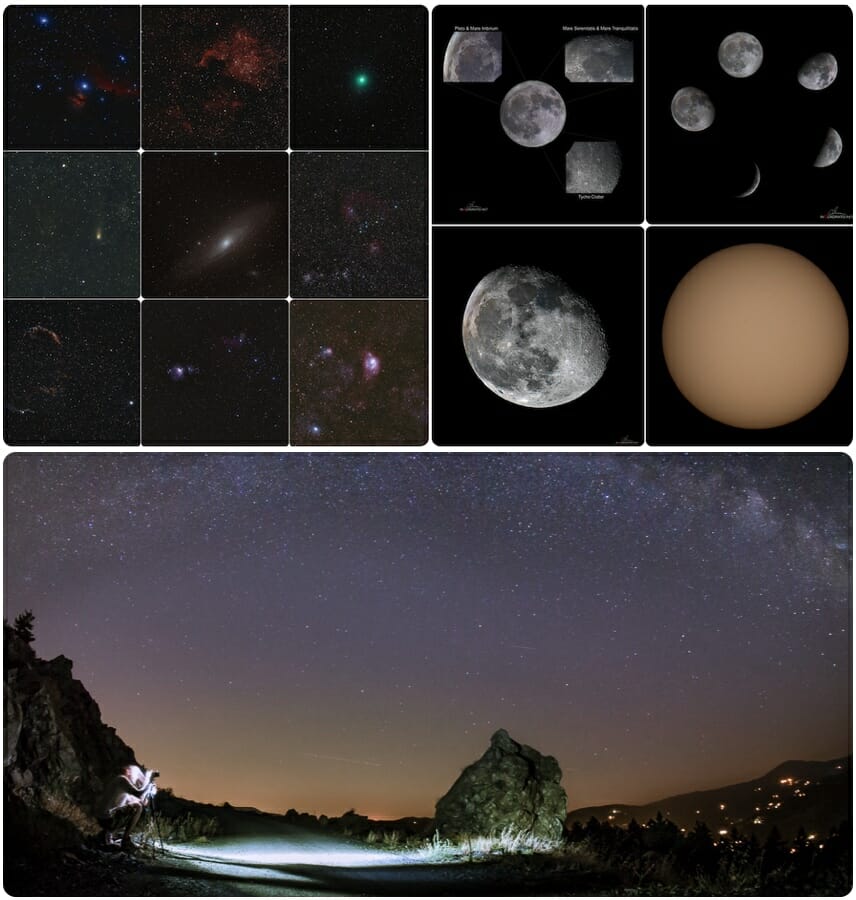
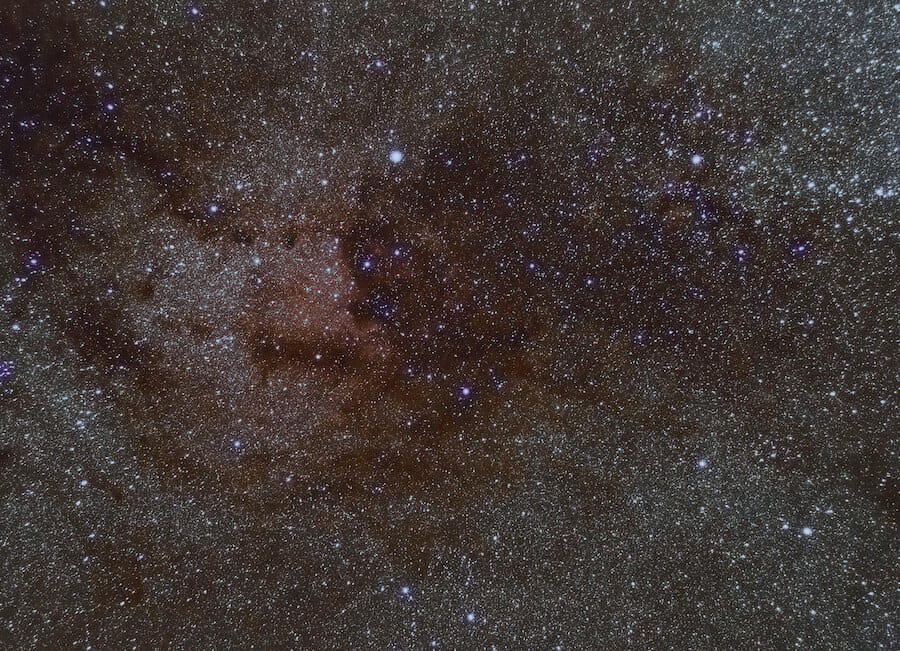
Venture beyond the Milky Way
Astrophotography doesn’t have to be limited to star trails or the Milky Way’s core.
With a tracker, you can photograph deep-sky objects which appear fainter than the Milky Way.
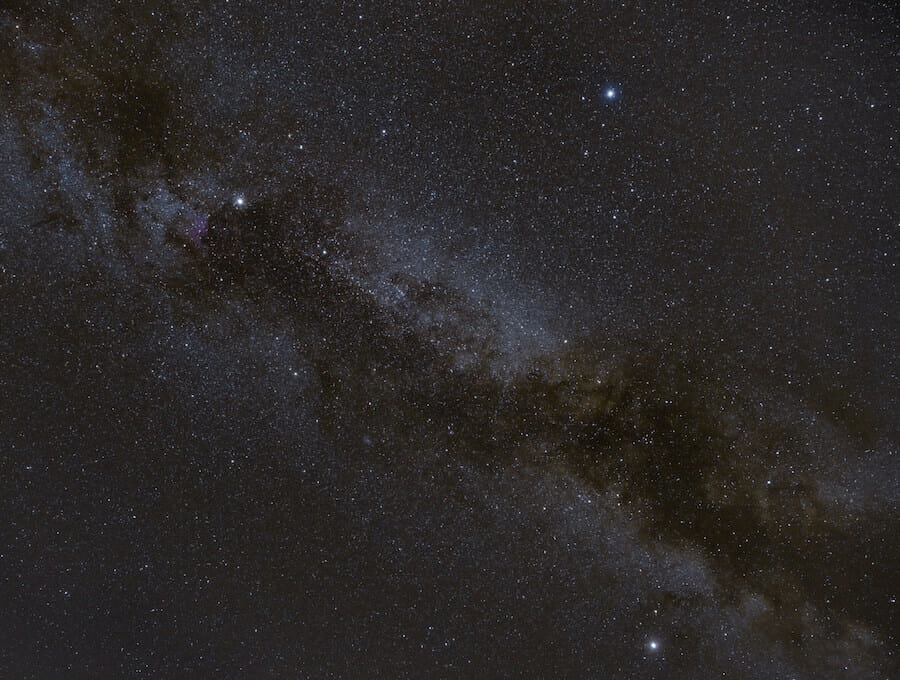
One of the best alternative targets for anyone in the Northern Hemisphere is the Orion constellation.
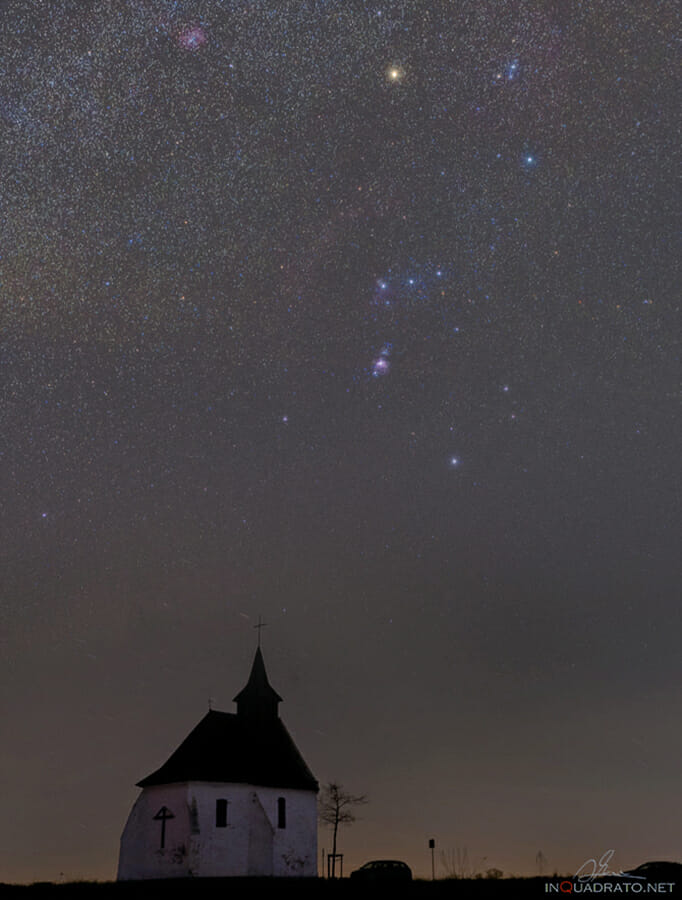
And Orion is visible during winter, so there is something to shoot all year round.
Over to You
Astrophotography is a challenging, addictive and highly rewarding genre.
We hope we have given you some inspiration to get out there and master Milky Way photography. Now you know where to start, the sky is literally the limit!
Now that you’ve learned these tips for stunning photos, you’re a better photographer.
Guaranteed.
But the fact is, the journey doesn’t stop there. There are more tips, tricks, and secrets–all of which will help you take gorgeous photos.
And if you want to learn all of these secrets, I recommend you sign up for the PhotoBlog newsletter. We send our subscribers all sorts of great stuff–including the tips, tricks, and secrets, straight from the experts. All to help you capture world-class photographs.
Did I mention that it’s all totally FREE?
(Oh, and we’ll send you a natural lighting cheat sheet–designed to help you use light in ways you’ve never considered.)
So to start taking stunning photos, enter your email: