In this in-depth Wildlife Photography Tutorial, we put together some of the best material we have published to date on photographing wildlife. Most of the information comes from myself (Robert Andersen), but a few extra tips are shared by other talented PL team members like Tom Redd. Instead of creating separate articles on each topic, we thought it would be a good idea to compile everything into a single piece, so that our readers could get the best out of it and have a chance to follow the material in a logical progression. This tutorial is a work in progress and we will be adding more sections in the future, so make sure to bookmark it in your browser!
Updates: New section added (page 10) on March 24, 2017.
Note from the authors: all the material presented in this article is based on our field experience and years of shooting, and our recommendations and guidance are based on that. If your experience differs from ours and you disagree with any of the expressed statements, please use the comments section to let us know. We always welcome healthy criticism and discussions.
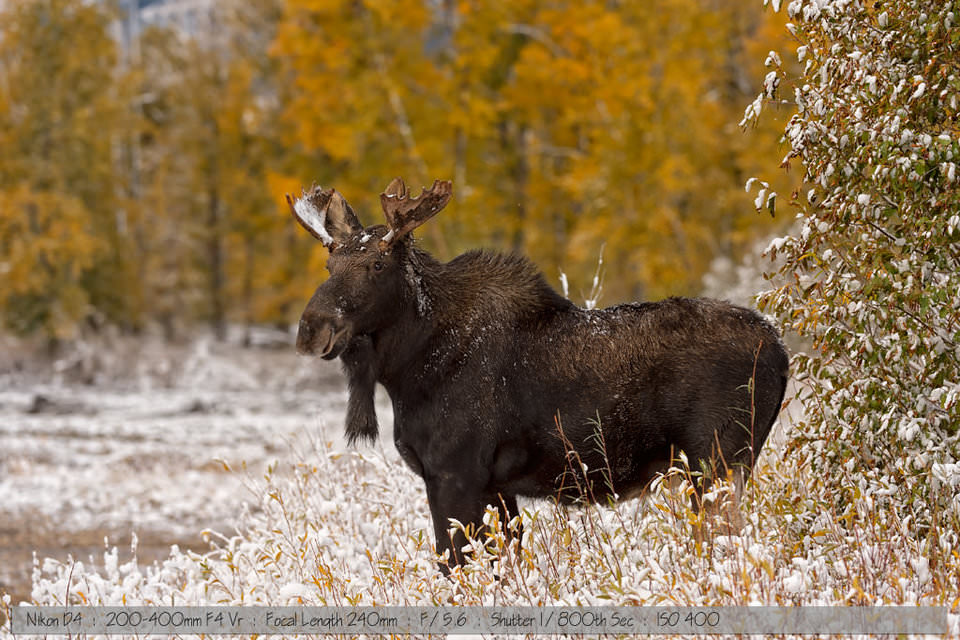
1) The Importance of Light
I hope everybody knows what the ‘golden hour’ is, but in case you are not familiar with the term, it’s the first hour of light in the morning and the last hour of light at the end of the day. There are many reasons why the golden hour is a great time to shoot photos, but the three reasons I want to mention are the tone of the light, the soft diffused light produced and the height of the sun relative to the subject. Lets start with a sample photo taken during morning golden light time and show you the magical properties the light produced.
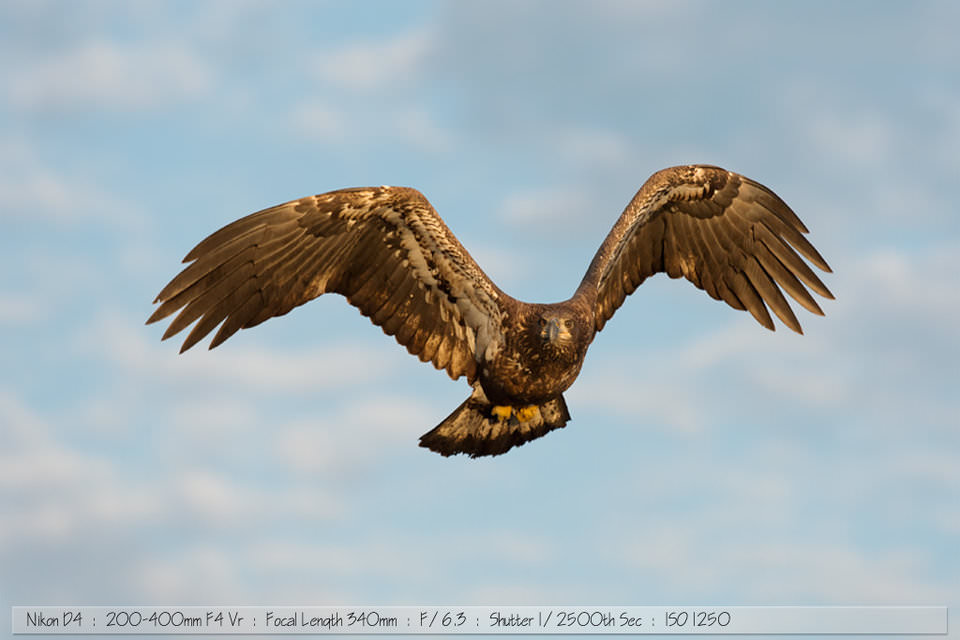
If you look closely at the photo you will see that the bird is beautifully lit and even has light illuminating it from below, almost as if I am holding a golden reflector on it. There is also no over exposure areas anywhere, however this bird does not have a white head and tail like it’s mature bald eagle parent, where that would have mattered more and been easier to over expose. What I want to say about the golden hour, is that morning and evening light is softer and not as harsh, so use that to your advantage when shooting difficult-to-expose animals. Also, because the sun is low in the sky at this time, it will illuminate the subject more evenly and have a beautiful temperature to the light.
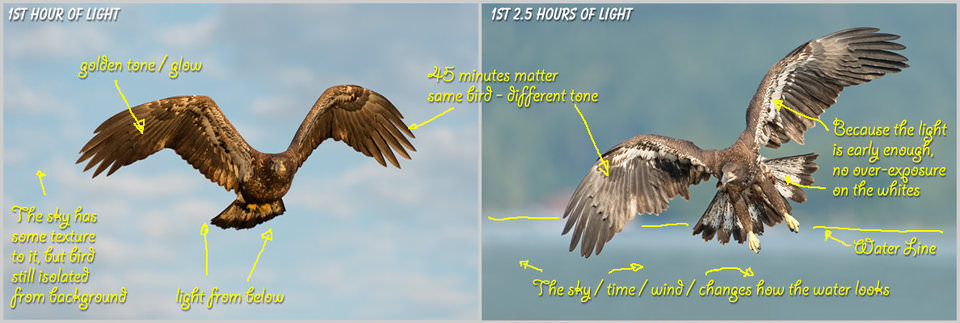
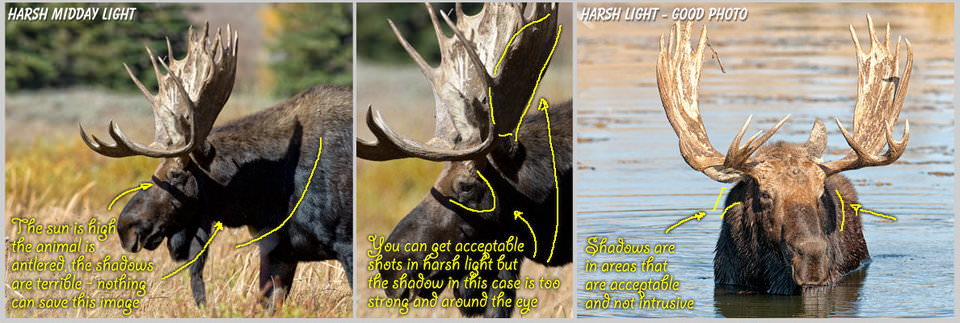
The main point about the golden hour, is not so much the hour itself, but rather that first and last light are powerful tools and the harsh light of a midday sun can easily ruin a photo that might otherwise have been stunning. The midday sun also creates very strong shadows that can ruin a photo because of the dark areas it creates on the animal itself (e.g. from antlers etc.) to strong dark shadows on the ground. The comparison photos shown above have no strong shadows anywhere, because they were both photographed in early light. The tone difference is because the left photo was shot in absolute first photographable light, whereas the right photo was approximately 45 minutes later, but still soft morning light. You can argue which light/photo you prefer, because I also love the photo on the right; they are two very different photos of the same bird. The point is that light is important in how the resulting photo looks and you need to consider that when shooting, it’s hard to make a harsh midday sun look great.
Tips:
- You need to get up real early to shoot in the morning light
- You need to allow travel time to get to the location
- You need to allow time to find the subject
- Watch the shutter speed, allow for the light level
- Watch your white balance – Auto might not be best choice to catch the colors
2) Weather
My wife is a walking talking weather station. She checks the weather all the time and that’s great, but don’t let what you think the weather will be, rule your decision to go out and shoot. I have come to think that the weather for the most part doesn’t matter or more accurately, the weather can be your friend. Photographing moose / elk / deer or other large antlered animals is most of the time better done on an overcast day. However, shooting birds or having the sky in the image when it’s that sucky winter overcast off white could end in horrible results. Don’t be afraid to venture out into a bit of rain or snow either, you just never know what you are going to get until you go. I have seen some amazing light/skies the day after a major storm. Always be on the ready – there are no hard or fast rules. Look at different weather situations as photographic opportunities, rather than reasons to sit at home.
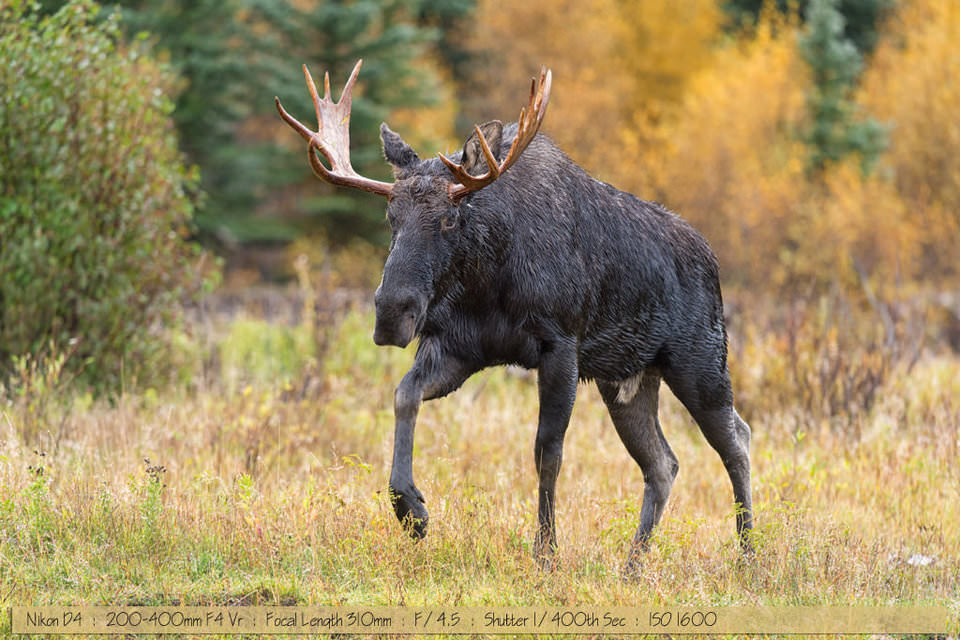
The above photo was taken right after it stopped raining and the extra details the weather provided were just awesome in my opinion.
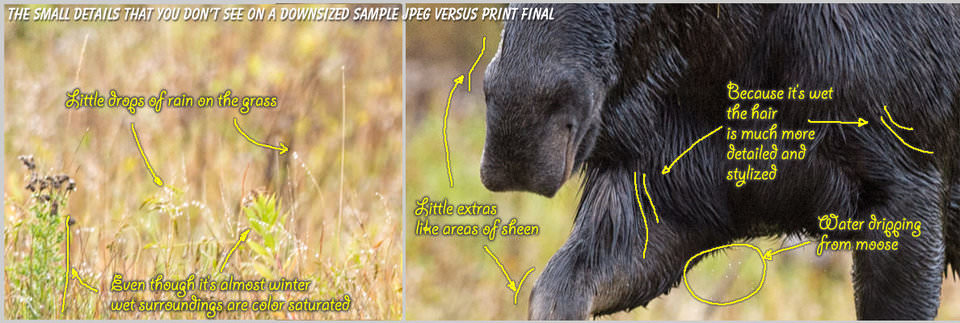
I actually prefer to use wet photos to draw animals from or reference as they show how hair and fur really flows on an animal. To me, all these little extras add to the story of the photo and make it more interesting.
This next photo shows how I prefer my moose photos to look with nice, even light and no harsh shadows on the moose. Because it is a semi-overcast day, it’s perfect weather for moose photography. I am in between trees and a bright sunny day would make for very contrasty photos with areas of strong shadows and bright highlights that are hard, but not impossible to make look good. The biggest reason I love overcast days for this type of animal, is that there are no shadows from the antlers ruining a good photo. Finding a huge moose is hard enough, finding a huge moose and having crappy photos because of a bright sunny day can make a grown man cry.
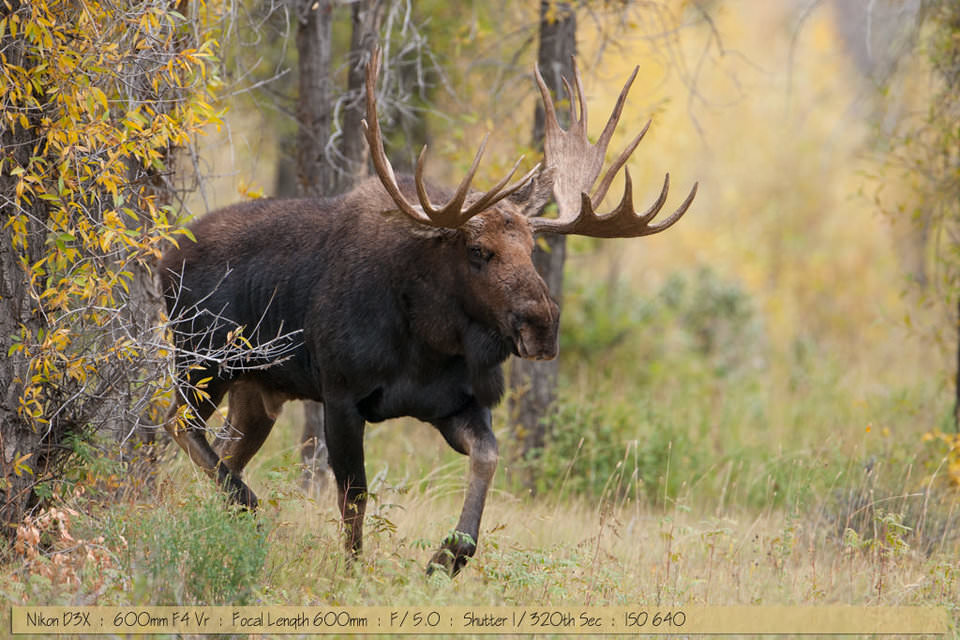
Most of my experience with moose in my part of the country (NH) where I chase them all the time, is that you usually find them extremely early in the morning or late evening when they are most active. The photo below will compare sunny versus overcast for you.
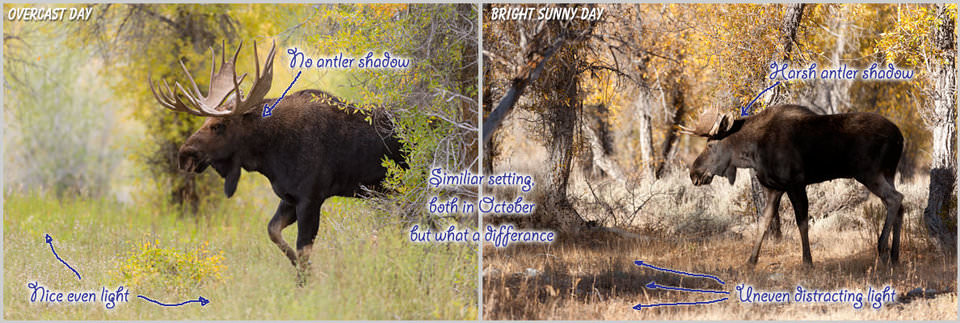
I tried to pick two photos from around the same time of year, same setting and similar subjects. It doesn’t matter which photo you like more – that’s a personal choice. Just be aware of your light choices. To me the left is the photo I prefer and here are the things I like about it: background looks more pleasing, moose is lit evenly, no antler shadow, no distracting lighting changes or harsh tree shadows. You can’t always pick the light, you probably booked your trip in advance and once you are there. You just have to deal with what you are given. We will make subject choices based on the weather e.g. we are in the Grand Teton / Yellowstone area and its going to be a bright sunny day, we may decide to just do moose at first light and then move onto other subjects while the light is harsher, or we get three days of overcast and we will forego all other animals and concentrate on moose or elk, because we prefer to shoot those with no shadows. Preferably, bright overcast is amazing light condition for wildlife photography where there are no scenic vistas with the sky showing – hehe if only it was that easy.
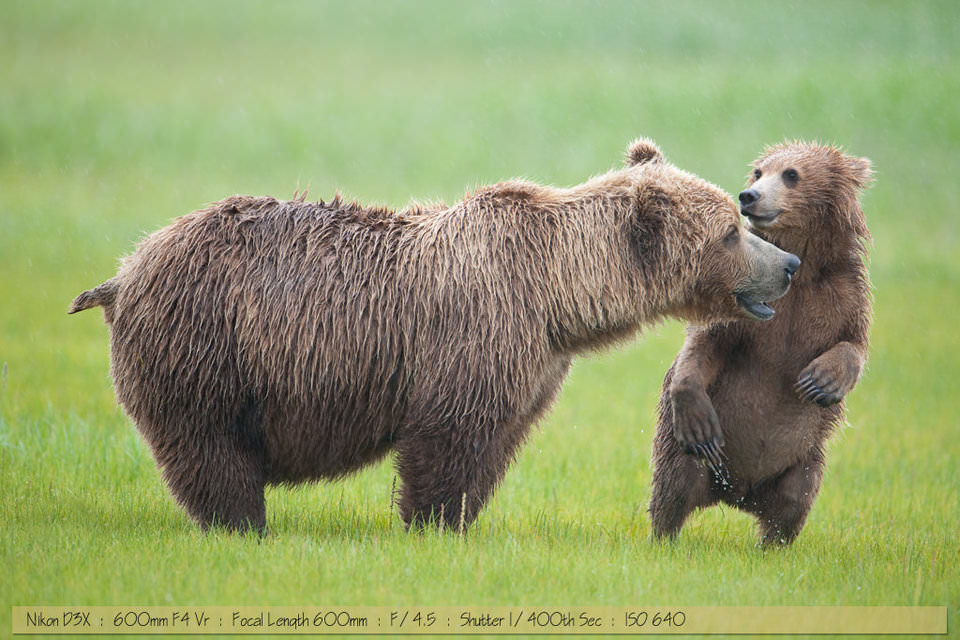
Before I move off weather, I will re-mention that rainy wet animals look very different to dry ones. They have more texture to their fur and also, the environment will look more saturated naturally and set more of a mood. I don’t like it pouring down in such a manner that the rain becomes the photo. More a light drizzle or just after it rains is a good time to look for opportunities. This next photo is from Alaska and it is drizzling, but look at the texture it adds to the bears and also the motion it conveys from the splashes of water from the cub’s paws. Lastly, look how saturated the greens are and as an added bonus, there are no clouds of insects hovering around the bears because of the rain.
Tips:
- Get wet weather gear for you, your camera and lenses (I use AquaTech sports shield for camera)
- Also you will need Muck boots or hip waders to get to those wet / muddy locations
- Wet or snow – don’t point your lens up (water spots on the lens glass)
- Windy rain or snow – watch the direction you point your lens to (water spots)
- Cold weather – have layered clothing and gloves that still allow you to shoot
- Cold weather warm car/house etc. – watch condensation issues, let the camera warm slowly
- Cold weather drains batteries faster
- Cold weather – breath / warmth fogs your viewfinder – can’t see your subject